Orochium Shrine: Difference between revisions
No edit summary |
mNo edit summary |
||
| Line 43: | Line 43: | ||
File:Orochium-Shrine-09.jpg|Avoid the lasers and walk through the room | File:Orochium-Shrine-09.jpg|Avoid the lasers and walk through the room | ||
File:Orochium-Shrine-10.jpg|Use Ascend to reach the chest and get the [[Small Key]] | File:Orochium-Shrine-10.jpg|Use Ascend to reach the chest and get the [[Small Key]] | ||
File:Orochium-Shrine-11.jpg|Ascend to the next floor | File:Orochium-Shrine-11.jpg|Ascend to the next floor and use the small key on the locked door | ||
File:Orochium-Shrine-12.jpg|Grab the [[Orb]] and carry it up to the green elevator | File:Orochium-Shrine-12.jpg|Grab the [[Orb]] and carry it up to the green elevator | ||
File:Orochium-Shrine-13.jpg|Place the orb in the hole to open the nearby gate | File:Orochium-Shrine-13.jpg|Place the orb in the hole to open the nearby gate | ||
File:Orochium-Shrine-14.jpg|Pull out the [[Glider]] and attach the orb to it | File:Orochium-Shrine-14.jpg|Pull out the [[Glider]] and attach the orb to it | ||
File:Orochium-Shrine-15.jpg|Place it on the rails and ride the glider back to the entrance | File:Orochium-Shrine-15.jpg|Place it on the rails and ride the glider back to the entrance | ||
File:Orochium-Shrine-16.jpg|Place the orb in the | File:Orochium-Shrine-16.jpg|Place the orb in the hole to open the gate leading to the altar | ||
</gallery> | </gallery> | ||
Latest revision as of 02:00, May 1, 2024

Games | ||
Depths Counterpart | ||
Items | ||
Rewards | ||
| Attributes | ||
|---|---|---|
Type | ||
Orochium Shrine, also known as Courage to Fall, is a Shrine of Light from Tears of the Kingdom.
The Shrine is located just north of Snowfield Stable.
Courage to Fall
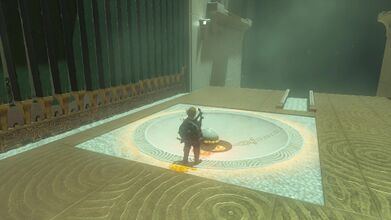
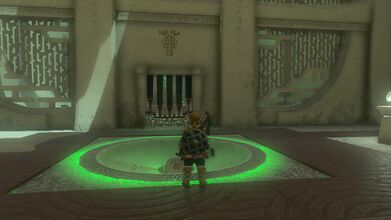
- As you enter the shrine, you'll see a hole to your right that a ball needs to go in, as well as the final gate to complete the shrine. Unfortunately, it's not that easy, as you'll have to traverse the whole shrine to bring the ball back to the start.
- Use Ultrahand on the stone doors directly in front of the shrine entrance to open them up. Inside, you'll see an impassable laser grid that will open a trapdoor in the floor if you touch the lasers, so for now, go around the corner to the left of the double doors and take out the single enemy. After it's destroyed, use Ascend to go up to the next level at the end of the path.
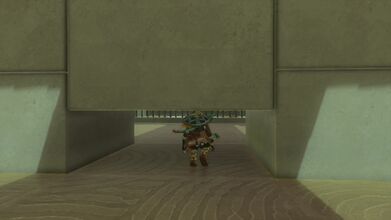
- Go up the ladder, crouch down through the small opening, and turn right before dropping down to the floor below. Make sure you clock the position of the enemy before doing so however, so you can hit it with a falling attack on the way down. After destroying it, go to the right of the double doors to fight another Soldier Construct. Open the treasure chest for 5 Arrows, and then proceed through the double doors after opening them with Ultrahand.
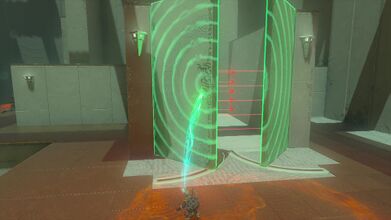
- You'll be confronted with another laser grid, however we actually do want to fall down this area. Walk into the lasers and let them drop you down to the floor below.
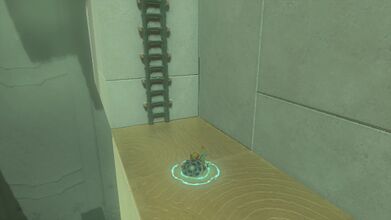
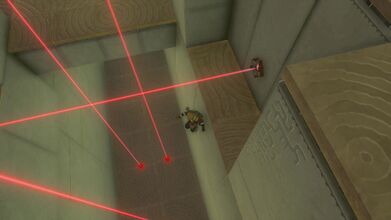
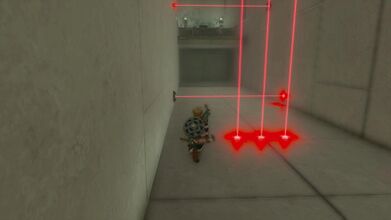
- After landing you'll want to avoid these lasers, just like the first grid, and work your way to the end of the hallway by sticking to the side and being patient. As soon as the horizontal lasers go high enough, run under them, waltz on through and then Ascend on the other side to find a chest with the Small Key.
- Use Ascend to get back up to the higher floor. Defeat any Soldier Constructs that are here and make your way over to the green locked door. Open it with the Small Key, and grab the Orb inside. Carry the orb to the back side of the room and hang either a left or a right to step onto one of the moving green platforms. Ride them up to the higher floor and place the orb in the opening here. Grab the glider from the other side of the recently lowered gate.
- Since you don't need this gate to be open anymore, grab the ball once more with Ultrahand, and stick it to the glider. Place the glider on the rails leading off the platform, hop on the glider, and strike the fans to carry both Link and the ball you need back to the shrine entrance.
- Place the orb in the hole to open the final gate.
Video Walkthrough
Video Walkthrough of Orochium Shrine
Gallery
Use Ultrahand to open the double doors

Defeat the Soldier Construct on the left side
Use Ascend to climb up to the higher level
Kneel down to squeeze through the small passage
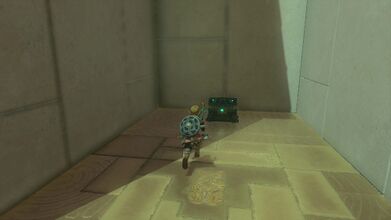
Defeat the Soldier Construct and open the chest for five Arrows

Open another set of double doors
Walk into the laser to open a trapped door below and let it take Link down
Avoid the lasers and walk through the room

Use Ascend to reach the chest and get the Small Key
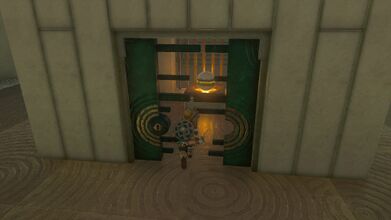
Ascend to the next floor and use the small key on the locked door
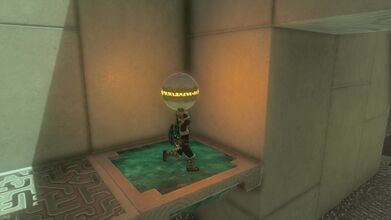
Grab the Orb and carry it up to the green elevator
Place the orb in the hole to open the nearby gate
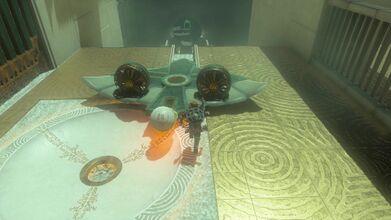
Pull out the Glider and attach the orb to it
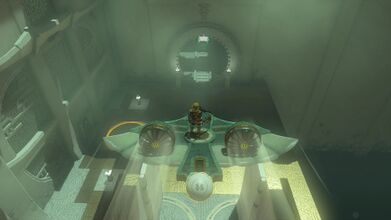
Place it on the rails and ride the glider back to the entrance
Place the orb in the hole to open the gate leading to the altar


