Marakuguc Shrine: Difference between revisions
Jump to navigation
Jump to search
Video Walkthrough of Marakuguc Shrine
Want an adless experience? Log in or Create an account.
mNo edit summary |
No edit summary |
||
| Line 1: | Line 1: | ||
{{Infobox|location | {{Infobox|location | ||
| image = | | image = [[File:Marakuguc-Shrine-01.jpg|400px]] | ||
| caption = | | caption = | ||
| game = ''[[The Legend of Zelda: Tears of the Kingdom|Tears of the Kingdom]]'' | | game = ''[[The Legend of Zelda: Tears of the Kingdom|Tears of the Kingdom]]'' | ||
| Line 31: | Line 31: | ||
==Gallery== | ==Gallery== | ||
<gallery widths="400px" heights="220px"> | |||
File:Marakuguc-Shrine-02.jpg|Extend the bridge across the gap | |||
File:Marakuguc-Shrine-03.jpg|Attach the platform to the broken bridge | |||
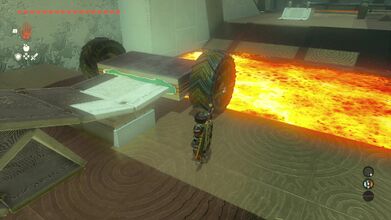
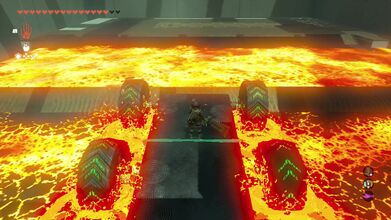
File:Marakuguc-Shrine-04.jpg|Activate the wheels to roll out the bridge across the lava | |||
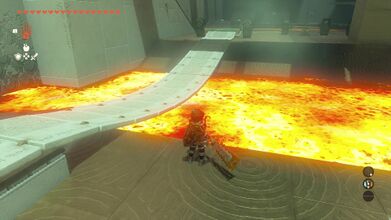
File:Marakuguc-Shrine-05.jpg|Attached the two platforms with wheels to make a vehicle | |||
File:Marakuguc-Shrine-06.jpg|Ride it across the lava | |||
File:Marakuguc-Shrine-07.jpg|Arrange the curged platform so it's like a staircause to reach the treasure chest | |||
File:Marakuguc-Shrine-08.jpg|Attach the curved platform to the vehicle | |||
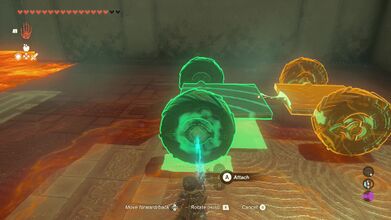
File:Marakuguc-Shrine-09.jpg|Activate it to push the orbs | |||
File:Marakuguc-Shrine-10.jpg|With enouh orbs on the switch, the door will open up | |||
</gallery> | |||
{{Listbox|Tears of the Kingdom Shrines}} | {{Listbox|Tears of the Kingdom Shrines}} | ||
{{Cat|Tears of the Kingdom Shrines}} | {{Cat|Tears of the Kingdom Shrines}} | ||
Revision as of 01:59, May 31, 2023
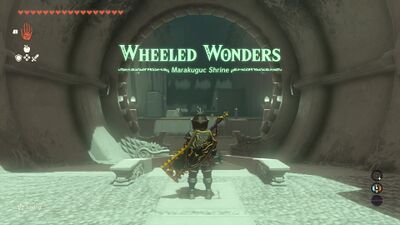
Marakuguc Shrine

Games | ||
Counterpart | ||
Items | ||
Rewards | ||
| Attributes | ||
|---|---|---|
Type | ||
Marakuguc Shrine, also known as "Wheeled Wonders, is a Shrine of Light from Tears of the Kingdom.
The Shrine is located in Death Mountain.
Wheeled Wonders
- Walking into this shrine presents us with our first obstacle: a broken bridge. Using Ultrahand, pick up one side of the bridge and attach it to the other side. Proceed to walk across.
- Next, there will be a cart on a platform as well as some bridge panels on another, move the bridge panels away a bit, and then place the wheeled contraption onto the platform in front of the bridge panels.
- Proceed to attach the panels onto the cart and activate it so it rolls across the lava making a bridge, you may need to tinker around quite a bit to get it all the way across.
- Now, there should be two wheeled contraptions, attaching them together you can make a 4-wheeled car that will get you across the lava up ahead
- Ascend onto the next platform. Be careful, as there is a hostile Construct here.
- In the corner of this room is a chest containing a Strong Construct Bow. You can get up here by using the curved platform as a bridge.
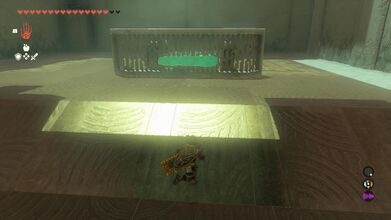
- This next area has a bunch of metal orbs and a glowing orange platform. It is actually a pressure plate, so place as many orbs as it takes (about 14) to weigh the plate down.
Video Walkthrough
Video Walkthrough of Marakuguc Shrine
Gallery

Extend the bridge across the gap
Attach the platform to the broken bridge
Activate the wheels to roll out the bridge across the lava
Attached the two platforms with wheels to make a vehicle
Ride it across the lava
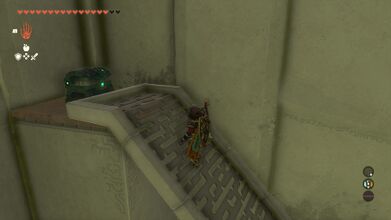
Arrange the curged platform so it's like a staircause to reach the treasure chest
Attach the curved platform to the vehicle
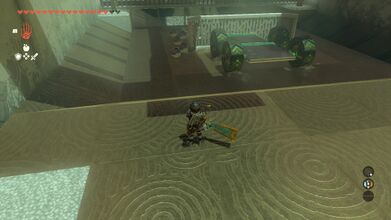
Activate it to push the orbs
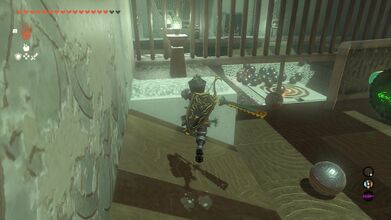
With enouh orbs on the switch, the door will open up


