Gallery:Hyrule Warriors: Age of Calamity: Difference between revisions
m (→Characters) |
|||
| (14 intermediate revisions by the same user not shown) | |||
| Line 2: | Line 2: | ||
==Scene art== | ==Scene art== | ||
<gallery> | <gallery widths=160 heights=90> | ||
File:Battlefield wallpaper - HWAoC.jpg | File:Battlefield wallpaper - HWAoC.jpg | ||
File:Battlefield alt 1 - HWAoC.jpg | File:Battlefield alt 1 - HWAoC.jpg | ||
File:Hyrule Castle dark - HWAoC key art.png | File:Hyrule Castle dark - HWAoC key art.png | ||
File:Age of Calamity Expansion Pass scene art - HWAoC.png|[[Age of Calamity Expansion Pass]] | |||
File:Pulse of the Ancients - HWAoC.jpg|[[Pulse of the Ancients]] | |||
File:Guardian of Remembrance - HWAoC.jpg|[[Guardian of Remembrance]] | |||
</gallery> | </gallery> | ||
==Characters== | ==Characters== | ||
<gallery> | <gallery> | ||
File:Link Soldier - HWAoC key art.png|[[ | File:Astor.png|[[Astor]] | ||
File:Battle-Tested Guardian - HWAoC.png|[[Battle-Tested Guardian]] (DLC) | |||
File:Daruk - HWAoC key art.png|[[Daruk]] | |||
File:Daruk Champion - HWAoC.png|[[Daruk]] in [[Daruk's Champion Garb|Champion Garb]] | |||
File:Great Fairies - HWAoC.png|[[Great Fairies]] | |||
File:Hestu - HWAoC.png|[[Hestu]] | |||
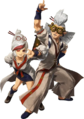
File:Impa - HWAoC key art.png|[[Impa]] | |||
File:King Rhoam - HWAoC.png|[[King Rhoam]] | |||
File:Link Champion Tunic - HWAoC.png|Link in [[Champion's Tunic]] with [[Master Sword]] | |||
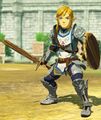
File:Link Soldier Set - HWAoC key art.png|Link in [[Soldier Set]] | |||
File:Link Lucky Ladle - HWAoC.png|Link with [[Lucky Ladle]] and [[Pot Lid]] (DLC) | File:Link Lucky Ladle - HWAoC.png|Link with [[Lucky Ladle]] and [[Pot Lid]] (DLC) | ||
File:Zelda Sheikah Slate - HWAoC | File:Link Training Sword - HWAoC.jpg|Link with [[Training Sword]] and Pot Lid (requires ''[[The Legend of Zelda: Breath of the Wild|Breath of the Wild]]'' save data) | ||
File:Age of Calamity Expansion Pass Purchase Bonus - HWAoC.jpg|Link in Prototype Ancient Set with [[Prototype Ancient Short Sword]] (DLC) | |||
File:Master Kohga - HWAoC key art.png|[[Master Kohga]] | |||
File:Mipha - HWAoC key art.png|[[Mipha]] | |||
File:Mipha Champion - HWAoC.png|[[Mipha]] in [[Mipha's Champion Garb|Champion Garb]] | |||
File:Monk Maz Koshia - HWAoC.png|[[Monk Maz Koshia]] | |||
File:Purah - HWAoC.png|[[Purah]] | |||
File:Purah and Robbie - HWAoC.png|[[Purah and Robbie]] (DLC composite warrior) | |||
File:Revali - HWAoC key art.png|[[Revali]] | |||
File:Revali Champion - HWAoC.png|[[Revali]] in [[Revali's Champion Garb|Champion Garb]] | |||
File:Riju - HWAoC.png|[[Riju]] | |||
File:Robbie - HWAoC.png|[[Robbie]] | |||
File:Sidon - HWAoC.png|[[Sidon]] | |||
File:Sooga - HWAoC.png|[[Sooga]] | |||
File:Teba - HWAoC.png|[[Teba]] | |||
File:Terrako - HWAoC.png|[[Terrako]] | |||
File:Urbosa - HWAoC key art.png|[[Urbosa]] | |||
File:Urbosa Champion - HWAoC.png|[[Urbosa]] in [[Urbosa's Champion Garb|Champion Garb]] | |||
File:Yunobo - HWAoC.png|[[Yunobo]] | |||
File:Zelda - HWAoC key art.png|[[Zelda]] with [[Sheikah Slate]] | |||
File:Zelda Ceremonial Robes - HWAoC.png|[[Zelda]] in [[Zelda's Ceremonial Robes|Ceremonial Robes]] | |||
</gallery> | </gallery> | ||
| Line 18: | Line 50: | ||
<gallery> | <gallery> | ||
File:Lucky Ladle - HWAoC.png|[[Lucky Ladle]] (DLC) | File:Lucky Ladle - HWAoC.png|[[Lucky Ladle]] (DLC) | ||
</gallery> | |||
==Divine Beasts== | |||
<gallery> | |||
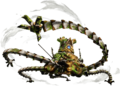
File:Vah Medoh - HWAoC white bg.jpg|[[Vah Medoh]] | |||
File:Vah Naboris - HWAoC white bg.jpg|[[Vah Naboris]] | |||
File:Vah Rudania - HWAoC white bg.jpg|[[Vah Rudania]] | |||
File:Vah Ruta - HWAoC white bg.jpg|[[Vah Ruta]] | |||
</gallery> | </gallery> | ||
==Icons== | ==Icons== | ||
{{Gallery|dark=true|caption= | {{Gallery|dark=true|caption=https://www.gamecity.ne.jp/zelda-yakusai loading icons|size=64|align=left}} | ||
{{Gallery/Box|file=Loading Icon Zelda - HWAoC.png|caption=[[Zelda]]}} | {{Gallery/Box|file=Loading Icon Zelda - HWAoC.png|caption=[[Zelda]]}} | ||
{{Gallery/Box|file=Loading Icon Link - HWAoC.png|caption=[[Link]]}} | {{Gallery/Box|file=Loading Icon Link - HWAoC.png|caption=[[Link]]}} | ||
| Line 45: | Line 85: | ||
File:Link with Master Sword - HWAoC prerelease screenshot.jpg|Link holding the [[Master Sword]] | File:Link with Master Sword - HWAoC prerelease screenshot.jpg|Link holding the [[Master Sword]] | ||
File:Mipha and Zelda - HWAoC prerelease screenshot.jpg|[[Mipha]] and Zelda | File:Mipha and Zelda - HWAoC prerelease screenshot.jpg|[[Mipha]] and Zelda | ||
File:Urbosa | File:Urbosa and Zelda - HWAoC prerelease screenshot.jpg|[[Urbosa]] and Zelda | ||
File:Urbosa vs Yiga - HWAoC prerelease screenshot.jpg|Urbosa and [[Gerudo]] fight a [[Yiga Blademaster]] and [[Yiga Footsoldier]]s | |||
File:Zelda Magnesis - HWAoC prerelease screenshot.jpg|Zelda uses [[Magnesis]] | File:Zelda Magnesis - HWAoC prerelease screenshot.jpg|Zelda uses [[Magnesis]] | ||
File:Zelda Magnesis vs Army - HWAoC prerelease screenshot.jpg|Zelda uses a Magnesis'd metal crate as a weapon | File:Zelda Magnesis vs Army - HWAoC prerelease screenshot.jpg|Zelda uses a Magnesis'd metal crate as a weapon | ||
| Line 70: | Line 111: | ||
File:Urbosa with Zelda and Link - HWAoC prerelease screenshot.jpg | File:Urbosa with Zelda and Link - HWAoC prerelease screenshot.jpg | ||
</gallery> | </gallery> | ||
===Other=== | |||
<gallery widths="160" heights="90"> | |||
File:Master Kohga - HWAoC prerelease screenshot.jpg|[[Master Kohga]] | |||
</gallery> | |||
==Miscellaneous== | ==Miscellaneous== | ||
Latest revision as of 11:55, September 25, 2021
A gallery of images from Hyrule Warriors: Age of Calamity.
Scene art


Characters
Battle-Tested Guardian (DLC)

Link in Champion's Tunic with Master Sword

Link in Soldier Set

Link with Lucky Ladle and Pot Lid (DLC)
Link with Training Sword and Pot Lid (requires Breath of the Wild save data)
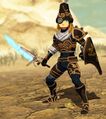
Link in Prototype Ancient Set with Prototype Ancient Short Sword (DLC)
Purah and Robbie (DLC composite warrior)

Zelda with Sheikah Slate


Weapons
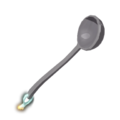
Lucky Ladle (DLC)

Divine Beasts


Icons
Pre-release screenshots
Initial reveal
The Champions
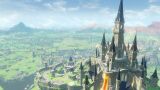
Hyrule Castle
Link and Revali
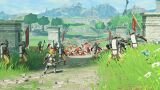
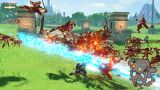
Link and a group of Hylian Soldiers vs. a Bokoblin army
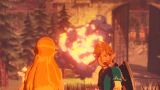
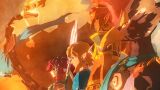
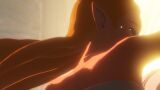
Link and Zelda see a firebomb
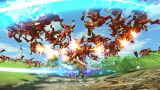
Link Spin Attacks
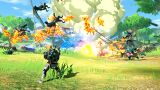
Link fights Blue Bokoblins
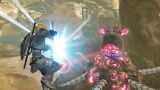
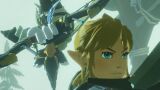
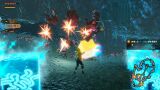
Link fights a Guardian
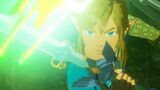
Link holding the Master Sword
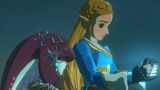
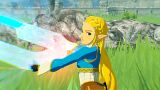
Mipha and Zelda
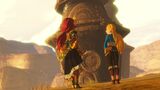
Urbosa and Zelda
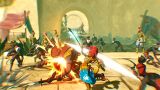
Urbosa and Gerudo fight a Yiga Blademaster and Yiga Footsoldiers
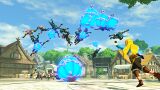
Zelda uses Magnesis
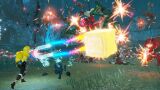
Zelda uses a Magnesis'd metal crate as a weapon
Zelda uses Remote Bombs
Zelda seals Calamity Ganon
Zelda uses Magnesis with Cryonis blocks behind her
Link slashes at Bokoblins


Tokyo Game Show 2020


Other

Miscellaneous
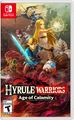
Nintendo of America box art

Nintendo of Europe (exc. Germany) box art
Japanese box art
English-language logo
Japanese logo


