Mogawak Shrine: Difference between revisions
Jump to navigation
Jump to search
Video Walkthrough of Mogawak Shrine
Want an adless experience? Log in or Create an account.
| (5 intermediate revisions by 4 users not shown) | |||
| Line 1: | Line 1: | ||
{{Infobox| | {{Infobox|shrine | ||
| image = [[File:Mogawak-Shrine-1.jpg|400px]] | | image = [[File:Mogawak-Shrine-1.jpg|400px]] | ||
| caption = | | caption = | ||
| Line 6: | Line 6: | ||
| location = [[Zora's Domain (Tears of the Kingdom)|Zora's Domain]] | | location = [[Zora's Domain (Tears of the Kingdom)|Zora's Domain]] | ||
| pointsint = | | pointsint = | ||
| counterpart_header = Depths Counterpart | |||
| counterpart = [[Kawagom Lightroot]] | | counterpart = [[Kawagom Lightroot]] | ||
| reward = [[Light of Blessing]] | | reward = [[Light of Blessing]] | ||
| Line 19: | Line 20: | ||
==The Power of Water== | ==The Power of Water== | ||
*On the right side of the shrine, there is a treasure chest in the water that contains a [[Magic Scepter]]. | *On the right side of the shrine, there is a treasure chest in the water that contains a [[Magic Scepter]]. | ||
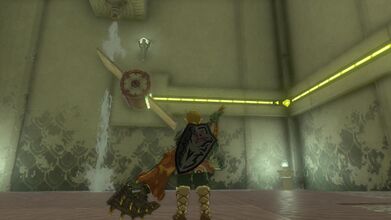
*Also on the right side of the shrine, use [[Ultrahand]] to grab the plank that is | *Also on the right side of the shrine, use [[Ultrahand]] to grab the plank that is in the water. Attach it to the wheel so it is on the opposite side of the existing one. Then use Ultrahand and turn the wheel so one of the planks goes underneath the water. The water will cause the wheel to continuously spin. This will generate power, shown by the yellow line. | ||
*In the center of the shrine, grab the [[Battery|Zonai Battery]] and place it on the yellow charge. The Battery will begin to charge. | *In the center of the shrine, grab the [[Battery|Zonai Battery]] and place it on the yellow charge. The Battery will begin to charge. | ||
*After the battery is fully charged, take it to the left side of the room. There is a charge spot that ignites a metal ball in the water. Use Ultrahand to move the two balls to pass electricity, opening the gate on the other side. Then carefully swim across, along the edge of the water so you don't get electrocuted. Open the chest here to get an [[Opal]] gem. | *After the battery is fully charged, take it to the left side of the room. There is a charge spot that ignites a metal ball in the water. Use Ultrahand to move the two balls to pass electricity, opening the gate on the other side. Then carefully swim across, along the edge of the water so you don't get electrocuted. Open the chest here to get an [[Opal]] gem. | ||
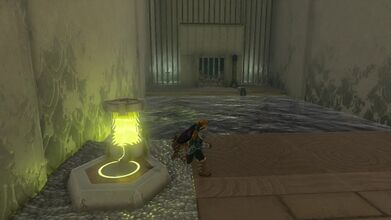
*Recharge the battery and take it to the center of the shrine. Stand on the platform and then use Ultrahand to place it on the charge spot. This will power the platform, causing it to rise to the top of the shrine. | *Recharge the battery and take it to the center of the shrine. Stand on the platform and then use Ultrahand to place it on the charge spot. This will power the platform, causing it to rise to the top of the shrine. | ||
*Collect your [[Light of Blessing]] at the exit. | *Collect your [[Light of Blessing]] at the exit. | ||
==Video Walkthrough== | |||
{{Youtube|BtVZPRN2KYM|360|Video Walkthrough of Mogawak Shrine}} | |||
{{Clear}} | |||
==Gallery== | ==Gallery== | ||
<gallery widths="400px" heights="220px"> | <gallery widths="400px" heights="220px"> | ||
File:TotK Mogawak Shrine.jpg|Link arriving at the Shrine | |||
File:Mogawak-Shrine-3.jpg|Pull up the treasure chest in the water to get a [[Magic Scepter]] | File:Mogawak-Shrine-3.jpg|Pull up the treasure chest in the water to get a [[Magic Scepter]] | ||
File:Mogawak-Shrine-2.jpg|Attach the plank to the opposite side of the wheel from the other plank | File:Mogawak-Shrine-2.jpg|Attach the plank to the opposite side of the wheel from the other plank | ||
File:Mogawak-Shrine-4.jpg|Use [[Ultrahand]] on a plank to turn the wheel so it is under the water | File:Mogawak-Shrine-4.jpg|Use [[Ultrahand]] on a plank to turn the wheel so it is under the water | ||
File:Mogawak-Shrine-5.jpg|Water will | File:Mogawak-Shrine-5.jpg|Water will consistently turn the wheel, creating electricity | ||
File:Mogawak-Shrine-6.jpg|Place a [[Battery]] on the charger | File:Mogawak-Shrine-6.jpg|Place a [[Battery]] on the charger | ||
File:Mogawak-Shrine-7.jpg|Carry the charged battery to the other side of the room | File:Mogawak-Shrine-7.jpg|Carry the charged battery to the other side of the room | ||
| Line 39: | Line 45: | ||
{{Listbox|Tears of the Kingdom Shrines}} | {{Listbox|Tears of the Kingdom Shrines}} | ||
{{Cat|Tears of the Kingdom Shrines}} | {{Cat|Tears of the Kingdom Shrines}} | ||
{{Cat|Tears of the Kingdom Lanayru Shrines}} | |||
Latest revision as of 05:07, October 26, 2023
Mogawak Shrine

Games | ||
Location | ||
Depths Counterpart | ||
Items | ||
Rewards | ||
| Attributes | ||
|---|---|---|
Type | ||
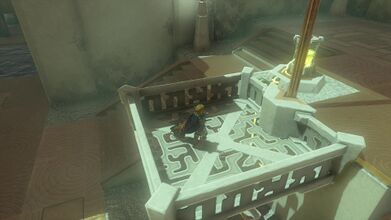
Mogawak Shrine, also known as The Power of Water, is a Shrine of Light from Tears of the Kingdom.
The Shrine is located in Zora's Domain.
The Power of Water
- On the right side of the shrine, there is a treasure chest in the water that contains a Magic Scepter.
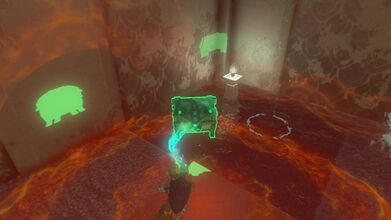
- Also on the right side of the shrine, use Ultrahand to grab the plank that is in the water. Attach it to the wheel so it is on the opposite side of the existing one. Then use Ultrahand and turn the wheel so one of the planks goes underneath the water. The water will cause the wheel to continuously spin. This will generate power, shown by the yellow line.
- In the center of the shrine, grab the Zonai Battery and place it on the yellow charge. The Battery will begin to charge.
- After the battery is fully charged, take it to the left side of the room. There is a charge spot that ignites a metal ball in the water. Use Ultrahand to move the two balls to pass electricity, opening the gate on the other side. Then carefully swim across, along the edge of the water so you don't get electrocuted. Open the chest here to get an Opal gem.
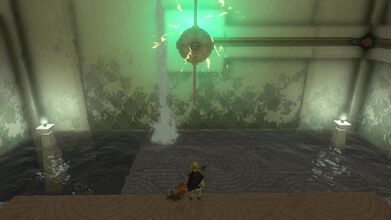
- Recharge the battery and take it to the center of the shrine. Stand on the platform and then use Ultrahand to place it on the charge spot. This will power the platform, causing it to rise to the top of the shrine.
- Collect your Light of Blessing at the exit.
Video Walkthrough
Video Walkthrough of Mogawak Shrine
Gallery
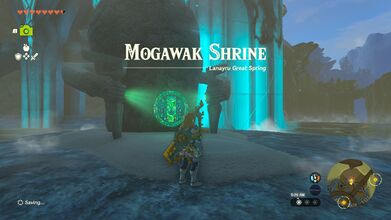
Link arriving at the Shrine
Pull up the treasure chest in the water to get a Magic Scepter
Attach the plank to the opposite side of the wheel from the other plank

Use Ultrahand on a plank to turn the wheel so it is under the water
Water will consistently turn the wheel, creating electricity
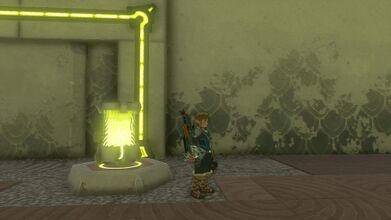
Place a Battery on the charger
Carry the charged battery to the other side of the room
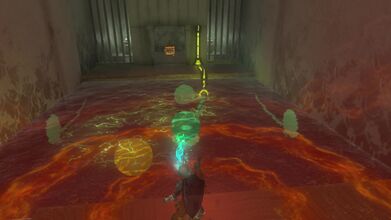
Move the balls so they are close together, creating an electric current and opening the door
Place the battery and ride the platform to the top of the shrine


