Beneath Hyrule Castle: Difference between revisions
ZeldaFan8000 (talk | contribs) No edit summary Tags: Mobile edit Mobile web edit Advanced mobile edit |
No edit summary |
||
| Line 6: | Line 6: | ||
| locations = [[Gloom's Approach]]<br/>[[Forgotten Foundation]]<br/>[[Imprisoning Chamber]]<br/>[[Gloom's Lair]]<br/>[[Gloom's Origin]] | | locations = [[Gloom's Approach]]<br/>[[Forgotten Foundation]]<br/>[[Imprisoning Chamber]]<br/>[[Gloom's Lair]]<br/>[[Gloom's Origin]] | ||
| quest = [[Destroy Ganondorf]] | | quest = [[Destroy Ganondorf]] | ||
| boss = [[The Demon King's Army (Boss)|The Demon King's Army]]<br/>[[Demon King Ganondorf]]<br/>[[Demon Dragon]]<br/>'''If not defeated in their respective dungeons:'''<br/>{{hide|[[Colgera]]<br/>[[Marbled Gohma]]<br/>[[Mucktorok]]<br/>[[Seized Construct]]<br/>[[Phantom Ganon (Tears of the Kingdom)|Phantom Ganon ×10]]}} | | boss = [[The Demon King's Army (Boss)|The Demon King's Army]]<br/>[[Demon King Ganondorf]]<br/>[[Demon Dragon]]<br/>'''If not defeated in their respective dungeons:'''<br/>{{hide|[[Colgera]]<br/>[[Marbled Gohma]]<br/>[[Mucktorok]]<br/>[[Queen Gibdo]]<br/>[[Seized Construct]]<br/>[[Phantom Ganon (Tears of the Kingdom)|Phantom Ganon ×10]]}} | ||
| miniboss = [[Phantom Ganon (Tears of the Kingdom)|Phantom Ganon]] | | miniboss = [[Phantom Ganon (Tears of the Kingdom)|Phantom Ganon]] | ||
| enemies = '''Before The Upheaval:'''<br/>[[Keese]]<br/>'''After The Upheaval:'''<br/>{{hide|[[Black Bokoblin]]s<br/>[[Black Boss Bokoblin]]s<br/>[[Black Horriblin]]s<br/>[[Black Lizalfos]]<br/>[[Black Moblin]]s<br/>[[Blue Bokoblin]]s<br/>[[Blue Lizalfos]]<br/>[[Blue Moblin]]s<br/>[[Bokoblin]]s<br/>[[Chuchu]]s<br/>[[Electric Keese]]<br/>[[Fire Like]]s<br/>[[Gibdo]]s<br/>[[Gloom Spawn]]<br/>[[Ice Keese]]<br/>[[Ice Like]]s<br/>[[Lizalfos]]<br/>[[Moblin]]s<br/>[[Moth Gibdo]]s<br/>[[Shock Like]]s<br/>[[Silver Bokoblin]]s<br/>[[Silver Horriblin]]s<br/>[[Silver Lizalfos]]<br/>[[Silver Lynel]]<br/>[[Silver Moblin]]s<br/>[[White-Maned Lynel]]}} | | enemies = '''Before The Upheaval:'''<br/>[[Keese]]<br/>'''After The Upheaval:'''<br/>{{hide|[[Black Bokoblin]]s<br/>[[Black Boss Bokoblin]]s<br/>[[Black Horriblin]]s<br/>[[Black Lizalfos]]<br/>[[Black Moblin]]s<br/>[[Blue Bokoblin]]s<br/>[[Blue Lizalfos]]<br/>[[Blue Moblin]]s<br/>[[Bokoblin]]s<br/>[[Chuchu]]s<br/>[[Electric Keese]]<br/>[[Fire Like]]s<br/>[[Gibdo]]s<br/>[[Gloom Spawn]]<br/>[[Ice Keese]]<br/>[[Ice Like]]s<br/>[[Lizalfos]]<br/>[[Moblin]]s<br/>[[Moth Gibdo]]s<br/>[[Shock Like]]s<br/>[[Silver Bokoblin]]s<br/>[[Silver Horriblin]]s<br/>[[Silver Lizalfos]]<br/>[[Silver Lynel]]<br/>[[Silver Moblin]]s<br/>[[White-Maned Lynel]]}} | ||
Revision as of 14:40, April 20, 2024

Games | ||
Location | ||
Locations | ||
Quests | ||
Boss |
The Demon King's Army Demon King Ganondorf Demon Dragon If not defeated in their respective dungeons: [show] | |
Mini-bosses | ||
Enemies |
Before The Upheaval: Keese After The Upheaval: [show] Black Bokoblins
Black Boss Bokoblins Black Horriblins Black Lizalfos Black Moblins Blue Bokoblins Blue Lizalfos Blue Moblins Bokoblins Chuchus Electric Keese Fire Likes Gibdos Gloom Spawn Ice Keese Ice Likes Lizalfos Moblins Moth Gibdos Shock Likes Silver Bokoblins Silver Horriblins Silver Lizalfos Silver Lynel Silver Moblins White-Maned Lynel | |
Inhabitants | ||
Items | ||
Memory | ||
Prerequisite | Complete The Closed Door | |
Rewards | Completion of Game | |
Related | ||
Beneath Hyrule Castle is both the opening area and the final dungeon in Tears of the Kingdom.
Tears of the Kingdom
Pre-Upheaval
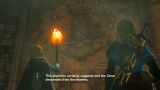
Beneath Hyrule Castle is the first location that Link and Zelda travel to at the start of the quest during the prologue of the game. It is where they find the Zonai ruins and discover Ganondorf's sealed corpse.
Prior to the events of the game, Zelda asked her father if there was anything beneath Hyrule Castle. He told Zelda that there was, but also told her that seeing it in person or speaking of it was forbidden. Link and Zelda initially travelled down to the area to investigate the Gloom that had been causing Hylians to fall ill after having travelled through nearby caves. Upon traveling deeper into the cavern, the Master Sword begins to illuminate, sensing a disturbance further on.
Link and Zelda discover the ancient Zonai Ruins, designs of which Zelda had only previously seen in her studies, in the Forgotten Foundation. They were said to possess godlike power, and had a prosperous civilization in the sky. The murals on the wall depict a great Imprisoning War fought long ago, between allied tribes and a Demon King. The mural further shows that the Zonai descended down to the first Hylians, helping to establish the land that become Hyrule.
Upon reaching the Imprisoning Chamber, the final room of the cavern, they discover Ganondorf's sealed corpse. However, the apparent corpse suddenly comes to life as a mummy-like figure and destroys much of Link's Master Sword, along with his right arm. Ganondorf begins to lift Hyrule Castle into the sky and then falls beneath the crumbling ground, along with Zelda, who is consumed by a glowing light. Link is then taken away by a glowing blue hand.

Link and Zelda exploring the cavern
Link and Zelda discovering the Zonai Ruins
Link and Zelda discovering Ganondorf's corpse

Link attempting to save Zelda from the crumbling Ruins


Post-Upheaval
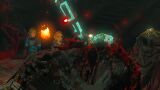
Following the Upheaval, the entrance to the area in the Royal Hidden Passage is blocked by rubble. The only way to access the area is via Hyrule Castle Chasm. A cave known as Gloom's Approach at the base of Hyrule Castle Chasm allows access to the ruins and tunnels that lead to the Forgotten Foundation. The Imprisoning Chamber is only a hole in the ground, leading to Gloom's Lair and Gloom's Origin.