Hyrule Warriors Weapons: Difference between revisions
Jump to navigation
Jump to search


Want an adless experience? Log in or Create an account.
No edit summary |
m (For the {{Galbox}} - see Category:Hyrule Warriors Weapons) |
||
| Line 13: | Line 13: | ||
|- | |- | ||
| 1 | | 1 | ||
| [[File:Hylian Sword.png]] | | [[File:Hylian Sword.png|Knight's Sword]] | ||
| Knight's Sword | | Knight's Sword | ||
|colspan="2"| Automatic | |colspan="2"| Automatic | ||
|- | |- | ||
| 2 | | 2 | ||
| [[File:White Sword.png]] | | [[File:White Sword.png|White Sword]] | ||
| White Sword | | White Sword | ||
|colspan="2"| Legend Mode: [[Sealed Grounds (Hyrule Warriors)|Sealed Grounds]] - [[Sealed Ambition]] in the East Cannon Keep | |colspan="2"| Legend Mode: [[Sealed Grounds (Hyrule Warriors)|Sealed Grounds]] - [[Sealed Ambition]] in the East Cannon Keep | ||
|- | |- | ||
| 3 | | 3 | ||
| [[File:Magical Sword.png]] | | [[File:Magical Sword.png|Magical Sword]] | ||
| Magical Sword | | Magical Sword | ||
| Adventure Map C-2 | | Adventure Map C-2 | ||
| Line 29: | Line 29: | ||
|- | |- | ||
| 4 | | 4 | ||
| [[File:Magical Sword.png]] | | [[File:Magical Sword.png|Magical Sword +]] | ||
| Magical Sword + | | Magical Sword + | ||
| ''Unobtainable'' | | ''Unobtainable'' | ||
| Line 35: | Line 35: | ||
|- | |- | ||
| 4+ | | 4+ | ||
| [[File:No Image.png|180px]] | | [[File:No Image.png|180px|Darkmagic Sword]] | ||
| Darkmagic Sword | | Darkmagic Sword | ||
| ''Unobtainable'' | | ''Unobtainable'' | ||
| Line 41: | Line 41: | ||
|- | |- | ||
| 3 (Wii U)<br/>4+ (Switch) | | 3 (Wii U)<br/>4+ (Switch) | ||
| [[File:8-Bit Wooden Sword.png]] | | [[File:8-Bit Wooden Sword.png|8-Bit Wooden Sword]] | ||
| 8-Bit Wooden Sword | | 8-Bit Wooden Sword | ||
| Complete Legend Mode: [[Valley of Seers]] - [[Shining Beacon]] | | Complete Legend Mode: [[Valley of Seers]] - [[Shining Beacon]] | ||
| Line 59: | Line 59: | ||
|- | |- | ||
| 1 | | 1 | ||
| [[File:Fire Rod.png]] | | [[File:Fire Rod.png|Fire Rod]] | ||
| Fire Rod | | Fire Rod | ||
|colspan="2"| Legend Mode: [[Eldin Caves]] - [[The Sheikah Tribesman]] in Tunnel Square | |colspan="2"| Legend Mode: [[Eldin Caves]] - [[The Sheikah Tribesman]] in Tunnel Square | ||
|- | |- | ||
| 2 | | 2 | ||
| [[File:Prism Rod.png]] | | [[File:Prism Rod.png|Prism Rod]] | ||
| Prism Rod | | Prism Rod | ||
| Adventure Map E-7 | | Adventure Map E-7 | ||
| Line 70: | Line 70: | ||
|- | |- | ||
| 3 | | 3 | ||
| [[File:Magical Rod.png]] | | [[File:Magical Rod.png|Magical Rod]] | ||
| Magical Rod | | Magical Rod | ||
| Adventure Map F-2 | | Adventure Map F-2 | ||
| Line 76: | Line 76: | ||
|- | |- | ||
| 4 | | 4 | ||
| [[File:Magical Rod.png]] | | [[File:Magical Rod.png|Magical Rod +]] | ||
| Magical Rod + | | Magical Rod + | ||
| ''Unobtainable'' | | ''Unobtainable'' | ||
| Line 82: | Line 82: | ||
|- | |- | ||
| 4+ | | 4+ | ||
| [[File:No Image.png|180px]] | | [[File:No Image.png|180px|Crackling Rod]] | ||
| Crackling Rod | | Crackling Rod | ||
| ''Unobtainable'' | | ''Unobtainable'' | ||
| Line 88: | Line 88: | ||
|- | |- | ||
| 3 (Wii U)<br/>4+ (Switch) | | 3 (Wii U)<br/>4+ (Switch) | ||
| [[File:8-Bit Candle.png]] | | [[File:8-Bit Candle.png|8-Bit Candle]] | ||
| 8-Bit Candle | | 8-Bit Candle | ||
| Master Quest Map A-11 | | Master Quest Map A-11 | ||
| Line 142: | Line 142: | ||
|- | |- | ||
| 1 | | 1 | ||
| [[File:HW Silver Gauntlets.png]] | | [[File:HW Silver Gauntlets.png|Silver Gauntlets]] | ||
| Silver Gauntlets | | Silver Gauntlets | ||
|colspan="2"| Adventure Map G-14 | |colspan="2"| Adventure Map G-14 | ||
|- | |- | ||
| 2 | | 2 | ||
| [[File:HW Golden Gauntlets.png]] | | [[File:HW Golden Gauntlets.png|Golden Gauntlets]] | ||
| Golden Gauntlets | | Golden Gauntlets | ||
| Adventure Map F-12 | | Adventure Map F-12 | ||
| Line 153: | Line 153: | ||
|- | |- | ||
| 3 | | 3 | ||
| [[File:Power Gloves.png]] | | [[File:Power Gloves.png|Power Gloves]] | ||
| Power Gloves | | Power Gloves | ||
| Adventure Map G-14 | | Adventure Map G-14 | ||
| Line 159: | Line 159: | ||
|- | |- | ||
| 4 | | 4 | ||
| [[File:Power Gloves.png]] | | [[File:Power Gloves.png|Power Gloves +]] | ||
| Power Gloves + | | Power Gloves + | ||
| ''Unobtainable'' | | ''Unobtainable'' | ||
| Line 165: | Line 165: | ||
|- | |- | ||
| 4+ | | 4+ | ||
| [[File:No Image.png|180px]] | | [[File:No Image.png|180px|Burning Gloves]] | ||
| Burning Gloves | | Burning Gloves | ||
| ''Unobtainable'' | | ''Unobtainable'' | ||
| Line 171: | Line 171: | ||
|- | |- | ||
| 3 (Wii U)<br/>4+ (Switch) | | 3 (Wii U)<br/>4+ (Switch) | ||
| [[File:8-Bit Power Bracelet.png]] | | [[File:8-Bit Power Bracelet.png|8-Bit Power Bracelet]] | ||
| 8-Bit | | 8-Bit Power Bracelet | ||
| Twilight Map C-3 | | Twilight Map C-3 | ||
| Koholint Island Map A-14 (with 8-Bit setting on) | | Koholint Island Map A-14 (with 8-Bit setting on) | ||
Revision as of 15:21, August 11, 2021
This is a list of weapons found in Hyrule Warriors. For locations, letters start in the top and go down while numbers start in the left and go right.
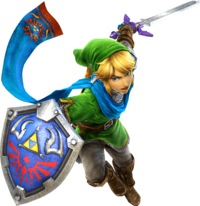
Link
Hylian Sword

- Main article: Hylian Sword
| Level | Image | Name | Location (Wii U) | Location (3DS & Switch) |
|---|---|---|---|---|
| 1 | 
|
Knight's Sword | Automatic | |
| 2 | 
|
White Sword | Legend Mode: Sealed Grounds - Sealed Ambition in the East Cannon Keep | |
| 3 | 
|
Magical Sword | Adventure Map C-2 | Master Quest Map H-6 |
| 4 |
|
Magical Sword + | Unobtainable | Twilight Map C-2 |
| 4+ | 
|
Darkmagic Sword | Unobtainable | Lorule Map A-11 |
| 3 (Wii U) 4+ (Switch) |

|
8-Bit Wooden Sword | Complete Legend Mode: Valley of Seers - Shining Beacon | Lorule Map A-11 (with 8-Bit Weapons setting on) |
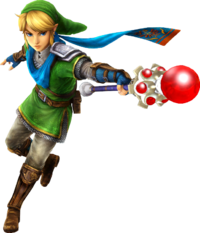
Magic Rod

- Main article: Magic Rod (Hyrule Warriors)
| Level | Image | Name | Location (Wii U) | Location (3DS & Switch) |
|---|---|---|---|---|
| 1 | 
|
Fire Rod | Legend Mode: Eldin Caves - The Sheikah Tribesman in Tunnel Square | |
| 2 | 
|
Prism Rod | Adventure Map E-7 | Great Sea Map F-14 |
| 3 | 
|
Magical Rod | Adventure Map F-2 | Master Quest Map B-8 |
| 4 |
|
Magical Rod + | Unobtainable | Twilight Map E-1 |
| 4+ |
|
Crackling Rod | Unobtainable | Grand Travels Map E-10 |
| 3 (Wii U) 4+ (Switch) |

|
8-Bit Candle | Master Quest Map A-11 | Grand Travels Map E-10 (with 8-Bit Weapons setting on) |
Great Fairy

- Main article: Great Fairy (Hyrule Warriors)
| Level | Name | Location (Wii U) | Location (3DS & Switch) |
|---|---|---|---|
| 1 | Great Fountain Fairy | Adventure Map H-1 | |
| 2 | Great Forest Fairy | Adventure Map B-7 | Great Sea Map C-1 |
| 3 | Great Sky Fairy | Adventure Map B-1 | Master Quest Map A-9 |
| 4 | Great Sky Fairy + | Unobtainable | Termina Map B-7 |
| 4+ | Great Fairy of Tempests | Unobtainable | Lorule Map F-16 |
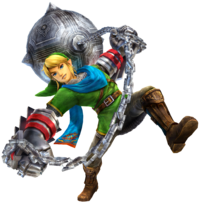
Gauntlets

- Main article: Gauntlets
| Level | Image | Name | Location (Wii U) | Location (3DS & Switch) |
|---|---|---|---|---|
| 1 | 
|
Silver Gauntlets | Adventure Map G-14 | |
| 2 | 
|
Golden Gauntlets | Adventure Map F-12 | Great Sea Map B-3 |
| 3 | 
|
Power Gloves | Adventure Map G-14 | Master Quest Map A-11 |
| 4 |
|
Power Gloves + | Unobtainable | Twilight Map G-5 |
| 4+ |
|
Burning Gloves | Unobtainable | Koholint Island Map A-14 |
| 3 (Wii U) 4+ (Switch) |

|
8-Bit Power Bracelet | Twilight Map C-3 | Koholint Island Map A-14 (with 8-Bit setting on) |
Master Sword

- Main article: Master Sword (Hyrule Warriors)
This weapon can be obtained by completing the Legend Mode mission The Sacred Sword.
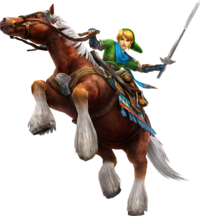
Horse (DLC / Legends / Def. Ed.)

- Main article: Horse (Hyrule Warriors)
| Level | Name | Location (Wii U) | Location (3DS & Switch) |
|---|---|---|---|
| 1 | Epona | Automatic upon purchasing the Master Quest Pack | Adventure Map E-15 |
| 2 | Twilight Epona | Automatic upon purchasing the Master Quest Pack | Great Sea Map G-1 |
| 3 | Epona of Time | Automatic upon purchasing the Master Quest Pack | Master Quest Map D-13 |
| 4 | Epona of Time + | Unobtainable | Termina Map H-8 |
| 4+ | Storm-Eyed Epona | Unobtainable | Lorule Map F-9 |
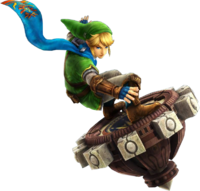
Spinner (amiibo / Legends / Def. Ed.)

- Main article: Spinner (Hyrule Warriors)
| Level | Name | Location (Wii U) | Location (3DS & Switch) |
|---|---|---|---|
| 1 | Ancient Spinner | Obtained by scanning a Link Amiibo | Adventure Map C-2 |
| 2 | Enhanced Spinner | Obtained by scanning a Link Amiibo | Great Sea Map E-1 |
| 3 | Triforce Spinner | Obtained by scanning a Link Amiibo | Master Quest Map F-15 |
| 4 | Triforce Spinner + | Unobtainable | Twilight Map D-5 |
| 4+ | Hydro-Spinner | Unobtainable | Lorule Map G-1 |
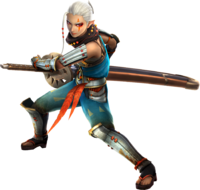
Impa
Giant Blade

- Main article: Giant Blade
| Level | Name | Location (Wii U) | Location (3DS & Switch) |
|---|---|---|---|
| 1 | Giant's Knife | Legend Mode: Hyrule Field - The Armies of Ruin | |
| 2 | Biggoron's Knife | Legend Mode: Death Mountain - Land of Myth in E. Boulder Keep | |
| 3 | Biggoron's Sword | Adventure Map C-1 | Master Quest Map G-6 |
| 4 | Biggoron's Sword + | Unobtainable | Twilight Map G-8 |
| 4+ | Biggoron's Sunblade | Unobtainable | Lorule Map G-2 |
| 3 (Wii U) 4+ (Switch) |
8-Bit Boomerang? | Master Quest Map G-6 | Lorule Map G-2 (with 8-Bit Weapons setting on) |
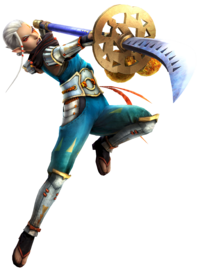
Naginata

- Main article: Naginata
| Level | Name | Location (Wii U) | Location (3DS & Switch) |
|---|---|---|---|
| 1 | Guardian Naginata | Adventure Map G-9 | Adventure Map G-11 |
| 2 | Scorching Naginata | Adventure Map G-11 | Great Sea Map G-14 |
| 3 | Sheikah Naginata | Adventure Map D-15 | Master Quest Map E-3 |
| 4 | Sheikah Naginata + | Unobtainable | Termina Map C-7 |
| 4+ | Crackling Naginata | Unobtainable | Grand Travels Map B-11 |
Lana
Book of Sorcery

- Main article: Book of Sorcery
| Level | Name | Location (Wii U) | Location (3DS & Switch) |
|---|---|---|---|
| 1 | Spirit's Tome | Legend Mode: Hyrule Field - The Armies of Ruin | |
| 2 | Sealing Tome | Legend Mode: Palace of Twilight - The Shadow King in Lower Level East | |
| 3 | Sorceress Tome | Adventure Map A-11 | Master Quest Map A-4 |
| 4 | Sorceress Tome + | Unobtainable | Twilight Map A-9 |
| 4+ | Tome of the Night | Unobtainable | Lorule Map C-12 |
| 3 (Wii U) 4+ (Switch) |
8-Bit Book of Magic | Master Quest Map H-12 | Lorule Map C-12 (with 8-Bit Weapons setting on) |
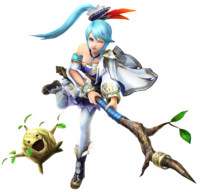
Spear

- Main article: Spear
| Level | Name | Location (Wii U) | Location (3DS & Switch) |
|---|---|---|---|
| 1 | Deku Spear | Legend Mode: Valley of Seers - The Sorceress of the Valley in West Keep | |
| 2 | Kokiri Spear | Adventure Map F-7 | Great Sea Map A-14 |
| 3 | Faron Spear | Adventure Map H-12 | Master Quest Map B-6 |
| 4 | Faron Spear + | Unobtainable | Twilight Map E-3 |
| 4+ | Sun Faron Spear | Unobtainable | Grand Travels Map C-11 |
Summoning Gate

- Main article: Summoning Gate
| Level | Name | Location (Wii U) | Location (3DS & Switch) |
|---|---|---|---|
| 1 | Gate of Time | Adventure Map C-16 | Adventure Map A-9 |
| 2 | Guardian's Gate | Adventure Map B-4 | Great Sea Map A-4 |
| 3 | Gate of Souls | Adventure Map A-16 | Master Quest Map D-16 |
| 4 | Gate of Souls + | Unobtainable | Termina Map D-16 |
| 4+ | Gate of Tides | Unobtainable | Koholint Island Map B-14 |
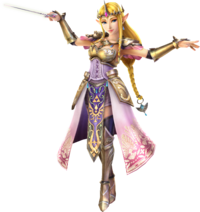
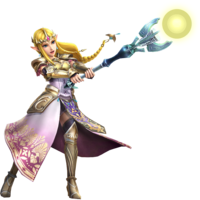
Zelda
Rapier

- Main article: Rapier
| Level | Name | Location (Wii U) | Location (3DS & Switch) |
|---|---|---|---|
| 1 | Polished Rapier | Legend Mode: Hyrule Field - The Armies of Ruin | |
| 2 | Glittering Rapier | Legend Mode: Temple of the Sacred Sword - The Sacred Sword in S. Temple Hall | |
| 3 | Gleaming Rapier | Adventure Map A-9 | Master Quest Map G-5 |
| 4 | Gleaming Rapier + | Unobtainable | Twilight Map D-10 |
| 4+ | Gloomy Rapier | Unobtainable | Lorule Map D-12 |
| 3 (Wii U) 4+ (Switch) |
8-Bit White Sword? | Master Quest Map B-10 | Lorule Map D-12 (with 8-Bit Weapons setting on) |
Baton

- Main article: Baton
| Level | Name | Location (Wii U) | Location (3DS & Switch) |
|---|---|---|---|
| 1 | Wind Waker | Adventure Map E-12 | Adventure Map C-15 |
| 2 | Sacred Baton | Adventure Map H-2 | Great Sea Map B-13 |
| 3 | Glorious Baton | Adventure Map A-2 | Master Quest Map B-10 |
| 4 | Glorious Baton + | Unobtainable | Termina Map F-13 |
| 4+ | Liquid Glorious Baton | Unobtainable | Grand Travels Map D-8 |
Dominion Rod (DLC / Legends / Def. Ed.)

- Main article: Dominion Rod (Hyrule Warriors)
| Level | Name | Location (Wii U) | Location (3DS & Switch) |
|---|---|---|---|
| 1 | Old Dominion Rod | Automatic upon purchasing the Twilight Princess Pack | Adventure Map A-2 |
| 2 | High Dominion Rod | Automatic upon purchasing the Twilight Princess Pack | Great Sea Map G-3 |
| 3 | Royal Dominion Rod | Automatic upon purchasing the Twilight Princess Pack | Master Quest Map B-16 |
| 4 | Royal Dominion Rod + | Unobtainable | Termina Map A-3 |
| 4+ | Volcanic Dominion Rod | Unobtainable | Lorule Map A-12 |
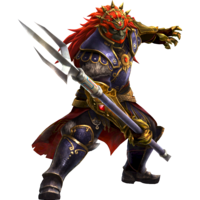
Ganondorf
Great Swords

- Main article: Great Swords
Trident (DLC / Legends / Def. Ed.)

- Main article: Trident (Hyrule Warriors)
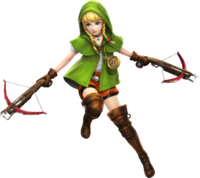
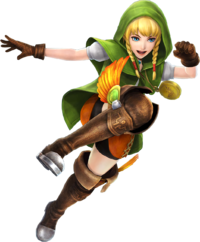
Linkle (DLC / Legends / Def. Ed.)
Crossbows

- Main article: Crossbows
Boots (DLC / Def. Ed.)

- Main article: Boots (Hyrule Warriors)
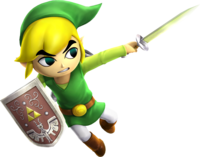
Toon Link (DLC / Legends / Def. Ed.)
Light Sword

- Main article: Light Sword (Hyrule Warriors)
Sand Wand (DLC / Def. Ed.)

- Main article: Sand Wand (Hyrule Warriors)
Other Characters
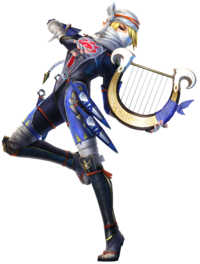
Harp (Sheik)

- Main article: Harp
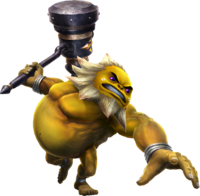
Hammer (Darunia)

- Main article: Hammer (Hyrule Warriors)
Zora Scale (Ruto)

- Main article: Zora Scale (Hyrule Warriors)
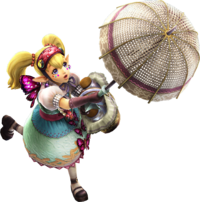
Parasol (Agitha)

- Main article: Parasol
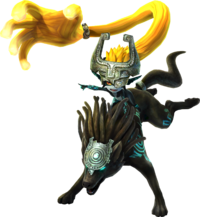
Shackle (Midna)

- Main article: Shackle
Scimitars (Zant)

- Main article: Scimitars
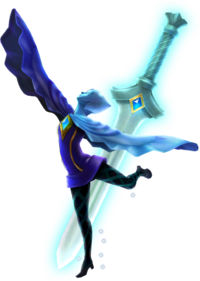
Goddess Blade (Fi)

- Main article: Goddess Blade
Demon Blade (Ghirahim)

- Main article: Demon Blade
Scepter (Cia)

- Main article: Scepter
Dragon Spear (Volga)

- Main article: Dragon Spear
Ring (Wizzro)

- Main article: Ring (Hyrule Warriors)
Mirror (Twili Midna; DLC / Legends / Def. Ed.)

- Main article: Mirror (Hyrule Warriors)
Mask (Young Link; DLC / Legends / Def. Ed.)

- Main article: Mask (Hyrule Warriors)
Balloon (Tingle; DLC / Legends / Def. Ed.)

- Main article: Balloon
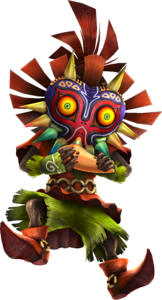
Ocarina (Skull Kid; DLC / Legends / Def. Ed.)

- Main article: Ocarina (Hyrule Warriors)
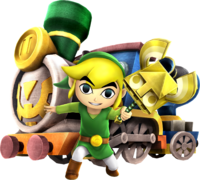
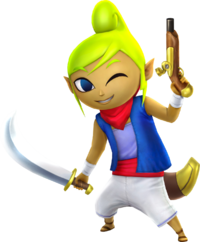
Cutlass (Tetra; DLC / Legends / Def. Ed.)

- Main article: Cutlass
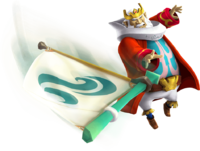
Sail (King Daphnes; DLC / Legends / Def. Ed.)

- Main article: Sail (Hyrule Warriors)
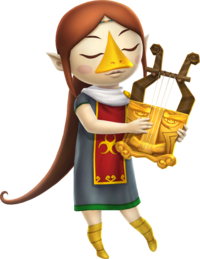
Rito Harp (Medli)

- Main article: Rito Harp
Bell (Marin; DLC / Def. Ed.)

- Main article: Bell (Hyrule Warriors)
Phantom Arms (Toon Zelda; DLC / Def. Ed.)

- Main article: Phantom Arms
Rental Hammer (Ravio; DLC / Def. Ed.)

- Main article: Rental Hammer
Picture Frame (Yuga; DLC / Def. Ed.)

- Main article: Picture Frame