Gallery:A Link to the Past Items: Difference between revisions
mNo edit summary |
m (Text replacement - "Gargoyle's Domain" to "Thieves' Town") |
||
| (16 intermediate revisions by the same user not shown) | |||
| Line 76: | Line 76: | ||
File:Lttp crystal2.gif|2nd Crystal-encased Maiden, [[Swamp Palace (A Link to the Past)|Swamp Palace]] | File:Lttp crystal2.gif|2nd Crystal-encased Maiden, [[Swamp Palace (A Link to the Past)|Swamp Palace]] | ||
File:Lttp crystal3.gif|3rd Crystal-encased Maiden, [[Skull Woods (A Link to the Past)|Skull Woods]] | File:Lttp crystal3.gif|3rd Crystal-encased Maiden, [[Skull Woods (A Link to the Past)|Skull Woods]] | ||
File:Lttp crystal4.gif|4th Crystal-encased Maiden, [[ | File:Lttp crystal4.gif|4th Crystal-encased Maiden, [[Thieves' Town (Dungeon)|Thieves' Town]] | ||
File:Lttp crystal5.gif|5th Crystal-encased Maiden, [[Ice Palace]] | File:Lttp crystal5.gif|5th Crystal-encased Maiden, [[Ice Palace]] | ||
File:Lttp crystal6.gif|6th Crystal-encased Maiden, [[Misery Mire (A Link to the Past)|Misery Mire]] | File:Lttp crystal6.gif|6th Crystal-encased Maiden, [[Misery Mire (A Link to the Past)|Misery Mire]] | ||
File:Lttp crystal7.gif|7th Crystal with [[Zelda]], [[Turtle Rock (A Link to the Past)|Turtle Rock]] | File:Lttp crystal7.gif|7th Crystal with [[Zelda (A Link to the Past)|Zelda]], [[Turtle Rock (A Link to the Past)|Turtle Rock]] | ||
</gallery> | </gallery> | ||
| Line 119: | Line 119: | ||
File:Power-Glove.png|[[Power Glove]] | File:Power-Glove.png|[[Power Glove]] | ||
File:Titans-Mitt.png|[[Titan's Mitt]] | File:Titans-Mitt.png|[[Titan's Mitt]] | ||
File:MoonPearl-ALttP- | File:MoonPearl-ALttP-Inventory.png|[[Moon Pearl]] | ||
File:ZoraFlippers.png|[[Flippers]] | File:ZoraFlippers.png|[[Flippers]] | ||
</gallery> | </gallery> | ||
| Line 165: | Line 165: | ||
File:DungeonMap-ALttP-Inventory.png|[[Dungeon Map]] | File:DungeonMap-ALttP-Inventory.png|[[Dungeon Map]] | ||
File:BigKey-ALttP-Inventory.png|[[Big Key]] | File:BigKey-ALttP-Inventory.png|[[Big Key]] | ||
File:SmallKey-ALttP-Inventory.png|[[Small Key]] | |||
</gallery> | </gallery> | ||
| Line 176: | Line 177: | ||
File:HeartContainer.png|[[Heart Container]] | File:HeartContainer.png|[[Heart Container]] | ||
</gallery> | </gallery> | ||
==Item Artwork== | ==Item Artwork== | ||
===Equipment=== | ===Equipment=== | ||
< | <gallery> | ||
File:Fighters Sword - LTTP art.png|[[Fighter's Sword]] | |||
File:MasterSwordlttp.png|[[Master Sword]] | |||
File:Tempered Sword DSTLOZLTTP.png|[[Tempered Sword]] | |||
File:Golden Sword.png|[[Golden Sword]] | |||
File:Fighter Shield - LTTPGBA artwork.png|[[Fighter's Shield]] (extracted from art for the [[The Legend of Zelda: A Link to the Past (GBA)|GBA port]]) | |||
File:Red Shield - LTTP art.png|[[Fire Shield]] | |||
File:FireShield.png|Fire Shield ([[A Link to the Past Nintendo Player's Guide|Nintendo Player's Guide]]) | |||
File:MirrorShield.png|[[Mirror Shield]] | |||
File:GreenMail.png|[[Green Jerkin]] | |||
File:BlueMail.png|[[Blue Mail]] | |||
File:RedMail.png|[[Red Mail]] | |||
File:PegasusBoots.png|[[Pegasus Boots]] | |||
File:PowerGlove.png|[[Power Glove]] | |||
File:TitansMitt.png|[[Titan's Mitt]] | |||
File:Moon Pearl - LTTP art.png|[[Moon Pearl]] | |||
File:ZoraFlippers - LTTP art.png|[[Flippers]] | |||
</gallery> | |||
===Items=== | ===Items=== | ||
< | <gallery> | ||
File:Bow and Arrow - LTTP art.png|[[Bow]] and [[Arrow]] | |||
File:Boomeranglttp.png|[[Boomerang]] | |||
File:Magic boomerang.jpg|[[Magic Boomerang|Magical Boomerang]] | |||
File:HookShot.png|[[Hookshot]] | |||
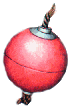
File:Bomblttp.png|[[Bomb]] | |||
File:Mushroom - LTTP art.png|[[Mushroom]] | |||
File:MagicPowderlttp.png|[[Magic Powder]] | |||
File:FireRodlttp.png|[[Fire Rod]] | |||
File:Ice Rod.png|[[Ice Rod]] | |||
File:Bombos Medallion - LTTP art.png|[[Bombos Medallion]] | |||
File:BombosMedallion.png|Bombos Medallion | |||
File:Ether Medallion - LTTP art.png|[[Ether Medallion]] | |||
File:Ether Medallion Art.png|Ether Medallion (Nintendo Player's Guide) | |||
File:EtherMedallion.png|Ether Medallion | |||
File:Quake Medallion - LTTP art.png|[[Quake Medallion]] | |||
File:QuakeMedallion.png|Quake Medallion | |||
File:Lamp - LTTP art.png|[[Lamp]] | |||
File:MagicHammer.png|[[Magic Hammer]] | |||
File:Shovellttp.png|[[Shovel]] | |||
File:Flutelttp.png|[[Flute]] | |||
File:BugCatchingNetlttp.png|[[Bug Net]] | |||
File:BookOfMudora.png|[[Book of Mudora]] | |||
File:CaneOfSomaria.png|[[Cane of Somaria]] | |||
File:CaneOfByrna.png|[[Cane of Byrna]] | |||
File:MagicCape.png|[[Magic Cape]] | |||
File:MagicMirror.png|[[Magic Mirror]] | |||
</gallery> | |||
===Bottle Items=== | ===Bottle Items=== | ||
< | <gallery> | ||
File:Bottlelttp.png|[[Bottle|Magic Bottle]] (empty) | |||
File:Bottle Red Potion - LTTP art.png|[[Red Potion]] | |||
File:Bottle Green Potion - LTTP art.png|[[Green Potion]] | |||
File:Bottle Blue Potion - LTTP art.png|[[Blue Potion]] | |||
File:Bottle Bee - LTTP art.png|[[Bee]] | |||
File:Bottle Fairy - LTTP art.png|[[Fairy]] | |||
</gallery> | |||
===Dungeon Items=== | ===Dungeon Items=== | ||
< | <gallery> | ||
File:Compass - LTTP art.png|[[Compass]] | |||
File:Dungeon Map - LTTP art.png|[[Dungeon Map]] | |||
File:Small Key - LTTP art.png|[[Small Key]] | |||
File:Big Key - LTTP art.png|[[Big Key]] | |||
</gallery> | |||
===Quest Items=== | ===Quest Items=== | ||
< | <gallery> | ||
File:PendantOfCourage.png|[[Pendant of Courage]] | |||
File:PendantOfPower.png|[[Pendant of Power]] | |||
File:PendantOfWisdom.png|[[Pendant of Wisdom]] | |||
File:Crystals.png|[[Crystal]]s | |||
</gallery> | |||
===Other Items=== | ===Other Items=== | ||
< | <gallery> | ||
File:Rupeeslttp.png|[[Rupee]] | |||
File:MagicJarslttp.png|[[Magic Jar]] | |||
File:Apple - LTTP art.png|[[Apple]] | |||
File:Heart - LTTP art.png|[[Recovery Heart]] | |||
File:Piece of Heart - LTTP art.png|[[Piece of Heart]] | |||
File:Heart Container - LTTP art.png|[[Heart Container]] | |||
File:Crystal Switch - LTTP art.png|[[Crystal Switch]] | |||
{{ | File:Crystal-Switch-Artwork-ALttP.png|Crystal Switch ([[A Link to the Past Nintendo Player's Guide|Nintendo Player's Guide]]) | ||
File:SuperBomb.png|[[Super Bomb]] (Nintendo Player's Guide) | |||
</gallery> | |||
===Unused Items=== | |||
{{cut|section}} | |||
<gallery> | |||
File:Unused Medallion - LTTP art.png|Design for a fourth medallion, published in ''[[The Legend of Zelda: Art & Artifacts]]'' | |||
</gallery> | |||
{{Galleries}} | {{Galleries}} | ||
{{cat|A Link to the Past Items| Gallery}} | {{cat|A Link to the Past Items| Gallery}} | ||
Latest revision as of 20:50, March 27, 2023
A gallery for items from A Link to the Past.
Overworld Sprites
Equipment


Items

Bow w/Arrows

Bow w/Silver Arrows

Bomb × 10

Bombs

Bottle Items

Red Potion (Bottled)

Green Potion (Bottled)

Blue Potion (Bottled)

Bee (Bottled)

Fairy (Bottled)
Dungeon Items
Quest Items

1st Crystal-encased Maiden, Dark Palace

2nd Crystal-encased Maiden, Swamp Palace

3rd Crystal-encased Maiden, Skull Woods

4th Crystal-encased Maiden, Thieves' Town

5th Crystal-encased Maiden, Ice Palace

6th Crystal-encased Maiden, Misery Mire

7th Crystal with Zelda, Turtle Rock


Other Items

Green Rupee (1)

Blue Rupee (5)

Red Rupee (20)

Magic Jar (Small)

Magic Jar (Large)


Inventory Sprites
Equipment


Items


Bottle Items


Dungeon Items


Quest Items

Other Items

Item Artwork
Equipment

Fighter's Shield (extracted from art for the GBA port)
Fire Shield (Nintendo Player's Guide)


.png)


Items

Bombos Medallion

Ether Medallion (Nintendo Player's Guide)

Ether Medallion

Quake Medallion


Bottle Items

Magic Bottle (empty)


Dungeon Items


Quest Items


Other Items
Crystal Switch (Nintendo Player's Guide)
Super Bomb (Nintendo Player's Guide)


Unused Items
| This section describes cut content, game elements which were removed before the game was released. |

Design for a fourth medallion, published in The Legend of Zelda: Art & Artifacts
