Shadow Temple: Difference between revisions
m (Text replacement - "<br>" to "<br/>") |
m (I believe Sheik uses they/them, not she/her) |
||
| (16 intermediate revisions by 6 users not shown) | |||
| Line 1: | Line 1: | ||
{{Specify|this=the dungeon from Ocarina of Time|other=the dungeon from A Link Between Worlds|link=[[Dark Palace (A Link Between Worlds)|Dark Palace]]}} | {{Specify|this=the dungeon from Ocarina of Time|other=the dungeon from A Link Between Worlds|link=[[Dark Palace (A Link Between Worlds)|Dark Palace]]}} | ||
{{Infobox|dungeon | {{Infobox|dungeon | ||
| image | | image = [[File:Shadowtempleinside.jpg|400px]] | ||
| game | | caption = | ||
| | | game = ''[[The Legend of Zelda: Ocarina of Time|Ocarina of Time]]'' (''[[The Legend of Zelda: Ocarina of Time 3D|3D]]'') | ||
| boss | | location = [[Kakariko Village Graveyard]] | ||
| miniboss | | quest = | ||
| enemies | | boss = [[Bongo Bongo]] | ||
| reward | | miniboss = [[Dead Hand]] | ||
| walkthrough = [ | | enemies = {{Hide|[[Beamos]]<br/>[[Blade Trap]]<br/>[[Eye Switch#Flaming Eye Switch|Eye Switch]]<br/>[[Fire Keese]]<br/>[[Flying Jar]]<br/>[[Gibdo]]<br/>[[Keese]]<br/>[[Like Like]]<br/>[[ReDead]]<br/>[[Red Bubble]]<br/>[[Stalfos]]<br/>[[Skulltula]]<br/>[[Wallmaster]]}} | ||
| inhab = [[Impa]] | |||
| item = [[Hover Boots]]<br/>[[Gold Skulltula Token]]s [[Ocarina of Time Gold Skulltulas|#82-86]] | |||
| prereq = [[Nocturne of Shadow]]<br/>[[Din's Fire]] | |||
| reward = [[Heart Container]] <br/> [[Shadow Medallion]] | |||
| related = | |||
| walkthrough = [https://www.zeldadungeon.net/ocarina-of-time-walkthrough/shadow-temple/ Text Walkthrough] | |||
[https://www.youtube.com/watch?v=xpjrtVqQVAo Video Walkthrough (Part 1)] | |||
[https://www.youtube.com/watch?v=XW478Rszs5A Video Walkthrough (Part 2)] | |||
[https://www.youtube.com/watch?v=DBfR_HxPGuw Video Walkthrough (Part 3)] | |||
[https://www.youtube.com/watch?v=8zoRKd7vx6A Video Walkthrough (Bongo Bongo)] | |||
[https://www.zeldadungeon.net/ocarina-of-time-walkthrough/master-quest-shadow-temple/ Master Quest Walkthrough] | |||
| music = [[Shadow Temple (Theme)]] | |||
}} | }} | ||
{{ZD|[https://www.zeldadungeon.net/ocarina-of-time-walkthrough/shadow-temple/ ''Ocarina of Time'' Walkthrough<br/>Chapter 12: Shadow Temple]}} | |||
{{ | The '''Shadow Temple''' is the seventh [[dungeon]] in ''[[The Legend of Zelda: Ocarina of Time|Ocarina of Time]]'', filled with illusions and macabre imagery. Whispering voices claim that the temple "gather[s] Hyrule's bloody history of greed and hatred..."{{Ref|''Ocarina of Time'' in-game text|{{dump|OOT|456}}}} | ||
==Gaining Entrance== | |||
After gaining the [[Forest Medallion|Forest]], [[Fire Medallion|Fire]] and [[Water Medallion]]s, the next time [[Link (Ocarina of Time)|Link]] visits [[Kakariko Village (Ocarina of Time)|Kakariko Village]] as an adult, he will find it on fire, and [[Sheik]] in front of the Well. An [[Bongo Bongo|evil shadow spirit]] emerges, breaking the well's bar and tossing Sheik around, then knocking Link out when he tries to protect them. Link comes round to find the force gone, the fires extinguished and Sheik kneeling over him. They teach him the [[Nocturne of Shadow]], allowing him to [[warp]] to the [[Triforce Pedestal]] outside the Shadow Temple, and order him to follow Impa there to help her with the evil spirit. | |||
After using the Nocturne to warp, and entering the cavernous space behind, Link is presented with a room full of unlit torches. Lighting all of these with [[Din's Fire]] opens the door, but to enter the Shadow Temple proper, he must hookshot across a large pit - while Link can light the torches and enter as a child, this essentially prevents him from fully entering except as an adult. | |||
While not strictly necessary to gain entrance, illusions make it difficult to progress, with a voice periodically whispering to Link that the "Shadow will yield only to one with the eye of truth, handed down in Kakariko Village". The "eye of truth" is the [[Lens of Truth]]; to obtain it from the [[Bottom of the Well]], Link must paradoxically obtain the Song of Storms from the [[Phonogram Man]] as an adult, then play it as a child to drain the well and create the Phonogram Man's obsession with it. Working his way through the well as a child and obtaining the Lens allows Link to find his way through the Shadow Temple much more easily. | |||
==Dungeon Overview== | |||
{{stub|section}} | |||
The Shadow Temple is filled with invisible enemies, guillotines, scythes, etc.; which can only be seen plainly with the Lens of Truth. Early on in the dungeon, Link faces another [[Dead Hand]], and when defeated he receives the [[Hover Boots]]; which allow him to cross gaps by walking on air. | |||
After Link defeats the boss of this dungeon, [[Bongo Bongo]], he travels to the [[Temple of Light|Chamber of the Sages]] where he meets [[Impa]], the newly awakened sage of Shadow. She adds her power to his and gives him the [[Shadow Medallion]]. The song used to [[warp]] to this dungeon is the [[Nocturne of Shadow]]. | |||
==Gold Skulltulas== | |||
<gallery widths=400 heights=240> | |||
File:OoT-Gold-Skulltula-082.jpg|'''#82:''' After going down the pathway with the guillotines and reaching the lone Stalfos, take the path on the left, using the [[Lens of Truth]]. Defeat the [[Like Like]] and all the [[Keese]] to unlock the gate and defeat the Skulltula. | |||
File:OoT-Gold-Skulltula-083.jpg|'''#83:''' In the room with the falling spike traps, use the Lens of Truth to find a block hidden in the wall. Push the block so that it prevents both of the falling traps from hitting the ground. Check behind the fence on the left side to find the Gold Skulltula. | |||
File:OoT-Gold-Skulltula-084.jpg|'''#84:''' The Skulltula can be found in the room with the giant skull, where Link has to toss a bomb into the skull to find a small key. There is a Gold Skulltula tucked away behind where the skull stood. | |||
File:OoT-Gold-Skulltula-085.jpg|'''#85:''' Once Link arrives on top of the large moving boat, look back to where the shortcut is located, which is by the fencing. Navi will fly up and turn green. Play the [[Scarecrow's Song]] and Longshot over to this ledge to find the Skulltula. | |||
File:OoT-Gold-Skulltula-086.jpg|'''#86:''' In the room with the invisible walls, just before acquiring the Boss Key, head to the room to the west to will find three spinning skulls. The Skulltula is hidden just behind them. | |||
</gallery> | |||
{{References}} | |||
{{clear}} | |||
{{Listbox|Ocarina of Time Dungeons}} | |||
{{Cat|Ocarina of Time Dungeons}} | {{Cat|Ocarina of Time Dungeons}} | ||
{{Cat|Ocarina of Time Locations}} | {{Cat|Ocarina of Time Locations}} | ||
Latest revision as of 00:11, March 4, 2024
- This article is about the dungeon from Ocarina of Time. For the dungeon from A Link Between Worlds, see Dark Palace.

Games | ||
Location | ||
Boss | ||
Mini-bosses | ||
Enemies | ||
Inhabitants | ||
Items | ||
Prerequisite | ||
Rewards | ||
| Guides | ||
|---|---|---|
Walkthrough | ||
| Media | ||
Music | ||
In-depth guide:
Ocarina of Time Walkthrough Chapter 12: Shadow Temple |
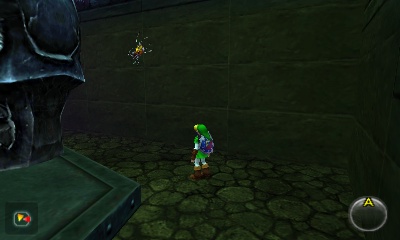
The Shadow Temple is the seventh dungeon in Ocarina of Time, filled with illusions and macabre imagery. Whispering voices claim that the temple "gather[s] Hyrule's bloody history of greed and hatred..."[1]
Gaining Entrance
After gaining the Forest, Fire and Water Medallions, the next time Link visits Kakariko Village as an adult, he will find it on fire, and Sheik in front of the Well. An evil shadow spirit emerges, breaking the well's bar and tossing Sheik around, then knocking Link out when he tries to protect them. Link comes round to find the force gone, the fires extinguished and Sheik kneeling over him. They teach him the Nocturne of Shadow, allowing him to warp to the Triforce Pedestal outside the Shadow Temple, and order him to follow Impa there to help her with the evil spirit.
After using the Nocturne to warp, and entering the cavernous space behind, Link is presented with a room full of unlit torches. Lighting all of these with Din's Fire opens the door, but to enter the Shadow Temple proper, he must hookshot across a large pit - while Link can light the torches and enter as a child, this essentially prevents him from fully entering except as an adult.
While not strictly necessary to gain entrance, illusions make it difficult to progress, with a voice periodically whispering to Link that the "Shadow will yield only to one with the eye of truth, handed down in Kakariko Village". The "eye of truth" is the Lens of Truth; to obtain it from the Bottom of the Well, Link must paradoxically obtain the Song of Storms from the Phonogram Man as an adult, then play it as a child to drain the well and create the Phonogram Man's obsession with it. Working his way through the well as a child and obtaining the Lens allows Link to find his way through the Shadow Temple much more easily.
Dungeon Overview
| This section is a stub. You can help the Zelda Dungeon Wiki by expanding it. |
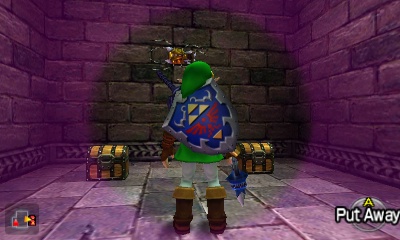
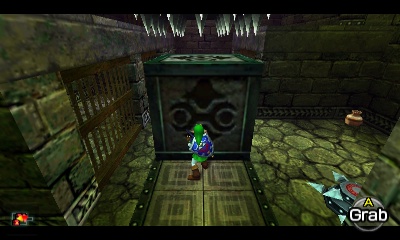
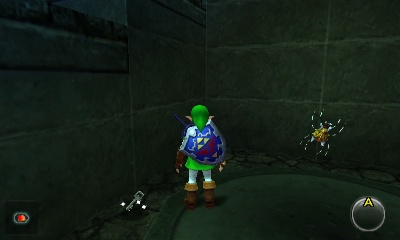
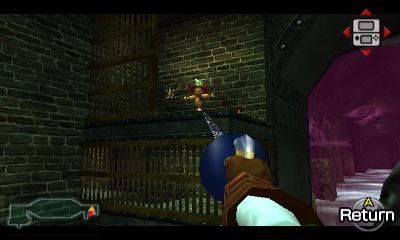
The Shadow Temple is filled with invisible enemies, guillotines, scythes, etc.; which can only be seen plainly with the Lens of Truth. Early on in the dungeon, Link faces another Dead Hand, and when defeated he receives the Hover Boots; which allow him to cross gaps by walking on air.
After Link defeats the boss of this dungeon, Bongo Bongo, he travels to the Chamber of the Sages where he meets Impa, the newly awakened sage of Shadow. She adds her power to his and gives him the Shadow Medallion. The song used to warp to this dungeon is the Nocturne of Shadow.
Gold Skulltulas
#82: After going down the pathway with the guillotines and reaching the lone Stalfos, take the path on the left, using the Lens of Truth. Defeat the Like Like and all the Keese to unlock the gate and defeat the Skulltula.
#83: In the room with the falling spike traps, use the Lens of Truth to find a block hidden in the wall. Push the block so that it prevents both of the falling traps from hitting the ground. Check behind the fence on the left side to find the Gold Skulltula.
#84: The Skulltula can be found in the room with the giant skull, where Link has to toss a bomb into the skull to find a small key. There is a Gold Skulltula tucked away behind where the skull stood.
#85: Once Link arrives on top of the large moving boat, look back to where the shortcut is located, which is by the fencing. Navi will fly up and turn green. Play the Scarecrow's Song and Longshot over to this ledge to find the Skulltula.
#86: In the room with the invisible walls, just before acquiring the Boss Key, head to the room to the west to will find three spinning skulls. The Skulltula is hidden just behind them.


References
- ↑ "Shadow Temple... Here is gathered Hyrule's bloody history of greed and hatred...", Ocarina of Time in-game text