Network Sites: Hyrule Warriors Walkthrough | Pokemon X and Y Walkthrough | Darksiders Dungeon | GenGAME
-
- Walkthrough
- Video Walkthrough
- Bosses
- Characters
- Enemies
- Guides
- Info
- Media
-
- Walkthrough
- Video Walkthrough
- Enemies
- Quest
- Guides
- Info
- Media
-
- Walkthrough
- Bosses
- Characters
- Enemies
- Items
- Guides
- Media
-
- Walkthrough
- Video Walkthrough
- Enemies
- Quest
- Guides
- Info
- Media
-
- Walkthrough
- MQ Dungeons
- Video Walkthrough
- Dungeons
- Enemies
- Quest
- Guides
- Info
- Media
-
- Walkthrough
- Video Walkthrough
- Text Guide
- Enemies
- Quest
- Guides
- Info
- Media
-
- Walkthrough
- Bosses
- Enemies
- Rings
- Guides
- Media
-
- Walkthrough
- Enemies
- Characters
- Rings
- Quest
- Guides
- Media
-
- Walkthrough
- Enemies
- Quest
- Guides
- Info
- Media
-
- Walkthrough
- Coming Soon
- Enemies
- Walkthrough
-
- Walkthrough
- Enemies
- Quest
- Guides
- Info
- Media
-
- Walkthrough
- Ordon Village
- The Twilight
- Faron Woods: Twilight
- Forest Temple
- Kariko Village: Twilight
- Death Mountain
- Goron Mines
- Lanayru Province: Twilight
- Lake Hylia: Side Quest
- Lakebed Temple
- The Master Sword
- Gerudo Desert
- Arbiter's Grounds
- Scaling Snowpeak
- Snowpeak Ruins
- Sacred Grove
- Temple of Time
- In Search of Sky
- City In The Sky
- Palace of Twilight
- Cave of Ordeals
- Hyrule Castle
- Video Walkthrough
- Ordon Village
- The Twilight
- Faron Woods: Twilight
- Forest Temple
- Eldin In Twilight
- Death Mountain
- Goron Mines
- Lanayru In Twilight
- Lake Hylia: Side Quest
- Lakebed Temple
- The Master Sword
- Gerudo Desert
- Arbiter's Grounds
- Scaling Snowpeak
- Snowpeak Ruins
- Sacred Grove
- Temple of Time
- In Search of Sky
- City In The Sky
- Palace of Twilight
- Cave of Ordeals
- Hyrule Castle
- Enemies
- Quest
- Guides
- Info
- Media
- Walkthrough
-
- Walkthrough
- Enemies
- Quest
- Guides
- Info
- Media
-
- Walkthrough
- Video Walkthrough
- Enemies
- Quest
- Guides
- Media
- Characters
- Story
-
- Walkthrough
- Video Walkthrough
- Bosses
- Characters
- Enemies
- Equipment
- Items
- Story
- Side Quests
- Upgrades
- Media
This chapter covers the three levels in level 6, the Desert of Doubt, the Desert Temple, and the Pyramid.
6.1 Desert of Doubt
|
|
|
|
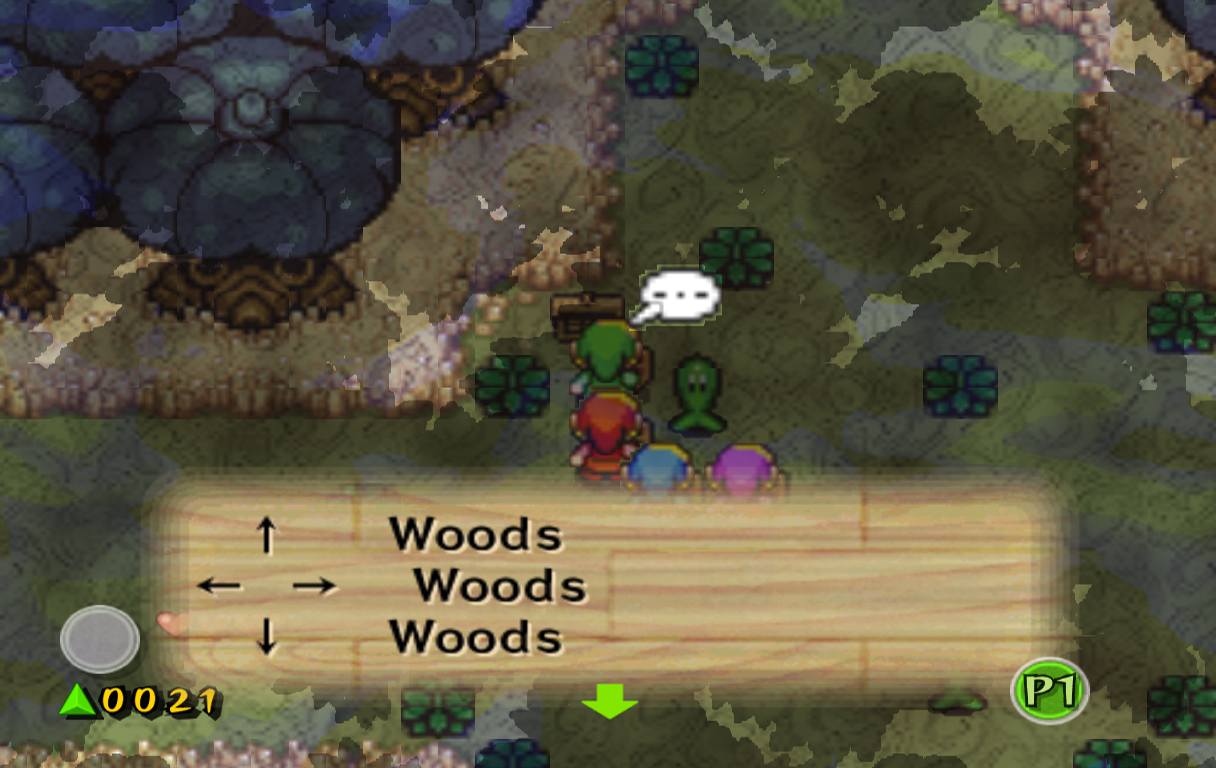
Welcome to the sixth level in the game, the Desert of Doubt. This dry land is full of Gerudo, sandstorms and death around every corner. Listen to the Maiden's words, then head north to the second screen.
Speak with the Gerudo woman here and she will talk of a man who broke their laws and went into the desert to find the Pyramid. This is none other than Ganondorf, our real nemesis. You can enter the other houses on this screen and speak with the other women inside, who will only continue to speak of what Ganondorf did. Each house contains chests, but they each only contain a single green force gem.
You will need to enter the house on the top-right part of the screen, as this contains the Gerudo Elder. After listening to your story she will tell you to speak with the Guard blocking access to the desert. Do so and the Guard will open the gate, allowing us to continue into the Desert.
This Desert is full of Gibdo, Debirando and Geldman enemies, along with fierce winds and sand pits. The goal when traversing through this desert is to move in the opposite direction the wind is blowing. If you try to move to the next screen by going in the wrong direction, you'll be transported back to the Gerudo Village. Start off by heading north and left around the wall. You'll find four pyramids here, with one blocking the entrance to another pyramid. Create a Box formation and push the pyramid to the right, unblocking the entrance. Head inside and walk down the stairs in the center of the screen. You'll find one of the many sand pits in the level on this screen. Sand will constantly be flowing downward and will drag you down with it if you're not careful. This sand doesn't drag you down very fast though, so you can easily walk or run across it. Walk to the right and use the middle ladder to grab the floating force gem when it comes near. Continue right and you'll reach a dead end. To make it past you need to sink into the sand just far enough to walk under the rock wall and around the corner. Once you get the hang of it, climb up the ladder and grab the Pegasus Boots.
At the top-right of the screen you'll see two vertical blocks. Use the Pegasus Boots to dash into them, allowing you to head right a screen. On the next screen, defeat the Keese and climb down the ladder, then open the chest for another 50 force gems. Climb back up the ladder and head left a screen, then head left across the sand pit. Head up the ladder in the middle of the screen (not the short one) and you'll be led back outside. Defeat the Debirando here with a quick sword attack, then head right to the next screen, which is the opposite way the wind is blowing. On the next screen you'll find three Gibdo. These mummy enemies take a couple of hits to defeat, and depending on which screen you're on, may then transport into the Dark World and become Stalfos. If this happens, you'll have to use a Moon Gate to transport into the Dark World and kill them there. This is one of the screens it happens on, so kill the Gibdo in the Light World to cause them all to head to the Dark World.
Once the three Gibdo are dead, head north into the cave. Walk left and into the vertical line that is four from the left of the screen. Smash the block here with the Pegasus Boots, then push the block at the top to reach the top of the screen. Open the three chests here for another 120 force gems and a Moon Pearl. Head back through the path we came from and back outside. Use the Moon Pearl on the land to the right and defeat the Stalfos in the Dark World. Follow the path right and north, then jump into the Moon Gate here. Kill the two Gibdo here as well, then follow them into the Dark World. Defeat their Stalfos incarnations as well, then use the Moon Gate to reach the Light World again. Head north to the next screen. Quickly run up and kill the four Shadow Link here, then head into the cave nearby. Walk to the right and create a Long formation. Use the Pegasus Boots to dash into the blocks here, then hop down into the area below. Open the chest for another 50 force gems, then lift up the rock here and head down the staircase.
Follow the path south and open the two chests along the bottom for another 500 force gems. In the middle of the screen you'll find a block puzzle. This puzzle is actually fairly easy; just use each individual Link to push his color block. It may take a little trial and error, but if it takes too long the path is: Green Block down, right block to the right, Red Block down, Blue Block down, block diagonally north-west of the purple block upwards, then Purple Block down. Create a Box formation at the end and three Stalfos will appear, along with a Force Gem Knight. Defeat them and collect the big green force gem. There are three pathways to the north; the left and right sides contain more force gems, and the middle contains a Great Fairy who will upgrade your Pegasus Boots. After at least upgrading the Pegasus Boots, head back up the stairs to one of the previous screens.
Walk to the left and you'll reach a wall with a few red force gems on top. Use a Long formation to dash into the wall, which will bring the gems down. Collect them, then head up the ladder nearby. You can simply dash across the gap here with the level 2 Pegasus Boots. If you're having trouble making it through the small gap, you can land on the nearby star-shaped switch to create a platform leading across the gap. Once you make it across, head south and back outside. Head to the right and drop down into the sand pit near the right edge of the screen. Head to the left and open the chest here to find another 5 force gems. Continue climbing the ladder to get back outside. Use the Pegasus Boots to dash all the way across the sand hole to the next screen.
Instead of defeating the first Debirando on this screen, drop down into the sand pit it creates. Before you land on the sand pit, use the Pegasus Boots to dash to the right, which will lead you to a chest on a high level. Open the chest for a big green force gem. Drop down to the sand pit to the left, then dive into the sand and head right, leading to a ladder to get back outside. If you didn't get to the chest the first time, you can reenter the sand pit and try again. After you collect the force gem, you can then defeat the Debirando on the screen. Afterwards, you can lift up the rock near the center of the screen for a couple big green force gems. These gems will try to run away from you, including one that will hang out near the edge of the screen. If you happen to head back a screen you can lift the rock again to find the gem waiting for you. Defeat the Tektites that were under the rock as well, then dash across the sand hole to the north and to the next screen.
Finally we have made it out of the wind desert, for now at least. This is the Zuna Village, a race of people descended from the ones who created the Pyramid many years ago. This Village is rather useless though, as most houses here are useless. A few contain single force gems inside chests much like the Gerudo Village from before. The house on the left side contains two things of decent importance. The first being a healer that will charge 100 force gems to bring your health up. The amount you are healed depends on what the game gives you. If you lift the rock inside the house and head downstairs, you'll find a game much like the one from the Village of the Blue Maiden. In order to play you must pay 100 force gems, where you will have the option to pick from three chests. The chests may contain 1, 100, 150, or 300 force gems. This is a very low risk game, and I'd recommend it if you need more force gems or are simply bored.
In the center of town there is a tree that you can dash into and a force fairy will appear. Along with this, there is another tree in the southwest corner that will pop out a big green force gem when hit. After you grow bored of this town you can head left back into the windy desert. This screen is full of vultures and loose sand. If you drop down to the area below and dash the wall above it will drop down force gems to collect. If you try to walk on the sand to the left you'll fall down to a lower screen. In this cave you'll see some square areas with circular shapes on them. Wherever these shapes are is where the loose sand is above. If you transfer this map to the outside land above it will tell you where you will fall down. To get past this screen you must walk around the loose areas and to the south edge of the screen. You can also do this by slowly walking on the sand, and wherever the loose sand pits are, the ground will shake. You can use this to reach the south end of the screen.
Once you reach the south end you'll find a dead end. To leave the screen you must exit at the west end of the screen, but you can't quite get there. To do this, look north and you'll see a gap between some coconuts and a skull. Use the Pegasus Boots to dash through this gap and land on the water above. Drop down into the whirlpool nearby and you'll find a long path to the exit. To the left is a big green force gem, along with a Cheep-Cheep. If you head south you'll simply find a Cheep-Cheep and a path that will connect with the previous one. If you continue left you'll find another big green force gem and the exit. You only have 10 seconds of breath though, so you might have to use multiple breaths to make it to the end. Once you do, you can dash into the tree to the left to find another 20 force gems, then continue left to the next screen.
This screen can be rather tricky, as there are many moving sand holes that will distort the path. You can fall into one of these holes if you choose to, where you can find a big green force gem floating across the screen. You can use the cannon to grab it, or dash across the screen to do the same thing. Otherwise, you can use the Boots to dash across the moving sand holes, making this screen much easier. Once you make it to the left side of the screen, head up and enter the cave. Follow the very direct path and use the boots to dash over the three gaps. Create a Box formation at the end and step on the switch to drop down a big blue force gem. Exit the cave, then follow the path on the left to the south side of the screen, then head down to the next screen.
Immediately use the Boots to dash south and you'll smack into a set of stairs. This will land you on safe sand, along with showing all the loose sand areas on the screen. Head down the stairs and open the chest for another 100 force gems. You can speak with the Zuna here and he will simply give you a hint about heading past this screen. Climb up the ladder and head back outside. Drop down into one of the holes surrounding this area and you'll be lead back underground. Walk to the left and dash across to each ladder to get back outside. Walk to the right of this higher area and you'll find a small ledge you can drop down off of. Instead of doing this, dash across the gap with the Pegasus Boots to another area with a chest. Open the chest for a big green force gem, then drop off the ledge to the left.
Dash back down to the stairs, then dash across the screen to the right. Open the next two chests for another 120 force gems. Dash back left and past the stairs, but stop when you get to the area with the rocks at the north and south edges of the area. Create a Long formation and slowly walk across this area to the left side of the screen. Once you make it, head left to the next screen. Walk down the stairs here and drop down to the sand pit. Dash all the way to the left side and walk up the ladder to find another chest with another 100 force gems. Head back down the ladder and to the right side of the screen, then use the cannon to fly back outside. On the bottom area of this screen is a large sand hole that will try to pull you in from almost every area you can reach. Defeat the vultures as best you can, then separate the Links. There are four switches in this area, one in each corner of the area. Place a Link on each switch on the right side, then use the other two Links to dash across the sand hole to the other switches. Once all are stepped on the sand hole will disappear.
Drop down into one of the three holes that appear. Instead of trying to avoid the sand pit like usual, sink down to the bottom of it, which will lead to a new area. Open the chest to the right for another big green force gem, then head to the left side of the screen and climb the ladder here. Walk through the next screen and open the next chest for another 100 force gems. Continue up the ladder, then exit on the north side of the outside screen. Four more Shadow Links will appear on this screen, on one of the higher ledges. There are two bomb plants on this screen, along with walls that you can bomb to find secret entrances. Shadow Link will bomb these holes when fighting to deter you, but aside from this, these holes are useless. You can end this battle fairly quickly by running up to the second ledge and dashing into the Shadow Links. Defeat the one that changes colors as well, then head north another screen.
You'll find a familiar scene on this screen, as the third jewel can be found here. Defeat the four normal Stalfos on this screen, then defeat the Big Dark Stalfos like before. After bringing the Knight of Hyrule back, he will inform you that Vaati is not the man from the desert and that Ganon is much stronger than Vaati. Collect the red jewel, then head north a screen. Break the eye barriers, grab the force fairies and join me for the next stage, the Desert Temple. |
 Gerudo Gerudo
The Gerudo are a race of desert nomads found only in this stage. The race is mostly comprised of women, except for their most infamous exiled member: Ganondorf. [more]  Gerudo Elder Gerudo Elder
The Gerudo Elder is the oldest woman in the Gerudo clan. After the Links speak with her, she will allow them to enter the Desert to search for the Pyramid. [more]  Devalant Devalant
Devalant are creatures of the sand found in the Desert area. They will create large sinkholes that will draw the Links in if they are not careful. They can be defeated with simple sword attacks. [more]  Gibdo Gibdo
Gohma are one-eyed spider-like enemies that quickly move across the ground. In some games they are mini-bosses or bosses, but in most of Four Swords Adventures they are simple enemies. They can only be defeated with a Bow, and the arrow must be shot through their large eye. [more]  Zuna Zuna
The Blue Maiden is the first Maiden rescued in Four Swords Adventures. She presides over the Eastern Hyrule area, where the Village of the Blue Maiden is named after her. [more] Red Knight of Hyrule
The Blue Maiden is the first Maiden rescued in Four Swords Adventures. She presides over the Eastern Hyrule area, where the Village of the Blue Maiden is named after her. [more]  Red Jewel Red Jewel
The Blue Bracelet is an item found only once per level in only one of the stages of that level. This means the Bracelet can only be found eight times throughout the game, and its effects only last during the stage it was found, not for the entire level as one may hope. The Bracelet cuts all damage Link receives in half, making it a very useful defensive weapon. [more] |
6.2 Desert Temple
|
|
|
|
Welcome to the second stage in the level, the Desert Temple. This Temple is the precursor to the Pyramid, although it is very easy to complete.
Start off by simply heading north into the Temple itself. Create a Box formation and pull the Armos Statue at the north end of the room, revealing another door. Quickly defeat the Shadow Link in the top-left corner of the next room, then head right a room. Defeat two more Shadow Links in this room (it is possible), then continue right to the next room. On the right side of this room there are four switches; hit them all starting with the top-right, then the bottom-right, then the bottom-left, and finally the top-left. Create a Box formation and step on the switch in the middle, which will completely change how the dungeon looks. Grab one of the Hammers that appear in this room, then head back left a room. Turtles known as Terrorpins have now appeared in this room, and they come in four different colors, representing the four Links as usual. Defeating the Terrorpins isn't necessary, but if you want to, you must use each individual Link to defeat its specific color Terrorpin. Whether or not you do, there are force gems hidden in the sand, along with a small key. If you only want the small key, it is located in the top-left corner of the room. Once you finish doing what you please with this room, use the key to unblock the pot at the bottom-left corner. Step on the switch below the pot and head back left a room. Head to the center of the room, then walk up. Pull the right side Armos statue down, then head north to the next room. This room contains many Beamos, Anti-Fairies and pots. It is possible to defeat the Beamos in this room by using the Bow to shoot them. You can only shoot them though when the Arrow will pierce their eye. This is rather difficult as the Beamos will try to shoot you at this time, so you have to time it well. Start off by heading to the left and opening the chest for a Heart Container. Walk to the right side of the screen and open another chest for some more force gems. In the middle of the screen is a blocked off Beamos. To find a hidden chest, you must stand in the middle of the back wall. If you position yourself correctly, the Beamos will shoot at you, breaking the pot south of the switch. After the Beamos activates the switch, open the chest to the southwest to find the Blue Bracelet. Head up to the next screen and you'll find a few Armos. To head up to the next screen you need to defeat all of them. This isn't difficult, and you will recieve at least a big green force gem for defeating each one. Also, under each Armos is a switch that will cause something to appear. The bottom-left contains 50 force gems, the top-right contains a level 2 Bow, and the rest will make level 1 Bows appear. Once you defeat the Armos, head up to the next room. Defeat the two Mini-Moldorms in this room, then use a Cross formation to hit the four switches. Open the chest on the right for 20 force gems, then open the one on the left for a Moon Pearl. Head back south two screens. To the right side of the Beamos in the middle of this screen is a long, rectangular area. Break the pots on the right side, then use the Moon Pearl to activate a Moon Gate. Hop into the Dark World and grab the few force gems floating around. Grab the key on the left side of the screen, then head back into the normal world. Use the key at the locked door on the left side of the screen, then quickly defeat the two Shadow Link in the next room. Defeat the two Armos as well, then walk to the south part of the room. Stand in the bottom right corner, then shoot an arrow through the flames above and it will light the torch above. Do the same for the right side torch and the door above will open. There are six red Armos Statues in this room that will continually circle around the center pillar. You cannot defeat them with any weapon; all you can do is avoid them. To complete this room you must light every torch. To do this, you must employ the same method as in the last room - using one torch to light other torches. As an example, use the torch at the top-left and shoot and arrow through to the right, lighting the torch next to the pillar. Make your way through this room doing this and eventually the Armos Statues will disappear. Grab the key that appears in the top-right corner, then open the door in the top-left corner. Use Long and Wide formations to defeat the Mini-Moldorms in this room, then head south to get outside. Use the Bow or the sword to defeat the three Debirando on this screen, then slash at the switch to drop hundreds of force gems. Collect them and head left a screen. Use a Wide formation to try and kill the four Shadow Links, then use a Cross formation to step on the gray switch. Use the same formation to defeat the few Geldarms that appear, then head up a screen to get back inside the Temple. There is a single Gohma on this screen, along with multiple torches. These torches will shoot flames at you like the Gohma will do. Defeat it as with any other Gohma, then head north another screen. Four Shadow Links will appear on this screen, along with many portals and a Beamos. This battle is almost the same as previous stages, where the Shadow Link will transport into the Dark World and make your life difficult. Defeat them like any other Shadow Links and head north a screen afterwards. Break the eye barriers, collect the fairies and join me for the final stage in this level, The Pyramid. |
 Terrorpin Terrorpin
Gohma are one-eyed spider-like enemies that quickly move across the ground. In some games they are mini-bosses or bosses, but in most of Four Swords Adventures they are simple enemies. They can only be defeated with a Bow, and the arrow must be shot through their large eye. [more]  Beamos Beamos
Gohma are one-eyed spider-like enemies that quickly move across the ground. In some games they are mini-bosses or bosses, but in most of Four Swords Adventures they are simple enemies. They can only be defeated with a Bow, and the arrow must be shot through their large eye. [more]  Heart Container #1 Heart Container #1
The first Heart Container can be found in Lake Hylia at the top of the waterfall. Enter the right side cave and use the Links to step on the switches, creating a bridge. Exit back outside and enter the middle cave. Follow the path to a chest containing the Heart Container. [more]  Blue Bracelet Blue Bracelet
The Blue Bracelet is an item found only once per level in only one of the stages of that level. This means the Bracelet can only be found eight times throughout the game, and its effects only last during the stage it was found, not for the entire level as one may hope. The Bracelet cuts all damage Link receives in half, making it a very useful defensive weapon. [more]  Armos Armos
Gohma are one-eyed spider-like enemies that quickly move across the ground. In some games they are mini-bosses or bosses, but in most of Four Swords Adventures they are simple enemies. They can only be defeated with a Bow, and the arrow must be shot through their large eye. [more]  Mini-Moldorm Mini-Moldorm
Gohma are one-eyed spider-like enemies that quickly move across the ground. In some games they are mini-bosses or bosses, but in most of Four Swords Adventures they are simple enemies. They can only be defeated with a Bow, and the arrow must be shot through their large eye. [more]  Armos Statue Armos Statue
Gohma are one-eyed spider-like enemies that quickly move across the ground. In some games they are mini-bosses or bosses, but in most of Four Swords Adventures they are simple enemies. They can only be defeated with a Bow, and the arrow must be shot through their large eye. [more] |
6.3 Pyramid
|
|
|
Welcome to the final stage in this level, The Pyramid. This ode to the Egyptians is structured much like you would except - many endless pathways, Gibdos, and other traps. Start off by heading up into the Pyramid.
You can destroy the pots in each corner of this room if you choose to; otherwise, simply use a Long formation to grab the lever on the right and pull it down to open the door above. Defeat the Gibdos in the next room (a Box formation works best), then head up another screen. There are two levers in this next room. The left side will open the door above, while the right side will drop down Ropes into the next room. If you defeat the Ropes a couple hundred force gems will drop down, so it may be worth your while. Whatever you decide to do, step on the switch at the top-left of the outside room to open the doorway out. Shadow Link will appear in this room. While the room may seem normal there is actually a hole in the center, to the right of where Shadow Link initially stands. You can avert this and defeat Shadow Link by separating the Links and placing one on the right side. Have another walk over to the left, then quickly switch back to the previous Link when Shadow Link jumps over. After you kill Shadow Link it can be helpful to actually fall in the hole and hold right on the control stick, as there is a chest containing a big green force gem hidden in the right alcove. To get out of the underground, continue left and climb up the ladder. Kill the two Keese, then step on the switch underneath the left pot on the top row. Walk off to the left and hold the control stick to the left, causing you to land on the new platform. Continue up the next ladder, defeat another Keese, and step on another switch to get back out. Use the key on the door above to reach the next room. Shadow Link will appear in this room, stuffed with more Giant Bombs as usual. Break the pot to the southwest and step on the switch, then head north inside to safety. Defeat the Stalfos in this room, then push the block to the south. Follow the pathway and walk outside the room after the Giant Bomb explodes. Step on the switch in the top-left corner, then enter through the next door. Walk down the pathway to the right and defeat the Stalfos. Break the pot in the southeast corner, then step on the switch that was underneath. Don't walk through the door above that is now open, as it simply leads to a dead end. Instead, head back left and up along the pathway. Enter back outside when it's safe, then step on another switch to open the door to the right. Defeat the last Stalfos in the next square area, then exit through the pathway to the right. Open the chest outside to find a Heart Container. Head back inside the dungeon area, then take the pathway north. Open the next chest for 150 force gems, then head left. Walk left and drop down onto a small area. Keep walking off the ledge and you'll land across a small gap below. Climb up the ladder nearby, then defeat the Keese up top. Break the pots and step on the switch below, bridging the gap. Continue up the path and you'll be back outside. Pull the four levers on the far left to open the door out of this room. Once you enter the doorway of the next room immediately stop. Two Shadow Links will come running at you from the right, but as long as you stay in the doorway the bottom Shadow Link should miss you. After they hit the wall, kill them both. Head to the left and defeat the Gibdo here (a Box formation works best). Continue along the pathway and you'll find a locked door. Above the door on the left wall is a switch; use the Links to push it into the wall, opening the door. Use another Box formation to defeat the Ropa in this room, bridging the gap to the left. Defeat the Mini-Moldorms on this side as well, then grab one of the Slingshots. Head back out the door to the right, then continue up to the next screen. Open the door to the left in the same way as before. Defeat the two Gibdos in this room, then enter the door that opens to the left. Break the pot in the top-left corner of this area and step on the switch underneath to open the doors above and below. Walk to the left and create a Cross formation. Have one Link facing to the north and one facing to the south, then power up the Slingshot. Shoot out the north and south doors, hitting the switches outside this room. This will drop down a key. Grab it, then head back out the door to the right. Walk to the north and follow the pathway to the bottom-right side of the room until you find a locked door. Use the key on the door and enter it. Head right and break the four pots, then create a Box formation and step on the switches. This will bring four Gibdos out; defeat them and they will all transport to the Dark World. Break the pot in the bottom-right corner and a Moon Pearl will drop out. Grab it, then head to the north end of the room and use it to create a Moon Gate. Once in the Dark World grab one of the Lamps to the south. Defeat the four Stalfos here, which will drop down hundreds of force gems back in the Light World. Quickly hop back in the Moon Gate and grab the force gems, then head back out the door to the left. Continue following the path to the left around this room and defeat the lone Gibdo here. Light the two torches along the wall and a couple hundred force gems will drop down. Head left another screen and light two more torches, opening the door above. Before you head inside, continue left and enter the first room on the left. Light the four torches nearby and it will open another door. Head back right and enter the door to the south. Grab the Pegasus Boots here, then head back out to the room with the four torches. Enter the door above and give the Pegasus Boots to the Great Fairy, who will upgrade them. Head back south a room and right a room. Walk south around this room and enter the door at the top-right of the screen, next to where the gap in the center circular area is. Use the Pegasus Boots to dash across the room, which is full of holes. Open the two chests at the end to find 20 force gems and a Moon Pearl. Pull the lever above to open the door, then enter through it. Follow the short pathway and it will lead you back to the other side of the room. Head back through the door to the central room. Walk into the gap to the left and the Moon Pearl will create another Moon Gate. Inside this Dark World there are many small, short platforms and gaps. You will need to use the Pegasus Boots to dash across them. This can be tricky, as you need to change directions while running across the gap. If you feel you are up to this, you can dash to the south, then push the control stick to the right to land on the platform. It only contains 20 force gems though, and is not necessary to get. If you do get it, push the right block north to get out of this small area. If you didn't collect the force gems, dash to the right and you'll land on the same platform. Head north and break the columns of pots, then dash into the line of blocks to break them. Continue along the path and open the chest at the southwest corner to find some more force gems. Head back up a couple of steps to the rows of pots. Break them, then dash across the gap to the right. Open the chest for a big blue force gem. To make it past this screen we have to head south. This requires dashing to the left, then moving to the south to another platform. If you can do this you are more than welcome to, if not, dash back to the left platform. Head up, then right a couple of steps. You can dash down to the bottom of the screen here to make this much easier. Step on the gray switch here with a Box formation, then use the Moon Gate to get back to the Light World. Head left a screen and you'll find Shadow Link. Quickly defeat him, then defeat the Gibdo as well. There are many chests on this screen, each containing something different. Open all the chests except for the two top-left ones. You'll find force gems in the other chests, along with Bombs and a Big Key. Use the Big Key on the chest in the center of the room to find a thousand force gems. Afterwards, use a Bomb at the top-right corner to find an entrance. Break the line blocks to the left with bombs, then do the same for the next line. Break the pots here and step on the switches to open the door above. Back out in the main room, head up and to the right a couple of steps. Bomb the cracked wall here to open another entrance. Climb the ladder and head to the right where you'll find a gap. Place a bomb down and pick it up with R, then throw it across the gap to the switch. The exploding Bomb will activate the switch, allowing you to open a chest containing a Heart Container. Head back out to the main room. Head right a screen and you'll see a line of cracks along the top wall. Bomb them and another entrance will be revealed. Defeat the Ropes in this next room and follow the pathway to find a large gap. Enter the door to the north and use the Slingshot to individually hit all five switches so they turn green. Head back out of this room and use the platforms to make it halfway across the gap. Enter through another door above to reach the same room, this time on the opposite side. Hit the switches with the Slingshot so that only the left switch and the second switch from the right are still glowing. Head back out and walk across the next gap to reach the right side of the room. Follow the pathway and head up to the next room. Follow the straightforward pathway here and defeat the enemies that get in your way. Make sure to break the pot in the top-left corner to find a force fairy. Head up to the next room and right a room to find the dungeon and level boss: Moldorm. Moldorm is different from his previous appearances in A Link to the Past and Link's Awakening. While in other games you simply hit his tail with one Link to defeat him, this time around Moldorm's tail will change colors, and you will need to hit the tail with the specific color of Link it needs. After doing this enough times, Moldorm will split into two Moldorms, making the battle more difficult. You can aleve some of this difficulty by implementing a switch method, where you can switch to a different Link if you are about to be hit. If you do happen to fall off the platform down below, simply head up the ladder and you will reappear on the Moldorm screen. Either bring the Links together or have the one that fell jump back down onto the platform. That's pretty much all there is to this battle, simply hit away at the tail with the correct Link and Moldorm will soon be defeated. Once he is, drop down to the lower level and take the staircase back up. Enter through the room to the right and you will be given a speech about what the inscription says. The realization will come that Ganondorf took the trident and is the true King of Darkness, not Vaati. Continue to the next screen and break the eye barriers surrounding the Maiden. Listen to her speech as well, then collect your fairies and join me for the next level: Frozen Hyrule. |
Heart Container #1
The first Heart Container can be found in Lake Hylia at the top of the waterfall. Enter the right side cave and use the Links to step on the switches, creating a bridge. Exit back outside and enter the middle cave. Follow the path to a chest containing the Heart Container. [more] Heart Container #2
The first Heart Container can be found in Lake Hylia at the top of the waterfall. Enter the right side cave and use the Links to step on the switches, creating a bridge. Exit back outside and enter the middle cave. Follow the path to a chest containing the Heart Container. [more]  Big Moldorm Big Moldorm
Gohma are one-eyed spider-like enemies that quickly move across the ground. In some games they are mini-bosses or bosses, but in most of Four Swords Adventures they are simple enemies. They can only be defeated with a Bow, and the arrow must be shot through their large eye. [more] |
| Four Swords Adventures Site Walkthrough | |
|
Chapter 1 - Whereabouts of the Wind Chapter 2 - Eastern Hyrule Chapter 3 - Death Mountain Chapter 4 - Near the Fields Chapter 5 - The Dark World
Chapter 8 - Realm of the Heavens | |
| � Previous | Next � |