- Chapter 1 – First Three Days
- Chapter 2 – Southern Swamp
- Chapter 3 – Woodfall Temple
- Chapter 4 – Collection
- Chapter 5 – Snowhead
- Chapter 6 – Snowhead Temple
- Chapter 7 – Spring, Romani Ranch, Ikana Graveyard
- Chapter 8 – Great Bay & Zora Cape
- Chapter 9 – Great Bay Temple
- Chapter 10 – Ikana Canyon
- Chapter 11 – Well & Ikana Castle
- Chapter 12 – Stone Tower Temple
- Chapter 13 – The Moon
12.1 Small Keys
While the past three temples have focused on their respective transformation mask, this one uses all of them. It’s also far more confusing to keep track of where you’re supposed to go. You may want to bring a few fairies in Bottles as well as some Green Potion, if not Chateau Romani. It would also be good to use the Inverted Song of Time to ensure you have enough time to complete it. If you plan on getting all of the Stray Fairies, you’ll have to exit and re-enter the temple repeatedly throughout, so be emotionally prepared for that annoyance.
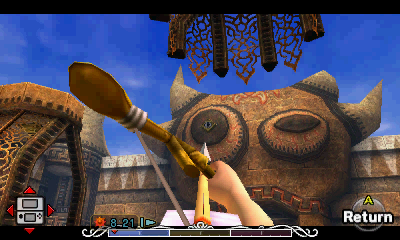
As you first enter the temple, you’ll notice that some things are upside-down, such as the platforms above you. Don’t worry, you will have to explore those later. First of all, whip out your Hero’s Bow and shoot the golden eye switch in the statue straight ahead. This will cause a chest to appear on the nearby platform. Taunt the Real Bombchu over and deflect it with your Shield or shoot it from afar, then jump to the platform while wearing the Bunny Hood or Zora Mask and open the chest to find your first Stray Fairy.
Stray Fairy #1 Shoot the golden eye switch in one of the eyes of the giant figure straight ahead. Jump to the chest that appears using the Bunny Hood or Zora Mask and open the chest.
With that in hand, there are two doors you can go through. Enter the one on the left.
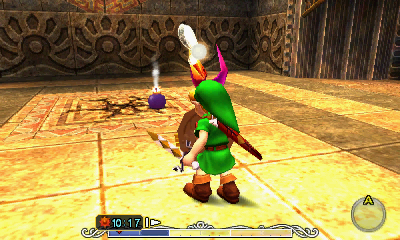
Run through here, killing all of the Real Bombchus (use your Shield). There are four switches in this room, but you can only hold down three at a time with the Elegy of Emptiness. Straight across from the door you entered from is a cracked wall. Use a Bomb or the Blast Mask to blow it up, revealing some crates, behind which is a large block that you can push/pull. Drag it over to the nearby switch to keep it pressed down. NOTE: In the Nintendo 64 version, there are small crates here that you can lift up. Lift one up and put it on any of the small switches in the room.

Now use the Elegy of Emptiness to hold down the remaining two small switches, using Human Link and Zora Link. The big switch can only be held down with the empty shell of Goron Link.
In the second half of the room there are two dark patches on the floor. Place a Bomb (or use the Blast Mask) on the patch without grass to open up a hole. Put on the Goron Mask and either fall down or take the nearby stairs to the lower room.
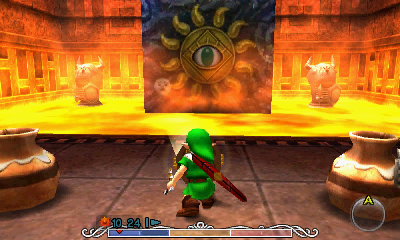
In this room (which is very dark in the Nintendo 64 version), stand in the light and use the Mirror Shield to reflect the light onto the Sun Block in front of you. Change into Goron Link and march through the lava. There are six Armos Statues in this room, and once you Fire Punch them, they will activate and start bouncing around in the room. Defeat all six of them and a treasure chest will appear, containing a Small Key. NOTE: In the Nintendo 64 version, only 4 of the 6 statues will activate.


Additionally, with the Sun Block gone, you can also reach a chest containing the Dungeon Map. Considering how massive and confusing this dungeon gets, this is one of the more valuable Dungeon Maps in the game.
Before leaving, there is a Stray Fairy to get as well. Look up at the ceiling where the sun is shining in from. There is a nearby target, so latch onto it using the Hookshot and then open the chest to get the second Stray Fairy. Return upstairs and use the Small Key on the locked door.
Stray Fairy #2 Hookshot the target on the ceiling to reach a hidden ledge with a chest.


NOTE: This room is notably different in the Nintendo 64 and Nintendo 3DS versions.
Jump into the water and swim to the other side. Climb onto the ledge and you’ll see a floor switch at the south end of the room. You can use Zora Link and leap up to this ledge, but the MUCH easier method is to simply use Deku Link and jump across the water. Step on the switch and a treasure chest containing a Small Key will appear. Grab it and then hop back in the water. This time, swim through the opening underneath the Dexihand.


Be careful to avoid the Spike mines and on the other side of the room, you’ll see a Dexihand that’s placed curiously. Allow it to grab you and it will throw you up onto the ledge. The ledge is otherwise a bit too tall to reach on your own.


In both versions of the game, you’ll see a crystal switch on the other side of this metal wall here. It is currently inaccessible, but you can hit the switch easily using a Bomb or a Spin Attack. This won’t help immediately, but it will allow you to more easily get a Stray Fairy later on.
Stray Fairy #13.1 In the water, allow the Dexihand to toss you up onto the ledge. Stand next to the metal lattice and use a Bomb or Spin Attack to hit the crystal switch on the other side.
As soon as you enter this large, water-filled room, sink down to the bottom and defeat the enemies. Swim through them while using the Electric Barrier (R). Once they’re taken care of, either walk behind the Spike Mines or destroy them by using your Double Cutters (charge B) or use Z + R to walk into them. Step on the floor switch to make a chest appear upside-down. This will allow you to get a small key later.


Float up to the surface and climb onto the ledge (or dolphin jump). Stand in the light and reflect it towards the mirror on the southern wall. Charge it up for a bit, then run over reflect the light it projects onto the nearby Sun Block. This will reveal a shortcut to the entrance as well as an alcove with a chest guarded by a Real Bombchu. Use your Shield to defeat it, then open the chest to get the Compass. With that, enter the locked door to the north.


12.2 Light Arrows
This room has two Black Boes that will continually reappear. This is annoying, since you’ll have to use the mirrors in this room to reflect light and solve puzzles. To make this easier, you can wear the Stone Mask to make them ignore you the entire time. As soon as you enter, put on the Goron Mask and punch out the suspicious pillars near the door you entered from. This will reveal light that is coming from a hole in the ceiling.


First of all, stand in the light and turn right. Use your Mirror Shield to reflect the light onto the leftmost Sun Face to make a chest appear containing the third Stray Fairy. Next, stand in the light again and face towards the center. Charge up the mirror on the right, run over and use it to remove the Sun Block. Pass the Nejiron (or wear the Stone Mask) and open the chest to find the fourth Stray Fairy.
Stray Fairy #3 There are six Sun Faces on the walls near the light source. When facing away from the door, turn right and reflect light on the far left one.
Stray Fairy #4 When standing in the light and facing the center of the room, reflect light onto the mirror on the right side of the central pillar. Once it’s charged up, run over and reflect light to make the Sun Block on your right disappear. Sneak past the Nejiron and open the chest.


Now to continue onward in this room, you’ll have to charge up the mirrors on the left side of the room. This is made very difficult because of the Black Boes, but if you have the Stone Mask, it’s immensely easier.
Stand in the light and face towards the left mirror on the central pillar. Kill all of the Black Boes once they come over to you and then wait. Only one of the Black Boes will appear (on the right). Wait for it to attack you and slash your sword as soon as it’s close. Immediately press and hold the R button until the Black Boe reappears and interrupts you. Kill it, run forward and immediately start charging up the next mirror. As soon as your current reflection fails, run forward, kill the next Black Boe and quickly reflect onto the Sun Block. It may take a try or two, but that is the best way to ensure you have the most time possible. Enter the next door.


This area is filled with lava and has several air pumps that blast upwards. Ignore the pumps for now and put on the Goron Mask. Drop down to the lower portion of the room and you’ll see a large switch close to the entrance. Use a Goron Pound to push it down, which removes the fire temporarily from around the floor switch on the opposite side of the room, also in the lava.
This part is extremely hard. Basically, walk around the room and roll with A to increase speed. The problem is that if you hit a wall, it’ll slow you down too much and you won’t make it. It is best to ignore the rolling for the most part. Focus on walking in the correct direction and only hold A when you’re in straight stretches. Never let go of the Analog Stick. By rolling in short bursts about three or four times, you should be able to make it without too much of a problem. If you struggle with this, don’t be surprised, as it’s probably the hardest Stray Fairy to acquire in the entire game. Once you manage to step on the switch, it’ll make a large chest appear above that you’ll be able to open in a moment.
Stray Fairy #6.1 Pound the switch in the lava and roll to the other side of the room to press down the other switch.


Return to the first side of the room and climb the ladder to get back up. Put on the Deku Mask and use the Deku Flower to fly out over the lava. After recharging at the first blast of air, swerve off to the left and collect the rupees, then open the chest to find your fifth Stray Fairy.
Put on the Goron Mask, drop down into the lava, climb the ladder, put on the Deku Mask and start flying again. This can be fairly tricky, but just remember that your flying time is completely restored whenever you touch a blast of air. Steadily work your way around the room, flying from gust of air to gust of air. It may be helpful to try turning so that you’re facing the correct direction and using Z targeting to center your camera angle. When you make it to the end, open the large chest to get the sixth Stray Fairy. Slash the jars if you’d like, then enter the door.
Stray Fairy #5 Fly to the alcove on the first side of the room.
Stray Fairy #6.2 Open the chest once you reach it.


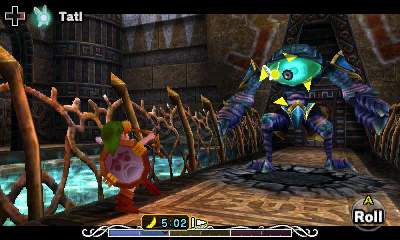
This guy looks familiar, but unfortunately his swords do not break because of your Shield like the other Garos you may have faced before. If you have the Bunny Hood, wear it, since it will allow you to run away from his attacks faster.
This guy is only vulnerable after he successfully performs an attack, meaning that even if you deflect his swords, his guard will remain up. The trick to defeating him is to avoid his attacks entirely so that he misses, leaving him vulnerable for a few moments. The easiest way to do this is to simply back up. When he charges at you, strafe to the side and then return after he swipes to get a good slash in with your own sword.
If you stand too far away when he charges at you, he’ll disappear and pop up right in front of you. When he does this, you’re best course of action is usually to run towards where he just was, then turn around and hit him in the back. It’s fairly predictable, so you shouldn’t have a problem with it.
While it is possible to fight as both Deku and Zora Link, if he manages to hit you, you’ll have to restart the battle, since you aren’t allowed to catch on fire (so don’t fight in those forms). However, he’s fairly easy in your Goron Form, since at short to medium distances, you can simply use A + B to perform a Goron Pound, which will hit him as soon as he finishes his charge attack. Immediately follow up with R to defend, or else his counter attack will hit you.


After you’ve defeated him, he’ll give you some very useful information, just like the other Garos you’ve seen before. Open the large chest he leaves behind to find the dungeon item, the Light Arrows. Exit through the next door.
12.3 Flipping the Temple
This small room looks rather confusing. If you fall down, simply Hookshot up to the target on the ceiling. Climb up the little protruding chunk of metal and jump to the skinny platform, where you’ll find a new variation of an enemy you’ve faced before: the Masked Hiploop. Simply use your Hookshot on it multiple times to remove it’s helmet and kill it. Enter the next door.


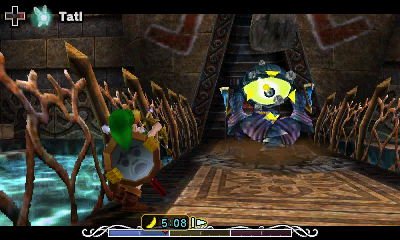
You’re back in one of the earlier rooms with all the water, but this time you’re on top of the bridge. Run forward to tackle your first Eyegore. Run forward and Z target it, then stand close to taunt it into attacking. Quickly back up so you don’t take damage and shoot it’s eye, which is yellow and vulnerable just after it attacks. Repeat this process until it’s dead, which creates a large chest back near the other door. Open it to find your seventh Stray Fairy. Continue on into the next door to return to the entrance room. Open the chest ahead if you haven’t yet and exit the temple.
Stray Fairy #7 Kill the Eyegore.

NOTE: This is a tad bit different in the Nintendo 64 and the Nintendo 3DS version.
In the Nintendo 3DS version it is simplified, as once you step outside, you can just look above the entrance to the dungeon where you’ll see a red dot. Shoot it with a Light Arrow and that’s that.
Back outside, go step on the rightmost switch (which reveals the red emblem the Garo Master spoke of) and place a statue on it with the Elegy of Emptiness. Stand on one of the side blocks and shoot the emblem with a Light Arrow, which will then flip all of Stone Tower (including the temple). Once you reappear, jump across the blocks and enter the now upside-down temple.
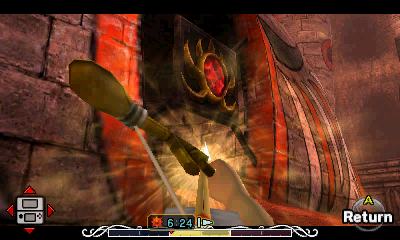

As you re-enter the temple, you may feel a bit uncomfortable with the clouds beneath you. There are some small crates with arrows and Magic Jars if you are running low. First of all, go stand on the Majora’s Mask symbol on the floor and turn around. Look straight up and you’ll see a Sun Face in the “lower area” you may have investigated earlier on when the temple was right-side up. Shoot it with a Light Arrow to make a large chest appear in the middle containing the eighth Stray Fairy. With that, enter the only door available.
Stray Fairy #8 In the first room, shoot the Sun Face with a Light Arrow to create a treasure chest.


As soon as you enter, shoot the Sun Block with a Light Arrow to make it disappear. Round the corner and you’ll see several gusts of wind that shoot upwards. Hop down into the lower part of the room and turn around. Just underneath the platform you were standing on is a frozen eye switch. Shoot it with a Fire Arrow to melt it and make a large chest appear in a nearby alcove. Put on the Deku Mask and use the center gust of air to reach it, gaining the ninth Stray Fairy.
Stray Fairy #9 Underneath the platform with the flower you start at, shoot the Frozen Eye Switch with a Fire Arrow. Use the middle air pump to get to the platform where a chest appears.


Fly up to the platform in the middle with the Masked Hiploop (which can be killed by simply hitting with the Hookshot repeatedly). Walk into the opening at one end and go step on the floor switch to make a chest appear back at the other side of the bridge. Go back and open it to find a Small Key.


Before you leave this room, there are a few things you can do. On the east side of the room is a platform about half way up with a Deku Flower and a floor switch on it. Step on the switch and place a statue on it with the Elegy of Emptiness to remove the fire around a chest up above. Use the tallest air pump to reach this upper north platform, being careful of the Spike Mines, and open the chest to get the tenth Stray Fairy.
Stray Fairy #10 Place a statue on the floor switch on the eastern platform to put out the flames. Fly up to the northern platform where the chest awaits.


Next, jump down to the central bridge and turn around. Look at the same platform (north) and shoot the upside-down Sun Face with a Light Arrow to create an upside-down chest. This will allow you to get a Stray Fairy later.
Stray Fairy #14.1 At the edge of the northern platform is a Sun Face. Shoot it with a Light Arrow to make a chest appear. You’ll be able to open that up in a moment.

That’s everything for this room. With Small Key and Stray Fairies in hand, take the west air pump to the highest platform, avoiding the Spike Mines, and enter the locked door.
Shoot the red emblem across the room to flip this area. Put on the Goron Mask and walk across the lava to the middle platform. Take off the Goron Mask and shoot the emblem again, then run to the door.


This puzzle requires you to flip the room over and over again. All you’re trying to do is move the Majora’s Mask block as far as possible, flip, move it again, repeat. If you run low on magic or arrows, the Green and Yellow ChuChus will constantly reappear. I’m not sure who thought this room was a good idea… It’s not that it’s hard, it just needlessly lengthy. The goal is to snap the block in place in the opposite corner from where it originally started.


Once the block is in place, the door will open up. You can either flip the room twice to get to the door so you land on the upper platform, or you can simply climb up with the Zora Mask. Enter the next door


You’re probably sick of this overused mini-boss, but sadly this isn’t last time you’ll be facing him!
He fights the same as usual, just like the Ikana Castle variety, he has a flaming attack that bursts into several different flaming rocks and spread across the area when they hit, which makes it harder to avoid. He has two higher areas to appear from and there’s also magma falling from the ceiling. Additionally, he has even more health than ever before, but that shouldn’t be a problem. Just watch your mini-map and run towards the red dot so you can attack him. When he appears up high, just shoot him with arrows.


After he has been defeated, use the Hookshot on the chest that appears and open it to get the eleventh Stray Fairy. Then walk down the steps.
Stray Fairy #11 Defeat the Wizzrobe and open the chest that appears.
12.4 Boss Key
As you enter this new area open to the sky, you’ll encounter a new enemy called a Poe. They’re invulnerable when they’re invisible, but when you defeat them, you can swipe their spirit into a Bottle and sell them for 50 rupees at the Curiosity Shop later. Snag a few if you’d like, then use the flower to get to the other side. Once you get there, use the second flower to enter the higher alcove on your right.


This is the upside-down version of the room with all the switches you had to use to open the gate earlier. In this version of it, it’s filled with a new enemy called Death Armos, which are a real pain. You have to shoot them with Light Arrows to flip them over, then run under them to make them slam down on their own head to kill them. You could try ignoring them, but that’s a little more difficult. If you have the Stone Mask, you can simply wear that, since they won’t be able to see you.


Go to the far end of this area and step on the floor switch to put out the flames. Use the Elegy of Emptiness to leave a statue on it and keep it pressed down, then go open the chest to get a Small Key. Run back to the start of this section and jump down to the platform. Enter the next door.
As you enter, you’ll see a door immediately to your right. DO NOT go that way yet. Instead, use an arrow on one of the Spike Mines ahead to cause them to collide, which removes two of them. Use the flower to fly over to that middle platform and beware of the malicious jars. Use the flower here to reach the next door.


These enemies will jinx you if they touch you, making you unable to use your sword for a short period of time. You can play the Song of Storms to remove this curse at any time. Also, the Blue Bubbles won’t be able to see you if you wear the Stone Mask. Try shooting them with Light Arrows to make them drop 50 rupees each. Nice! You can reenter this room a few times if you’d like to plump up your wallet. Slash the crates at the end to stock up on magic and arrows, then enter the next door.
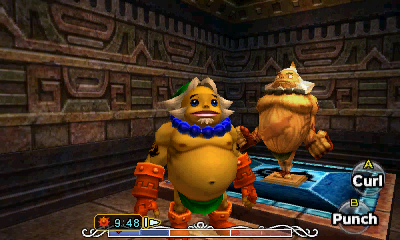
One of the cooler mini-bosses in the game, Gomess surrounds himself with bats, which makes him invulnerable. The bats themselves can be killed, but they will appear again continuously. You can use this to your advantage by using the Zora Mask, Z targeting him and holding R + B to use the Electric Barrier to kill a bunch of bats (you cannot be harmed while doing this). This will not hurt Gomess himself, but the bats will drop Magic Jars and arrows when defeated. Use this tactic to fill up whenever you begin to get low.


Always defend against this guy whenever possible, since his attacks can take a good chunk out of your hearts. If you stand too close, you’ll get hit by the bats, so try and stay a little further back. If you’re too far away (across the room) then he’ll send the bats after you, which is somewhat hard to avoid (use the Zora Mask or Deku Mask).
The trick to defeating him is to Z target him while defending, wait until just after he attacks, then shoot him with a Light Arrow to temporarily make the bats leave. This exposes the sphere in his chest which is his weak point. Quickly run forward and slash it. He immediately counter attacks, so defend again as soon as possible.
That’s all there is to it! Just repeat this process several times to defeat Gomess. As was mentioned earlier, kill the bats for more magic if you run low, as this battle is quite draining on your resources.

After a cool scene that shows Gomess’ defeat, the nearby door will open. Slash the jars in the corners of the room for Recovery Hearts and go open the large colorful chest to get the Boss Key. With that, return to the previous room, stocking up on arrows and magic as well as shooting the Blue Bubbles with Light Arrows to get some more rupees.
12.5 Giant's Mask
Shoot the Spike Mines again and fly to the middle area on the right. Watch out for the killer jars and fly back to the other side of the room again. NOW you can take the side door (south) that we ignored earlier.


You’re back in the starting room, but in the opposite corner from the entrance. There’s a Death Armos on the next platform, which is kind of a pain since you have limited space. Roll jump across (for extra distance so you don’t have to climb up) or wear the Bunny Hood or Zora Mask. Once over there, shoot it with a Light Arrow to flip it and taunt it into stomping down on its own head to defeat it. Alternatively, you can just wear the Stone Mask and ignore it.
Step on the floor switch to make a chest appear upside-down above an upper platform in the middle of the room. You can Z target it if you like, then Hookshot to it to get to the final area of the temple. Go through the locked door.
Stray Fairy #12.1 Step on the switch next to the Death Armos to make a chest appear on the ceiling.
Here there is another Eyegore, though this one’s a bit harder. It shoots energy beams this time around, which can be deflected (a little awkwardly) with the Mirror Shield. You can either kill it by stunning it with Light Arrows and then shooting its eye with regular arrows, or you can just get close and use the same method as last time. Either way, after a few hits, it’ll be defeated. NOTE: In the Nintendo 64 version, it will leave behind a large treasure chest that contains the Giant’s Mask. However, in the Nintendo 3DS version, you won’t be able to get the new mask until mid-way through the boss battle. Proceed through the next door.


12.6 Temple Boss
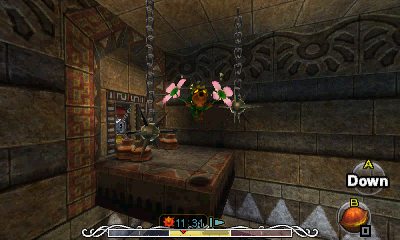
In this final room (looks familiar, no?) run forward and slash the Crystal Switch. This creates an upside-down chest that you can Hookshot to reach the upper platform. Hookshot the next target to drop down and get more rupees. Hop down from here and you’ll find a Beamos and some jars (two of which are alive) that you can use to fill up on magic, arrows, Bombs and Recovery Hearts. If you’re ready, you can go ahead and enter the Boss Door now.
Stray Fairy #15.1 Hit the Crystal Switch, causing a treasure chest to appear which we will open in just a bit.


At this point the guide will cover the other Stray Fairies that you’ve been working diligently towards. If you don’t want to collect them, feel free to skip ahead to the boss. Otherwise, play the Song of Soaring to return to the entrance, exit the temple and play the Song of Soaring again to warp to Stone Tower (which will flip it, saving a bit of time). You will have to play the Elegy of Emptiness on the floor switches once again to create the bridge to re-enter the temple.

Now that the temple is right-side up again, run forward and jump into the lower area with the Bombchu. Defeat it, then open the chest you created earlier for your twelfth Stray Fairy. Climb up the ladder and enter the west door.
Stray Fairy #12.2 In the entrance room at the lower level, open the treasure chest to get the Stray Fairy.
Defeat all the Bombchus and complete the switch puzzle again, using the Elegy of Emptiness to press down switches and also using the nearby crates. Go through the gate as well as the door on your right to return to the water-filled room with the Eyegore bridge down the middle. If you hit the Crystal Switch on the other side of the room earlier in the dungeon, then you are in good shape. If not, hop in the water and swim over to the other side.
Note: In the Nintendo 64 version, you can allow the Dexihand to grab you on purpose and it’ll toss you onto the upper ledge. You’ll see a Crystal Switch on the other side of the grating. You can get rid of the block with a Light Arrow, or just destroy it by using a Spin Attack or laying a Bomb (or using the Blast Mask). This makes a chest appear on the opposite side of the room.


There are a couple of different ways you can get back there. You can play the Song of Soaring and return to the entrance, then go back through that switch puzzle, but that’s a bit annoying. Instead, hop in the water and get right up to the far western edge, then put on the Zora Mask while facing the ledge. Because of your increased height and your displacement in the water, you’ll be able to grab onto the ledge.
Use a Light Arrow on the Sun Block here and defeat the Beamos. Open the large chest to find your thirteenth Stray Fairy. Hop back in the water and swim through the opening to the east, just under the Dexihand.
Stray Fairy #13.2 Remove the Sun Block and open the chest we created earlier.
Swim forward and go down. Atop the platform ahead of you is a chest that you created earlier by shooting the Sun Face. Open it to get your fourteenth Stray Fairy. Float up to the surface and enter the north door.
Stray Fairy #14.2 Sink down and open the chest on top of the southern platform.


Follow this series of rooms that circles around, through the Black Boe & Mirror Room, the “U” Shaped Room and the area where you battled the Garo Master. Eventually you’ll come to the metal filled room with the Masked Hiploop up on the ledge. Instead, drop down to the lower portion of the room and open the chest at the end to find the fifteenth Stray Fairy.
Stray Fairy #15.2 In the entrance room, hop down into the pit and open the chest you created earlier.


With all of those collected, soar back to the entrance and leave. Step on the rightmost switch outside and leave a statue, then shoot the red emblem again to flip the temple. Enter and look up to see the opened chest hanging upside-down on the ceiling. Hookshot to it and follow the doors until you get to the Spiked Log Room.
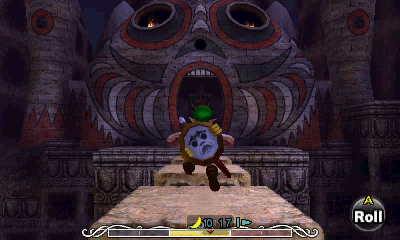
Hookshot to the upside-down chest on the ceiling, then Hookshot to the target ahead of you. Drop down and gather the goodies in the jars if you wish, then enter the Boss Door when you’re ready. Inside, you’ll see a pit of sand (this is the upside-down version of the Garo Master Room). There’s nothing to do now but hop in and initiate this battle.


NOTE: This boss is drastically different depending on whether you are playing on the Nintendo 64 or the Nintendo 3DS. Both strategies are listed below.
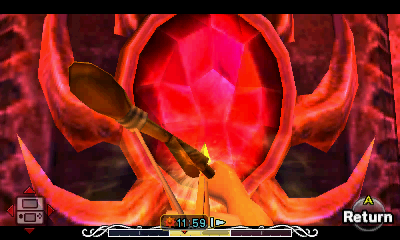
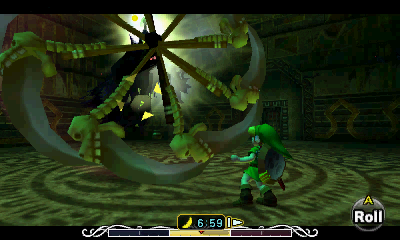
This is basically two battles in one, with the first part focusing on the Blue Twinmold creature. It will float around in the air and on its underside, you will see three eyes. Pull out your regular Hero’s Bow and shoot all three of these eyes. This will cause the enemy to come crashing down below, revealing its massive eye. This is, as usual, its weak spot. Pull out your Light Arrows and shoot as many as you can to harm the boss.

The process then repeats. This time however, the Blue Twinmold has 5 eyes on its belly. Repeat the process and then hit the massive eye until the Blue Twinmold has been defeated. It will leave behind a treasure chest that contains the Giant’s Mask. The mask allows Link to turn into a massive giant, capable of smashing the other Twinmold. However, it does use up magic.


At any time during the battle if you are running low on magic, you can smash some of the nearby pillars to regain some magic. Furthermore, Twinmold’s smaller minions will often leave behind magic, and Twinmold itself will sometimes drop magic after it comes up from underground. Keep an eye on your magic and continuously collect magic as it appears. It’s a good idea to use Green Potion if you run low, or if you previously used Chateau Romani during the three-day cycle, you will have an infinite amount of magic.
During this phase you want to smash Twinmold with your fists. Be careful of the fireballs that it will shoot at you. When it is floating around, side step it and then deliver a combination of fist attacks. Be careful when it burrows itself underground. It will come up and either shoot fireballs at you, which you should move away from, or it will unleash some smaller minions. You can punch the smaller versions of Twinmold, or simply roll over them to defeat them. These little guys will drop hearts or magic when they die, so make use of them if you’re running low.


After you’ve punched Twinmold enough times, it will lay on the ground. Run over to its tail and grab hold of it. Link will lift it up and smash it to the ground. You will have to repeat this same process until Link has smashed Twinmold to the ground four times, finally defeating it.


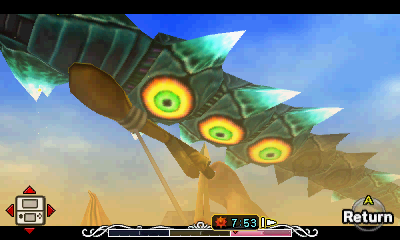
These two insects are called Moldorms, and collectively they’re named Twinmold, a corny twist on the name. Tatl explains that only their head and tail are vulnerable, which can be hit with pretty much anything. She also mentions that it would be a lot easier if you were the same size as them. Slap on the Giant’s Mask and show them who’s boss (no pun intended).
Follow after them, slashing wildly with no real technique… it’s their weakness…? In all seriousness though, these guys are pathetic. Just watch one as it comes out of the sand and slash at the tail while moving towards it, without Z targeting. These vertical slashes will hit it most often. Just time it well and you can easily get several hits on it before it goes back into the sand.


Using too much magic with the Giant’s Mask? Slash the ruins throughout the area to reveal Magic Jars that you can then shrink down and collect to fill up quickly. Either way, it would be wise to come prepared with either Chateau Romani or Green Potion.
Alternatively, you can run over (Bunny Hood or Goron Mask) to the tail just before it disappears in the sand and hit it (sword or Fire Punches), but you’ll most likely take damage because you have to get super close and will probably touch it. You’re better off using the Blast Mask for that tactic, or simply standing on the center platform and shooting well-timed Light Arrows. While this does work, it’s much harder and you use a lot more magic than you would using Giant’s Mask, so… it’s really not a good option at all.


The one word of warning there is to offer for this battle is to avoid the edges of the sand. A little ways past the ruins is a “drop off” into quick sand that’s essentially an abyss. If you fall in, you’ll have to start the battle over again. Although this battle is pretty cool, it really is incredibly easy. Just run after them with the Giant’s Mask and don’t worry about getting hit too much. Tear them to pieces and you’ll be done in no time.
After they’re defeated, (so hard!) go snag the Heart Container as well as the last Guardian Mask. Afterwards, you’ll witness a cutscene with the fourth and final Giant. “Forgive your friend” it says. Hmm… the plot thickens!


- Chapter 1 – First Three Days
- Chapter 2 – Southern Swamp
- Chapter 3 – Woodfall Temple
- Chapter 4 – Collection
- Chapter 5 – Snowhead
- Chapter 6 – Snowhead Temple
- Chapter 7 – Spring, Romani Ranch, Ikana Graveyard
- Chapter 8 – Great Bay & Zora Cape
- Chapter 9 – Great Bay Temple
- Chapter 10 – Ikana Canyon
- Chapter 11 – Well & Ikana Castle
- Chapter 12 – Stone Tower Temple
- Chapter 13 – The Moon
