This chapter covers the normal mode of the HD version of Twilight Princess for the Nintendo Wii U. If you are playing on the Nintendo Wii, check out the Goron Mines – Wii Version.
- Chapter 1 – Ordon Village
- Chapter 2 – The Twilight
- Chapter 3 – Faron Woods: Twilight
- Chapter 4 – Forest Temple
- Chapter 5 – Kakariko Village: Twilight
- Chapter 6 – Death Mountain
- Chapter 7 – Goron Mines
- Chapter 8 – Lanayru Province: Twilight
- Chapter 9 – Lake Hylia: Sidequests
- Chapter 10 – Lakebed Temple
- Chapter 11 – The Master Sword
- Chapter 12 – Gerudo Desert
- Chapter 13 – Arbiter’s Grounds
- Chapter 14 – Scaling Snowpeak
- Chapter 15 – Snowpeak Ruins
- Chapter 16 – Sacred Grove: Round Two
- Chapter 17 – Temple of Time
- Chapter 18 – In Search of the Sky
- Chapter 19 – City in the Sky
- Chapter 20 – Palace of Twilight
- Chapter 21 – Cave of Ordeals
- Chapter 22 – Hyrule Castle
7.1 First Goron Elder; Dungeon Map
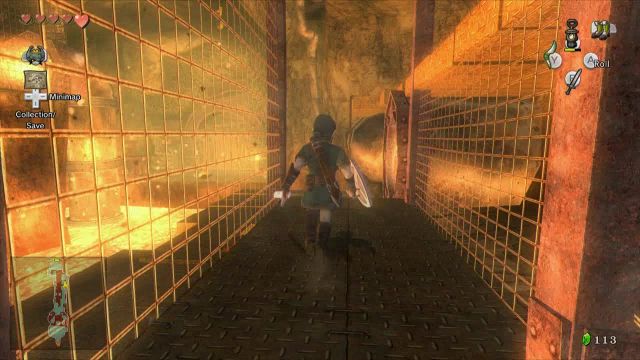
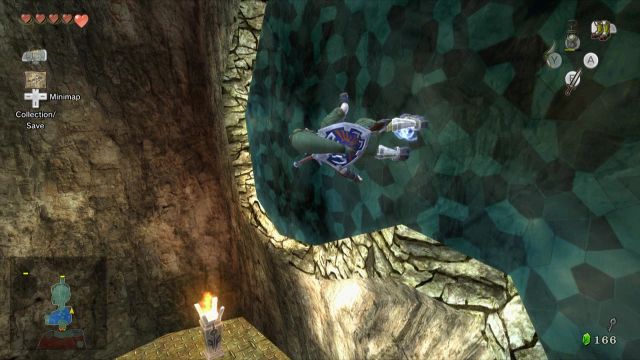
Once you enter the Goron Mines, run down the ramp and jump to the platform ahead. You can go either left or right, but avoid the lava that shoots up from below. Run forward onto the grated shafts, smashing the boards out of your way with your sword, and you’ll be blocked off by a gust of fire coming out of the wall. Just nearby there is a ground switch that you can stand on. Put on the Iron Boots to push the switch all the way down, and it will temporarily disable the flames ahead.


Run ahead and you’ll find a second gust of fire blocking your path. Once again use the Iron Boots on the floor switch to temporarily cause the flames to go out. Run ahead and jump past where the flames were. Make a U-turn to the left and run across the plank before the fire returns.
Continue onward and climb the ladder that is just ahead. Jump over the gap and defeat the Torch Slug that is nearby. Open the treasure chest here to get a Red Rupee.


Backtrack a bit and use the center platform to reach the west side of the room. Travel southward and you’ll find another floor switch. Once again use the Iron Boots on the switch and it will cause flames all the way at the north end of the room to go out. Quickly run in that direction, but be careful of the fire slugs that will drop from the ceiling.


At the north end of the room, jump on the lever and it will move down slightly. Put on the Iron Boots and it will completely lower, opening the nearby gate. Go through the gate and head through the door to reach the next room.
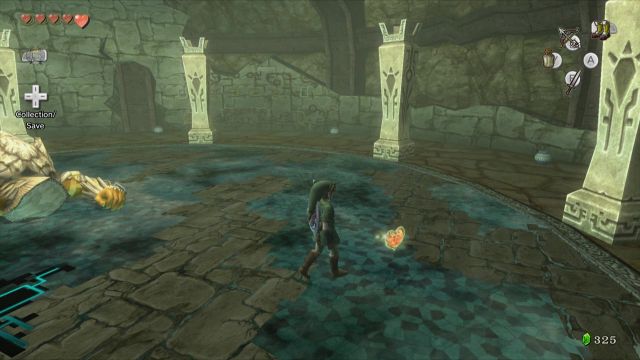
This is the massive central room of the Mines and we will be returning here a number of times. Take the pathway to the right and it will lead to the a treasure chest that contains a small key. Climb back up and this time take the path to the left.


There are some rotating platforms that you will need to jump across. Wait until they are flat and quickly jump across. Jump ahead and used the small key to unlock the door.
Run ahead and you’ll encounter a new enemy: Dodongo. These classic Zelda enemies will breathe fire at Link. Wait until it starts breathing fire and then quickly run around and slash away at its vulnerable tail. Repeat this process until the enemy has been defeated.
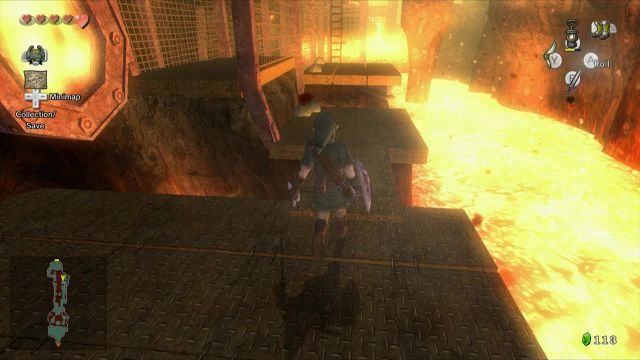
Jump across the platforms, avoiding the lava that shoots up and you’ll come across a second Dodongo. Get rid of this enemy as it could get in your way. Now jump to the north end of the room and defeat a a third Dodongo.
There is a large chain that Link can grab. Do so and pull it all the way back. While still holding the chain, change your perspective so you can see the timing of the lava spumes you jumped over. Once the lava settles down, release the chain and run back and jump across the platforms. Quickly jump to the middle platform and run past the spiked wall, before it fully retracts. If you run of time, just backtrack and pull the chain again. Continue onward to the next room.


Once you enter the room, drop into the water below and put on your Iron Boots. You only have a limited amount of time before Link runs out of breath. Walk forward and step on the floor switch and this will create a magnet, shooting Link up to the magnetic field on the ceiling. Walk along the magnetic field and head through the door ahead.


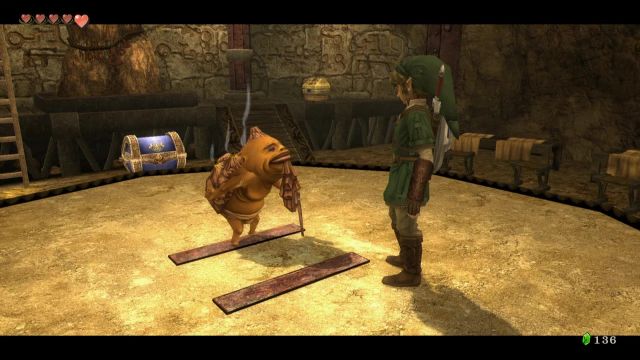
Here you will find Gor Amoto, the first of the Goron Elders here in the Goron Mines. He will give you a Key Shard, and will indicate that you will need to gather three of them to complete the Big Key. Open the nearby treasure chest to get the Dungeon Map. There is a second treasure chest here, so run over and open it to get a red rupee.


7.2 Second Goron Elder
Climb the ladder in the room to reach the second floor and head towards the door. Lift the pot to find Ooccoo once again. This character can be found in all of the dungeons and you can use her to warp out of the dungeon at any point. Continue onward and head through the door on the second floor of this room.
Use the Iron Boots to walk along the side of the walls. While on the wall, you can still use your sword to defeat the fire slug. Remove the Iron Boots and head through the door ahead.
Run ahead and step on the floor switch with the Iron Boots to shoot yourself up to the magnetic plate on the ceiling. Slowly but steadily walk over to the northeast corner of the room where you will find a treasure chest. Open it up to get Piece of Heart #7. Equip the Iron Boots again and walk on the magnetic field to get back up to the ceiling. Make the very long trek across the ceiling to get all the way to the east end of the room. Once you are at the door, drop down and head through to get back to the larger central chamber.


Make your way to the center of the room and fight off a number of bulblin. Step on the floor switch with the Iron Boots and it will activate one of the large cranes nearby. Walk over to the center platform at the east end of the room and equip the Iron Boots. When the crane comes by, Link will attach to the magnetic crane. Allow it to carry you to the north end of the room and then remove the Iron Boots.


Climb up the ramp and use the Iron Boots on the floor switch here to activate another magnetic crane. Allow this one to carry you to the far north portion of the room and then head through the door nearby.


You can defeat the tektites if you’d like but then jump down into the water and equip the Iron Boots. You’ll find a treasure chest that contains a small key. Grab it and then swim to the other side of the room to find a grated off corner with a pushable block underwater. Equip the Iron Boots and push the block to get by. Resurface and then climb up to find a floor switch. Step on the floor switch with the Iron Boots and use the magnet to get up to the ceiling.


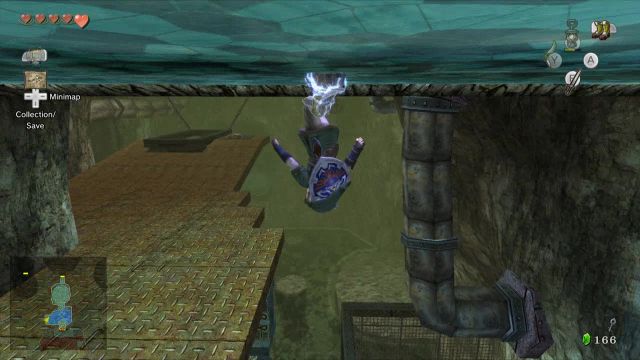
Walk over to the platform ahead and then release the Iron Boots to drop down. Run ahead and step on another floor switch with the Iron Boots, and it will cause a magnetic field to shoot across the room. Walk to the edge of the grated shaft with the Iron Boots equipped and then drop down. You will be pulled into the field and attach to the magnetic wall. Walk around to the safe platform and release the boots. Open the treasure chest here to get a red rupee. Strike the diamond switch here and it will open up the nearby gate. Drop down and run through the gate before it closes.


In this room there are two beamos statues, but unfortunately, we cannot do anything about them just yet. On the side of the room, use the Iron Boots to climb up the magnetic wall. At the southwest corner of the room, there is a treasure chest, so make your way over. Drop down and open the treasure chest to get Piece of Heart #8.


Drop down and again climb up the magnetic wall, this time heading towards the north end of the room. Slash at the rope found here and it will cut down the bridge, allowing you to progress onward. Drop down and use the small key to unlock the door.


You’ll find yourself in a massive outdoor area. Run ahead and be careful not to stand in the open too long as the bulblin archers will continuously shoot arrows at you. Break the wood that blocks your way and continue forward. Head to the west side of this area. When you get to the beamos, avoid it and instead look to your left. There is a treasure chest here, so go ahead and open it to get a small key. Take this small key to the other side of the room and use it to unlock the door.


Wait until the platform is level and then jump across. Up ahead you’ll find a massive rotating platform with multiple magnetic squares on it. The idea here is to ‘hold on’ with your Iron Boots on a magnetic surface when the platform flips over, and head forward when you’re rightside up. This is easier using the side with more squares, but possible using the side with only one square if you hurry. Make your way across and then through the door ahead.


Here you will meet up with Gor Ebizo, the second Goron Elder. He will give you the second Key Shard. After chatting with him, check out the rest of the room as you’ll find a treasure chest that contains a yellow rupee. Climb the ladder in the room and the exit through the upper door.


Back in this large room, use the Iron Boots and walk along the magnetic field on the wall. Walk to the corner of the room and then drop down below. Open the treasure chest here to get a yellow rupee and then head through the door ahead.


The door will close behind you, so run ahead onto the magnetic platform and you’ll meet up with the dungeon mini-boss, Dangoro. The boss wears a bunch of armor and it will prevent Link from doing much damage. However, Dangoro will occasionally lift his hands in the air, waiting to smash them down onto Link. When he does this, strike his belly with your sword.
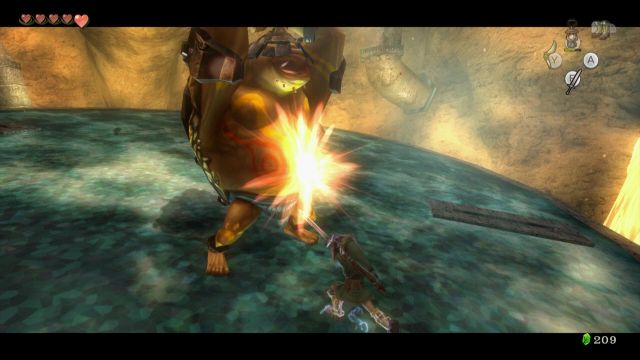

After a number of hits Dangoro will roll into a ball. Be sure your Iron Boots are equipped as Dangoro will roll into you. Alternatively, you can just walk up to Dangoro. When he is nearby, grab Dangoro and launch him to the side. You want to arrange yourself so that you are near the edge of the platform so that you can toss Dangoro into the lava below.


Repeat this process three times and Dangoro will admit defeat. The platform will rise back up and he will allow Link to progress to the next room. Open the treasure chest here to get the dungeon item, the Hero’s Bow. Immediately equip the bow and aim at the bridge ahead. Use an arrow to cut down the rope above, causing the bridge to fall to the ground, allowing you to reach the next area.


7.3 Compass; Third Goron Elder; Big Key
Run straight ahead and at the end of the room the beamos statue will come to life, activating all the beamos statues in this room. Use your bow to hit the eye on each of the seven beamos statues in this room, deactivating them. This will allow you pull the statues back and access the area behind them. Behind the beamos at the west end of the room is a large treasure chest that contains the Compass.


Pull the beamos at the east end of the room and head through the door. Here you will meet with the next Goron Elder, Gor Liggs. He will give you the third Key Shard, completing the Big Key. Be sure to also open the treasure chest found in this room to get a purple rupee.


7.4 Finding the Boss Chamber
With the big key now complete, exit the room to get back to the beamos room. From here, pull the beamos statue at the south end of the room and progress to the next room.
This room has a ton of fire slugs, fire keese, and a few dodongos. Patience is important to survive this room. Run ahead and defeat the keese. Then roll into the gate to knock it down.


Before jumping to the next platform look at the ceiling and use your bow to knock down all the fire slugs. Continue onward and defeat the Dodongo on the next platform. If you’d like, you can stay back and snipe at the Dodongos tail with your bow.
Before jumping to the next platform, look above and you’ll see a ton of fire slugs. Use your bow to defeat these enemies. Furthermore, use your bow to defeat all the fire slugs above the next platform, and along the wall, as it will make things a lot safer for you.


Run ahead and look to the ceiling to find a Dodongo on the magnetic field. Use your arrows and shoot down the dodongo so he doesn’t get in your way. Progress ahead and at the corner of the room and you will find a floor switch. Use the Iron Boots and you’ll be sent up to the magnetic field. Walk along the field and look in the direction of the door. There is a crystal switch above the door in the small tunnel. While hanging from the ceiling, use your bow and hit the crystal, causing the gate below to open. Drop down and head through the door.


You will appear back in the massive central room that we’ve been to a few times. Look to your left and jump to the treasure chest to get a purple rupee. Back across to the other side, use your bow to hit the rope that is holding the platform there up. Cross the bridge and step on the floor switch with Iron Boots to activate the magnetic crane.


The crane will take you back to the north end of the room. Once you are over the platform, release the Iron Boots and head through the door to the north.


We are back in this same room and it is now populated by a few enemies known as Water Toadpoli. Just ignore them and jump across the platforms. Since we now have the bow, we can it to hit the diamond switch on the higher ledge, causing the the gate to open. Run ahead and in the next room, defeat the two beamos statues and progress straight ahead.


You’ll find yourself back outside in the open room. Make your way through and use the bow to get rid of all the bulblins that are shooting arrows at you, as it will make this area considerably easier. Run ahead and turn to the left to find the beamos statue we avoided earlier. Defeat the statue with the bow and then pull it back, causing the nearby door to open up.


Climb up the ramp and get rid of some more bulblins found here. Run ahead and use the Iron Boots on the large switch to activate the crane.
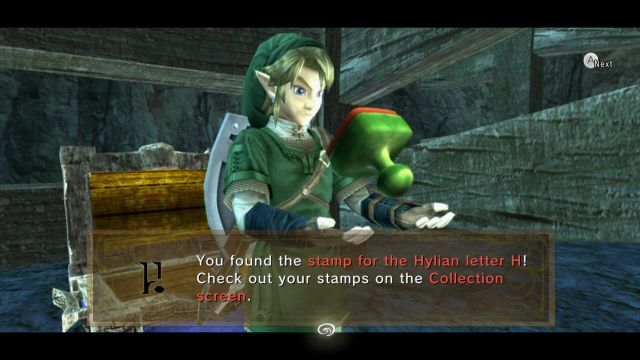
Before progressing any further, you’ll notice on your map that there are two treasure chests in this room. The first one is in the water, so drop down all the way and make your way to the east end of the room. Put on the Iron Boots and sink down into the water. Slash at the wooden boards that is in the way and open the treasure chest here to get the Miiverse Stamp of the Hylian Letter H.

The other treasure, we unfortunately cannot access yet. It requires an item that we will not get until later in the game, so we will be returning to this dungeon.
Climb back up and make your way to where the activated magnetic crane is located. Use the Iron Boots and it will carry you over to a massive bridge. Use your bow to cut the rope, and then drop down onto the platform. You can jump over to the wooden ledge to the side and run around to find some pots with arrows and a fairy. Continue onward through the door ahead.


7.5 Twilit Igniter: Fyrus
This room has a number of Bulblin archers and they can actually be a bit difficult to fight off as their arrows will hit you. Quickly aim your bow to get rid of the archers, as well as the two other bulblins that are on the ground level. Run ahead and use your bow to cut the rope down on the next platform. A number of bulblins will come running towards you. Defeat them and then once you are ready, use the big key on the locked door to reach the dungeon boss.


Inside you will meet up with the Twilight Igniter, Fyrus. This giant Goron is chained to the ground and ceiling, but upon seeing Link, he will awaken, breaking free from his chains and engulfing in flames.


Keep your distance from Fyrus and when you have a chance, pull out your bow and shoot the shining light that is on Fyrus’ head. This will stun the boss momentarily. At this point, run over to Fyrus and grab one of the chains that is attached to its legs. Put on the Iron Boots and pull back. Fyrus will eventually be pulled far enough where he will come tumbling down to the ground. Run over to the boss’ face and slash away at the shining light.


That is about all there is to this battle. If you attack him quickly enough, Fyrus will basically not be able to get off any substantial attacks on Link.
After Link has defeated Fyrus, he will be rewarded with the second Fused Shadow. Grab the heart container that is left behind and then talk to Midna to warp out of the Goron Mines.

- Chapter 1 – Ordon Village
- Chapter 2 – The Twilight
- Chapter 3 – Faron Woods: Twilight
- Chapter 4 – Forest Temple
- Chapter 5 – Kakariko Village: Twilight
- Chapter 6 – Death Mountain
- Chapter 7 – Goron Mines
- Chapter 8 – Lanayru Province: Twilight
- Chapter 9 – Lake Hylia: Sidequests
- Chapter 10 – Lakebed Temple
- Chapter 11 – The Master Sword
- Chapter 12 – Gerudo Desert
- Chapter 13 – Arbiter’s Grounds
- Chapter 14 – Scaling Snowpeak
- Chapter 15 – Snowpeak Ruins
- Chapter 16 – Sacred Grove: Round Two
- Chapter 17 – Temple of Time
- Chapter 18 – In Search of the Sky
- Chapter 19 – City in the Sky
- Chapter 20 – Palace of Twilight
- Chapter 21 – Cave of Ordeals
- Chapter 22 – Hyrule Castle
