- Chapter 1 – First Three Days
- Chapter 2 – Southern Swamp
- Chapter 3 – Woodfall Temple
- Chapter 4 – Collection
- Chapter 5 – Snowhead
- Chapter 6 – Snowhead Temple
- Chapter 7 – Spring, Romani Ranch, Ikana Graveyard
- Chapter 8 – Great Bay & Zora Cape
- Chapter 9 – Great Bay Temple
- Chapter 10 – Ikana Canyon
- Chapter 11 – Well & Ikana Castle
- Chapter 12 – Stone Tower Temple
- Chapter 13 – The Moon
8.1 Zora Mask
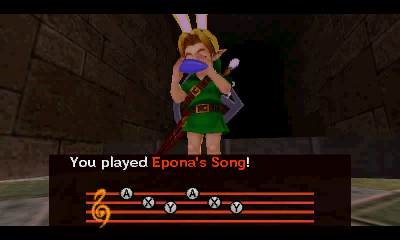
Summon your horse with Epona’s Song and head down to the beach area to the west. You’ll find new enemies here called Leevers, but they can’t harm you while on Epona. Ride her to the far west and use some carrots to jump over the spiked fence.
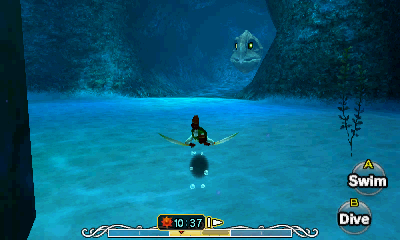
As you enter, you’ll get a lovely overview of the area. There are two houses here near the coast, but you can’t do anything with them yet. Store them in your memory for now and continue towards the water. Avoid the Leevers and swim out to the seagulls on your left. You’ll find something floating in the water which turns out to be a Zora. He asks you to help get him to shore, so swim around behind him and hold A to grab him, then push him back towards the land. Once you get there, you’ll witness a somewhat lengthy scene of him struggling several steps and eventually collapsing a few paces away. Go speak with him to learn of his plight, in the form of… a song?
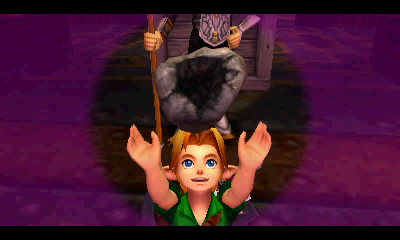
It turns out that he’s a member of the Indigo-Go’s, a Zora band that is supposed to be playing at the Carnival of Time in Clock Town. Their lead singer laid some eggs that were stolen by Gerudo Pirates, and Mikau got beaten up when he tried to go get them back. After the comic relief is over, he’ll plop back down and ask you to “heal his soul.” Play the Song of Healing to witness another sad cutscene in which Mikau hangs out with the band one last time. After it’s over, you’ll receive the awesome Zora Mask.


Afterwards, you’ll be standing in front of the grave you made for the guy, which, if you check it out, has instructions on how to use the mask. Check it out if you’d like (there’s a paraphrased list on the left that explains it in detail). The Zora Mask will make you taller, allow you to swim and grant you the ability to use a couple of new attacks.
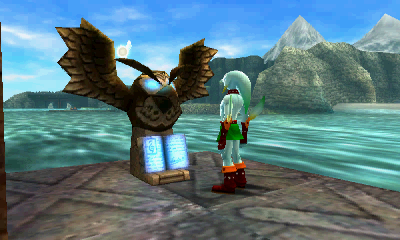
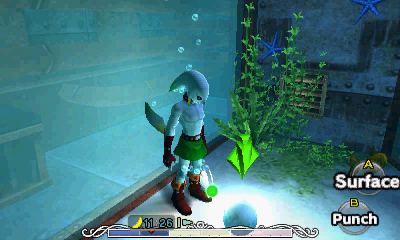
Put on the Zora Mask and run into the water. Use A to swim forward (isn’t this awesome?) and go to the teapot-shaped building straight ahead. Climb onto the platform, take off the mask and hit the Owl Statue with your sword to wake it up. Look up to see Tingle floating in the sky. Shoot him down with an arrow and purchase the Map of Great Bay for 20 rupees.
At this point, you can go to the second portion of Great Bay called Zora Cape, (on the south side of your map through the cave-like entrance along the beach,) but there are a few things you should do first.
8.2 Pirates' Fortress
NOTE: If you are playing the Nintendo 3DS version, you will be acquiring the Stone Mask in this section. It will require a bottle filled with Red Potion. You can buy a potion for 30 rupees at the Trading Post in Clock Town, or purchase it for 20 rupees at the Witch’s Hut in Southern Swamp.
As Mikau told you before he died, Lulu, the lead singer of his band lost her voice because the Gerudo Pirates stole her eggs. You’re going to need to get those things back and avenge the groovy guitar player’s death! Put on the Zora Mask and swim to the northern portion of Great Bay Coast. Along the wall, sink down to the seafloor and you’ll find four boards with skulls painted on them. Using A (or R in the 3DS version), swim into the second from the left to reveal a secret entrance. Go inside.


This large area is filled with water and there are several patrol boats (represented by white dots on your map) that circle around the lagoon. If the guards see you, they’ll throw you back into Great Bay. To prevent that from happening, you can either avoid their sight (by staying far back or swimming under the water) or you can simply wear the Stone Mask (if you have it, of course).

Jump into the water and swim to the left side (or ride on one of the boats if you have the Stone Mask). Once there, wait until a patrol passes and climb onto the platform on the far left (northern) side of the map where you’ll come to a Goron Switch. Put on the Goron Mask and use a Goron Pound (A + B) to slam it down. This will open a gate that water flows in through.
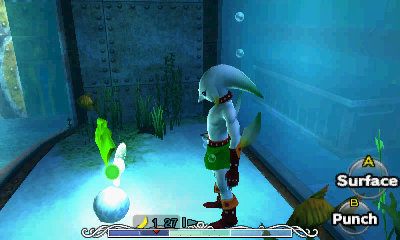
Put the Zora Mask back on and jump back in the water. You can open the various chests on the seafloor here, which contain red rupees (20). You’ll encounter new enemies here called Skullfish, which tend to appear just in front of you. You can swerve around them without difficulty, or simply tap the R button when you swim towards them to kill them instantly. When you’re done playing around, enter the channel you opened underwater.


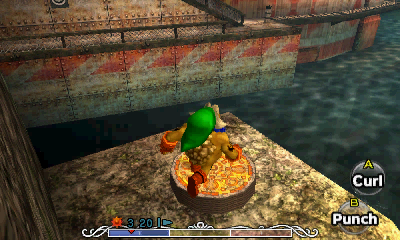
As you enter, swim forward and into the boarded hole, then check out the block straight ahead. Grab hold and pull it out, then turn left and break through the boarded hole here as well. At this point, you can press A to rise upwards and swim over the walls here to get to the middle of the area that contains a chest with a red rupee (20). You’ll come to another block, which you can push straight ahead. Walk around the pathway and step into the pump, which shoots you upwards. At this level, go forward and avoid the Spike Mines while staying low so you don’t get blown out by the pump. At the end, press A to float back up, climb up and enter the door.


In this second room, avoid the spikes and open the chest at the other end to get a red rupee (20), then go up the ramp. There’s a cage here with a Piece of Heart inside, but you’ll need to open the door first. Run up the stairs, go to the left and destroy the barrels with Bombs, by rolling into them, or simply Fire Punching them. You’ll find a floor switch that temporarily raises the door for a few moments. NOTE: You can make it easily in the Nintendo 3DS version, but in the Nintendo 64 version, you’ll have to either roll with the Goron Mask or wear the Bunny Hood. Quickly run down the stairs and enter the cage before it closes to get the Piece of Heart.


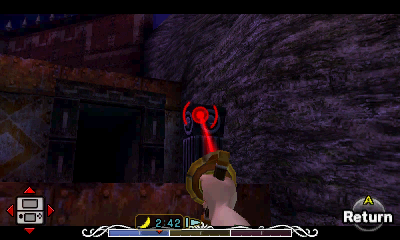
Step on the switch to leave this small area. If you would like, there is a chest underwater containing a blue rupee (5). Go back up the stairs. Break the barrels next to the stairs and look across the way to see a Crystal Switch. Shoot it with an arrow or use the Double Cutters (Zora Mask + hold B), which temporarily raises the gate to the next area. Jump in the water, (avoid the Spike Mines,) and quickly swim through to the next area.


In this third room, swim along the surface of the water either along the left or right side to avoid the Spike Mines and the pumping water. Swim all the way to the end and climb the ladder at the corner. Once up here, step on the floor switch to temporarily raise the bars blocking the Crystal Switch (which activates the pump). Stand on top of the pump itself and quickly shoot the Crystal Switch before the timer runs out. The pump will activate and you’ll be lifted up. Once you can see the platform, quickly jump off (otherwise the pump will take you to some Spike Mines hanging from the ceiling).


Smash the barrels here for a bunch of rupees, then climb up the ladder and look through the telescope if you wish. Turn around and shoot an arrow (or the Double Cutters) at the Spike Mines to knock them into each other, causing them to explode. This will reveal a Crystal Switch just behind them that you can now shoot, which opens the door.
You’ll find yourself back in the large patrol boat area but up on a higher platform. Do NOT jump back in the water!!! Go around the corner, up the ramp and through the doorway to enter the actual fortress.


This area is filled with Gerudo Pirates, and unlike regular enemies, you can’t kill them. You can, however, stun them by hitting them with pretty much anything, knocking them out for several moments. You can sneak up on them and use your sword, but it’s much easier to simply shoot them from afar with arrows. Alternatively, if you have the Stone Mask, you can simply wear that and ignore them entirely.
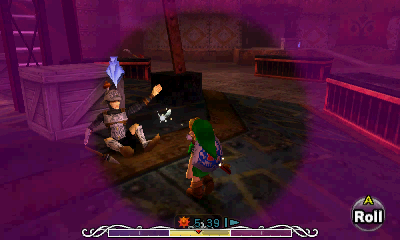
NOTE: In the Nintendo 64 version, the Stone Mask is acquired in Ikana Valley. However, in the 3DS version, it is located right here in the Pirates’ Fortress. In the center of this area there is a tower that has a tall ladder. There are two crates on the ground floor. Next to the crate to the east of the ladder, if you use your Lens of Truth, you will find a wounded soldier sitting on the ground. You can reach this soldier by shooting the Gerudos with an arrow to stun them briefly and then quickly running over without being seen. Speak with the soldier and give him the Red Potion to heal his wounds. He will reward you with the Stone Mask, making this section of the game considerably easier.
The first goal is the ladder in the center. It looks tough, but it’s actually very simple. Simply the shoot the guard or two that are walking in your direction on the left and right, then run towards the ladder. When you get near the inner circle of crates, shoot the guard next to the ladder and quickly make a run for it. It’s not really as hard as it sounds. Climb up the ladder, but stop right before the top so you can see above without being seen yourself. There’s a pirate that patrols along the bridge and circles the ladder occasionally. Wait until she’s turned the other way (or far away) and climb up the rest of the way. Shoot her down and quickly run to the opposite side. Enter the door just behind the target at the end.


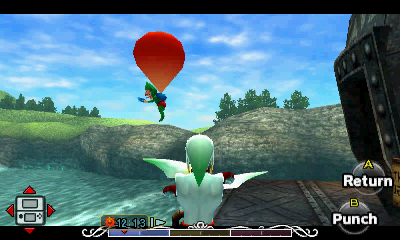
Run forward and you’ll see a Giant Bee. You’ll see a short scene of it flying into a beehive in the larger room. The screen will then move down and you’ll witness a short conversation between two Gerudos, a nameless on wearing white along with their leader, Aveil. Apparently, Skull Kid told them that if they could gather the Zora Eggs, they’d find a way into the Great Bay Temple, where they hope to find some serious loot. She also reveals that they only have four of the Zora Eggs, while the others are still missing somewhere near some “sea snakes.” Once the clip is over with, shoot the beehive on the ceiling to make it land in the middle of the room. The Giant Bees will attack the Gerudos and chase them out of the room. Nice!

Walk to the end of the pathway and hop down below. NOTE: In the Nintendo 64 version, you’ll have to go back outside and hop down to the lower platform on your right. Enter the door. Inside, now that the guards are gone, you can simply open the large chest in the middle containing an amazingly useful item: the Hookshot. All of those pillars you’ve seen in this area with the “circles” on them are targets, which you can use to latch onto and bring yourself over to them. Now if we you caught by any of the Gerudos, you can use the Hookshot to quickly get back into the fortress (by way of the target on the northern side of Gerudo Lagoon).
Before you leave, turn to the left, where you’ll see a large fish tank. Inside is a glowing orb that looks as if it could be an egg. Hmm… Use your new-found Hookshot to latch onto the wood above the tank (preferably on the left or right) and put on the Zora Mask. Hop into the tank, where you’ll encounter a new enemy called a Shell Blade. You can defeat it if you wish, or simply ignore it. Use a Bottle to swipe up the Zora Egg, then get out of the tank and leave the room.

Turn left and walk down the stairs. At the end here, use the Hookshot to latch onto the target above you to the far south. This leads you to the highest point of the Pirate’s Fortress where there’s a chest containing a red rupee (20). Turn around, jump down (hold forward to roll) and open the chest on your right to get another red rupee (20). Go left, pass the first target and use the Hookshot to latch onto the target in the far southwest corner. Enter the door closest to this target.


In this room filled with barrels, a guard patrols in circles around the middle. When you walk somewhat close to her, she’ll stop and look towards you, making it impossible to run passed her. Wait till her back is turned and run on the far side of her. It’s not hard and you should have no trouble getting to the door. Alternatively, you can simply wear the Stone Mask.

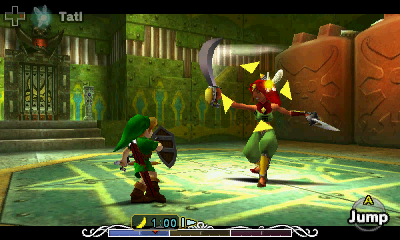
As soon as you enter, both doors slam shut. Run forward to initiate a short clip, starting a battle with a Pirate. These tan young ladies use two swords, but fight much like you do in your normal form (defending as if they had a shield). They also can charge up and perform a Jump Attack, which does a whole heart of damage. They’re vulnerable just before and after they attack, so either smack them repeatedly and hope you get a hit in, or time it so that you can hit them while they’re vulnerable. Surprisingly, she’s fairly vulnerable to a lot of your stunning attacks, giving you plenty of opportunity to deal loads of damage. Once you defeat her, the doors will open. Go up the small staircase and exit.
As you did before, use the Hookshot to grapple up to the wooden overhang above the tank and drop in while wearing the Zora Mask. This one contains another Shell Blade, which you can defeat if you want. Use another Bottle to snag the Zora Egg, then get out of the tank and slash the jars for goodies if you wish. Leave through the door.

NOTE: If you’ve been following the walkthrough, you should have at least 4 Bottles at this point, regardless of whether you are playing the Nintendo 64 or the Nintendo 3DS version. If you have 4 bottles, skip this paragraph and continue. However, if you didn’t get all four bottles, you’ll have to drop off the two eggs and then return here.
To do so, soar to the Owl Statue in Great Bay Coast and climb the ladder to get to the Marine Research Lab. If you talked with Evan at Zora Hall (while wearing the Zora Mask), he’d tell you to bring the Eggs here. Climb up the ladder on the right and get on top of the giant tank, then use your bottles to dump the Eggs in. It may take a few tries to position yourself correctly, since the placement is a bit specific (at least on the Nintendo 64 version), but once you get in the right spot, they should plop in just fine. Once your Bottles are empty, return to Gerudo Lagoon and get back on top of that platform on the left side. Hookshot across using the target against the wall and enter the doorway to get back to the Pirate’s Fortress.
In the middle of the northern wall is a lower target you can grapple onto. From here, you can get onto the ledge on your left, where you’ll find a door.

In this first room, there’s a Gerudo patrolling back and forth. Simply stand far back and aim your Hookshot between the two barrels. Shoot her as she passes to knock her out (or run by with the Stone Mask) and enter the door on the left side. You’ll fight another Pirate here, so defeat her in the exact same way as before. Enter the next room where you’ll find another Zora Egg in a tank.

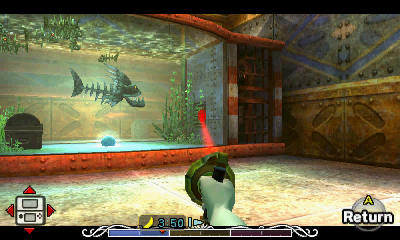
This one is guarded by a new enemy, however, called a Desbreko. These things are a huge pain, but luckily there’s a rather easy way to harm them. Hookshot the wooden plank above the tank (on the left or right side) and Z target the evil skeleton fish. At this point, you can hop in with the Zora Mask and press R to electrocute it or you can simply hit it twice with the Hookshot (be careful not to latch onto the chest though). Dive down and open the chest to get a red rupee (20), then swipe up the Zora Egg in a Bottle.


Back outside, repeat the same process to get to the targets on the northern side. When you get to the doorway though, turn around and go use the next target to get to the highest point. There’s a bridge here with a Gerudo patrolling back and forth. Shoot her down when she’s not looking (or wear the Stone Mask) and run to the opposite side where you’ll find a door.


Here, you’ll be in a room with three Gerudos patrolling back and forth and a large chest in the middle containing a Silver Rupee (100). To get it, either wear the Stone Mask and simply… open it… or shoot all three of the guards with arrows, run and open it, then quickly run up the ramp before they see you. You have to be very quick to pull it off, but it is possible. Snag it if you like, then enter the next door where you’ll fight another Pirate. After the other two you’ve already faced, she should be easy.


In the last room, latch onto the wooden overhang above the tank, kill the Shell Blade (if you wish), and snag the last Zora Egg in the Fortress.
Before leaving, there’s one more important thing to do. Go back outside and take a picture of a Gerudo with your Pictograph Box. You can shoot one with an arrow and run up to her limp body to get a good shot of her, or if you have the Stone Mask you can simply stand in front of her and get an excellent one. Make sure you get a good one, then soar back to Great Bay Coast and drop off the Zora Eggs in the Marine Research Lab.


8.3 Pinnacle Rock
With your Bottles empty and a Pictograph of a Gerudo, go to the shore of Great Bay and enter the little house on the right called the Fisherman’s Hut. Inside, you can chat with the Fisherman if you’d like, who explains that the waters of Great Bay have been uncomfortably warm lately, causing the fish to be scarce. Also, the waters have been very murky, making it impossible to go very far without getting lost and winding up back at shore.
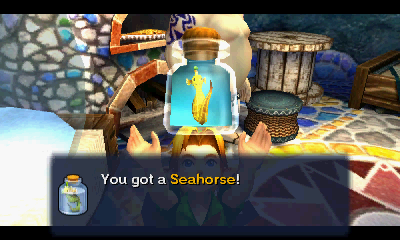
Next to him is a tank with a Seahorse in it. If you speak to it, it’ll ask you to help it by taking it back to Pinnacle Rock. The Fisherman will offer to give it to you, in exchange for a picture of one of the “female pirates.” Hand over the Pictograph of the Gerudo we took earlier and he’ll fork over the goods in a Bottle.


If you look out towards Great Bay, on the northern end in the distance are two large stone pillars sticking out of the water. Swim over there, where you’ll find a Zora who will tell you he’s looking for a gold-colored fish to guide him through the murky water to get to Pinnacle Rock. Swim between the two pillars.


Walk down towards the signs and use the bottled Seahorse to release it. It’ll offer to guide you along the correct path to get to the Sea Snakes’ Lair up ahead. Follow it to successfully get through this area. Technically, if you already know the right path, you don’t need the Seahorse at all. At the end, it’ll ask you to help a bit more by defeating all of the giant Sea Snakes up ahead in order to save its friend.
This place is contains eight holes in the walls (two at each level) that each hold a Deep Python, also known as a Sea Snake. When you get close, they’ll come out and swing their head back and forth trying to grab you. To defeat them, first you have to lure them out. At this point, you have two options:
- Swim around to avoid them, then swim into their vulnerable neck and press R to use the Electric Barrier which will damage them.
- Land on the little ledge at the mouth of the entrance and hold B to charge up the Double Cutter, which you can also use on their soft neck.

Either way you choose, two hits will defeat them. After that, grab the goodies inside the den and venture to another. It’s not really hard, but it is time consuming. You can glance in the entrance of each one to find the ones that have the Zora Eggs, which are the only ones you’re required to kill, but killing all of them will reunite the two Seahorses, who gift you with a Piece of Heart. Once you’ve collected all three Zora Eggs (unfortunately you cannot use the Ocarina underwater), swim up to the top and get lost in the murky water on purpose to return to the start of the area. Swim back through the pillars.


Return to the Marine Research Lab and put the remaining Zora Eggs in the tank. Once they’re all placed correctly, stand in front of the aquarium to witness something special. It seems the Zora children are born as tadpoles who have an affinity for music. Stand in front of the Professor and whip out the Ocarina (while wearing the Zora Mask) to learn the wicked awesome tune they show.

With that, you have everything you need to enter the Great Bay Temple. There are a few more things you can get beforehand, though, so put your remaining rupees in the bank and play the Song of Time.
8.4 Great Bay Collection
Go to the Trading Post in West Clock Town. Inside, you can speak with the Scarecrow here named Pierre. He simply loves music, so why not play him some? Whip out your Ocarina while standing near him and he’ll get excited, asking you to play a song. This is your chance to make up your very own song! Make sure it’s something you can remember! You’ll be using this mysterious song a couple of times throughout the game.


Now that you have the Zora’s Mask, there’s a Piece of Heart that you can get quickly in west Termina Field. There’s a boulder near the wall you have to jump over with Epona. Break the boulder using Bombs, the Blast Mask, or a Fire Punch with the Goron Mask. Drop down into the cavern and whip out your Hero’s Bow. Shoot the three beehives (one will drop a Piece of Heart into the water) and defeat any Giant Bees that appear. Put on the Zora Mask and jump into the water, pressing R to knock down the Bio Deku Babas that try to attack you. Sink down and grab the Piece of Heart.


Next, warp to Snowhead and go back a screen. Use the Goron Mask to roll across the first gap, bringing you to the middle area. Watch out for Ice Keese here, which you may have to shoot with your Hero’s Bow. Look towards the small island off in the distance. Suspicious isn’t it? How do you get out there? Use the Lens of Truth to see some invisible platforms that lead partway over there. Jump along them and once you get to the end, you’ll see Tatl fly over to the island and turn blue. This is your clue to play the Scarecrow’s Song, which will summon Pierre (the Scarecrow). Hookshot him to latch on and get to the island, where you’ll find a Piece of Heart.


Soar to Southern Swamp. Slash the nearby bushes for some rupees or take a Pictograph of the Big Octo nearby and turn it in for a quick 20 rupees. Put on the Deku Mask and speak with the Business Scrub at the corner of the Tourist Information building to purchase a Magic Bean for 10 rupees. Hop down and either go to the Magic Hags’ Potion Shop to the northeast or to the Road To Southern Swamp (directly north). In both places there is a pool where you can scoop up some Fresh Spring Water. Soar to Great Bay Coast.


Use the Zora Mask to swim to the northern portion of Great Bay and get on the land. If you look at the metal wall (presumably part of the Gerudo Fortress), you’ll see several smaller platforms. Hookshot to the target on the lowest platform in the middle, directly above the pool. Plant a Magic Bean in the soft soil here and use the Bottle of Fresh Spring Water you got earlier. Ride the Magic Bean Plant to the next platform (which is just a short distance away). Tatl will fly over to the next, far platform and turn blue. Play the Scarecrow’s Song to summon Pierre. Hookshot to him and snag the Piece of Heart.


Jump down and run to the fresh water pool here (or the one a little further south), where you’ll find a ton of Fish. Scoop them in as many Bottles as you have, then soar over to Great Bay Coast (or swim). Enter the Marine Research Lab and press A while standing next to the fish tank near the door. Tatl will mention that she thinks they’d swallow a fish whole. Test that theory by climbing up on top of the ledges nearby and dropping Bottles of Fish into the tank. The fish in the tank will fight over it, but only one will swallow it (and grow larger). Dump all of your fish in there and return to Great Bay to collect more little fishies. Once one of the fish has eaten enough, it’ll swallow the other and spit out a Piece of Heart.


Swim to shore and enter the cave-like entrance along the coast, which leads to Zora’s Cape. Follow the land until you get to a waterfall (you can swim along in the water to move faster). It plunges into a pit in which there are a few enemies. The sandy floor here steadily moves towards the center, where there’s a new enemy called a Like Like, which you want to stay far away from. Sink down with the Zora Mask and kill the Skullfish to get them out of the way. Use your Double Cutters to defeat the Like Like, who will leave behind a Piece of Heart.


Float back up to the surface and look up. There are round platforms along the walls here that have trees on top of them. Head to the lowest one, straight ahead to the north, and use the Hookshot to latch onto the tree. Work your way from platform to platform until you get all the way to the top. Enter the cave that’s near the waterfall to get to Waterfall Rapids.


Inside, you’ll see a short scene showing off the beaver swimming in the middle. Hop in the water and Z target him once you get close enough. He’ll swim down to the bottom of the lake to avoid you, but just be persistent and use the Zora Mask to sink down and speak with this anti-social rodent. He’ll immediately realize you must want a Bottle. How he came to this conclusion is a mystery, but he says you’ll have to fight him for it by playing an elaborate game.


Wear the Zora Mask and jump off the ledge and hold A as soon as you start. Swim after the Beaver who will leads you through a series of rings (in a specific order) until you get to the end. Remember that you have to go through the flashing ring before any others and that the rings themselves are solid (meaning you can bonk into them), so be very careful not to hit them. You can also jump out of the water like a dolphin, but you’ll lose precious seconds when you do this. This is important to avoid in the later races, since it can make you miss some of the double rings.


The first race with the younger beaver is 20 rings in 2:00 minutes. When you complete it, he’ll make you race against his brother for 25 rings in 2:00 minutes. After that, you can race them again with the exact same rules, but you only have 1:50 this time around, making it quite a bit harder.


For beating the game twice, you’ll be gifted with an empty Bottle! At this point, you can speak with them again for a rematch. Same rules, but you have even less time now. If you can successfully beat both races, you’ll get a Piece of Heart.
There are two houses along the coast of Great Bay. You’ve already been to the Fisherman’s Hut, and now it’s time to venture into the other building, known as the Oceanside Spider House. This is what you will need:
- Bombs
- Hookshot
- Fire Arrows
- Captain’s Hat (Optional Piece of Heart)
Oh, one more thing…
If you are playing the Nintendo 64 version, IT MUST BE THE FIRST DAY OR NIGHT WHEN YOU COMPLETE IT, OR ELSE YOU WON’T GET A PRIZE!!!. In the Nintendo 3DS version of the game, this has changed, and you can complete the Skulltula House on the second or third day. However, you must complete it in a single day.
That being said, you should put your rupees in the bank and play the Song of Time. Get the items listed above and enter on the First Day. Play the Inverted Song of Time to slow down time so that you have more than enough to complete it.


As you enter, use a Bomb or the Blast Mask on the cracked wall to continue. Kill the Skulltulas and slide down the ramp.
#1-2 On the wall on the ramp.


#3 On the ceiling in the lower part of the room. Use Fire Arrows to burn the cobwebs on the ceiling, then use the Hookshot on the target behind it and enter the door.
As you enter, you’ll probably immediately notice the cobwebs covering the nearby door. You will need to go there later, but first:
#4 Roll into the first large jar.
#5 Roll into the last large jar (burn the spider webs first).
#6 On one of the rafters on the ceiling. Climb on top of the crates, then snag it with your Hookshot.
#7 Behind the mask on the wall above the stairs (wait for it to come up).


That’s it for this floor. Go down the stairs.
#8 While standing on the stairs, look towards the opposite wall. Along the top in a dark crevasse, there’s a Skulltula marching back and forth. Kill and snag it with the Hookshot.
#9 Roll into the lone jar next to a door.
#10 In a jar atop some crates in the corner of the room.
#11 Inside a little hole in the wall. Burn the spider webs and use your Hookshot.
#12 Behind a mask near the last door.


That’s all for this room. Go back up the stair and burn the spider webs covering the door nearest the one you entered from. Enter.
This is the Library. First of all, if you have the Captain’s Hat, go speak with the two Stalchildren in this room to learn some useful information for later (write it down). One’s on the left side of the room at a table, and the other’s on top of a bookcase.
#13-14 On the west side of the room, there is a bookcase against the wall that you can push/pull to the right. Do so to reveal an alcove with two Skulltulas.
#15 On the north end of the room, there are three small bookcases. Pull the outer ones away, then push the middle one to either side to reveal a small hole. Use the Hookshot.


On the right side of the room, there is a bookcase with some of the books missing from it. Use it like a ladder to jump along the tops of all the other bookcases.
#16 Behind a painting, at the northwest corner of the room.
#17 Along the ceiling on the north side of the room.
#18 On top of a bookcase at the southeast corner of the room.
#19 Behind a painting at the southwest part of the room, in a small hole. use the Hookshot.


That’s all for the library. Go to the previous room and go down the stairs. Go around the corner and enter the last door.
This is the storage room. It’s dank, dusty and covered in white blankets. Watch out for the big Skulltula in the center of the room.
#20 Roll into the brown crate at the north end of the room.
#21 There are some canoes leaning up against the western wall opposite the door. NOTE: In the Nintendo 64 version, the Gold Skulltula is right behind the canoes and you have to stand on top of the crates. In the Nintendo 3DS version, it is along the northwestern wall.
#22 Behind a spider web on the ceiling.
#23 Roll into the brown crate to the left of the door where the boxes are about to start getting higher. Enter the small hole and turn around. It’s above the entrance.
#24 Climb on top of the crates on the left side of the door as far as they will go. Use your Hookshot on the target in the ceiling area on the right side of the room. In this upper area, slash the jars to find the last Skulltula in this room.


You’re done here, exit the room and enter the last door (near the stairs).
This room has a table with four Stalchildren sitting around it. If you have the Captain’s Hat, speak with them to learn the last of the order (write it down).
#25 Roll into the giant jar in the corner, under the red mask.
#26 Behind the painting (Hookshot) closest to the red mask.
#27 Crawling along the dark parts of the ceiling, along the walls. Stand on the table for a good shot.


#28-30 Put on the Goron Mask and use a Goron Pound (A + B).
If you spoke to all six of the Stalchildren, you should have the order as to how you should hit certain targets. This varies from game to game, so you cannot simply look it up. Once you have the completed order, shoot the colored masks on the wall with your Bow in the order that the Stalchildren had said. Go up the stairs, defeat the Skulltula and claim a new Piece of Heart!


When you’re all done, head back to the entrance, Hookshot back across and roll up the ramp with the Goron Mask. At this point, there’s a man here who will give you a nifty prize, but if you are playing the Nintendo 64 version, HE’LL ONLY BE HERE ON THE FIRST DAY OR NIGHT!!! Even on the 3DS version, you will have to have completed the house in one day.
If it’s later than that, sorry, but there was ample warning! Anyway, this random man is seeking shelter from the moon and will give you a lovely prize if you’ll give him the building. Agree and he’ll fork over the Giant Wallet. Awesome!


8.5 Zora Hall
In the middle of Zora Cape is a stone formation that looks like a giant fish with its tail sticking up in the air. Use the Zora Mask to swim into the mouth of the fish, avoiding the Skullfish and Like Like along the way.


This place is very interesting. It’s a Zora Music Hall! Right now, they’re doing sound tests and the like (which you can “help with,” but it doesn’t actually accomplish anything, sadly). There are also a lot of interesting character interactions, such as taking a picture of Lulu and giving it to her crazed fan upstairs, and even scolding a peeping tom who’s trying to look through the keyhole into Lulu’s room! All of these things don’t really matter for the main quest, but they are still fun to check out. There is, however, a Piece of Heart to get here, so do the following:
Put on the Zora Mask and enter Mikau and Tijo’s room (first door you come to, far right). Speak with Tijo, Mikau’s roommate, who informs you he accidentally broke the ladder. Tijo is playing the cave theme from A Link to the Past on his drums. Use the Hookshot to get to the upper bunk instead and wear the Zora Mask again to read Mikau’s diary, discovering two little diddies:
1st: A, v, >, A – N64 Version
1st: L, R, Y, L – 3DS Version
2nd: v, >, <, v - N64 Version
2nd: R, Y, X, R – 3DS Version
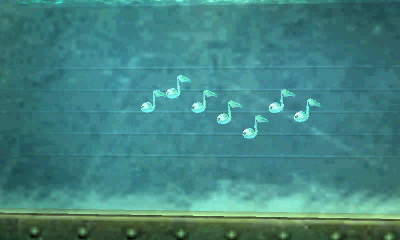
Exit the room and enter the next one, where you can hang out with Japas. The song he’s playing on his bass is the dungeon theme from The Legend of Zelda for the Nintendo Entertainment System, 1988. If you speak with him, he’ll talk a bit about the situation with Lulu, but go on to say how you (Mikau) and he have been jamming together lately. Whip out the Ocarina (guitar) and play the parts you learned in the diary, adding it on to what Japas plays, and thus creating a larger song:
1st: >, >, v, A, A, v, >, A – N64 Version
1st: Y, Y, R, L, L, R, Y, L – 3DS Version
2nd: <, <, >, v, v, >, <, v - N64 Version
2nd: X, X, Y, R, R, Y, X, R – 3DS Version


The Zoras outside rush to the door to listen to the jamming session and apparently think it’s pretty groovy. After the scene is over with, Japas will sigh and say that Evan, their band leader, wouldn’t like it if he found out they were making songs behind his back. What kind of band IS this? Isn’t that their job…?
Enter the next room down the line, which is Evan’s room. Evan is playing the credits from The Legend of Zelda on his piano. Run up to him and speak with him if you wish, and he just tells you to bring him the Zora Eggs (which, if you did, he’d tell you to take them to the Marine Research Lab). Take off the Zora Mask. Play the complete, 16 note song Mikau and Japas made WITHOUT wearing the Zora Mask (or else it’ll make him jealous). Evan will proceed to steal the song and expand upon it (which comes into play later in the game, as you’ll see). He’ll be pretty proud of himself and bribe you with a Piece of Heart to keep it quiet that he stole the tune. Great way to get sued by the way.
N64 Version
>, >, v, A, A, v, >, A
<, <, >, v, v, >, <, v
3DS Version
Y, Y, R, L, L, R, Y, L
X, X, Y, R, R, Y, X, R


That’s everything there is to do down here. Go through the hallway and take a left to go outside to where Lulu is sulking. Unlike the last game, the Zora females apparently have clothes now (although the men still don’t). She still doesn’t have her voice, so she can’t speak with you. Tatl will mention that it looks like she’s trying to tell you something (not trying very hard though *grumble grumble*). Turn around and smack the Owl Statue with your sword. Now that you have the song for this area and the Owl Statue, you should, as usual, soar to Clock Town, put your remaining rupees in the bank and play the Song of Time.


Return, play the Inverted Song of Time to slow down time and slash the nearby jars to stock up on goodies. Put on the Zora Mask and play the New Wave Bossa Nova for Lulu. She’ll sing along, and thus, wake up a giant sea turtle! It’ll yawn and explain that it apparently hears everything that happens in the ocean, even while asleep. After a moment, it’ll tell you to get on its back so it can take you to the Great Bay Temple and vanquish the evil there. If you speak with it at this point, it’ll explain that you can do this by using the Hookshot. Do exactly that and away you go! Along the way, you’ll see a humorous scene of the Gerudos attempting to get into the temple themselves, but the “dragon storm” stops them easily.


- Chapter 1 – First Three Days
- Chapter 2 – Southern Swamp
- Chapter 3 – Woodfall Temple
- Chapter 4 – Collection
- Chapter 5 – Snowhead
- Chapter 6 – Snowhead Temple
- Chapter 7 – Spring, Romani Ranch, Ikana Graveyard
- Chapter 8 – Great Bay & Zora Cape
- Chapter 9 – Great Bay Temple
- Chapter 10 – Ikana Canyon
- Chapter 11 – Well & Ikana Castle
- Chapter 12 – Stone Tower Temple
- Chapter 13 – The Moon
