- Chapter 1 – Zelda’s Rescue
- Chapter 2 – Eastern Palace
- Chapter 3 – Desert Palace
- Chapter 4 – Tower of Hera
- Chapter 5 – Hyrule Castle Tower
- Chapter 6 – Dark Palace
- Chapter 7 – Swamp Palace
- Chapter 8 – Skull Woods
- Chapter 9 – Gargoyle’s Domain
- Chapter 10 – Ice Palace
- Chapter 11 – Misery Mire
- Chapter 12 – Turtle Rock
- Chapter 13 – Ganon’s Tower
7.1 Overworld Goodies
There are a ton of optional Heart Pieces and items that we can acquire since we have the Magic Hammer and can access the bulk of the Dark World. This section consists almost completely of optional material, so jump ahead to section 7.2 to continue onward in the main quest. The only required item that we will get in this section is the Flute, but you won’t need that until later in the quest.
From just outside of the Dark Palace, walk to the west and go through the bush maze where we first met Kiki the monkey. Continue through this entire area and exit south a screen at the southwest corner of this region. Continue westward one screen and walk to the south where you fill find nine stakes. Link can use the Magic Hammer to knock these stakes down, allowing him to pass. Continue walking south a screen.


Walk southward and leap off the ledge to enter the water. This area was previously Lake Hylia, but the landscape has changed a bit. In particular, there was a Heart Piece on a higher platform in this area. From right where you leapt off the ledge, swim southeast just a bit until you reach shallow water that you can stand in. Pull out the Magic Mirror and return to the Light World. You will be on a higher platform that has a Piece of Heart!


Since we are in the area we can make another trip to the Pond of Happiness. This is the area in the center of Lake Hylia. If you haven’t been there before, Link can toss rupees into the pond and after he has tossed 100 rupees in, he will be able to upgrade either his bombs or arrows. Since we will be getting tons of rupees within this section, now is a good to spend most of your rupees on the upgrades.


We now have to return to the Dark World. Jump into the water of Lake Hylia and swim to the northwest corner. Climb onto land and then head up a screen. Continue left a screen and then down a screen to get back to the swamp area. From here go left a screen and you’ll see a few wooden stakes. Pound one of them and then lift the rock to the left to find a portal to the Dark World. Go ahead and step in it.


Walk to the right a screen and make your way to the northeast corner of this area. There is a crack in this wall where Link can place a bomb. Do so and head inside the cave. Speak with person inside and he’ll give you 300 rupees! Furthermore, you can place a bomb against the northern wall to reveal a room with four additional treasure chests. Each has a red rupee, giving a total of 80 rupees.


Back outside, head up a screen and left a screen. Continue down and left a screen and defeat the enemies that you encounter. Walk to the southwest corner of this area and you’ll find a large rock. Stand to the southwest of the rock and use the Magic Mirror to warp to the Light World. You will be on a higher ledge and can now enter the nearby cave, so do so. Walk inside and acquire the Piece of Heart.


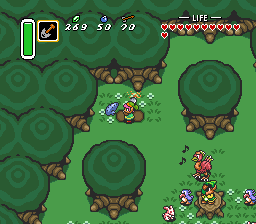
Walk back outside and step into the warp portal you created to get back to the Dark World. Walk northward in this area and you’ll find a bunch of small purple bushes. Slash at these bushes and then head up into this area. Walk northward and you’ll find a man known as the Flute Boy sitting on top of a tree stump. Walk up and talk to him and he’ll give you the Shovel.


Pull out the Magic Mirror and walk away from the man. Use the Magic Mirror to return to the Light World. NOTE: You don’t want to be too close to the man, otherwise the Flute Boy in the Light World will play his flute, freezing Link in the process, and once you regain control of Link, you’ll automatically warp back to the Dark World since you’ll be standing on the warp portal.
At this northwest portion of this area, there are a few flowers on the ground. Use your recently acquired Shovel and dig up the flowers that are nearby. Underneath one of the flowers, Link will find the Flute. Grab it and return to the Dark World. Speak with the man on the tree stump once again and he’ll ask you to play it one last time for him.

While you have the Flute, it doesn’t quite serve a purpose just yet. Return to the Light World and make your way over to Kakariko Village. Make your way over to the center of the village near the Weathercock. Stand just south of it and play the Flute. The duck will break out of the statue and begin to fly around. Now Link can play the Flute from almost anywhere in the Light World and the duck will come and pick Link up. Link can then immediately warp to several fixed locations through the Light World, making for fast travel.


Remain in the Light World and head east of Kakariko Village. There is a cave in this area, but if Link enters it, he runs into a locked door. Just beside the cave there is a hole that Link can drop down from the higher ledge. Pound the stake with the Magic Hammer and then leap off the ledge to fall down the hole. Walk up a screen and sprinkle some Magic Powder on the red pot. Mad Batter will appear and claim to curse you, though what he really does is make it so your magical attacks only use half the amount of magic! After getting the upgrade, exit the cave.


Return to Kakariko Village and walk all the way to the northwest corner of the town. From there head north and enter the Lost Woods. Immediately turn to the right and then exit the Lost Woods to the south. Walk down and pound the stake with Magic Hammer. Lift up the rock to reveal a portal and step into it to enter the Dark World.


Back in the Dark World, travel up just just a bit and then left, slashing the bushes along the way. Continue southward to enter the Village of Outcasts, the Dark World equivalent of Kakariko Village. There is plenty to do here, but our first stop is at the Treasure Chest Game, which is within the house at the northwest corner of town. Speak to the shop owner and he’ll allow Link to open two treasure chests for 30 rupees. Link can win arrows, bombs, a recovery heart, and rupees from this game, but the main reward is the rare Piece of Heart! The item locations are completely random in this game, so just keep playing until you win the Heart Piece.


There is a pair of secret locations within the Village of Outcasts where Link can earn a ton of rupees. The first location is where the shop was located in the Dark World. It is located near the southern portion of the village, but the entrance is blocked off. Use a bomb to blow it open and head inside. Open the treasure chest to get 300 rupees!


The next location is found at the northeast corner of the Village of Outcasts. Enter the house and make your way over to the treasure chest here. Open it up to get 300 more rupees!


Exit the Village of Outcasts by heading up a screen at the northeast corner. Run east three screens to find the Dark World’s version of the Cemetery, the Ghostly Garden. At the top-left portion of this screen dash into the block to make it disappear. Walk to the right and climb the steps to get on the higher ledge. Pull out the Magic Mirror while on the higher ledge to warp to the Light World. Enter the cave here and bomb the northern wall. Walk on through and collect the Piece of Heart! Exit the cave and return to the Dark World.


Just to the right of the steps, slash at the bush and enter this small enclosed area. Stand at the bottom-right corner and use the Magic Mirror to return to the Light World. Face the gravestone in this area and dash into it using the Pegasus Boots. The grave will open so head inside. Open the treasure chest found inside to get the Magic Cape! When using the Magic Cape, Link will become invisible and won’t take damage, but it will drain the Magic Meter. Walk back outside and return to the Dark World.


Walk left two screens and then head up two screens. Once again pull out the Magic Mirror and head back to the Light World. There is a large tree here that that Lumberjacks were cutting down earlier and it appears discolored. Use the Pegasus Boots to dash into it, which will make all its leaves fall down. Drop down into the trunk of the tree. Grab some fairies if you’d like but then head right a screen and collect the Piece of Heart! Exit the cave and return to the Dark World.


Since we just got plenty of rupees at the Village of Outcasts, you should be able to get this next Heart Piece. Return to the Light World and use the Flute to warp on over to Location #4 at Link’s House. From there head down a screen and left a screen. Pound the stake and lift the rock to enter the Dark World. Walk to the west part of the screen and then lift the large rock. Continue to walk left a screen and then up a screen at the northwest part of this area. Walk left two screens and you’ll reach the Digging Game.


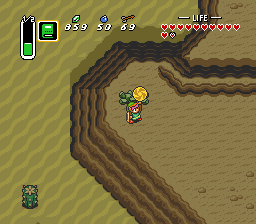
For the cost of 80 rupees, Link will be able to dig for 30 seconds in this area using the shovel that is given to him. Link can uncover a ton of rupees, but the main prize here is a Piece of Heart. This could be rather tedious and depending on how unlucky you are, it could also be very costly on the rupee front. Keep digging until you’ve won the Piece of Heart.

Use the Magic Mirror to return to the Light World and then play the Flute. Use Location #1 to warp on over to Death Mountain. From here, scale the mountain just as you’ve done before and then enter the warp portal to return to the Dark World. Once you re-enter the Dark World, walk directly southward and jump off the ledge. Enter the cave here. Use the Hammer to smack the moles in this cave. The cave is filled with spikes that will damage Link. Use the Magic Cape we just got and quickly run through the linear pathway. At the very end, lift the large rock and step off the spikes. Open the treasure chest here to get the Cane of Byrna. This item surrounds Link in a ring of light that can also be used to attack enemies. Rather than return through the cave, it’s safer to just Save and Quit at this point, starting at one of the set locations in the Dark World.


Return to the Light World and use the Flute to warp on over to Location #4. From there head down a screen and left a screen. Once again pound the stake and lift the rock to create a portal to enter the Dark World. Walk down a screen and left a screen as if you were going to the Desert area in the Light World. The entrance to the Desert is now blocked off and there are a number of pink stakes on the ground. Stand to the north of the last stake and use the Magic Mirror. You should appear on the higher ledge in the Light World. From there walk to the left and use the Book of Mudora on the tablet. Link will acquire the Bombos Medallion! This is the most powerful of the medallions, but is also the only one that isn’t required. Return through the portal to get back to the Dark World.


7.2 Finding the Dungeon
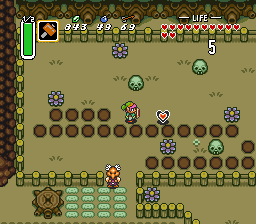
Our next destination is over at the Swamp Palace, located at the south-central portion of the Dark World. From the Pyramid of Power head right a screen and then down a screen. Use the Magic Hammer to pound the stakes and then head southward. After pounding the stakes head left a screen and then down a screen.


Continue down and left a screen to reach the Swamp Palace. Unfortunately, we cannot really do much inside the palace at this point in time, as we’ll first need to do something in the Light World. Use the Magic Mirror to return to the Light World and then enter the building found here.


Push the middle block up and then either of the other blocks to the side. Afterwards, head up a screen. Pull the lever on the right side, causing the floodgate to open, allowing water to flow through. Exit the building and if you haven’t gotten it earlier, a Piece of Heart will be waiting for you just to the left of the building. Otherwise step in the warp portal and return to the Dark World.


With the floodgate now open, this somehow effects the water flow in the Dark World, so you can now enter the Swamp Palace. NOTE: This is the first time in Link’s quest where the Flippers are required, so if you haven’t gotten them yet, you must do so now.


7.3 Swamp Palace
From the start of the Swamp Palace, jump into the water and swim to the left. Climb the short ladder and you’ll find a few types of enemies here. There is a Blade Trap that moves back and forth as well as a three enemy Hovers that walk on the shallow water. At the top part of the room there is a Kyameron enemy. These are bubble-like enemies that appear from shallow water and then bounce around the room. Defeat the three Hovers and a treasure chest will appear. Grab the small key from it and head through the locked door.


There is a cracked wall on the left side that Link can blast open with a Bomb. This will lead to a treasure chest containing the Dungeon Map. Back in the large room there are four skulls in the center. The bottom of the four pots contains a small key. Grab it and head through the locked door to the west.


There are a variety of enemies in this room, but you can simply walk right passed them. Walk down the steps and head up a screen. Lift the pot found here to get a small key. Walk back to the previous room and use the small key on the locked door. Use the Magic Hammer to smash the moles in this room and then push the large lever to the left. This will cause water to flow.


Return to the previous room and jump into the water. Swim to the west side of the room and then head left to enter the main central chamber of the dungeon.


This large central chamber has a lot of doors that Link can enter. The pathway that leads south is completely optional and it will lead Link to acquire the Compass. Climb the steps at the southwest part of the room and head west. Once again defeat or avoid the enemies and then climb down the steps. Walk up a screen and lift the skull to find another small key. Backtrack down a screen and right a screen to get back to the central chamber.


Climb the steps at the northwest corner of the room and use the small key to head through the locked door. Slash at the crystal switch to lower the blue blocks and then push the lever, causing water to flow through the room. Before you exit this room, make sure the crystal switch is red and the blue blocks are raised. Exit through the door on the right to get back to the central chamber.


Once again climb the steps and head through the door at the southwest part of the room. This time Link can jump into the water and swim over the blocks to the left. Climb back onto land and head through the door to the left. There are some more blocks in the shallow water here. Push the bottom-most block to the left, and then push the adjacent block up. Climb the steps and then head up the staircase at the top of the room.


Push the block to the right and quickly run over to the northeast corner of the room. Push the block out of the way over here and then fall down the hole. When you land on the ledge, the orange blocks should be lowered, so walk right a screen. Open the treasure chest here to get the Big Key. Grab it and then head back left a screen. Jump off the ledge and then backtrack all the way to the large central chamber.


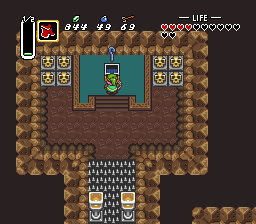
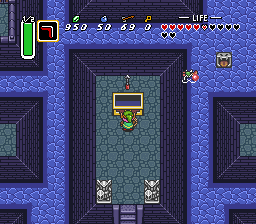
Back in the central chamber, climb up the steps in the center of the room and open the big chest here to get the dungeon item, the Hookshot. This item allows Link to latch onto objects in the distance, pulling himself over to them, or in some cases, pulling small items towards him. After acquiring the Hookshot, immediately turn to the right and use it on the skull pot on the right side of the room. Lift up the pot on the far right to acquire a small key.

Climb back up the stairs in the center of the room and walk just north of the large treasure chest. Face northward and use the hookshot to grab onto the pots over here. Use the small key on the locked door and head up a screen.


Walk to the left and defeat the Red Bari in this area. Lift the pot and you’ll find a floor switch. It won’t stay down, so you’ll have to pull the nearby statue onto the switch. This opens two doors in the room, one right nearby, and another on the other side of the room. Walk to the right side of the room and head up through the door on the left. Walk straight ahead and head down the stairs.


Push the lever to the left and the water will drain from the room. Climb down the steps and head left a screen. Run to the south end of the room and head through the door. Open the treasure chests to get some extra rupees and then head back left a screen. Run to the top of the room and head through the door.


There are six blocks lined up in a row in this room. The third one from the left can be pushed to the right and a treasure chest will appear. Open it up to get some rupees. There are a series of small mouths at the top of the room where water is flowing down from. The one that is second from the right can be walked into as it is a secret door. Go through and then climb up the stairs in the next room.


Walk down a screen and then jump into the water. Swim to the right side of the room and climb the ladder. Lift the pot here to get a small key. There are some annoying enemies floating around in the water that will swim towards the ladder. You can use Bombos, Ether, or Quake to defeat them. There is a cracked wall along the north side of the room, and if you place a bomb, it will lead to a room that has some extra items, including two recovery hearts. Jump back into the water and then swim all the way to the left side of the room. Use the small key and head through the door. Walk up and once you are ready, head northward to take on the dungeon boss.


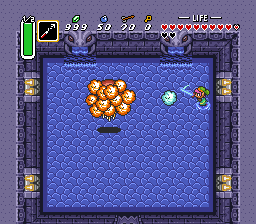
Arrghus is a giant eye surrounded by smaller enemies called Arrgi. Link will first need remove its layer of minions before taking on the main form of Arrghus. Keep your distance from Arrghus and use your Hookshot to pull off one Arrgi at a time. Once it is removed from Arrghus’ body, slash it twice with your sword to defeat it. Keep repeating the process until all the small Arrgi have been defeated.


Arrghus will then jump into the air and slam down into the water. Regardless of where Arrghus lands, he will always start to move towards the bottom-right corner of the screen. He will then rapidly move around the room, ricocheting off the walls. When Arrghus gets near, slash at him with you sword and he’ll jump back up into the air. He’ll come slamming down again and the process will repeat. Hit Arrghus 8 times with the Master Sword to defeat him. Alternatively, Arrghus will die in 4 Ice Rod shots.


After Arrghus has been defeated, collect the Heart Container that is left behind, as well as the second crystal.


- Chapter 1 – Zelda’s Rescue
- Chapter 2 – Eastern Palace
- Chapter 3 – Desert Palace
- Chapter 4 – Tower of Hera
- Chapter 5 – Hyrule Castle Tower
- Chapter 6 – Dark Palace
- Chapter 7 – Swamp Palace
- Chapter 8 – Skull Woods
- Chapter 9 – Gargoyle’s Domain
- Chapter 10 – Ice Palace
- Chapter 11 – Misery Mire
- Chapter 12 – Turtle Rock
- Chapter 13 – Ganon’s Tower
