- Chapter 5 – Fire Temple
- Chapter 6 – Ice Cavern
- Chapter 7 – Water Temple
- Chapter 8 – Bottom of the Well
- Chapter 9 – Shadow Temple
- Chapter 10 – Spirit Temple
- Chapter 11 – Gerudo Training Grounds
- Chapter 12 – Ganon’s Castle
5.1 Fire Temple
As you enter, you’ll see a stairway leading up to three tiki-looking statues (only one is lit). Go through the door to the right of the stairs, and a Like Like will drop down on top of you, eating your tunic (if its the red/blue one) and shield (if you have one equipped) before you can even react. If it gets both (it can get both at the same time) you’ll only get one back upon victory, so make sure to unequip before entering this room. Defeat it for a small chest with a new Hylian Shield. (Remember, save this chest until you need it, you can always come back for it.) The path forward is blocked by a gate but it’s best to get this Like Like out of the way early, so head back to the first room.
Try to climb the stairs and a fire will block your path. Instead, climb up the side to avoid it. At the top of the stairs there will be a torch on either side, so use Din’s Fire while standing between them to light the two unlit torches. Quickly run up and use it again near the unlit Tikis to open the next door and proceed. After a short chat with Darunia, jump across to the left and use your hookshot on the target on the far platform. Climb up and break the crates to reveal a second torch here. Jump down, standing between the two torches on the lower level, and use Din’s fire to light them both. Quickly equip your bow and aim across to the platform on the other side, shooting an arrow through the lit torch into the unlit torch across the room. Once all three are successfully lit, a gate on the same platform as the final torch will open, giving you access to a Small Key. (If you’re having trouble aiming, it’s possible to jump into the lava and run across, climb up the last platform, and cast Din’s Fire again before the first two burn out.) Make your way across the room to get the key, then head back to the first room.
Once again, avoid the fire that blocks the stairs, and use your key to open the door below to the left of the stairs. Kill the Keese, and then take the fight to the two Stalfos. After winning, you can play the sun song in the middle to get a red fairy spirit if you need health. Through the next door, raise your shield or dodge until the tiles stop flying at you. Head towards the suit of armor to find out it’s really an Iron Knuckle. Now with double damage, they can potentially kill you in one hit. Be cautious; use L targeting and back away. Dodge their attacks, strike back, and retreat again. Though, other than the insane amount of damage he deals the fight is the same as they have always been, so it shouldn’t be too much trouble if you’re used to avoiding his attacks. If you do, Bombchu can be your best friend.
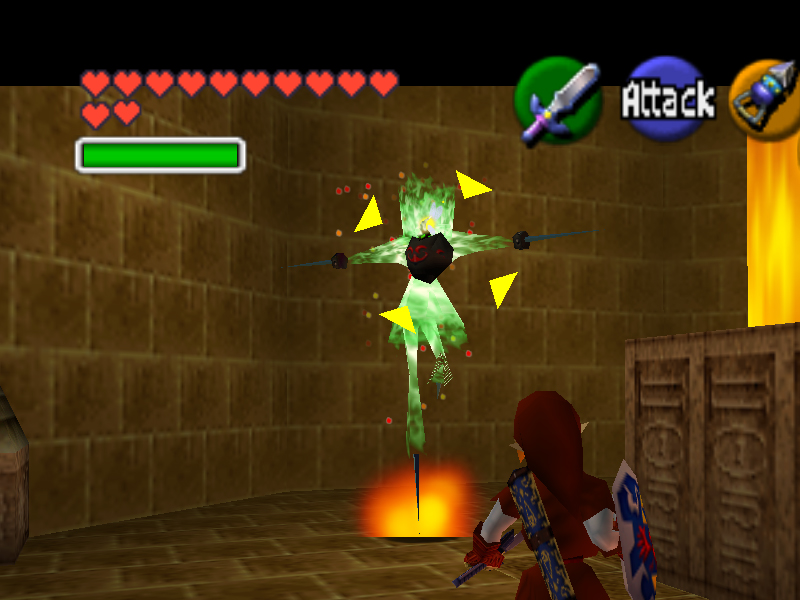
After the fight break some pots if you need anything, as there are fairies and items waiting in them for you. Through the newly unlocked door you’ll find a Flare Dancer’s room. As usual, it will jump out of the fire in the center and begin dance-fighting. The fight is the same and it’s simplistic to avoid damage; hookshot, slash, repeat. Back up as it explodes, then claim the chest left behind for your Megaton Hammer. You know how to use this thing.
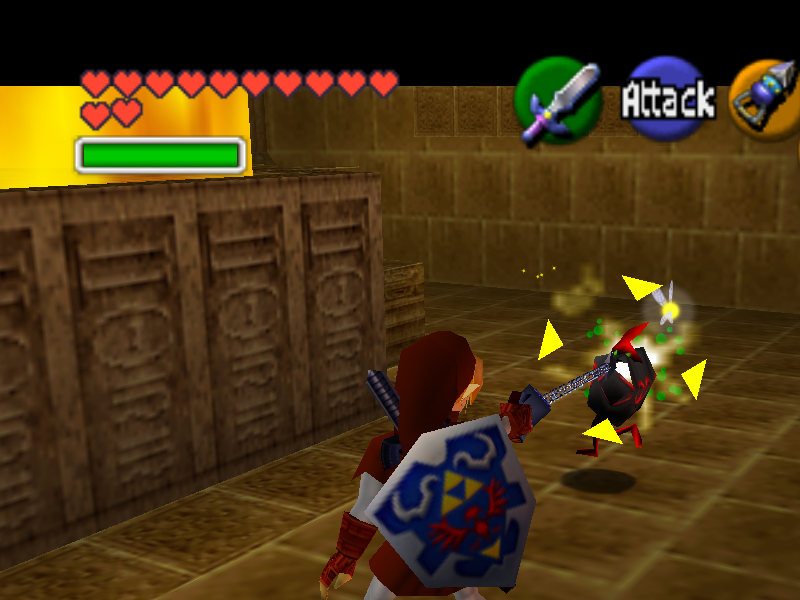
Yipes! This mini-boss is known as a Flare Dancer. It’s pretty easy if you know what to do, but can be annoyingly awkward to defeat if you wait too long.
As soon as the battle begins, this enemy will jump out of the flames and start spinning. If you don’t stop it quickly, it will shoot out flames in a radius around him. He has two types of flames: red, which simple sits there, and blue, which slowly inches its way around the room, similar to a previous Zelda title, the Adventure of Link.
The rest of the time, he’ll zip around the room like he’s skating on ice, leaving a trail of fire in his wake. He purposely tries to knock you over while doing this, and while it doesn’t do any damage, it makes it annoying to get your bearings again.
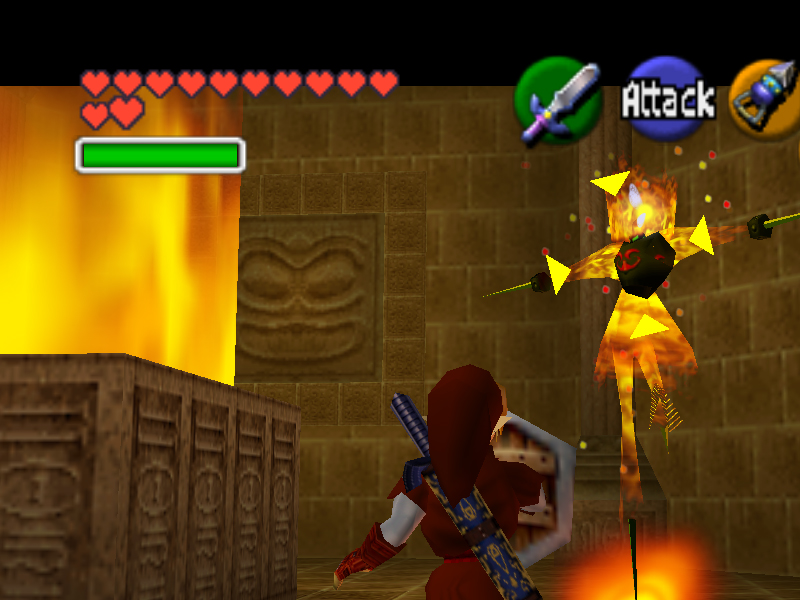

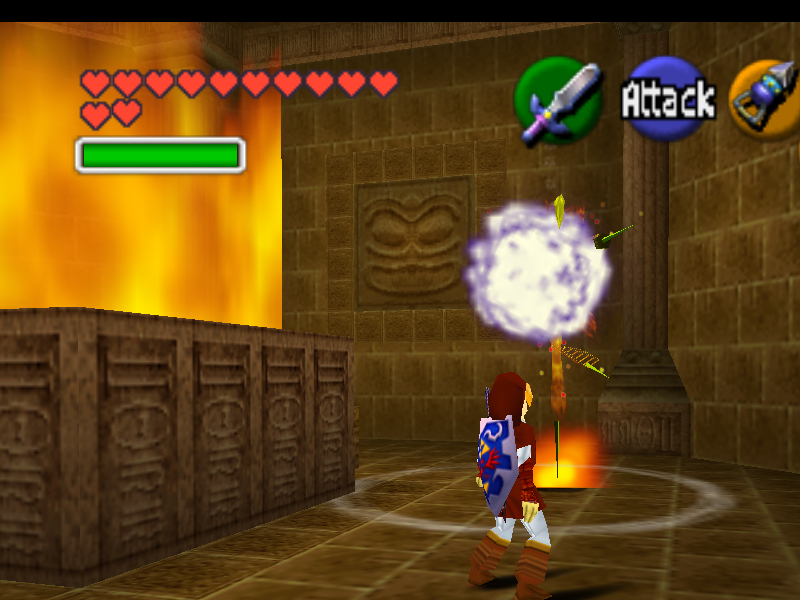
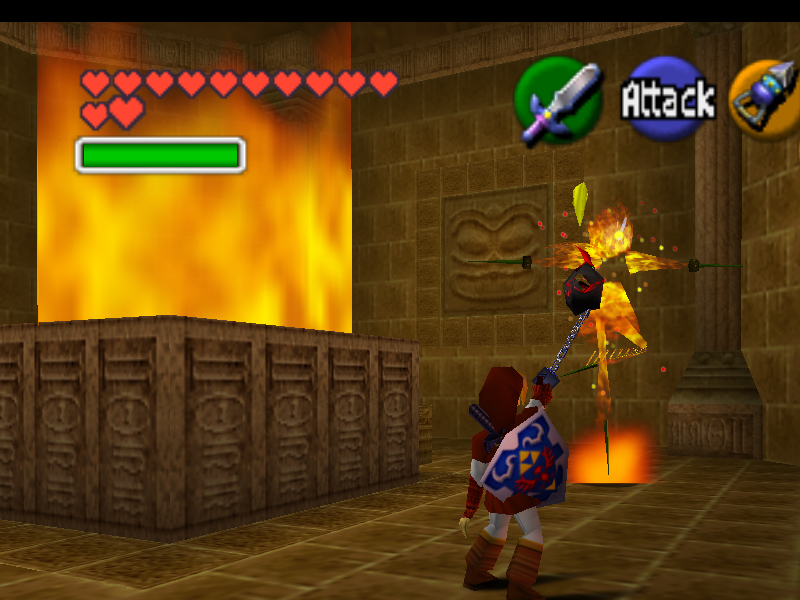
To hurt him, you have to wait for him to hold still right before he attacks. While he’s spinning around, Z target him and either throw a Bomb or use your Hookshot to temporarily rid him of his flaming body. He’ll be reduced to a black torso, which grows tiny legs and runs around the room squeaking. He’ll circle the room, then turn around when he sees you and run the other way repeatedly. Eventually, he’ll jump back into the flames.
There’s three good ways to hurt him at this point: Hookshot him back to you, circle around the room and use a Jump attack, or circle around the guy himself after he sees you, so he can’t move at all and sees you on his other side. The last method can be incredibly effective and make this battle very short if you do it right.

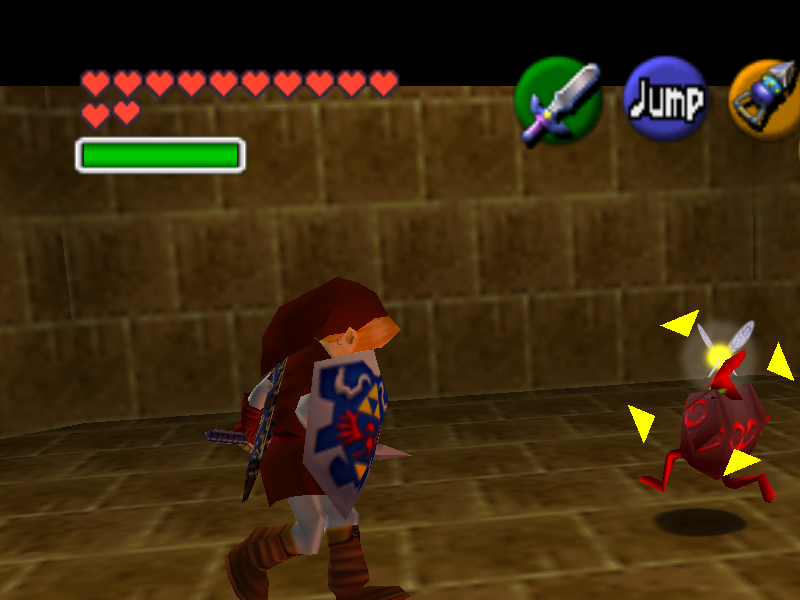
Eventually, he’ll take enough damage or be out long enough and jump back into the flames. If you harmed him enough, he’ll change colors, just like the Torch Slugs. Red to blue to green. It’s a nice little gauge to see how much life he has left. Overall though, disembodying him with the Hookshot then circling around and using a Jump Attack is by far the easiest and fastest way to defeat him.
Through the south door (the one without a face on it) and hammer the rusty switch to release the first Goron you find here. After he runs off telling YOU to help Darunia, raid the room to find the Dungeom Map in the large chest he left behind. Exiting through the door ahead leads back to the first room again. Head upstairs and smash the totem pole at the west end to get to the familiar big, lava-and-platform-filled room. Jump across to the left, then hookshot over the wall of fire to the torch. Light it with Din’s Fire to raise some hookshot targets throughout this room, then bomb the doorframe. Inside, use Din’s Fire between the two torches in the wall here to free the Goron and get the small key, then leave this room.
Now, make your way across to the north end. The hookshot targets that have risen should make navigation easier. One of the platforms on the north side near the west wall should shake, then rocket into the air instead of sink. Jump to the little alcove with a pot (it holds magic), and use Din’s Fire to light the torch up here. Quickly, shoot an arrow through the fire to the torch near the barred door to the left below to unlock it. Jump down, through the lower door to save a Goron in exchange for a Golden Skulltula. Back ouside, hookshot the target on the platform just above the door you used and use the top door. Block the tiles that immediately fly at you, then hookshot through the fire and flames to claim the boss key on the other side of the room.
Back to the big room, take the door in the west corner of the room with your small key. Climb up the wire fence on either side, jump onto one of the columns, and jump onto the block as it’s rising to ride it up through to the ceiling. Don’t jump while it’s stuck on the ground because the fire will throw you off. Once you’ve rode it safely up, head through the door. Climb up the platforms at the right and light the oversized torch with Din’s Fire. It will arise the hookshot target, so you can now make your way up to the top. Defeat the Lizalfos and climb (or hookshot) up the wire fence.
Now that the boulders have disappeared, this room is nothing but a breeding ground for more Lizalfos, but they are predictable and shouldn’t pose a problem anymore. Follow the right wall and find the false wall in a little alcove. Bomb the wall, and destroy the Skullwalltula. Smash the rusty switch to raise the hookshot targets to get access to the top level. Hookshot up to find and bomb the breakable floor and fall (or climb) down below. Break the crates, smash the switch, and claim your Compass.
Climb back up, and head to the southern part of this room (on top). Time a bomb to explode in the air and hit the switch on the other side of the gate; jump over. The crate at the left hides a chest with bombs. Climb on the crate(s) at the right, and pick up a box. Jump down and set the box down, and head directly west to find another barred gate blocking access. Charge up a spin attack and release to open it up and give you access to another chest with bombs. Now, pick up the box and head straight to the north corner of the room. You’ll find another false wall, which can be bombed to find a blue switch. Set the box down to enter the door next to it; free the goron, take the small key, and head back.
Back in the Lizalfos pit, hookshot to the top level and head to the northernmost area. On the east wall you’ll see a small platform with a target, so hookshot to it. Then turn around to face west and you’ll see a platform with another target. Hookshot to it and ride as it carries you up. Go through the only door, and Navi will target a face in the wall. Hookshot it to unbar the door above, and kill a few Torch Slugs as you climb the wire fences to the top.
Through the door, ignore the button switch and slowly make your way up and around until you get to the block that is surrounded by fire. Equip your Megaton Hammer and smash the rusty switch hidden behind it to raise a hookshot platform directly above the door you can in from. Head back to the first button switch and press it to turn off the fire for a few seconds. Hookshot to the newly raised target and quickly run over to push the block. Hiding underneath is a Golden Skulltula (note that a Golden Skulltula takes two hearts on contact, and to get him you have to take damage from it, so make sure you have at least a few hearts before proceeding). Back away before the fire comes back, and destroy it with your Hookshot. Head back through the door you came, or simply jump into the pit into the middle if you can land on a ledge, and work your way back to the Lizalfos Pit.
Hookshot to the top level, and take the door on the northeast side with your key. Climb over the fence to your right. Walk past a blue button switch and a door, and hookshot to the crate, grab a box, and jump down to place it on the blue switch. Hookshot back to the crate and jump to the platforms hanging over the lava. Stand between the two golden torches and shoot at the torch on the wall above the blue switch to open the door to the east. Get close enough and hookshot to the platform with the door and open it. Through the hallway to the next room, jump across the time block to the top of the altar, and use the Megaton Hammer on this block to knock the pillar from the room you saw Darunia in into the ground. (We have everything we need now to take on the boss. However, while we’re here, let’s do a little more collecting and exploring. If you’d like to finish it now, jump down into the hole, then head for the bosses room.)
Now, jump to the platform with a door just to the east, and use the song of time near where Navi prompts you. Jump over and onto the newly-floating time block, and jump off through the northwest door. Defeat the Lizalfos here to claim your Golden Skulltula. Back to the last room, again, play the Song of Time to put the block back and use it to jump over the flames. Climb/jump your way back up to the platform where you played the song of time the first time and go through the door. Hookshoot to the target across the fire in this room, hammer the switch, then climb on the target block to jump over the fire to the path below. The little alcove has a false wall hiding a Golden Skulltula.
Take the north door, and work your way around the east side of the fires to the switch. Race past the shortly-extinguished flames, and take the door for another fight with a fire-dancer. After defeating it the same way as the last one, climb on and quickly drop from the center block. As it rises, claim the small key hiding underneath. When it comes back down, jump on it again, and ride it to the top. Climb all the way up the wire fences, and enter a large circular room.
The first thing you should do here is hit the diamond switch just to the right, which will raise a few hookshot targets in this room. What you need to do next is turn off the fire around the chest with a button switch. The switch you need to press is in the moat around the right side, on the southwest part of the octagon. The button is on a short timer, so you need to set up your path to the chest beforehand. There are a few ways you can do it: Easiest is to simply call the scarecrow directly above the switch; hookshot to him, and run straight to the chest. Alternatively, you can run back until you can climb on the wall around the center and take a run up that to the top just before the fire comes back on, or you can run back to the beginning, hookshot to the target, and climb to the chest from there.
Whichever method you choose, know your route, hit the button switch, and race to the chest. After getting the key, head back where the diamond switch is. Hammer the face-square thing into the ground, fall after it and use the key on the only door in this room. As soon as you enter, a Stalfos will ambush you. Deal with him, then use the Megaton Hammer on the face-square to lower the stairs. As you climb down, another stalfos will ambush you, so deal with him too. When you near the bottom, Navi will target the face on the wall. Hookshot him right in the nose to unlock the door.
Go through, claim the Golden Skulltula on the wall, then hammer the face-square down. Fall through after it, and you end up in the room with the fire-walls and time blocks. Fall through where you hammered the large pillar earlier, and head for the boss door. Jump straight onto the giant whack-a-mole platform and prepare for the party.
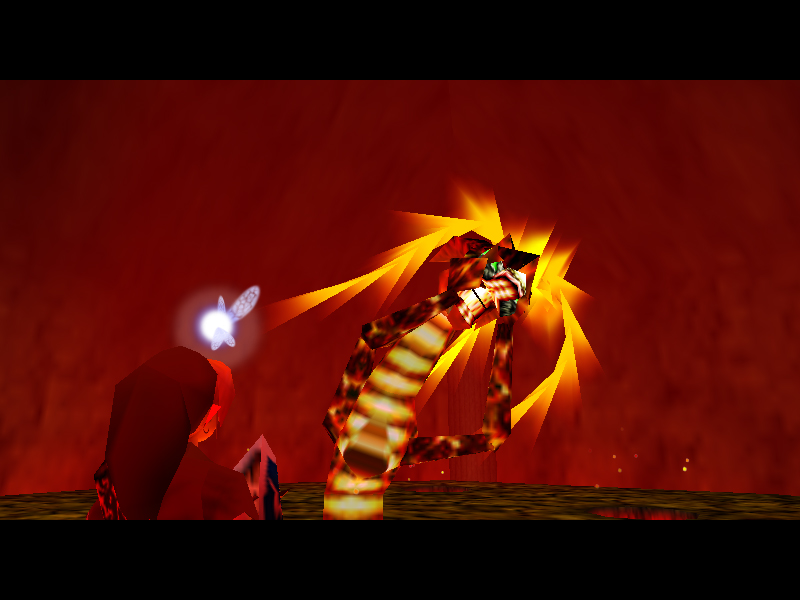
Wow, thanks Navi for that incredible advice… This worm-like oblong dragon has you trapped on a hexagon shaped platform surrounded by lava. Should you fall in, don’t worry, cause you can climb up the sides and back onto the main platform. Should the need arise, you can actually climb off to the side on purpose to avoid being attacked by any of his moves. All its attacks are somewhat awkward to avoid and they all do a great deal more damage than the other bosses you’ve faced thus far.
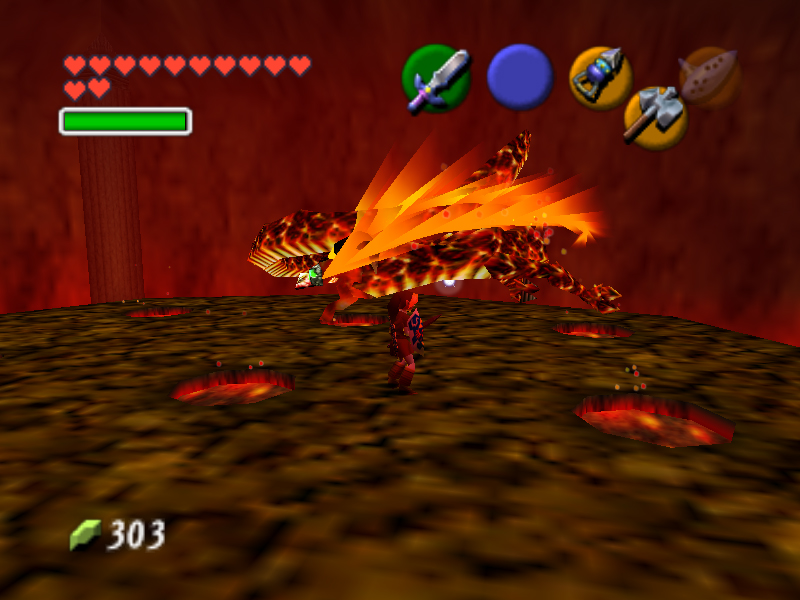


Volvagia has three main attacks it cycles through somewhat randomly. The first is flying up to the ceiling and bumping against it, causing flaming rocks to fall down. Generally, they fall where you were standing when he first went up to the ceiling, so going to the opposite side of the arena usually fixes that problem. In either case, run away from shadows.
The second attack is to come out of the lava and fly around the arena, trying to breathe fire at you. While this does loads of damage and knocks you over (potentially into the lava below) it’s easily avoided by simply standing next to the hole he originally comes out of; the reason being, because he doesn’t have a very tight turn radius and he’s too stupid to simply back up. Alternatively, you can run around like a chicken with your head cut off, circling the area, or just Z target him and use your shield. Standing still is easier in my opinion. =)


His third attack is to stick his head out and lean over the edge, pausing a moment before breathing fire or smacking you if you’re close enough. This is your chance to teach him a lesson. Each time he does this, run over and smack him in the head with your Hammer. This will stun him and give you the opportunity to slash away with your sword.

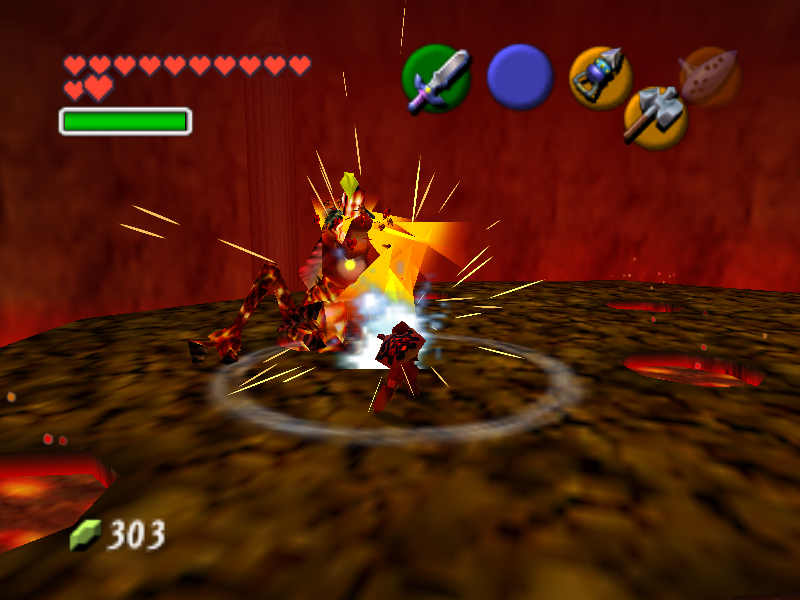

As he takes more damage, he’ll stall more in his appearance out of the nine lava holes, trying to trick you into running to different ones. It’s pretty easy to keep track of though, simply because he’ll have two in a row that are fake, then the third one is him. The best method is to simply stand near the middle and run towards the last one. Because lava doesn’t hurt you immediately to walk on it now, feel free to walk over the holes themselves.
After several hits, it’ll grab it’s head and scream as it goes back into the lava, only to emerge to fly around as it burns from the inside out and it’s skeleton falls to the ground disintegrating. The triumphant music will announce the appearance of the blue teleporting light. Make sure you snag the Heart Container before you go though!