This chapter covers the normal mode of the HD version of Twilight Princess for the Nintendo Wii U. If you are playing on the Nintendo Wii, check out the Snowpeak Ruins – Wii Version.
- Chapter 1 – Ordon Village
- Chapter 2 – The Twilight
- Chapter 3 – Faron Woods: Twilight
- Chapter 4 – Forest Temple
- Chapter 5 – Kakariko Village: Twilight
- Chapter 6 – Death Mountain
- Chapter 7 – Goron Mines
- Chapter 8 – Lanayru Province: Twilight
- Chapter 9 – Lake Hylia: Sidequests
- Chapter 10 – Lakebed Temple
- Chapter 11 – The Master Sword
- Chapter 12 – Gerudo Desert
- Chapter 13 – Arbiter’s Grounds
- Chapter 14 – Scaling Snowpeak
- Chapter 15 – Snowpeak Ruins
- Chapter 16 – Sacred Grove: Round Two
- Chapter 17 – Temple of Time
- Chapter 18 – In Search of the Sky
- Chapter 19 – City in the Sky
- Chapter 20 – Palace of Twilight
- Chapter 21 – Cave of Ordeals
- Chapter 22 – Hyrule Castle
15.1 Map of the Mansion
The Snowpeak Ruins is a giant mansion and unlike previous dungeons, you may find yourself traveling across the same rooms multiple times as you navigate your way through. Start off by heading straight ahead where you will find a Poe Soul. Defeat it just as you’ve done before.
Poe Soul #46: In the entrance room of the Snowpeak Ruins, run ahead to find the Poe Soul.


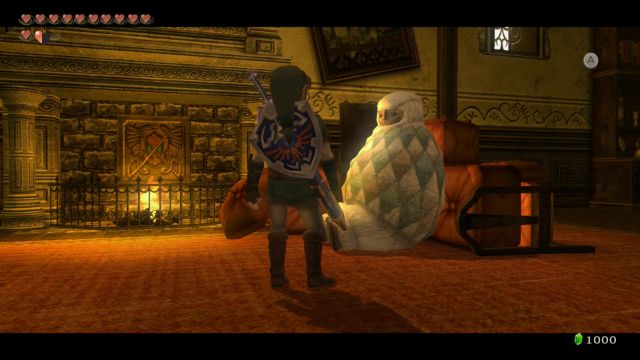
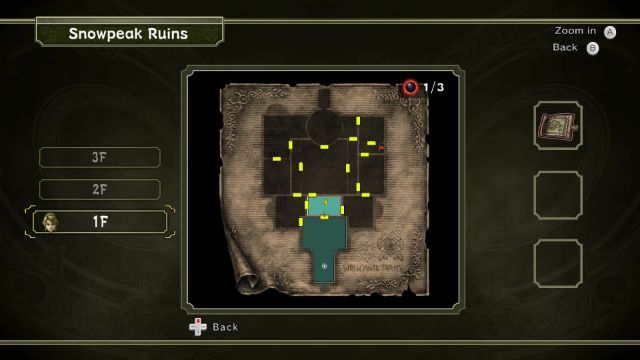
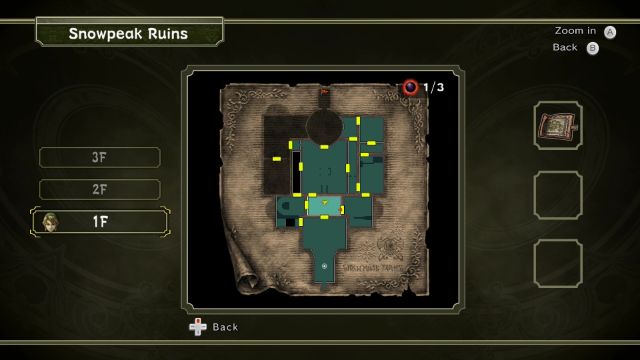
There are two doors that you can enter, but the one at the northwest corner just leads to a dead end. For now head straight ahead through to the next room. Run forward and speak with Yeta, who is the wife of Yeto who we met earlier. She is sick, but says that the Mirror is locked in the bedroom. She says that you need to find the Bedroom Key and will give you the Map of the Mansion. She indicates on the map a location where she thinks the Bedroom Key is located.
15.2 An Ordon Pumpkin?
Go through the door to the east and you will find Yeto. You can climb up and use your bottle to scoop up some Simple Soup, which will replenish two hearts. Staying in this room, if you walk over to the south end, you will find Ooccoo. As usual you can use Ooccoo and Ooccoo Jr to warp in and out of the dungeon. Continue onward through the door to the north.


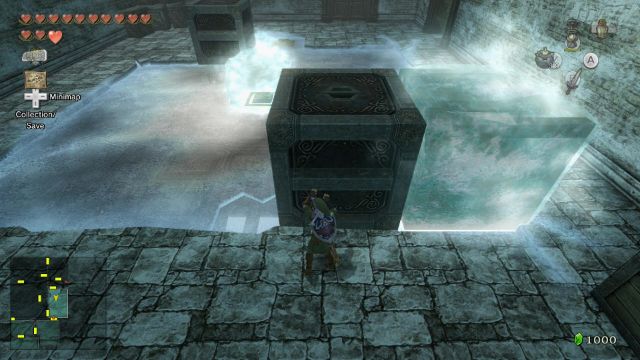
There is a floor switch at the south end of this room, along with two blocks you that you can push. Walk over to the large block near the the door you entered, and push that black to the east. Now run over to the other block in the room and push it West, South, East, and South so that it lands on top of the floor switch. This will unlock the door at the west end of the room, so head on through.




Turn into Wolf Link and dig into the snowy ground to get to the inner courtyard of the mansion. Here you will see the locked door to the bedroom above and the area is also surrounded by white wolfos. Open the nearby the treasure chest to get some rupees. Run northward and you’ll find another treasure chest buried beneath the snow. Dig it up using Wolf Link and open it to get a Small Key.

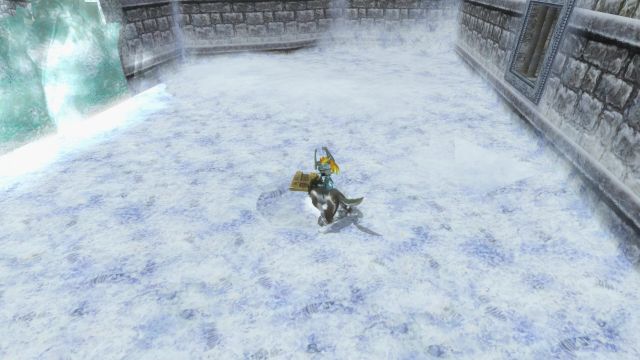
Travel through the door to the east and you’ll encounter some mini-freezards. If you hit one, it will slide across the ice and if it comes into contact with you, it will momentarily freeze you. Run ahead and use the small key on the locked door.
There are three more mini freezards here and you’ll have to defeat these ones to progress. Unfortunately right now your sword is still the best way to defeat them. Slash until they are defeated and then travel east through the door that has opened up.


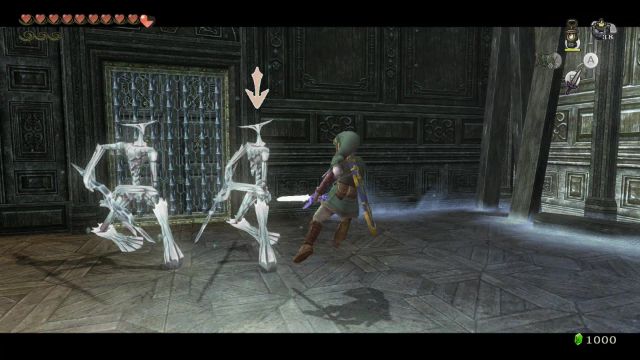
Walk towards the door and you’ll be confronted by some new enemies known as Chilfos. These tall enemies will toss icicles at you that can deal some damage. The back slice sword technique works well in defeating them as they will block some of your frontal attacks. Once both Chilfos have been defeated head through the door that has opened. Open the treasure to get an… Ordon Pumpkin? Clearly not the Bedroom Key that we are looking for.



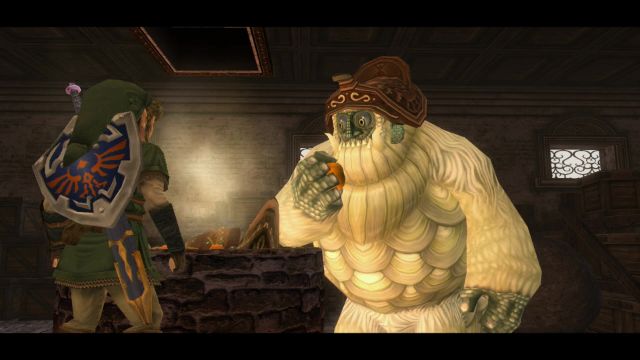
Travel the through the door to the south to get back to the Ice Block room. Climb up and then jump back down to the room below. Travel through the door to the south and speak with Yeto. He can sniff out the Pumpkin that you got and it will knock you down to take it from you. He puts it into his soup, which now upgrades the soup to Good Soup. This will now replenish up to four hearts.

Walk back to the west a room and speak with Yeta. Clearly her memory is jumbled and this time she marks a new location on your map, at the north end of the Mansion.

15.3 The Compass
Yeta opens the door heading northward, so walk on through to get back outside. This area is littered with white wolfos, so go ahead and defeat them if you’d like. Watch out for the large Freezard that patrols the north door. Make your way to the northwest corner of the map and climb through the window and then head through the door.


This room has a bunch of mini-freezards and like usual, they can be quite annoying. I recommend slashing at them from the doorway, as you are safe when you are not on the ice. There is a large cannonball that Link can pickup and toss at the freezards as well. Pick up the cannonball and carry it over to the north end of the room where you will find a large cannon. Place the cannonball into the hole and then drop a bomb into the hole afterward. It will shoot the cannonball to the northeast corner of the room, destroying the ice. Run over and open the treasure chest found here to get some bombs.


Grab the cannonball again and once again place it into the cannon. This time turn the cannon so that it is facing southward. Once again drop a bomb and it will blast through the ice, leaving a pathway to the door at the south end of the room. Run on over and head through.


Walk to the west end of the room and you’ll see some ice keese as well as some more mini-freezards. Defeat the ice keese and then use your bow to shoot an arrow at the mini-freezards. Jump over the gap and slide your way to the southwest part of the room. Be careful not to go too far, otherwise you’ll slide all the way off the ledge. Defeat the other mini-freezard nearby with an arrow and then leap over to the next platform. Open the treasure chest in the center of the room to get the Miiverse Stamp for the Hylian Letter B.


Walk over to the southeast corner of the room and open the treasure chest to get the Compass. From there walk northward and use your Clawshot on the target to get back to the door that you entered the room from; then head on through. Make your way back east to get back outside to the center courtyard.


15.4 Ball and Chain
If you glance at your map now you will see there is a treasure chest hidden beneath the snow here. Defeat the white wolfos and then use wolf Link to dig in this location. Open the treasure chest found here to get a small key. Use that key on the door just to the west and head on through.


On the other side of the door you will find three cannonballs. Pull on the lever nearby to lower the seesaw. Pickup a cannonball and place it on the hole. Walk back through the door and pull the lever to flip the seesaw. The cannonball will come rolling down and you can pick it up. Carry it over to the cannon that is located in the center of the courtyard. If you glance at your map, you’ll see there is a treasure chest at the south end of the courtyard, blocked off by the large piece of ice. You can use the cannon to shoot through the ice and open the treasure chest to get some extra bombs.


Carry the cannonball back to the cannon and this time turn the cannon so it facing to the north. Drop a bomb and send the cannonball blasting through the massive freezard. Run on over and head through the door.
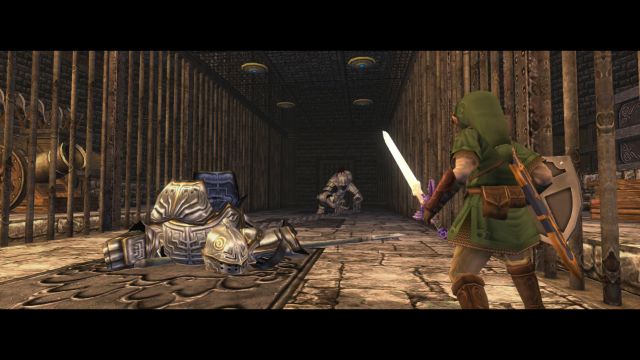

Run ahead and try to open the next door and it will shut before you reach it. A short scene will play, revealing Darkhammer, the mini-boss of the Snowpeak Ruins. This bulky enemy wields a large ball and chain and he will spin it as he slowly walks towards Link. Wait until the boss toss the ball at you and quickly dodge to the side. Then run up to the boss and slash away at its tail.


As Darkhammer gets close to you, you will be cornered in this narrow corridor. Use your Clawshot to grab onto the targets that are on the ceiling to get to the other side of Darkhammer. Once again wait for him to attack and dodge the ball. Slash at his tail and repeat this process until the enemy has been defeated. Run over and pickup the dungeon item, the Ball and Chain! With item in hand, make your way through the door to the north.
Use the Ball and Chain to break the ice and open the treasure chest to get some… Ordon Goat Cheese? Seriously, how did this get here?
Before returning to Yeta, you can do two quick things now with the Ball and Chain to obtain some rupees. The first of these is very easy; use the Ball and Chain to smash one of the statues on the east side of the room. A bubble will pop out of the statue, which after defeating will net Link an orange rupee.
You can also head back two rooms and into the main courtyard. Climb through the window on the northwest side and walk through the door to re-enter the far northwest room. These mini-freezards can now be easily defeated with the Ball and Chain, making them much less threatening enemies. Use the Ball and Chain to break some ice along the left wall, revealing a chest containing a red rupee.


Return to Yeta and she tells you to take the cheese to her husband. Return to Yeto and give him the Ordon Goat Cheese. After giving him the cheese, you can scoop up the soup, which is now Superb Soup, and will restore 8 recovery hearts. Return to Yeta and speak with her. This time she will mark a location at the northwest corner of the second floor.
15.5 Some Hidden Heart Pieces
Before progressing with the next area there are some treasures we can obtain, including a few hundred rupees, a Stamp, and a Poe Soul. Open the door to the south to reach the foyer where we first entered the mansion. There are two chests marked on the map; one on the east side and one on the west side. Use the Ball and Chain to break both statues, making sure to hit each statue twice to completely remove it. The chest on the east side will contain 10 rupees, while the chest on the west side will give you the Miiverse Stamp for the Hylian Letter Q.


You can also break the middle statue on the right side to reveal a Poe’s Lantern. Transform into Wolf Link and defeat it for another Poe Soul. Furthermore, if you break the top left statue, a Bubble will appear which you can kill for an orange rupee.
Poe Soul #47: In the entrance room of the Snowpeak Ruins, use the Ball and Chain to break the middle statue on the right side and reveal the Poe’s Lantern.
With all of that completed, head north one room and return to Yeta. Head through the newly opened door to the west to reach the next area. Avoid the ice for now and instead head through the door to the north. Push the block here forward, which will give you access to the cannonballs we were using before. Grab one and drop it into the seesaw next to the door we entered from.


Return to the previous room and pull the lever to drop the cannonball into this room. Break the ice to the north and you will find a freezard breathing frost onto the spiraling ramp. There is a small gap in the cage where Link can use the ball and chain to hit the freezard. Wait until the freezard is facing up the ramp and quickly hit it twice. Afterwards, you can defeat the mini-freezards with the ball and chain as well, though this is not required. Defeat the next freezard as well, and continue walking up to the top of the room.


Avoid the ice for now and enter the door to the right. Turn to the left and immediately defeat the chilfos to the left with a single hit from the ball and chain. Use the ball and chain to break the ice along the right side and reveal a clawshot target.


Stand near the gap in the center of the room and z-target the chandelier hanging in the middle. Use the ball and chain to hit it and the chandelier will begin to rock back and forth. Jump on top of it and then jump over to the chest on the other side of the room. Open the chest to get a small key. You can either use the ball and chain to reach the other side of the room like before, or simply use the clawshot to hook over to the target we revealed.


Return to the previous room and walk to the south end, where you will see the floor is a bit uneven. Place a bomb on the floor and it will create a hole. Drop down and open the treasure chest here to obtain Piece of Heart #31. Take out the clawshot and aim back up to the floor above. Use it to latch onto the target to get out of this room.


Continue to the east end of the room and use a small key on the locked door. Destroy the block of ice here with the ball and chain to reveal another target, allowing you to reach this area from the mansion entrance.


Walk to the end of the ledge and use the ball and chain to rock another chandelier. Jump onto it and then use the ball and chain to defeat the chilfos on the other side. This can be tricky to do, and if you are not careful the enemy will knock you off the platform and down to the lower level. If you are having some bad luck with timing, you can alternatively use a few rapid succession bomb arrows to defeat the chilfos.
Look to the south and you will see a series of hanging platforms. Wait for the one you are on to stop and then use the ball and chain to rock the next one. Jump over to the next platform and wait for it to stop as well. Watch out for ice keese that will appear here and on the next platform as well. Hit the next platform with the ball and chain, and jump over to this one as well. While this platform is still moving, jump over to the ledge and open the chest here for Piece of Heart #32.
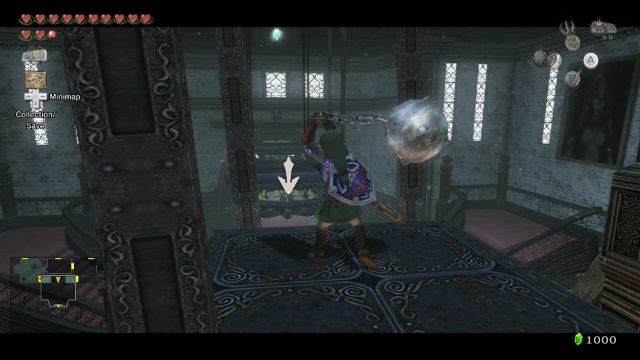

If you didn’t break the ice and reveal the clawshot target before, you can rock the platforms to reach the east side balcony door. It is much faster however to simply jump down and climb up the staircase on the right side, then clawshot the target to reach the second floor again. Use the ball and chain to rock this platform again, and then head through the next door.
15.6 Bedroom Key
There are a few mini-freezards in this room that you can use the ball and chain to defeat with relative ease. After all have been defeated, use the ball and chain to break the ice on the east side of the room. Another Poe Lantern will appear; so transform into Wolf Link and defeat it for the 48th Poe Soul. Transform back into human Link and head through the door to the north.

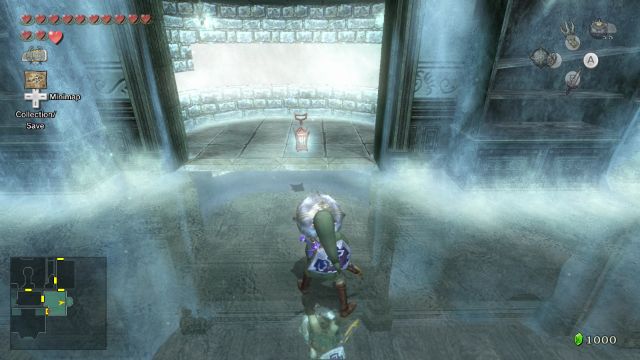
Poe Soul #48: Break the ice in the room with many mini-freezards to reveal the Poe Soul.
Push the block on the east side of the room, which will allow for easy access back up to the second floor. Drop down to the first floor and you will find yourself back in the block room.
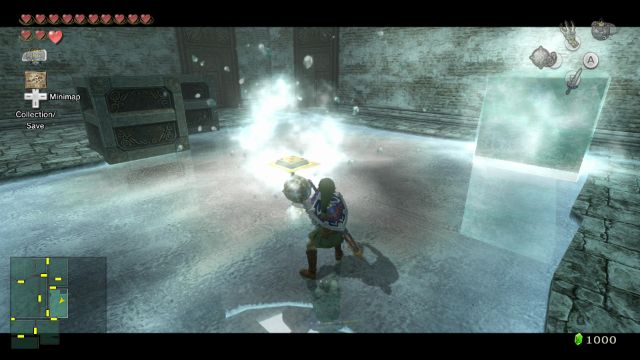
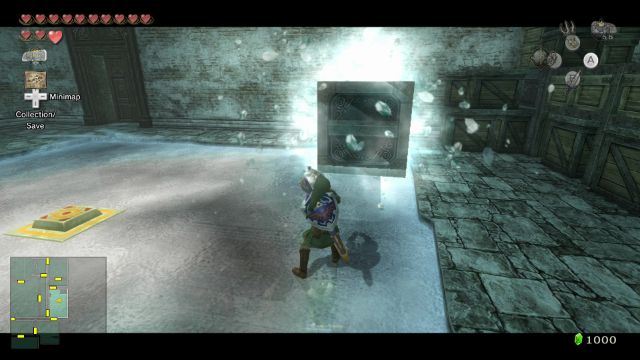
Use the ball and chain to break the block of ice in the center of the room, and then break the ice surrounding the frozen block nearby as well. To solve this next puzzle, we will need to place a block on the switch in the center of the room.
Start by pushing the block that is on the far south of the room northward and it will slide across the ice. Now push the block that was frozen to the south, then to the east, and then to the north so it will end up below the last block we pushed.
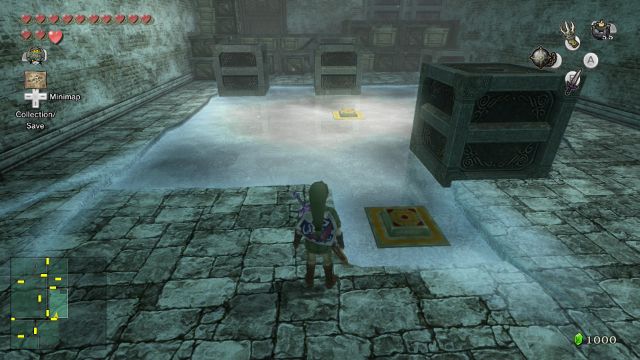

Now push the block that we first pushed (the one furthest to the north). Push it west, then south, then east, then back north where it will land on the switch. This will cause the locked door on the second floor to open up.
Climb the crates on the north side of the room and then jump across the gap and back to the south side of the room. Go through the door on the west side of the room that is now open.

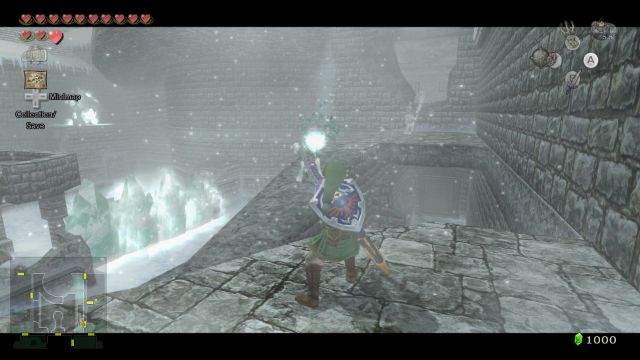
You will appear in the courtyard once again, but this time on the second level. You’ll notice there are three chilfos to your right. Use the ball and chain to defeat the first one from the platform you are currently one.


Then jump onto the piece of wall and carefully defeat the two remaining chilfos further up the path. Once they are defeated, look past the broken wall ahead and you’ll find a clawshot target. Hook over to it and walk through the door here.


Break the ice to your left with the ball and chain. Hit the hanging platform that is straight ahead and it will rock back and forth as usual. Jump over to the platform and wait for it to stop moving. Face the south part of the room and hit this platform as well. Jump onto the platform, and then onto the next part of the second floor. Open the chest here for a small key; then head through the nearby door.


Jump off the ledge to the left and climb the crates once again. Make your way to the south side of the room and open the door on the south side to return to the room with the mini-freezards. Avoid them or defeat them, and then open the locked door on the west side of the room.
There are two freezards in this room. Defeat them one at a time using the ball and chain; then hit the blocks on the west side of the room to knock them down. This will open a passage to a room that we’ve previously visited.


Head down the spiraling ramp and grab the cannonball we brought to this room in an earlier part of the dungeon. If it is no longer there, simply use the mechanism via the nearby door to grab a cannonball and bring one in.


Bring the cannonball up to the top of the room, and then break the large block of ice here. Defeat the ice keese, and then place the cannonball inside the cannon. Rotate the cannon so that it is facing east, and then place a bomb inside the cannon. This will launch the cannonball over to the room where the two freezards were.


Follow the ball back and use the seesaw on the north side of the room to get the cannonball into the next area. Head through the door and you will appear once again on the second floor of the courtyard. Turn to the left and break the ice to reveal another target. Use the seesaw to grab the cannonball; then place it inside the cannon nearby.
Turn the cannon 180 degrees so it is facing northwest. Place a bomb into the cannon and the cannonball will break the freezard blocking the corner path.


Jump off the second floor and enter the door on the west end of the courtyard. Walk to the north and climb up the ladder. Defeat the remaining mini-freezards here and then open the door to the east.
Upon entering this room both doors will lock. Before walking around the room, you can use the Ball and Chain to knock down the icicles on the ceiling. This will prevent enemy Chilfos from appearing in the room if completed successfully. Otherwise, after they fall down, defeat them as best you can with the ball and chain. Once the battle is over, open the large treasure chest for the Bedroom Key! Finally!


15.7 Twilit Ice Mass: Blizzeta
Backtrack to the courtyard where you will meet up with Yeta, who is waiting for you. She says the bedroom is right above you and that she’ll take you there. She moves very slowly, so just run to the top of the area and use the key on the locked door. Yeta will appear next you and tell you to come inside.
She will take you to the mirror and say how pretty it is. Her head turns around and all of a sudden she transforms into a monster. All the windows will break and snow will fly into the room. They will all combine with Yeta and become the mansion’s boss: Twilight Ice Mass: BLIZZETA.
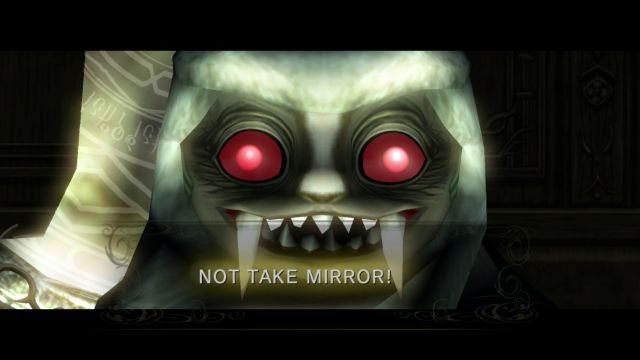

To attack this monstrosity of ice, you will need to use the ball and chain to hit the outer shell of ice. After doing this the block will start to decrease in size and move faster and faster around the room. At the same time mini-freezards will start shooting out from every direction. Keeping attacking with the ball and chain until the ice completely breaks and Blizzeta lifts into the air.
The next phase of the battle will encase Blizzeta in more ice, with large spikes surrounding her. After a few seconds the ice spikes will start to attack you. You can see their reflection in the ice when they are about to attack. Quickly roll out of the way to avoid them. Once the final spike drops, pull out the ball and chain and break as many of them as you can.


After the spikes stop attack, Blizzeta will drop all the ice spikes in a circle around Link and then Blizzeta will drop in the middle of it. If you broke the a few spikes earlier there will be a hole in this circle where you can roll out of the way as Blizzeta falls to the ground. Once Blizzeta lands use the ball and chain to hit her.


This process will now repeat and Blizzeta will regenerate the ice spikes. The spikes will begin attack again, so avoid them and do the same as before. After Blizzeta is hit three times with the ball and chain she will be defeated.
After the battle the room will return to nromal and Link will get the second mirror shard. After a speech from Midna, Yeto will appear and run towards Yeta. Yeta will awake and seem completely back to normal now that the mirror is with Midna. There is a lovely scene as Yeto and Yeta hug. Little hearts come falling out of them, soon followed by a full heart container. Grab the Heart Container, which will bring your total to 14 heart containers. Return to Midna and warp out of the mansion.


- Chapter 1 – Ordon Village
- Chapter 2 – The Twilight
- Chapter 3 – Faron Woods: Twilight
- Chapter 4 – Forest Temple
- Chapter 5 – Kakariko Village: Twilight
- Chapter 6 – Death Mountain
- Chapter 7 – Goron Mines
- Chapter 8 – Lanayru Province: Twilight
- Chapter 9 – Lake Hylia: Sidequests
- Chapter 10 – Lakebed Temple
- Chapter 11 – The Master Sword
- Chapter 12 – Gerudo Desert
- Chapter 13 – Arbiter’s Grounds
- Chapter 14 – Scaling Snowpeak
- Chapter 15 – Snowpeak Ruins
- Chapter 16 – Sacred Grove: Round Two
- Chapter 17 – Temple of Time
- Chapter 18 – In Search of the Sky
- Chapter 19 – City in the Sky
- Chapter 20 – Palace of Twilight
- Chapter 21 – Cave of Ordeals
- Chapter 22 – Hyrule Castle


