Network Sites: Hyrule Warriors Walkthrough | Pokemon X and Y Walkthrough | Darksiders Dungeon | GenGAME
-
- Walkthrough
- Video Walkthrough
- Bosses
- Characters
- Enemies
- Guides
- Info
- Media
-
- Walkthrough
- Video Walkthrough
- Enemies
- Quest
- Guides
- Info
- Media
-
- Walkthrough
- Bosses
- Characters
- Enemies
- Items
- Guides
- Media
-
- Walkthrough
- Video Walkthrough
- Enemies
- Quest
- Guides
- Info
- Media
-
- Walkthrough
- MQ Dungeons
- Video Walkthrough
- Dungeons
- Enemies
- Quest
- Guides
- Info
- Media
-
- Walkthrough
- Video Walkthrough
- Text Guide
- Enemies
- Quest
- Guides
- Info
- Media
-
- Walkthrough
- Bosses
- Enemies
- Rings
- Guides
- Media
-
- Walkthrough
- Enemies
- Characters
- Rings
- Quest
- Guides
- Media
-
- Walkthrough
- Enemies
- Quest
- Guides
- Info
- Media
-
- Walkthrough
- Coming Soon
- Enemies
- Walkthrough
-
- Walkthrough
- Enemies
- Quest
- Guides
- Info
- Media
-
- Walkthrough
- Ordon Village
- The Twilight
- Faron Woods: Twilight
- Forest Temple
- Kariko Village: Twilight
- Death Mountain
- Goron Mines
- Lanayru Province: Twilight
- Lake Hylia: Side Quest
- Lakebed Temple
- The Master Sword
- Gerudo Desert
- Arbiter's Grounds
- Scaling Snowpeak
- Snowpeak Ruins
- Sacred Grove
- Temple of Time
- In Search of Sky
- City In The Sky
- Palace of Twilight
- Cave of Ordeals
- Hyrule Castle
- Video Walkthrough
- Ordon Village
- The Twilight
- Faron Woods: Twilight
- Forest Temple
- Eldin In Twilight
- Death Mountain
- Goron Mines
- Lanayru In Twilight
- Lake Hylia: Side Quest
- Lakebed Temple
- The Master Sword
- Gerudo Desert
- Arbiter's Grounds
- Scaling Snowpeak
- Snowpeak Ruins
- Sacred Grove
- Temple of Time
- In Search of Sky
- City In The Sky
- Palace of Twilight
- Cave of Ordeals
- Hyrule Castle
- Enemies
- Quest
- Guides
- Info
- Media
- Walkthrough
-
- Walkthrough
- Enemies
- Quest
- Guides
- Info
- Media
-
- Walkthrough
- Video Walkthrough
- Enemies
- Quest
- Guides
- Media
- Characters
- Story
-
- Walkthrough
- Video Walkthrough
- Bosses
- Characters
- Enemies
- Equipment
- Items
- Story
- Side Quests
- Upgrades
- Media
This chapter covers the three stages in level 8, Realm of the Heavens, The Dark Cloud, and the Palace of Winds.
8.1 Realm of the Heavens
|
|
|
Welcome to the first stage in the last level of this game, the Realm of the Heavens. This level takes place high above the lands of Hyrule, where we will assault the lair of Vaati and Ganon.
Start off by heading to the right where you'll be met with a few lines of flame. This is much easier than it looks, as the flames will soon die down by themselves. Head right to the next screen and defeat the few Castle Guards here. Head south a screen. Defeat the few Castle Guards here and the Chief Soldier as well. Head into the Dark World via the vortex to the south. Hit both switches here to cause more Castle Guards to appear in the Light World. Defeat them as well then use the vortex at the top-left corner. Defeat a couple more enemies here and open the two chests for 50 force gems and a Heart Container. Head back to the Light World and head up a screen. Defeat the enemies that appear, then head up to the next screen. Defeat the lone Shadow Link here, then head in the vortex to the right. Walk to the north and use a Cross formation to hit the switches above the portal, bringing out more enemies in the Light World. Defeat these enemies as well, then open the chest that appears for a Moon Pearl. Drop it on the ground, then head into the top-left vortex. Open the chest for a Heart Container and 50 force gems. Use the portal to head back into the Light World. Grab the Moon Pearl and head back south a screen. Head south two screens and use the Moon Pearl in the top-right corner to create a Moon Gate. Grab one of the Roc's Feathers on this screen and defeat the remaining enemies on this screen. Head back into the Light World and back north a screen. Head to the right and use the Roc's Feather to jump across to the next area. There are three large cloud platforms to the right to transport you to the other side of the screen. The middle platform is the most dangerous, as it will lead to two Beamos while you transfer clouds. The top and bottom take more time, but are less dangerous. Make your way across and open the chest at the end for 300 force gems. Head right a screen. There is a Ball and Chain Trooper on the next screen that will produce flames when he swings around his ball. He can be easily defeated like with previous Troopers since we have the Roc's Feather. Jump up into the air and dive into the Trooper, completely avoiding the flames. After he's defeated, collect the force gems he leaves behind, then head north to the next screen. Follow the small pathway here to reach another vortex. Collect the force gems and hit the switches along the way, then hop into the vortex. Grab one of the Hammers above the portal, then head back into the Light World. Follow the pathway back south a screen, then head south another screen. Defeat Manhandla on this screen like usual, then collect the force gems left behind. Use the Magic Hammer and pound the cloud at the top-left area, revealing a Heart Container. Grab it, then pound at the bottom-left corner to find a small key. Grab the key, then head back north a screen and east a screen. This next screen is fairly straightforward. There are clouds revolving around a center cloud, and they will lead to the right side of the screen. You will need to defeat all the enemies on this screen, so make sure you do so. Once you do, continue to the next screen. This next area looks fairly tricky, though it's not too bad. There are four individually colored rows, each representing a Link. You will need to create a Long formation and wait until the green row is at the top of the area. Quickly run across the platform and to the right side. Defeat the three red Tektites here and head right to the next screen. This area can look fairly tricky, but it's easy if you are patient. Like before, the colored tiles will constantly switch between the four different colored Links, signifying that only one can walk across it. You will need to use this to have a Link stand on each switch in the top-left, bottom-left, bottom-right, and top-right corners. It doesn't matter which Link goes in which corner. Make sure to collect the force gems on the right and bottom sides, along with opening the chest to the bottom-right that contains a Heart Container. Collect the Pegasus Boots that appear in the center area, then head north a screen. To the right is another line of multi-colored tiles. Wait again until the green line is at the top of the area, then use the Pegasus Boots to dash all the way to the other side. Walk right to the next screen. There is a platform on the next screen with four switches. When you step on the right switch it will lead the platform right, and the top switch will lead it up. The other sides will do like things, so you will need to navigate all the way across the gap. This would normally be easy, but there are many fire flames across the gap that will turn on and off every couple of seconds. This takes a lot of patience to complete, so take it slow and make your way across the gap. There is a big green force gem at the top of the screen if you feel daring. The main thing you want to do is hit the switch at the bottom-right corner, which will turn off the flames and bring bombs onto the screen. Head up and grab them, then head right a screen. There are a couple Dodongos on this screen; use the bombs like before to drop them in their mouths and defeat them. Afterwards, a Big Dodongo will appear. Normal Bombs are ineffective, so you will need to open one of the chests for the level 2 Bombs. Drop three Level 2 Bombs into its mouth to defeat it. Head to the next screen and destroy the eye barriers, collect your fairies and join me for the next stage, the Dark Cloud. |
 Heart Container #1 Heart Container #1
The first Heart Container can be found in Lake Hylia at the top of the waterfall. Enter the right side cave and use the Links to step on the switches, creating a bridge. Exit back outside and enter the middle cave. Follow the path to a chest containing the Heart Container. [more]  Heart Container #1 Heart Container #1
The first Heart Container can be found in Lake Hylia at the top of the waterfall. Enter the right side cave and use the Links to step on the switches, creating a bridge. Exit back outside and enter the middle cave. Follow the path to a chest containing the Heart Container. [more]  Heart Container #1 Heart Container #1
The first Heart Container can be found in Lake Hylia at the top of the waterfall. Enter the right side cave and use the Links to step on the switches, creating a bridge. Exit back outside and enter the middle cave. Follow the path to a chest containing the Heart Container. [more]  Big Dodongo Big Dodongo
Gohma are one-eyed spider-like enemies that quickly move across the ground. In some games they are mini-bosses or bosses, but in most of Four Swords Adventures they are simple enemies. They can only be defeated with a Bow, and the arrow must be shot through their large eye. [more] |
8.2 The Dark Cloud
|
|
|
Welcome to the second stage in this level, the Dark Cloud. As the name implies, this is a very dark and stormy cloud, unlike the one from the previous level. In this stage we will discover the Dark Mirror and find out where all the Shadow Links have been coming from.
Head to the right and defeat the two Vultures nearby. Hop on the small cloud that appears and head to the next screen. Continue right and enter this small area that will lead to a Game Boy Advance screen. Climb up the first ladder and grab the force gems to the right, then drop down and grab some more force gems below. Climb back up the second ladder, then the first ladder, and exit this GBA screen. Walk through this small area and into another GBA screen. Drop down to the right and collect the small force gem, then hop over onto the ladder. Grab the big green force gem in the chest to the left, then hop in the cannon to the right and shoot out of this area. Make sure you hold right on the control stick and dive into the breakable blocks below. Head through the door into the next GBA screen and break the pots to the right. Leave two Links on the two switches here, then bring the other two up the ladder. Break some more pots to the left and stand on the other two switches, causing a moveable cloud to appear outside. Grab the Bow to the right, then hop on the cloud outside and head to the next screen. Head right onto the next moveable cloud and look upwards. There are four eye switches that need to be hit with the Bow to progress further. Aim upwards and do your best to shoot these switches while you are moving around. Once you do, climb up one of the ladders and grab the force gems that dropped down. Climb back down to the bottom-right corner and head to the next screen. Enter the first door and climb up the ladder. Turn to the left and shoot an arrow out through the left door, hitting the switch outside and creating more ladders above. Turn to the right and exit out the upper left door. Drop down to the floor and shoot an arrow upwards, hitting another eye switch. Head into the bottom-right door and defeat the few enemies inside. Continue right to the next screen and climb up the ladder. Grab the Bombs and head back down the ladder, then head back another three screens to the first ladder we climbed in the first room. Take the top-right door and this time walk across the new platform. Defeat the Keese and climb up the ladders to the next screen. Head through the next door to get back outside. Bomb the squares of cracked blocks here and climb up the ladders to the left to the next screen. Shadow Link will appear once again, this time equipped with a Giant Bomb. Head to the left and into the cloud, then climb the ladder. Break the pots to the left and step on the switch to create a cannon outside. Once it's safe, head outside and use the cannon to reach the top-left cloud area. Head inside and break the pots here too, then step on another switch to create another cannon. Once it's safe again, hop out into the cannon on the left side of the screen and use it to hop onto the top cloud platform in the middle of the screen. Jump into the right side cannon and use it to reach the top-right door. Defeat the Castle Guard in here and climb up the ladder. Bomb the cracked wall and the top and head back outside. Walk across the cloud to the opposite side of the screen. Break the pots on the bottom level and leave three Links down here on top of the switches. Use the last Link to climb up the ladder and break the other two pots and stand on the last switch. Grab the 200 force gems in the chest, then head back outside and climb the ladders to the next screen. Use the portal above to reach the next part of this stage. A force-grabbing Wizzrobe will appear on the next screen. He can easily be defeated except if he appears on the clouds to the left or right, which you can't easily reach. Instead of trying to hit him with the sword, throw some bombs over and let them explode, defeating him. You can also try and throw a Link over there to collect the force gems he leaves behind. Head up to the next screen. Step on the gray switch and Hardhat Beetles will appear all over this screen. You must push them off the platform like usual. This may be rather difficult as there are many Beetles, but there is a lot of space to move around. Once you accomplish this, grab the force gems that are left behind and open the chest for a Moon Pearl. Head back south a screen and use the Moon Pearl to create a Moon Gate. Use a Cross formation to hit the four switches at the bottom-left and head back into the Light World. Grab one of the Hammers and head back north a screen. Hammer down the barriers on the right side and follow the pathway. Defeat the enemy and pound the stakes to the right, the head down the stairs along the pathway. Open the chest for a Heart Container, then head back up the stairs. Head down the stairs to the left this time. Follow the pathway and pound the stakes to the south, then pound some more to the left. Open the chest for a big green force gem, then follow the pathway to the right side of the screen. Head up more stairs and defeat the Castle Guard here. Follow the pathway north and pound the stakes at the top-right corner, then head north a screen. Ignore this screen for now and continue right. There is a heavy wind blowing on this screen that will continually push you back. Hit the switch above and the wind will temporarily die down, allowing you to run across the pathway. You must make it to the stairs on the other side before the wind starts blowing again. Once you do, grab the Slingshot inside and open the chest for a big green force gem. Head back to the stairs and hit this switch, causing the wind to die down again. Quickly run back across the pathway and head back left a screen. Hit the switch to the left and the electrical field nearby will die off. Stand on the platform to the south with all four Links and it will move across the gap. You must hit the switches along the bottom area with the Slingshot to cause the three other electrical fields to die down as well. On the left side, head up to the next screen. On this screen you will find four switches. Hit the one on the gap with the Slingshot and it will drop down a force gem. Hit the other three switches nearby and walk halfway across the upper platform. Hit the switch on the gap again and it will create a platform leading across. Grab the force gem and continue to the next screen. Open the chest here for the Big Key, then walk back left a screen. Hit the black switch to the north and then separate the Links. Use one Link to lift another, then throw him onto the second part of the lower pathway to the left. Have this Link hit the switch on the gap, then bring the Links together at the same spot (with one Link holding the Big Key). Use a Link to lift another and throw him on the stable platform to the left, then bring the Links together on that side. Head left a screen. Drop the Big Key and defeat the few enemies on this screen. Use the Big Key to open the large chest at the top, giving you another 1000 force gems. You can open all the chests on this screen except for the top-left chest and the second from the left chest on the bottom row. The contents of the chest range from 1 force gem to 200, along with a Heart Container and a Crystal Ball that may give you many different things. Make sure you grab the Moon Pearl as well, then open the chest at the top-right for a Blue Bracelet. Head right to the next screen. Back on this screen, use the Slingshot to hit the three switches on the left side, creating a pathway across. Walk to the other side and use the Moon Pearl on the next screen to create another Moon Gate. Hop into the Dark World and use the Moon Gate in the middle of screen. Head the only direction we can: up to the next screen. More Castle Guards will appear on this screen, along with two Chief Soldiers. Defeat them in any way you want (a formation works well), then grab the force gems that drop down. Head up to the next screen. Go down the stairs to the left and grab the Lamp. Walk back up the stairs and use the Lamp to light the two torches you can reach. Head down the right stairs now and grab the Bow. Head back up and stand behind the right torch. Use the Bow to shoot an arrow through the flames and upward to the next torches, lighting the right side column. Do the same for the left side and it will create a pathway. Break the pots on the bottom-left and bottom-right sides, then place two Links on the switches on each side, creating a force gem fountain. Now open the chests at the top-left and top-right for another 150 force gems. Head up to the next screen to face the stage boss: Shadow Link. Yes, Shadow Link is back yet again. This time, there is only one of him, so it should be easy, right? Wrong. After you almost defeat the Shadow Link more will appear out of the cloud. Try defeating these as well and soon Princess Zelda will comment on the what is producing all these Shadow Link, the Dark Mirror in the middle of the screen. She uses her power to stop the Shadow Links from coming, so quickly defeat the ones left on the screen. Princess Zelda will pull the Mirror out of the Cloud, effectively ending Shadow Link's presence in the game (finally!). Head up to the next screen and break the last eye barriers, collect the last fairies and join me for the final stage in the final level, the Palace of Winds. |
 Heart Container #1 Heart Container #1
The first Heart Container can be found in Lake Hylia at the top of the waterfall. Enter the right side cave and use the Links to step on the switches, creating a bridge. Exit back outside and enter the middle cave. Follow the path to a chest containing the Heart Container. [more]  Heart Container #2 Heart Container #2
The first Heart Container can be found in Lake Hylia at the top of the waterfall. Enter the right side cave and use the Links to step on the switches, creating a bridge. Exit back outside and enter the middle cave. Follow the path to a chest containing the Heart Container. [more] 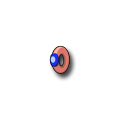 Blue Bracelet Blue Bracelet
The Blue Bracelet is an item found only once per level in only one of the stages of that level. This means the Bracelet can only be found eight times throughout the game, and its effects only last during the stage it was found, not for the entire level as one may hope. The Bracelet cuts all damage Link receives in half, making it a very useful defensive weapon. [more]  Heart Container #3 Heart Container #3
The first Heart Container can be found in Lake Hylia at the top of the waterfall. Enter the right side cave and use the Links to step on the switches, creating a bridge. Exit back outside and enter the middle cave. Follow the path to a chest containing the Heart Container. [more]  Dark Mirror Dark Mirror
The Blue Bracelet is an item found only once per level in only one of the stages of that level. This means the Bracelet can only be found eight times throughout the game, and its effects only last during the stage it was found, not for the entire level as one may hope. The Bracelet cuts all damage Link receives in half, making it a very useful defensive weapon. [more] |
8.3 Palace of Winds
|
|
|
|
Welcome to the third stage in this level and the final stage in the game, the Palace of Winds. This Palace is looks much like Ganon's Tower from A Link to the Past, and you will see many references to it. By the end of this stage we will have finished the game and restored peace to Hyrule.
Head into the Palace and drop off to the left side. Head left a screen and you will meet a regular Ball and Chain Trooper. Unfortunately, we do not have a Roc's Feather to use against this Trooper, making the battle much more difficult than as with previous incarnations. You can either choose to be aggressive and constantly run at the Trooper to try and attack him, or you can be reclusive and only attack every couple of seconds. Defeat the Trooper in whichever way you choose, then enter the rectangular area above. Hit the black switch inside and many force gems will drop down. Collect them, then push the third block from the right down and the first block from the right down. Push the second block from the right to the right and head back right a screen. Head right another screen and you'll find yet another Ball and Chain Trooper. Defeat this one as well, then break the rows of pots to the right. Create a Box formation and stand on the switches to reveal four chests on the platform above. Open them for another 355 force gems. Jump off the platform and head back left a screen then north a screen. Create a Box formation and step on the switch to cause many Stalfos and a regular Wizzrobe to appear. Defeat the Wizzrobe first (as it is most dangerous), then defeat the Stalfos as well. Head north to the next screen and walk up the stairs. To the upper-left is a lever; use a Long formation to pull it, bringing out Boomerangs and Bows. Grab one of the Boomerangs and head left to the next screen. To south and below the wall are two switches. Use the Boomerang to hit both of them, then head back right a room and grab the Bow. Reenter the left room again and head down the stairs to the left. To the right is a small gap with a long drop to the bottom. Near the bottom of the area is an eye switch along the right wall. To hit it, you will need to press A to prepare the Bow while standing up on the platform. Start falling down and attempt to shoot the eye before you hit the ground. This may take a few tries, but once you accomplish it, walk across the new path above that was created. You'll find another gap here with an eye switch that is on the ceiling. Prepare another Bow shot facing upwards, then drop down into the gap and shoot the switch. Climb back up the ladder and head right across the gap, and collect the force gems. Look upwards and you'll see two holes in the ceiling; fire arrow shots into these to hit the two eye switches in the main room. Head back out to the main room. Head north a room and you'll reach a maze. There are four eye switches in this room that need to be hit with the Bow. Unfortunately, they are often blocked by the maze barriers and can only be shot at from certain points in the room, making this rather difficult and annoying. Follow the path to the right and head upwards when you first can. Take a left and head south around the middle two rows of spikes. Take the south path and face left, then shoot the eye switch along the left wall to activate it. Walk back up to the middle spikes and head left, then take the path south to the eye switch we just activated. Before you walk near the eye switch, stand along the south wall near the bottom-left corner and shoot upwards to the eye switch on the north wall, activating it. Walk north until you are stopped by spikes, then head to the left. Follow the pathway to the top-left corner and open the chest for a Heart Container. Follow the path back to under the middle spikes, then walk upwards a tad so you are standing directly to the right of the top row of middle spikes. Shoot to the right and hit the third switch, then walk to the right a tad. Walk upwards a tad and head right, then face upwards and shoot the fourth eye switch. Walk upwards and follow the path to the top-right corner and open the chest for a big green force gem. Walk back left and upwards, then open the chests for a Moon Pearl and a Blue Bracelet. Exit to the screen to the south. Head right a screen and use the Moon Pearl to create a Moon Gate to the south. Grab one of the Boomerangs to the right and walk around the Moon Gate, then enter the bottom-left door. Continue left to the next screen and push both blocks to the right to create a Moon Gate. Separate the Links and use one to enter the Dark World. Use the Link to grab one of the Links in the Light World, and move him onto the middle platform. Place him on the switch and a connecting platform will appear, along with the right door opening back up. Use the Dark World Link to hop into the other Moon Gate to the left, then have the Link sitting on the switch shoot the black switch to the left. Bring all the Links together on the left side and head up to the next room. Open the two chests here for a small key and a Moon Pearl. Grab both of them, then head back south a room. Use the Moon Gates to reach the right side of the room, then head right another two rooms back to the main room of the dungeon. Head over to the right side and use the Moon Pearl to create a Moon Gate, then use the small key on the door nearby. Grab one of the Pegasus Boots, then look to the right. Near the door is a Bomb, but it has a fuse on it. Grab one, then quickly enter the room next to it. Look along the upper wall and you'll see a cracked part near the middle. Use the Bomb to blow it up and enter the room. Give the Pegasus Boots to the Great Fairy and she will upgrade them to the Level 2 Pegasus Boots. Head back south and walk to the right. You will need to use the Pegasus Boots to dash right, then dash up, then dash right, without hitting the ceiling above. This can be very difficult and may take a lot of time, so be patient. Once you make it, step on the switch and a big blue force gem will drop down. Use the Pegasus Boots to reach the other side, grab the force gem, and head up a screen. Walk right and head down the stairs above. To the left is another gap. When you drop down you will need dash to the left and over to a chest in a small crop in the wall. Drop down, then dash when you see an opening in the wall to the left. Keep dashing until you reach the chest, then open it for a big blue force gem. Walk down to the right. When you drop off this area, you will need to quickly dash to the left. Do so, and climb up the stairs to get back out. Open the two chests here for 40 force gems, then head down the next set of stairs. To reach the next ladder, you will need to dash more to the left. Soon though, you will reach a wall. Drop down for a little bit and you should land on a small outlet area. To the left is the ladder we need to reach, so you will need to drop down to the right, then quickly dash to the left and onto the ladder. This can be very difficult, so do your best to make it. Once you do, climb up the two ladders to get back out once again. Open two more chests for some more force gems, then enter the second staircase. Walk a little bit down the ladder, then dash to the left until you reach some more ladders. Move over to the third ladder from the right and drop down. You should land on a chest; open it for a Blue Bracelet. Look down and you'll see a door in this small block. You will need to dash back over to the ladder to the right, then head back up until you reach the top. Dash to the left again along the ceiling and stop on the ladders from before. Walk over to the fourth ladder from the right and drop down, then move the control stick right when you reach the door. Enter it to get back out for the final time. To make this room even more difficult, there are Blade Traps to the right moving across the gap. To make it across you will need to dash with the Pegasus Boots to the next small platform when the Blade Traps move out of the way. Dash to the right when the Blade Traps move up. A Wallmaster will appear, but he can be defeated with a single sword slash. Dash up to the next platform, then dash to the right when the Blade Traps move down. Turn to the right and dash across the gap when the Blade Traps move up. Open the chest here for a Moon Pearl and 300 force gems. Now push the third block from the right and the first block from the right downwards, then push the second block from the right to the right. Head down and to the left, then back south a screen. Head left a screen and walk down into the lower level of this screen. Use the Moon Pearl to create a Moon Gate on the right side, then grab the Magic Hammer and walk through the door to the bottom-right. Pound the two pegs here with the Hammer, then pound the floor to the right with a charged-up shot. This will bring spikes out of the floor, revealing the pathway you need to take. Continue to do this as you make your way across the path. Open the chest at the end for a big green force gem, then pound the last two pegs. Enter the door that opens to the south. Jump off the platform and pound all the pegs except for the top-right, middle-left and bottom-middle. Walk on the pathway along the left wall and down to a Game Boy Advance screen. Walk down to the south end and follow the pathway until you exit the GBA screen. Continue to follow the pathway and take a right once you reenter the GBA screen. Open the chest in the main screen for a Heart Container. Reenter the GBA screen and head south, then right and back up. Open the chest at the end of the path for 50 force gems. Head back out to the main screen and look to the right and you'll see a wall of blocks. Push the second block from the top and the fourth block from the top to the right, then push the third block from the top downwards. Enter the last pathway and open the last chest for the last Moon Pearl. Head back to the main screen of this Palace, the one with the three Moon Gates. Use the Moon Pearl on the bottom level of the room and grab the Bow. You will need to have a Link enter each Moon Gate and step on the switch in each area of the Dark World. Make sure to open the chests for more force gems as well. Once you have a Link on each switch, bring them together back in the main room and head north to the next room. There are two Hinox in this room and many spinners. Take your time here as there is only a small amount of room to move around in, and these Hinox are aggressive and take many hits to defeat. Grab the small key and head up to the next screen. There are three Gohmas on this screen across the gap. Defeat them with the Bow like before. I'd recommend focusing on one Gohma at a time, so you don't have multiple Gohmas firing three fireballs at once. Once you defeat them head right a room. Break the pots at the top of screen and hop in the hole under one of them. Open the chest to the left for a big green force gem, then climb up the ladder to the right and hop into the cannon. Shoot out of this area and hold down on the control stick, then dive into the gray platform in the middle of the screen. This will flip it over, allowing you to reach a new area. Head to the right and separate the Links. Use one Link to throw another across the gap, then connect the platforms. Climb up the ladder and throw another Link across another gap, then connect the platforms. Continue to do this across the platforms and drop down along the wall to the right. Dive into the gray blocks below and open the chest for 200 force gems. Throw another Link across this gap and open the chest here for a small key. Climb up the tall ladder and exit this screen. Head left a screen and use the small key on the small door along the left wall. Use the Bomb in here to break the blocks to the south, then open the chest for a Heart Container. Use another Bomb to break the blocks above, then use two bombs to break blocks on both sides of the pathway above. Grab another Bomb, then walk back outside and throw it across the gap. This should bomb open the left wall, revealing an entrance to the other side. Walk back inside the wall and head up the pathway. Step on the switch to the left and the door outside will open. Head right and walk down the pathway, then exit the wall area. Head up to the next room and break the pots for some more force gems. Break the final eye barriers and head up to face the Palace boss: Vaati. This is it, the semi-final battle between the evil mastermind Vaati and the Link(s). The battle with Vaati is actually fairly simple - especially the first part of it. Vaati will circle around the room with a vortex of wind beneath him. As long as you run away and stay away from him you won't take any damage, making him rarely harm you. Located around the room are four bombs that you can pick up. Pick up one of them and throw it into Vaati's vortex. It will climb higher and higher and eventually hit Vaati, damaging him and dropping force gems. Collect the force gems, then continue this process to complete the first stage. After being hit three times Vaati will momentarily disappear, then reappear without his vortex. Hop down into the hole in the middle of the room and you'll land in a cannon. The goal is to shoot out of the cannon and sword dive into Vaati once you reappear on the main screen. Wait until he goes near the middle square gap and then shoot out of the cannon. Move the Links so they are above Vaati, then dive into him. If you get it right you should hit him, damaging him further and dropping more force gems. Vaati will dive underground. Drop down below and use the ladders and platforms to reach wherever Vaati is floating around. Attack him with the sword and soon he will fly back up to the main room. Follow him back up using the right side ladder, then jump into the cannon again via the middle square gap. You will need to use the cannon again to jump dive into Vaati, although it is more difficult this time. Vaati will now avoid the middle gap more often, making it more difficult to hit him. Along with this, he will create a ring of orbs around him that will shoot across the screen after a couple of seconds. You can avoid this by jumping into the underground. Once Vaati floats over the gap, jump out of the cannon and attack him like before. Continue to do this until he is defeated. And that's it! Vaati is finally defeated. The Links will walk outside in pure glory, until the Palace of Winds starts crumbling down. The real final boss Ganon will then appear with words on screen, waiting for the Heroes to reach him. After escaping to the Tower of Winds, Princess Zelda will realize that there is more trouble afoot. This will start a lengthy part of the game where you will need to escape the Tower of Winds by slowly climbing down it. This can be rather annoying, as Princess Zelda will have to climb down each and every ladder to get to the floor, wasting a lot of time. Head down to the next screen via the stairs to the right. Drop down to the ground level and wait for Zelda to catch up, then walk down with her to the next level. Walk down the stairs and defeat the Stalfos in the middle of the screen, then enter the door here. Use a Cross formation to hit the four switches in this room, then head back out. Climb up to the chest in the top-right corner and open it for a big blue force gem. Climb down the stairs and defeat some more Stalfos, then head to the floor of this screen. Defeat some Castle Guards that appear, then head to the next screen. Drop down to the bottom-left and open the chest for some more force gems. Climb up the ladder to the right and use a Link to throw another across this gap. Break the pot here and step on the switch to create a ladder for Zelda, then open the chest for a big green force gem. Bring the Links together and drop down to the floor, then defeat some more enemies. Head south to the next screen. Drop down in the gap to the right then walk right a little bit and enter the door here. Grab one of the Roc's Feathers in this room and head back out to the main room. Climb up the ladder to the left and use the Roc's Feather to jump across the platforms near the ceiling. Enter the door at the end and hit the switch to reveal two chests. Open them for 100 force gems and a Blue Bracelet. Head back out. Head down to the floor and enter the door at the bottom-left corner. Open the chest for a big red force gem, then head up the stairs. Take the right path and exit back to the main screen. Break the pots to the right to create another path for Princess Zelda. Drop down off this path to the left and you should land on a block floating in the air. Jump onto another block to the right and step on another switch to complete Zelda's path. Defeat the enemies that appear surrounding Zelda, then head down the ladders to the bottom-right. The next pathway is very straightforward. Follow the path and grab the Bow, then use it to kill the two Gohmas. Grab the Roc's Feather again and jump up to the chest along the right wall. Open it for the final big green force gem. Follow the pathway to the bottom-left corner and a Ball and Chain Trooper will appear. I would suggest being aggressive with this one, as it won't have a chance to attack. Once you defeat it, continue and you'll reach the bottom of the Tower. The floor will crumble below the Links and Zelda, dropping them to a lower level of the Tower. The dark cloud will appear from before, capturing Princess Zelda and taking her away. Ganon will appear out of the cloud, ready to fight. This is the final boss of the game and the true dark power: Ganon. The first phase of this battle is actually rather simplistic. At its core, it simply involves hitting Ganon with the sword hundreds of times. You can make this easier and faster by creating a Wide formation and using the Roc's Feather to jump dive into Ganon, multiplying the damage. If you can't accomplish this, you can always just use the Wide formation and attack with four Links at once. Ganon has a few attacks, though most are fairly easy to dodge. The first is a Lightning attack. Ganon will shoot Lightning out of the Trident to four different points in the room. The four points are usually near each other, so you can move to the other side of the room to dodge it. After taking enough hits, Ganon will also throw his Trident around the room, producing a blue flame that will damage you. This can also be fairly easy to dodge as well, and you can once again move to the other side of the room. At times, a Moon Gate will also appear on the floor. You can enter it and defeat the Stalfos here that would normally attack you in the Light World. Defeat the Big Dark Stalfos as well and no other enemies will attack you. After taking enough hits, Ganon will disappear for a little while. Princess Zelda will reappear, and will produce a Light Orb. To finish Ganon off, we will need to use the Bow and shoot a Light Orb into Ganon. Unfortunately, the Light Orb takes a while to charge, and Ganon won't simply wait around for it to do so. We will need to deflect Ganon's attacks back at him to protect Zelda while the Orb charges. Once Ganon reappears, create a Wide formation. Stand in front of Princess Zelda and move where she does, constantly standing in front of her. When Ganon sends out an orb attack, deflect whichever orbs will hit Princess Zelda back at him. Continue to do this until the orb charges and Ganon will be temporarily stunned. The Light Orb will start to circle around him, so use the Bow to shoot the Light Orb into him. Once you do this, Princess Zelda and the other Maidens will use their powers to seal Ganon within the Four Sword. With this, the game is completed and Hyrule is saved! Congratulations on beating the game! |
 Heart Container #1 Heart Container #1
The first Heart Container can be found in Lake Hylia at the top of the waterfall. Enter the right side cave and use the Links to step on the switches, creating a bridge. Exit back outside and enter the middle cave. Follow the path to a chest containing the Heart Container. [more]  Blue Bracelet #1 Blue Bracelet #1
The Blue Bracelet is an item found only once per level in only one of the stages of that level. This means the Bracelet can only be found eight times throughout the game, and its effects only last during the stage it was found, not for the entire level as one may hope. The Bracelet cuts all damage Link receives in half, making it a very useful defensive weapon. [more]  Blue Bracelet #2 Blue Bracelet #2
The Blue Bracelet is an item found only once per level in only one of the stages of that level. This means the Bracelet can only be found eight times throughout the game, and its effects only last during the stage it was found, not for the entire level as one may hope. The Bracelet cuts all damage Link receives in half, making it a very useful defensive weapon. [more]  Heart Container #2 Heart Container #2
The first Heart Container can be found in Lake Hylia at the top of the waterfall. Enter the right side cave and use the Links to step on the switches, creating a bridge. Exit back outside and enter the middle cave. Follow the path to a chest containing the Heart Container. [more]  Heart Container #3 Heart Container #3
The first Heart Container can be found in Lake Hylia at the top of the waterfall. Enter the right side cave and use the Links to step on the switches, creating a bridge. Exit back outside and enter the middle cave. Follow the path to a chest containing the Heart Container. [more]  Vaati Vaati
Gohma are one-eyed spider-like enemies that quickly move across the ground. In some games they are mini-bosses or bosses, but in most of Four Swords Adventures they are simple enemies. They can only be defeated with a Bow, and the arrow must be shot through their large eye. [more]  Blue Bracelet #3 Blue Bracelet #3
The Blue Bracelet is an item found only once per level in only one of the stages of that level. This means the Bracelet can only be found eight times throughout the game, and its effects only last during the stage it was found, not for the entire level as one may hope. The Bracelet cuts all damage Link receives in half, making it a very useful defensive weapon. [more] 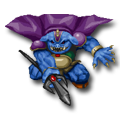 Ganon Ganon
Gohma are one-eyed spider-like enemies that quickly move across the ground. In some games they are mini-bosses or bosses, but in most of Four Swords Adventures they are simple enemies. They can only be defeated with a Bow, and the arrow must be shot through their large eye. [more] |
| Four Swords Adventures Site Walkthrough | |
|
Chapter 1 - Whereabouts of the Wind Chapter 2 - Eastern Hyrule Chapter 3 - Death Mountain Chapter 4 - Near the Fields Chapter 5 - The Dark World Chapter 6 - The Desert of Doubt Chapter 7 - Frozen Hyrule
| |
| � Previous | Index � |