- Chapter 1 – Mercay Island
- Chapter 2 – Temple of Fire
- Chapter 3 – Ocean King Part II
- Chapter 4 – Temple of Wind
- Chapter 5 – Ocean King Part III
- Chapter 6 – Temple of Courage
- Chapter 7 – Ghost Ship
- Chapter 8 – Ocean King Part IV
- Chapter 9 – Goron Temple
- Chapter 10 – Temple of Ice
- Chapter 11 – Ocean King Part V
- Chapter 12 – Mutoh’s Temple
- Chapter 13 – Ocean King Part VI
9.1 Southeast Quadrant
The entirety of section 9.1 is optional. If you’d like to progress in the main quest, jump ahead to section 9.2 and head directly to Goron Island.
Once you arrive in the Southeastern Quadrant, there is a grouping of three Pirate Ships. Sail towards them and allow the larger ship with a sail to get really close to you. The Miniblins on that ship will ambush you and jump on board your vessel. Defeat all of the Miniblins that appear and Linebeck will reward you with a Courage Gem.Optional: Courage Gem #8


There are two Golden Frog locations in this quadrant. The first is located almost directly in the center of the quadrant, just east of Goron Island, the largest island in the quadrant. This will allow quick access to the uncharted Dee Ess Island to the south and is a central location of the quadrant. The next Golden Frog can be found near the north end of the quadrant, just northwest of the Isle of Frost. This allows quick access to the uncharted Harrow Island, the Isle of Frost, as well as being in close proximity to the Northeast Quadrant once we journey there.Optional: Southeast Golden Frogs


The Southeast Quadrant also has its own Traveler’s Ship. If you make your way over, you will find the Ho Ho Tribe. Each day they are seeking a specific treasure and you can get a much better deal by selling them treasure instead of selling it to the Treasure Teller. The item they are seeking changes each day after midnight on the internal clock of the console. These guys will also pay top-dollar for the elusive Regal Rings. It’s a good idea to regularly visit the ship and trade in all of the corresponding treasure they are seeking for that day.Optional: Ho Ho Tribe


There is an uncharted island at the northwest portion of the quadrant. Sail just north of the three rocks on your map to find Harrow Island. This island serves as a mini-game of sorts. Once you arrive, strike the statue and pay it 50 rupees to play. Ride the geyser to the main part of the island and you’ll find a large sandy area. You can dig away with your shovel and you’ll find Blue, Red, and Big Green Rupees. However, you will also encounter Rupoors and Big Rupoors, which actually take away rupees from you. It is the luck of the draw, but you can dig until you get 10 items. After you’ve dug up 10 things, you have to end the game and return to Linebeck’s Ship. While you can keep digging, you will be very harshly penalized. You will have to pay 100 rupees at first, and then lose ALL of your rupees if you keep digging. Furthermore, the cost to play will then be 300 rupees, so stop digging! While digging, you may come across Lucky Lee. He offers to play a game with Link, costing him 50 rupees. The rewards are either 40, 150, or 300 rupees, so always choose to play as chances are, you will make money. While we can stay here and keep digging, we will be returning here a bit later. As of right now there are two Treasure Maps that we can dig up, but after we progress later in the game, there will be two additional ones. You can get these two now, or just wait for all four of them to be available at once.Optional: Harrow Island


Located at Harrow Island, the Treasure Map is randomly found while digging with the shovel. If you don’t get it after searching 10 times, just return to Linebeck, set sail, and then dock at Harrow Island to try again.Optional: Treasure Map #14


Also located at Harrow Island, the Treasure Map is randomly found while digging. Just keep at it until you have found the treasure map.Optional: Treasure Map #15

There is a second uncharted island in the southeast quadrant, located southeast of Goron Island. As its name suggests, it is in the shape of the Nintendo DS. If you have yet to go to Goron Island, this will be the first encounter with the race. They are starting a mini-game here, but it has yet to open. Fortunately, there are still some other goodies to collect. At the upper side of the map, there are some rocks and Rock ChuChus. Defeat them all and then whip out your shovel. Dig up all the soft soil spots. While you’ll occasionally dig up a beehive, some Rope enemies, and some small amounts of rupees, the big reward here are large rupees. There are two Big Green Rupees and even a Big Red Rupees, so go ahead and dig up everything you can.Optional: Dee Ess Island


At the west side of Dee Ess Island, you will find a small statue and if you smack it, it tells you that something is buried under the lower screen’s Menu button. The solution to this puzzle is to understand the shape of the island. The Menu Button on the DS screen is located at the bottom-left of the lower screen. Drop down into the pit at the south end of the island and use your shovel to dig up the bottom-left most spot to uncover a Courage Gem.Optional: Courage Gem #9

At the north end of Dee Ess Island, drop down into the pit and you’ll encounter two enemy Eye Brutes. To defeat them, shoot their eye with an arrow to stun them and then deliver some sword slashes. These enemies have quite a bit of health and they’ll recover and try to strike you, so don’t get too greedy with your sword slashes. Defeat both of them and open the treasure chest that appears to get a Courage Gem.Optional: Courage Gem #10


Now that you have collected 10 Courage Gems, you can travel to Spirit Island and present them to the Spirit Shrine. This will upgrade Ciela, the Spirit of Courage. This will allow Link to shoot a a thin beam blade attack that travels across the screen.Optional: Spirit Island Upgrade

There were a few Treasure Maps we collected in the previous chapter, and a couple of those corresponding Sunken Treasures are in the Southeast Quadrant. If you haven’t already, be sure to uncover these Sunken Treasures for some goodies. Sunken Treasure #11 – Northwest Quadrant – Just north of the Isle of Gust, the treasure contains one minute of Sand of Hours. Sunken Treasure #12 – Southeast Quadrant – North of Dee Ess Island, the treasure contains a ship part. Sunken Treasure #13 – Southeast Quadrant – East of Harrow Island, the treasure contains a ship part. Sunken Treasure #14 – Southeast Quadrant – Northwest of Goron Island, the treasure contains a ship part. Sunken Treasure #15 – Southeast Quadrant – West of Goron Island, the treasure contains a ship part.Optional: Sunken Treasure
9.2 Goron Island
We want to make our way over to Goron Island, which is the large island at the southwest portion of this region. Once you draw near a giant monster will leap out of the sea and will start circling around you. This sea creature has three eyes on each side of its body. You need to take aim with your cannon and shoot the eyes. After a single hit the an eye will turn pink, and after hitting it a second time, it will close for good.
The sea monster will occasionally launch yellow power balls towards you. Shoot them with your cannon so you do not take damage. The creature will also unleash eyeball monsters, so you should take them out as soon as possible. The monster will also come down to the sea surface and charge right at you, which is an attack you can’t avoid. Just keep hitting its projectiles when it attacks and then hit the eyes when there is an opening until the enemy has been defeated.


Once you arrive at Goron Island, you want to navigate the entirety of the island, speaking with every Goron that you can find. This will be a requirement in order to progress with the story, so be sure to talk to all Gorons you walk by, as well as any Gorons that are inside of the homes. You can also stop by the Goron Island Shop at the southwest corner of the island to purchase some goodies.


One of the Gorons is located directly north of the harbor and he is scared of the monsters that are on the higher cliff. You can resolve his fear and get a nice reward if you’d like.
Next to the scared Goron, use the shovel to dig up a wind geyser. From here shoot arrows at the Yellow ChuChu across the way. With all three of them defeated, the Goron will reward you with a Treasure Map.Optional: Treasure Map #16


Just northeast of the harbor you will come across a sign and there is a Goron across the water. Shout or simply blow into the microphone to get the Goron’s attention and he will extend the bridge. Continue speaking with all of the Gorons on this side of the island, including the Goron that blocks your way at the east end of the island. After you have spoken with all the Gorons, Ciela will make note that you’ve talked to everybody and that it is now time to speak with the Goron Elder.


Biggoron can be found at one of the homes at the east side of the island. Just south of his home, there is a soft soil spot where you can dig up a red rupee if you’d like. Biggoron will only recognize Link as a member of the Goron tribe if he can successfully complete a quiz. Fork over 20 rupees to take the quiz and answer the questions accurately. There are 10 questions pertaining to Goron Island, as well as 2 questions pertaining specifically to the quiz.


How many Gorons live on this island? – 14
How many homes are on this island? – 6
How many Gorons are in their homes right now? – 7
How many Gorons are outside right now? – 7
Of those Gorons outside, how many are adults? – 4
How many Goron Children are on the island? – 6
How many rocks are in this home? – 3
The Goron at this spot! What is he staring at? – Ship
What color were the odd creatures on the cliff? – Yellow
What is on this spot? – Chest
Easy one, stranger! What number question is this?! – 4 (If this question is asked, it will always be the 4th question)
How many Rupees have you won so far? Easy! – 46 Rupees (If this question is asked, it will always be the 5th question, which means you have collected 46 rupees)
After you have successfully answered all six of Biggoron’s questions, he will reward you with a Wisdom Gem.Wisdom Gem #11


After completing the quiz, speak with the Elder’s son, Gongoron, who will guide you to the temple. He runs off and you have to go and find him. He is back at the far west end of the island, so you’ll have to do some backtracking. You can talk to some of the other Gorons to get some hints about his whereabouts, but otherwise just walk to the west end of the island and you’ll eventually find him on a higher ledge. Gongoron then jumps off the ledge and runs off once again. Now make your way to the far east end of the island to find Gongoron again. You are now able to head up as the Goron will now let you pass.


There is a nearby bomb flower with two cracked walls. This whole maze requires you to use bombs or bomb flowers to blast open pathways. If you take the path to the left, it leads to an acorn that you can continuously break to fill up your bombs. Additionally, it leads to a switch that will eventually allow us to collect a Power Gem. The main path is on the right side, so blast away at a series of cracked walls.


Once you reach the north end of the maze, you can walk all the west to find a treasure chest with a Big Green Rupee. The last wall to be bombed is not clearly marked, but on the north side of the wall, you can see the symbol on the floor. Drop a bomb to blast it open and then run off to the west.
While going through the maze, take the first left pathway that leads to a floor switch, causing nearby spikes to disappear. After making it through the maze, re-enter it from the west and open the treasure chest to get the Power Gem.Power Gem #12


Toss bombs at the enemy Like-Like here to defeat it and then climb up the steps on the left. You can step on the nearby switch to extend a bridge, making it easier to reach this part of the island. Once you are prepared, go ahead and enter the Goron Temple.


9.3 Goron Temple
Run to the right and try to avoid the Blue ChuChus and Beamos statues. You will come to a floor switch that will lower the nearby spikes, but they will come back as soon as you step off the switch. Grab hold of the nearby Armos Statue and pull it so that it sits on the switch, causing the spikes to remain lowered.


Run ahead and you’ll find another Armos Statue, and this one will activate once you get close to it. Toss a bomb to defeat the enemy and then push it to the north so that it sits on top of the switch. This will cause the door on the right side of the room to open up, so run on through.
Defeat another Armos Statue here and push it on the floor switch. This will cause a nearby bridge to appear. Pull out your shovel and dig up the soft spot in the ground to create a wind geyser. Ride the geyser up and run across the bridge to the left.


Just below the bridge in the quicksand there is a switch. Grab the bomb flower that is near the bridge and toss it down to the floor below so that it activates the switch. Then quickly run to the right and open the treasure chest here to get the Treasure Map.Optional: Treasure Map #17


At the left side of the room there are two Armos Statues. Defeat them with bombs and the nearby door will open. In the next area, walk to the far right and pull out your bow and arrow. If you aim an arrow up and to the right, you will find an eye switch off in the distance. Shoot it to cause a nearby treasure chest to appear. Open it up to get a red rupee. Step on the nearby switch, causing the spikes to drop down, allowing for quick access to the entrance of the Temple.


There is a cracked wall to the left and if you blow it up with a bomb it will take you to a small room that has an acorn where you can replenish bombs. However, you can see that there is a secret path just to the right. Return to the previous room and this time place a bomb two pillars to the right, revealing the secret passage. Run through and then head down the steps to get to the lower floor.
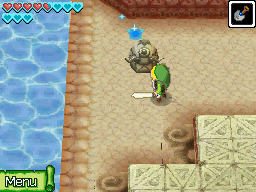
Defeat the two Fire Bubbles that appear and make your way around the room. At the northeast corner of the room you’ll reunite with Gongoron. After talking with him, you’ll get ambushed by an Eye Brute. Shoot it with an arrow and then deliver sword slashes. Repeat this process until the enemy has been defeated. Once defeated you will now be able to switch between controlling Gongoron and Link. Just tap the icon on the touch screen to make the change.


Control Gongoron and make your way to the pile of rocks to the south. There a few Rock ChuChus underneath some of the rocks. Simply tap them and Gongoron will launch his body at them. Defeat all of the Rock ChuChus and the spikes near Link will disappear.


Take control of Link and cross the lowered spikes to find a pair of Like-Likes. Use Bombs or Arrows to defeat both of them and the spikes will lower back by Gongoron. With Link, run south and step on the switch. Now take control of Gongoron and roll across the gap. Gongoron will automatically jump. Step on the floor switch here and with both characters stepping on switches, a large treasure chest will appear. Run over with Link and open it to get the Bombchus.


Take control of Gongoron and battle with the Eye Slugs at the southeast corner of the room. Once all of them have been defeated, the door back at the west side of the room will open up. Take control of Link and head through the opened door to battle with more Eye Slugs. Get rid of them all and open the treasure chest to get a common treasure, also lowering the nearby spikes.


Pull out your Bombchus and trace a path through the small hole and towards the nearby switch. Doing so will cause the nearby spikes to be lowered. It also triggers a scene where Gongoron sneaks through a small hole to another part of the dungeon. Run to the left and head up the stairs to get back up to Floor 1F.
Defeat the enemy ChuChu here and break the acorn if you need more Bombchus. Send a Bombchu through the small hole nearby, hitting the switch. This will cause a bridge to appear, allowing for quick access to the entrance of the Temple. Return down the steps to Floor B1, and then head down the next set of stairs to reach Floor B2.


Defeat the Like-Like and then lift the nearby rock. Defeat the Rock ChuChu in this area and walk over to the switch at the north end of the room. The goal here is to hit this switch, along with the one that is just to the right at the exact same time. In order to do this, you will need to stand next to the switch on the left and from there, trace a pathway with a Bombchu through the small holes to the switch on the right. Right when the Bombchu hits the switch, swing your sword to hit the other switch. With both switches hit at the same time, the nearby spikes will be lowered and you can progress down to the next floor.


Run around the quicksand and defeat all of the Miniblins that are located here. Open the treasure chest that appears to get a red rupee. At the northwest part of the room there is a switch along with two sets of colored blocks. Lower the red blocks and then trace a path with a Bombchu heading through the small hole, past the red blocks, and then past the blue blocks towards the switch. Let the Bombchu travel and once it passes the lowered red blocks, slash the switch nearby to lower the blue blocks. This will allow the Bombchu to hit the switch, causing the spikes in the room to lower.


Run to the northeast part of the room and you’ll find that there are four Armos Statues that will activate as you draw near. Use bombs to defeat them and then push each of the four statues onto the corresponding floor switches. This will cause the nearby spikes to lower. Run to the south end of the room and climb up the steps.


Once you arrive back on Floor B2, walk to the right and fight off the two Eye Brutes. Continue all the way to the northeast part of the room, defeat the Slime and ChuChu that appear. There are some spikes blocking your way and the switch that we just walked by controls them. However, the spikes will only stay lowered for a short amount of time. Stand next to them and send a Bombchu towards the switch. Once you hit it, quickly run past the spikes.


At the northwest corner of the room there are two crystal switches across the quicksand. However, this area is littered with rocks and Eye Slugs. Get rid of the nearby Eye Slugs using your sword and arrows. The goal is to launch some Bombchus across the sand and hit both of the switches. It may take a few tries as the rocks and slugs could get in the way. With both switches are hit, a large treasure chest will appear back to the right. If you defeat all of the Eye Slugs here, a treasure chest will appear nearby containing a random treasure.


The spikes at the northeast corner have come back up. Stand next to them and trace a path for a Bombchu across the quicksand to hit the switch. Run past the spikes and quickly run over to the treasure chest to get the Big Key. Return to the staircase at the south end of the room to get back up to Floor B3. From here, use the key on the large lock and head down the staircase to get to Floor B4.


Break the pots and the acorn here to fill up on some goodies. Be sure to examine the nearby tablet to create a warp point back to the entrance of the temple. Once you are ready, head up through the passage to take on the temple boss.
A river of quicksand prevents you from fighting Dongorongo, but luckily our Goron pal Gongoron has appeared to assist us. Take control of Gongoron and roll around the boss. It will shoot three fireballs at you, so be sure to dodge them. During this battle Eye Slugs will appear and some of them will even go and attack Link. If this happens, Ciela will call out to you and you should quickly take control of Link to get rid of the Eye Slugs. You can see where they are at all times as they are indicated by skulls on the map.


The key to defeating the boss is to quickly roll around so that you can jump and attack the mid-section of the boss. Dongorongo will occasionally stop shooting fireballs and will try to ram right into Gongoron. This leaves it stunned momentarily, allowing Gongoron to attack its mid-section, dealing damage. After a number of hits, the boss will fall to the ground. Quickly take control of Link and whip out your Bombchus. Trace a path so that a Bombchu leads right into the mouth of Dongorongo, causing an explosion and dealing more damage. Repeat this process until you’ve hit Dongorongo with three Bombchus.


After three hits, Dongorongo will drop to the ground and the door ahead will open. Gongoron runs ahead to get the Pure Metal and a bridge will appear, allowing Link to cross. However, the battle is not quite over as once Link makes it across, the boss will spring back to life.
The boss will still spin around, shooting fireballs out towards Link. Occasionally, Dongorongo will begin to inhale some air, preparing to unleash a much larger fire attack. While it is inhaling, grab a bomb and toss it at the boss. Dongorongo will inhale the bomb and when it explodes, the boss will be stunned. Run over and slash away at the blue weak point on its back. Repeat this for a few cycles until Dongorongo has been defeated.


Link will collect two more minutes of Sands of Hours. Open the treasure chest to get the Heart Container and then progress onward to the next room. Speak with Gongoron and then collect the first Pure Metal, Crimsonine. Step into the warp portal to exit the temple.


9.4 Post-Temple Goodies
Before you are allowed to leave the island, you must return to the Goron Elder. Make your way over to his house at the east side of town and speak to him. He will allow you to keep the Pure Metal and will also reward you with 200 rupees!
At this point you can leave the island and progress onward to Chapter 10 to continue with the main quest. However, there are several optional goodies for us to collect now that we have the Bombchus.
Make your way to the entrance of the Maze at the northeast portion of Goron Island. If you take the left pathway, you’ll come across a small hole where you can send a Bombchu through. Trace a path so the Bombchu hits the switch. This will cause a treasure chest to appear at the northeast corner of the island. It will only appear for a few moments, so quickly run on over and open the treasure chest in time.
Optional: Treasure Map #18


Before leaving Goron Island, make a stop at the Goron Shop, located at the southwest part of the island. You can purchase a Bombchu Bag upgrade, which costs 1,000 rupees. This will allow you to carry up to 20 Bombchus.Optional: Bombchu Bag Upgrade #1


After purchasing both the Quiver Upgrade and Bombchu Upgrade from one of the stores, a valuable Heart Container becomes available for sale. You can purchase this Heart Container for 2,000 Rupees and it is available at any of the shops at Mercay Island, Molida Island, or Goron Island. If you don’t have enough rupees, be sure to sell off some treasure or ship parts at the Treasure Teller on Mercay Island.Optional: Heart Container #10


After completing the Goron Temple, you will soon get a letter in the mail from Gongoron. You will have to close your game and turn your console back on to trigger this event to happen. Gongoron mentions he has gotten part-time job at a Southeastern Quadrant isle, but he includes a Courage Gem as a gift.
Optional: Courage Gem #11

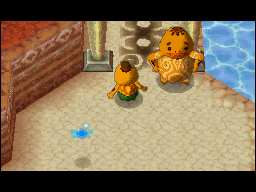
After getting the letter in the mail from Gongoron. Set sail for Dee Ess Island, located southeast of Goron Island. Drop down into the pit at the south end of the island and speak with the Goron here. Fork over 50 rupees to play the Goron Game. In this mini-game you will take control of Gongoron, rolling around Dee Ess Island, hitting all of the targets along the way. This eventually leads to the pit at the north end of the island where you will cross the finish line. The score to beat is 35 seconds, but you will get some rewards even if you don’t hit that mark. Over 45 Seconds – Blue or Red Rupee Just memorize the map, where the targets are, and try not to roll into a wall. It’s a rather fun mini-game, so even if it takes a few tries, it shouldn’t give you too hard of a time.Optional: Bombchu Bag Upgrade #2


Between 35-45 Seconds – Blue, Red, or Big Green Rupee
Under 35 Seconds – Bombchu Bag Upgrade. (Random Ship Part, Random Treasure, or Big Red Rupee on subsequent wins).
There were three Treasure Maps that we collected while at Goron Island and we can now collect those corresponding Sunken Treasures. Sunken Treasure #16 – Southeast Quadrant – Northeast of Goron Island, the treasure contains a ship part.Optional: Sunken Treasure
Sunken Treasure #17 – Southeast Quadrant – South of the Isle of Frost, the treasure contains a ship part.
Sunken Treasure #18 – Southwest Quadrant – South of Cannon Island, the treasure contains a ship part.
- Chapter 1 – Mercay Island
- Chapter 2 – Temple of Fire
- Chapter 3 – Ocean King Part II
- Chapter 4 – Temple of Wind
- Chapter 5 – Ocean King Part III
- Chapter 6 – Temple of Courage
- Chapter 7 – Ghost Ship
- Chapter 8 – Ocean King Part IV
- Chapter 9 – Goron Temple
- Chapter 10 – Temple of Ice
- Chapter 11 – Ocean King Part V
- Chapter 12 – Mutoh’s Temple
- Chapter 13 – Ocean King Part VI
