- Chapter 1 – First Three Days
- Chapter 2 – Southern Swamp
- Chapter 3 – Woodfall Temple
- Chapter 4 – Collection
- Chapter 5 – Snowhead
- Chapter 6 – Snowhead Temple
- Chapter 7 – Spring, Romani Ranch, Ikana Graveyard
- Chapter 8 – Great Bay & Zora Cape
- Chapter 9 – Great Bay Temple
- Chapter 10 – Ikana Canyon
- Chapter 11 – Well & Ikana Castle
- Chapter 12 – Stone Tower Temple
- Chapter 13 – The Moon
2.1 Item Collection #1 - (OPTIONAL)
NOTE: Everything in this section is completely optional. To continue with the main quest, skip to 2.2 – Southern Swamp.

As you exit the Clock Tower with your newly acquired Deku Mask, Tatl will tell you to head through the southern gate to reach Southern Swamp, the next area you’ll be able to explore. Before doing this, however, there are actually a ton of goodies that you can now collect. If you’d like to do so, hang around for this next section, and if not, skip ahead to the next one to venture to the Southern Swamp.
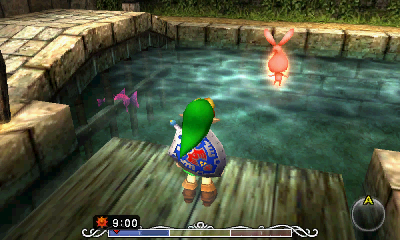
If you remember from earlier, the Great Fairy of Magic in North Clock Town told you to come back to her if you returned to your old self. You can do this, but remember, because you’ve played the Song of Time, everything has started over again. This means you’ll have to find the Stray Fairy and bring it to her in order to piece her back together again. During the day, it’s located in the Laundry Pool, hovering over the water. At night, it can be found in East Clock Town floating around in the middle of the square (use the Deku Flower to reach it).
Once you have it, return to North Clock Town and enter the Fairy Fountain on the left. She’ll thank you by giving you the Great Fairy’s Mask, which helps you to find Stray Fairies and even makes them fly to you if they’re able. It may sound a little silly to you at this point, but as you’ll find out soon enough, this is actually one of the most useful masks in the game!


While you were running around in North Clock Town as a Deku Scrub, you were probably dying to get the Piece of Heart in the branches of a tree near the slide. Well, now that you have your Hylian Form back, you can! Climb up the… pillar things… next to the slide and use them to get on top of it (seems kinda dangerous and not very kid-friendly… don’t slides usually have a ladder or steps or something?) then jump into the tree to claim your prize.


NOTE: If you are playing the 3DS version, you already have the Bombers’ Notebook, but if you have the N64 version, you’ll need to complete this quest to get it. Even if you have the 3DS version, however, you will need to get the Title Deed from this quest once again to get an optional Piece of Heart.
In the last chapter, you played hide & seek with the Bombers. For successfully catching them all, you learned their secret code, which you should’ve written down on a slip of paper. If you did not do this (and don’t remember it), you’ll have to play with them again in order to learn it. It’s random for each save file, so you cannot simply look it up.
Speak with the Bomber in the yellowish orange cap in East Clock Town to access the sewers area leading to the Astral Observatory. Just like you did in the last chapter, go through here, killing or avoiding the Skulltula, popping the balloon with a bubble (while wearing the Deku Mask), looking through the telescope at Skull Kid and finally get another Moon’s Tear. With that in hand, return to Clock Town.


When you exit the sewers, make sure you AREN’T wearing the Deku Mask! This causes Jim, the leader of the Bombers, to hail you down and explain that you’re pretty amazing for knowing their password without being a member and all, so he’ll then invite you to their gang by giving you, ta-da, the Bombers’ Notebook! Apparently, this group of kids is all about helping people, and this notebook will help you accomplish the many side quests that are found in this game. By completing different portions of quests, you will get stickers in the notebook that you can view by pressing Start.
The Bombers are your first entry. For learning their code, either by playing with them again or by entering their hideout, you will have completed their entry. That wasn’t so hard, was it? All of the other entries give you all sorts of goodies like Pieces of Heart or items. With that in hand, let’s find some of those wayward souls, shall we?
One of the entries you’ll be doing here in a bit requires paper (either a Title Deed or one of the letters, which haven’t been dealt with yet). If you went to the Astral Observatory, you got the Moon’s Tear, which you can now give to the Business Scrub in South Clock Town. Simply approach the big Yellow Deku Flower to make him appear and speak with him to trade for the Land Title Deed (again). You’ll use this in a little while, so just hang on to it for now.
The next entry for the Bombers’ Notebook (which will eventually net you two cool items) will take place at 12am on the First Night. NOTE: If you are playing the 3DS version of the game, you can play the Song of Double Time and skip directly ahead to 11pm on the first night. However, you’ll still want to snag the Adult Wallet sooner, rather than later. If you are playing the N64 version, you’ll have to stall for some time.
At this point, it’s probably somewhere between 12pm and 6pm, so you’ll have some time to burn. As long as you’re waiting, you should go out into Termina Field to collect rupees. Now that you are in your Hylian form, you can speak with the guards at any of the exits who will notice your sword after a moment and allow you to pass. At this point, you can only hold 99 rupees at a time, so whenever you get to about 80 or so, return to Clock Town and put your rupees in the bank, then go back to hunting rupees. Here is the recommended route:
NOTE: There is a large bird, known as a Takkuri at the entrance to Milk Road, at the southwest part of Termina Field. If you defeat this bird, you can instantly get 200 rupees. However, it is quite difficult and has a ton of health. Plus, it steals your items from you if it attacks! Experienced players can try to defeat it now, but you should just ignore this enemy for now.
1. Red Line – Start from the south exit of Clock Town, going to the southeast, up the ramp area towards the Astral Observatory. Slash the circles of bushes along the way to get rupees and kill ChuChus that get in your way. You should get about 20+ rupees doing this.
2. Orange Line – Right next to the Astral Observatory is a dude in a tree grabbing at something. Use A to roll into the tree, knocking down the guy and the 40 rupees that he was trying to get for himself. Collect them and go back to the south.
3. Yellow Line – In the high grass to the far south, there’s a chest in the corner near some Deku Babas. Open it to get 20 rupees.
4. Green Line – Work your way back towards Clock Town along the east side, slashing bushes as you go, getting another 20-ish rupees.
5. Teal Line – You should have about 90 rupees at this point. Enter West Clock Town and put your rupees in the bank. Remember that if you are playing the 3DS version, the bank is by the Clock Tower.
6. Light Blue Line – Go through the west exit again and you’ll see some fountains here at the top of these steps leading down into the sandy area. Climb into each fountain itself to get a total of 10 rupees.
7. Dark Blue Line – Work your way north along this upper ledge, slashing bushes as you go, getting 20-ish rupees.
8. Purple Line – In the northern, snowy area, take the ramp down and go around to find a "song" up against the wall. Turn away from it and use your Ocarina to see it behind Link. Position yourself so you can at least see most of it (but still close enough that it’ll work) and play the song back to it. If you do it successfully, it’ll reward you with varying amounts of rupees between 3 and 60.
9. Pink Line – Continue working your way clockwise around Termina Field, slashing bushes until you have a total of about 80+ rupees. Enter Clock Town again and turn ’em in to the bank.
If you put money in the bank during the first three day cycle, you should have close to 200 rupees in total at this point. There is also an easy 100 rupees to earn right here in Clock Town, so run over to where the yellow bomber is standing, near the route that takes you to the Astral Observatory. From here, run south and climb the steps. Just run straight ahead and Link will jump over the gap and grab the ledge on the other side. Then stand against the wall and continue running southward, where Link will automatically jump over to the posts against the wall. Once you make it across the final gap, circle around to find a treasure chest that contains a silver rupee!
NOTE: You can get this silver rupee every single time you go back through a three day cycle. It’s a good way to build up your bank account, as you’ll eventually need 5,000 rupees!


If you still don’t have 200 rupees, run out to Termina Field and collect some more until you do. Once you get past the 200 rupee mark, the banker will reward you with the Adult Wallet, which allows you to carry up to 200 rupees at a time.
If you would like more time running around, you can always play the Inverted Song of Time (play the Song of Time backwards) to slow time down, giving you more of an opportunity to collect rupees. Whatever you decide, just make sure you’re back in Clock Town before 12am!!!

Make sure you are within North Clock Town just before midnight hits. Right at 12am on the First Night, an Old Lady will come out of the northern exit in North Clock Town. As she walks through the area, another character named Sakon will rob her, taking her blue sack and running off with it. After she yells out, you’ll regain control, so run over to Sakon who’s prancing away and slash him with your sword. This will cause him to drop the sack and prance out of the area.
Once he leaves, the Old Lady will thank you by giving you the dangerous, but very useful Blast Mask, thus completing her entry for the Bombers’ Notebook. She also advises you to come see her at the Bomb Shop in the morning, where she will be selling the merchandise that’s in her sack (which Sakon tried to steal).


It should be about 1am right about now. It is recommended that you play the Inverted Song of Time (playing the Song of Time backwards) in order to slow time down. There are a few things yet to do on the First Night and you may not have enough time otherwise if this is your first time doing some of these side quests.
Run back out into North Termina Field (snowy area with all the mushrooms) and run over to the mushroom farthest to the west (left) that is closest to this upper platform. From 12am to 6pm on any night, there’s a spirit out here dancing atop one of the mushrooms. He’s easy enough to spot and you’ll hear his music as you draw near. Hop onto the ledge and jump onto the mushroom.
Speak with Kamaro to learn his plight. Apparently, this dancer died and didn’t get to pass on his mad dancing skills, so his spirit cannot pass on to the next world. If you remember from earlier, the Mask Salesman told us that the Song of Healing brings rest to troubled spirits. Play the Song of Healing to create Kamaro’s Mask, which will allow you to dance like Kamaro and will also complete his entry in the Bombers’ Notebook.


In East Clock Town, there’s a building called the Stock Pot Inn. Unfortunately, it is shut out to the general public at night unless you have a reservation there.
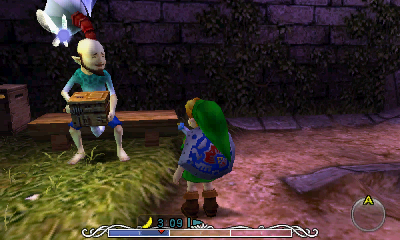
However, you can get in by using the nearby Deku Flower to get atop the thatch overhang and access the door on the second story. Do so, then go downstairs and follow the left wall which leads to the latrine. During any night from 12am onward, you’ll find a… hand… in the toilet… who’s in dire need of paper…. If you acquired the Land Title Deed earlier, show him the goods to help him out with his little *cough* problem. Notice, however, in the N64 version, there is a box of paper on the floor here. Why couldn’t he have used that, anyway? He’ll thank you, and after the hand finishes its, um, business, it’ll give you a Piece of Heart that apparently fell down there. This will complete the “???” entry of the Bombers’ Notebook.


During the First and Second Nights, you can find Guru-Guru in the Laundry Pool. This traveling musician, a member of the Gorman Troupe who plays a music box constantly, got kicked out of his room at the inn because his fellow performers needed their rest. If you chat with him in your normal form, he’ll relent to you a sad tale about his time in an animal troupe. Apparently, he was jealous of the dog leader (whom he says did an amazing job) so he stole the dog’s mask. It was a long time ago and he no longer needs the thing, so for listening to his confession, he’ll give you the Bremen Mask. Sweet! You can use this to parade small animals (such as the little dog in South Clock Town). It’ll also help you to get another very useful mask here soon!
The Rosa Sisters, Marilla and Judo, are members of the Gorman Troupe who are staying at the Stock Pot Inn. If you happened to speak with them during the day, you’ll find out that they’re looking for some new dance moves for the soon approaching Carnival of Time. They’re stumped with this, however, and practice during the First and Second Nights in West Clock Town. Head on over there, put on Kamaro’s Mask and show them your moves!

Link will then dance frighteningly, just like Kamaro, which the Rosa Sisters pick up on easily. After teaching them the dance, they’ll call you “master,” and reward you with a Piece of Heart. This also completes their entry in the Bombers’ Notebook.
If you are playing the N64 version, play the Song of Double Time to bring you to the second day. In the 3DS version, it doesn’t need to be the second day. Next, we’re going to need 100 rupees, so just pull it out of the bank if you don’t have that much at this point.
Enter the Bomb Shop in West Clock Town, which is the northern most of the three doors on the west side. They normally sell regular Bomb Bags which allow you to carry 20 Bombs. Since you saved the Old Lady on the First Night, now they’re stocking Big Bomb Bags for 90 rupees that allow you to hold up to 30 Bombs at a time. By purchasing this, you can save money by skipping straight to the better Bomb Bag! This also allows you to use Bombs now, which you’ll occasionally find when you slash bushes and jars from now on.


Also in West Clock Town is a door to the far north which leads to the Swordman’s School (Mighty Training Center). Inside, you can chat with the dude sitting on the ledge to take one of his two courses.
There are two courses available. The Novice Course will show you the basics of Z/L targeting and swordplay. The Expert Course is a challenge to see how many points you can rack up. It’s rather simple though, since you get the most points by Z/L targeting a log and pressing A.
How this works is occasionally two logs will come out of the ground. Keep your sword drawn and target them, then press A to perform a Jump Attack. If you do it correctly, it will split down the middle, giving you 3 points.
Do this to all of them to get a total of 30 points. The teacher will be impressed and gift you with a Piece of Heart.


In northern Termina Field, enter the snowy area with all the mushrooms. A little to the west is one of the larger mushrooms which has a hole next to its stem. Run over it to fall in. Inside, you’ll be in an underground area with two Dodongos. These enemies are much more difficult than they were in the previous game simply because they’re so much larger and they have much more health. Now that you have Bombs, however, they’re quite a bit easier to kill. Set your Bombs to one of your buttons, Z/L-target one of them and throw Bombs repeatedly. Six bombs will kill each, causing them to explode. Be sure to pick up the purple rupee each one leaves behind, since they’re each worth a whopping 50 rupees!!!
Alternatively, you can always attack them with your sword. Lure them to blow fire at you, then run around to slash at their tails. They spin around to counter-attack,and they might hit you with their tail as they do this, dealing loads of damage quickly. By circling around the room and slashing, you can kill both Dodongos, but it’s quite difficult to do so without taking damage (and ill advised for those of you new to the game). Remember, if you catch on fire, you can put it out by slashing your sword or rolling. Also, this is a fun place to play around with the Blast Mask. Simply hold R and press B to explode right in front of them, causing massive damage. So fun!
Once you’ve successfully killed both of them, a large chest will appear in the center containing a Piece of Heart.


In the southwest corner of Termina Field is the entrance to Milk Road. There’s a Takkuri (evil, evil bird who steals your stuff if you’re not careful) which you should avoid at this point in the game. Just before this, however, is a large patch of tall grass with some Deku Babas in it. There are some butterflies around here as well, and if you run around where the butterflies are hanging out, you’ll fall into a hole in the ground.
This takes you into another underground cavern with a lone Peahat. NOTE: It must be day-time, otherwise this Peahat won’t leave the ground. This is the only one found in the game, and while it looks rather intimidating, it really is a piece of cake. Run forward, Z-target it, and simply hold R as you inch forward. It’ll quickly spin around so its vulnerable root is exposed (not a very good tactic), so slash away at it repeatedly. After many sword strikes, it’ll explode, causing a large chest to appear containing a Piece of Heart.


At this point, you should have at least 100 rupees and you aren’t going to be getting any more serious cash for the rest of this 3-day cycle, so if you want to save the rupees you have gathered, you should go back to Clock Town quickly and put all but 20 of it in the bank. With that, return to Termina Field and enter the area to the far southwest which leads to Milk Road. Along the way, you’ll see an odd looking bird known as a Takkuri. It is HIGHLY recommended that you avoid it for now. Just run past it.


Once on Milk Road itself, slash the nearby Owl Statue with your sword to activate it (or press A on the 3DS). It doesn’t serve much purpose for now, but it will in the near future. You’ll see that Tingle is here, and he has some more maps for sale. Slash the nearby bushes (which are alive, you’ll have to kinda chase them down) to get 20 rupees if you don’t have that much currently. Transform into a Deku and shoot down Tingle’s balloon with a bubble. Speak with him and purchase the Map of Romani Ranch for 20 rupees.

In the back of Milk Road is the entrance to Romani Ranch. Unfortunately, a rock slide (caused by Skull Kid) has blocked it off, and one of Mutoh’s workers has been hired to clear it away. It’ll take him a little while to finish the job though, so play the Song of Double Time to skip ahead to the final day when he is finished. Dude, he’s hardcore, going at it with a pickaxe for two days and two nights straight! What a champ!


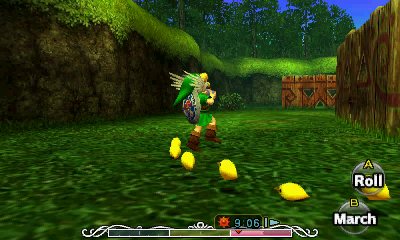
There’s not much to do in the Romani Ranch area itself yet. At the back of the area, however, there are two doors. Enter the one with all the chickens painted on the side to enter the Cucco Shack. In the center of this area is a pale dude with a spiked mohawk named Grog. He’ll tell you how he’s resigned that the moon is going to fall and all that jazz, but he’s depressed because he’ll never be able to see his baby chickens reach their prime. Don’t the baby chickens look like lemons?

If you got the Bremen Mask earlier, you may recall from its description that you can use it to “parade small animals.” Put it on, then hold the B button to play a catchy (but very repetitive) tune on the Ocarina as you march around. Touch the baby Cuccos to make them follow after you. Scour the area in search of the other ones, touching all of them to add to your troupe. This process is very lengthy and pretty annoying. Don’t let go of B or you’ll have to gather them up again! Look carefully and try to catch up to them before they go through the triangles in some of the walls, which is pretty frustrating.
Once you have gathered all ten, they’ll start bursting into full grown Cuccos. Keep holding B! Once all ten have matured, they’ll cockle-doodle-doo together. You’ll appear next to Grog, who will glance around and chuckle. He thanks you and gives you the Bunny Hood in reward, perhaps one of the most useful masks in the entire game! Who doesn’t love going fast? This will complete Grog’s entry within the Bombers’ Notebook.


That’s all there is to do here, so play the Song of Time to return to the Dawn of the First Day. At this point, there are technically a few more Pieces of Heart to gather, but they will be much easier to obtain later on. In particular, Link can get get the Piece of Heart from the Deku Playground in North Castle Town, but it might be best to get some more experience using Deku Link before doing so. Furthermore, Link can get a Piece of Heart relating to the Title Deed, but it requires 100+ rupees that you may or may not have at this point. Lastly, there is one Piece of Heart that can be gotten from the Postman, but it requires a whole new 3-day cycle.
Because of all of this, these particular Pieces of Heart will be covered later in the guide. If you’d really like to grab them right now, however, check out ZeldaDungeon’s Heart Piece Guide. For now, onward to Southern Swamp!
2.2 Southern Swamp
Next to the Clock Tower there is an odd statue that resembles an owl, and if you haven’t activated it yet, you should do so, as it will become useful in a bit. In the N64 version, you do so by smacking it with your sword.
You’ll be finding these Owl Statues throughout your journey and they serve a dual purpose. The first one, which is available now, is to temporarily save your progress. Saving in this manner is essentially “pausing the game” in a way, since you will pop up back at the same location, time, health, items, rupees and all when you open your file again. However, if you come back and don’t play the Song of Time, you’ll lose all that progress. It’s essentially good if you need to stop playing for a while, but don’t want to lose your progress. You will be finding other Owl Statues here soon, so keep this in mind.

Now that you have the Deku Mask and a ton of other goodies, you’re finally ready to go south, as Tatl advised earlier. Play the Inverted Song of Time to slow down time, and be sure to have the Deku Mask, Blast Mask and Bunny Hood all ready to be equipped. Run to the south exit of Clock Town and speak with the guard in your normal form to leave.
Welcome, officially, to Termina Field. You’ve already done quite a bit of collection out here in the last section, so there’s not much to do here at the moment. Before you venture onward, you’ll need 20 Rupees. There are two great places to get some quick cash out here in the field. One is the dude in the tree next to the Astral Observatory to the southeast. You can roll into the tree to knock him down along with two red rupees. The other great place is a chest in the tall grass in the corner to the far south which contains a red rupee.
With moolah in hand, run all the way to the south, past the hollowed log. Once you approach the large tree to the far south, you’ll be interrupted by a short scene of Tatl explaining she and her brother’s first encounter with Skull Kid. Apparently, Skull Kid had been “arguing with some friends of his” and was thus, lonely. Tatl and Tael found and befriended him, but after awhile, he started performing tricks on people, eventually stealing Majora’s Mask from the Mask Salesman. The rest is history, and after a bit more rambling, you’ll regain control of Link. Run along the left side of the tree to continue on towards the swamp.


This area has a few new enemies in it, including Chuchus, which are quite useful. Here you can easily see the green ones have Magic Jars inside them and the red ones have Recovery Hearts. This enemy in particular will reappear after a few moments when defeated, meaning you can wait in the area and kill them repeatedly to restore your life and magic.
The other new enemy here is called a Bad Bat. As the name implies, these things are downright evil, flying towards you if you get close. Run towards the tree in the center and kill all the ones that are flying around. Next, put on the Deku Mask and Z-target the one that is on the vines near the top of the tree here. Blow a big bubble at it to defeat it, then climb up the vines. You’ll find the top of the tree is actually flat. Odd. What’s cooler, however, is the Piece of Heart that is up here!
With that in hand, hop down and continue south, where you’ll see Tingle floating around. Shoot a bubble at him as well, then purchase the Map of Woodfall for 20 rupees. If you don’t have that much, simply slash the bushes and such in this area. There’s also a side area (on the right side of your map) that leads to the Swamp Shooting Gallery, but you can’t do anything there at the moment. However, there are some clumps of grass just outside it that contain a lot of rupees, so take advantage of this if you need cash. Once you buy the map, continue on to the next area.
Also, if you are playing the 3DS version of the game, you can stop by and do a bit of fishing. However, you don’t have any fishing passes just yet, so it will cost you 50 rupees.


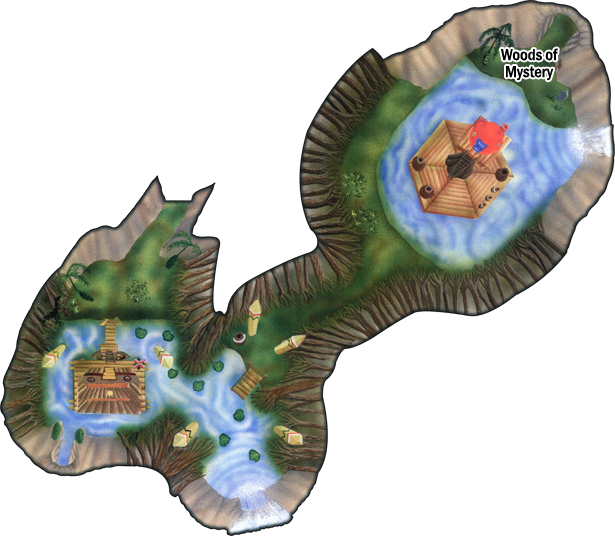
As you enter, you’ll see an overview of the area, giving you the general vibe of the place. Notable features are the big building at the beginning, which you can’t do anything with at the moment, as well as the Big Octos that block off the second half of the swamp, which you also can’t do anything about for now. Ignore both of those things, since you’ll come back to them later on. Once you regain control, run off to the right to find an Owl Statue along with the friendly Owl Kaepora Gaebora from Ocarina of Time. The owl will teach you the Song of Soaring, allowing for quick navigation throughout Termina.
NOTE: If you are playing the N64 version of the game, there will just be a standard Owl Statue here, without the actual owl. In the N64 version of the game, you will meet up with Kaepora Gaebora a bit further down the line in the Southern Swamp. Right next to the Owl Statue is a new enemy called a Mini Baba. They’re absolutely pathetic, however, they’re very useful if you need to collect more Deku Nuts. You can slash the bushes here and one of them will always contain a Deku Stick.


At this point, you’re probably dying to investigate the Swamp Tourist Center, but there’s nothing you can do with it at the moment, so go to the opposite side where you’ll find a bunch of lily pads. You can put on the Deku Mask and spin across these to follow the obvious path or you can simply swim along next to them in your normal form, since you’ll sink them as a Hylian. Before too long, you’ll come to a little dock of sorts that leads to a path flanked with a boiling cauldron on either side. Take the detour.
In this small area, you’ll encounter a Deku Baba. Use your shield to get close and slash it with your sword to defeat it. This particular enemy can drop both Deku Nuts and Deku Sticks depending on how you defeat them. You won’t need to use Deku Sticks until you reach the temple, but you can play around with them now if you like. This will lead you to an open area with a teapot house known as the Magic Hag’s Potion Shop. Ignore it for now and enter the dark woods in the back.

As soon as you enter, you’ll immediately see a Monkey. Speak with it and it’ll tell you to follow it. This is important because the Woods of Mystery is a maze that changes depending on which day you enter it. Unless you already know the correct path, the monkey is your best shot at going the right direction. You should barely be able to keep up on your own, but if you have the Bunny Hood, it makes this much easier.
Along the way, you’ll encounter a new enemy called a Snapper. While you can kill them, it’ll take some time, and you’ll lose the monkey that way. Ignore them and continue following your little furry friend (if you lose him/her at any point, try to listen for the monkey noises and quickly follow your ears). Also, it may help to simply understand that the woods is in the shape of a 3×3 square. The directions you follow always take exactly 6 screens, so if you were to draw it out on paper, you’d quickly find the directions you need to take simply using the process of elimination (or simply use the provided map).
Eventually, you’ll be taken to Koume, one of the twin witches, who is apparently wounded! Gasp! She was one of the bosses in the last game along with her sister, but apparently, these are completely different people with the same models and names. Speak with her to learn that she was picking mushrooms here in the woods when Skull Kid came and beat her up. She inquires if you have any potions, but currently, you aren’t even able to carry any. She’ll be annoyed at you and you’ll regain control. Leave the woods.


First Day – Red
Second Day – Yellow
Third (Final) Day – Blue

NOTE: If you are playing the Nintendo 3DS version AND it is the 1st Day, continue to the next paragraph. However, if it is 2nd or the 3rd Day, Kotake will NOT be in the Potion Shop. Instead, she will be in the Woods of Mystery. Re-enter the woods and run through and you’ll find Kotake along the way.
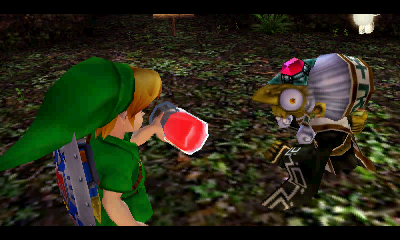
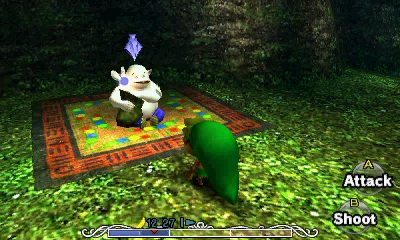
Climb up the ladder and enter the Magic Hag’s Potion Shop. Speak with Kotake (the other twin) to tell her what happened to her sister. She’ll scream in disgust, but after a bit more chatting, she’ll give you your very first Bottle filled with Red Potion! This is awesome, but don’t drink the potion, since it’s intended for Koume. If you do accidentally drink it, just return to Kotake and she’ll tell you how hopeless you are as she gives you a refill.
Return to the Woods of Mystery and follow the monkey (or the map) again. Once you return to Koume, speak with her again. Now this is the part that really stumps people. You see, in Ocarina of Time, you give people items by standing next to them and pressing that C button. Majora’s Mask DOES NOT work this way. Do NOT press it standing next to her, or you will drink the potion. Speak with Koume and wait for it to prompt you to press start. Now press the C button, while speaking to her, in order to give her the potion.
Koume will then take it from you, and after a quick whiff, she’ll drink the whole thing down and be as good as new. She’ll hop on her magic broom and advise you to come see her at the Swamp Tourist Center later. Sounds like a wonderful idea, doesn’t it? Leave the woods once more.

2.3 Monkeys
After helping Kotake, a bunch of monkeys will block the exit from the Woods of Mystery. Talk to them to hear their plea for help. It seems one of them was arrested by the Deku and is being held in the palace. You’re so generous and thoughtful, you could help him out, right?
Make your way back to the Swamp Tourist Center (the large rectangular building at the start of the swamp). Climb up the ladder and go inside where you’ll find two new characters: the Swamp Tourist Center Guide, who is actually Tingle’s father, and Koume, whose nose is sticking out of the hole in the wall. Speak with her and she’ll offer you a ride through Southern Swamp and give you the Pictograph Box, all for free! Heck yeah!
This boat ride is a little odd, as it is automated, but has no driver. Up until now, there have been Big Octoroks that block the second half of the swamp that you are unable to defeat at this time. They are no match for your pointy, wooden steed! What a way to go, huh? Getting impaled by a boat…. Anyway, it’ll take you to the next side, which is full of poisonous water, so don’t go swimming anytime soon. When the boat asks you to disembark for a while, say yes. Follow the monkey through the entrance up ahead to enter the Deku Palace.


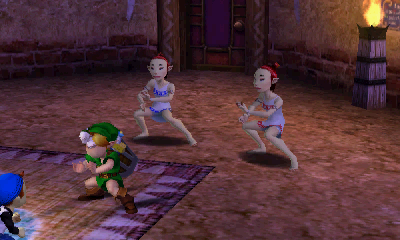
Run forward and speak with the Deku Guards. They won’t let an outsider in, so put on the Deku Mask and speak with them again. They say you’re still not allowed in unless you have official business… but perhaps you can enter the throne room to see the foolish monkey who is awaiting punishment. Just don’t go anywhere else! Hmph, well, that got them out of our way, so run forward and enter the Royal Chamber straight ahead. Speak with the various Deku in here, including the Deku Butler and the Deku King to discover that they plan on punishing the monkey for “stealing” the princess. If you speak with the monkey, he’ll claim they don’t understand and they need to go rescue her.
Back outside, a monkey will tell you to find the Bean Salesman and plant one of his beans to get to a high place so you can rescue the monkey. For some reason, you’re allowed into the throne room with the king, but not allowed to wander the gardens on either side (which have even more guards)…? Your objective is to get to the end of each garden while avoiding the guards (and collecting rupees along the way). If they see you, they’ll throw you out of the palace. It really is pretty straightforward and the camera angles are quite user friendly for this portion of the game. One of the masks in the game called the Stone Mask allows you to walk past the guards, making you “invisible” to them, but you are unable to get that mask for a very long while yet. Aww…


On the west side of the gardens there is a Piece of Heart at the end. It’s very easy to obtain, so it is suggested that you go that way first.
The other garden (to the east) has a hole in the ground at the end. Fall down into it and you’ll find a fat, jolly man known as the Bean Salesman. Speak with him to get your first Magic Bean for free! Unlike in Ocarina of Time, you’ll need a bottle of Fresh Spring Water to make the plant grow. If it is the second day, however, it will be raining, and you will not need any water. Swipe your bottle in the pool nearby, and if you’d like, you can test out your new Magic Bean here. Plant a bean, dump some water on it, then ride the plant to the upper ledge to find a large chest containing a red rupee. If you did this, purchase another Magic Bean and fill up your bottle with Spring Water again before you leave.
In the N64 version, you can quickly get caught by the guards to get to the outside of the Deku Palace. From there you can take the lily pads to the east side of the palace. However, in the 3DS version, there is a quick warp that immediately takes you to just outside of the Deku Palace to the east, saving you some time.


You’ll find a chunk of land with a soft patch of soil as well as a nearby Mini Baba. You can kill this pathetic enemy repeatedly (since it will reappear) in order to stock up on Deku Nuts for your task up ahead. Plant the Magic Bean and pour some of the Spring Water that you got in the cave (if it’s not the second day and raining). The Magic Bean will grow into a plant which you can use to reach the above area. This leads you to an area just above the guard-littered areas you tackled a moment ago. If you fall down due to bad timing or a Mad Scrub’s Deku Nut, the guards will catch you and throw you out again. Just take your time and aim carefully.


There are two strategies you can use here: either avoid the Mad Scrubs or kill them by shooting Deku Nuts at them with B. When defeated, the flowers they were in will transform into Pink Deku Flowers, which makes things a bit easier. If you decide to attack them, try swerving back and forth to avoid the Deku Nuts they shoot at you. As for the platforms, in the N64 version they will be moving around, where as in the 3DS version they are stationary and will only move once Link has landed on them. Furthermore, in the 3DS version, you can press R to see where you can land. The path is pretty straightforward. When you get to the end, the final platform will rise up, allowing you to access an entrance above the throne room.


Inside, you’ll find yourself within the monkey’s cage. What a dumb place for a secret entrance, no? If you take off the Deku Mask and speak with him, he’ll realize you’re not one of the Deku and ask you to cut the ropes. Smack the beam with your sword (you can’t reach high enough to cut the ropes) and the Monkey will say it’s futile after all. He does ask, though, if you have some kind of instrument. If you pull out the Ocarina, he’ll say it doesn’t sound right. Some of the Deku outside mentioned that the princess also had Deku Pipes. Put on the Deku Mask and pull out the Ocarina.


The monkey will be ecstatic and tell you about what really happened with him and the princess. They went to the Woodfall Temple to find out why the water has become poisonous and she was captured. Because he was seen with her, the Deku won’t listen to a word he says, and now he desperately wants to help her out. What a guy! Agree to go in his stead and he’ll teach you the Sonata of Awakening, a song known only to the Deku Royal Family that allows them to enter the Temple in Woodfall. The king and the guards will witness this display and throw you out of the palace.
2.4 Woodfall
As you are getting captured by the guards, the monkey yells out to you to take the shortcut the Deku use to get to Woodfall. After you get tossed outside, turn to the right (east) and go across the lily pads to reach the small island to the southeast that has a lone Deku Flower on it. The tree here says it’s the Deku Shortcut, so use the flower to get up to the ledge and go through.
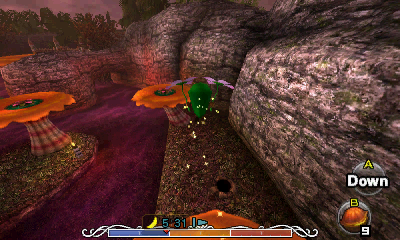

You’re actually back in the southern half of Southern Swamp, but now you’re on top of the giant orange mushroom-flowers. There are some new enemies out here called Dragonflies. They’re pretty big and they’ll smack you while you’re trying to fly around, so try to lure them into attacking you, then shoot them with a bubble.
The path is pretty obvious, so just use the Deku Flowers to get from flower to flower and you’ll eventually reach the platforms near the waterfall. In the N64 version, it is here that you will meet with Kaepora Gaebora (the owl), who will tell you a little about the Owl Statues and will also teach you the Song of Soaring. Sweet! This makes those Owl Statues that much more useful! When he has finished speaking, use the Deku Flower to get to the last platform across the waterfall and enter the entrance that was hiding up there.
As you enter, you’ll see a short clip giving you an overview of the area. The fancy wooden platform with the Owl Statue and Deku Symbol on it is obviously your objective. Once you regain control, look off to your left to see a lily pad through the grass. Go that way to find a large chest on a platform (that you can see on your mini-map) and open it to find a red rupee.
Go back the other way and hop across this lily pad to get to a new enemy called a Hiploop. These things can be annoying, and because there isn’t much room to work with, it is suggested that you just charge up a bubble and release it as it starts running towards you. It’ll take two bubbles to defeat them, but it’s better than being knocked into the poisonous water. Alternatively, you can use Deku Nuts to stun them, which is also very effective.


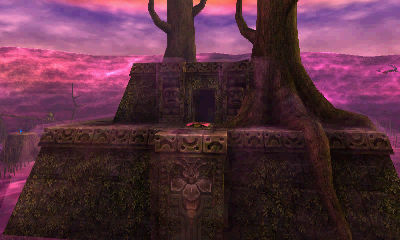
At the west end of Woodfall you will find a cavern that leads to a Great Fairy Fountain. Note: In the N64 version of the game, this fairy fountain is located at the southeast end of Woodfall. This fairy fountain is not much use right now, but it will be after you complete the first temple in the game.
Climb up the next ramp, killing another Hiploop along the way. At the end, kill the Mad Scrub by spinning into it, then use his Deku Flower to get to the platform to your right. Drop down next to the Scrub and spin to kill it, then run to the other side of the ramp and kill that one as well. Use the final flower to get to the main platform.
As you land, Tatl will mention the “Deku Scrub mark” in the center of the platform. That’ll come into play in a moment. First off, slash the Owl Statue with your sword to activate it. This will allow you to warp back here any time you wish, so this is very good. Slash the jars and such nearby, then use the Deku Flower to fly to the far southern platform where there’s a large chest containing a red rupee.


From here, face towards the giant cave to the southeast and spin onto the water (causing you to move quickly). Use the lily pad to reach solid ground, then start scaling up the ramp, killing the Hiploop and Mad Scrub as you go. Use the Deku Flower here to reach the next few platforms (use Deku Nuts to kill the Mad Scrubs if you have them) and work your way to the east side of the area, where there’s a chest you can see on your mini map. Once you finally get there, killing the Dragonflies as you go (if they cause you problems), open the large chest to find a Piece of Heart.
That’s everything you have to do in Woodfall. At this point, you can enter the temple, but now that you have the song required for this area as well as the Owl Statue for Woodfall, this is a great time to save. Use your newly acquired Song of Soaring to warp back to Clock Town (or Southern Swamp and then run to Clock Town if you didn’t get that particular Owl Statue). Put your remaining rupees in the bank, then play the Song of Time to save and allow yourself the greatest amount of time to complete the temple. When you reappear, play the Song of Soaring again and warp back to Woodfall.
Slash the jars that are on this platform to get some Deku Nuts, restore your magic and find a fairy. You should probably swipe the fairy into a bottle, since it will heal you automatically if you die. This will be very useful for the upcoming fights. Lastly, make sure you play the Inverted Song of Time to slow down time. This should give you just under 72 hours to complete this temple, and with time slowed, that’s over three and a half hours of real-life time, as opposed to just a little over an hour and a half total for the 3-day cycle.
At long last, warp to the Owl Statue in Woodfall if you haven’t already, then stand on the “Deku Scrub mark” in the center and play the Sonata of Awakening while wearing the Deku Mask. This will cause the temple to rise out of the poison water and cause a tidal wave through the area. Use the Deku Flower to fly over to it and enter the very first dungeon.

- Chapter 1 – First Three Days
- Chapter 2 – Southern Swamp
- Chapter 3 – Woodfall Temple
- Chapter 4 – Collection
- Chapter 5 – Snowhead
- Chapter 6 – Snowhead Temple
- Chapter 7 – Spring, Romani Ranch, Ikana Graveyard
- Chapter 8 – Great Bay & Zora Cape
- Chapter 9 – Great Bay Temple
- Chapter 10 – Ikana Canyon
- Chapter 11 – Well & Ikana Castle
- Chapter 12 – Stone Tower Temple
- Chapter 13 – The Moon
