This chapter covers the Nintendo Switch version of Link’s Awakening. If you are playing the Game Boy Color version, check out the Face Shrine Walkthrough.
- Chapter 1 – Tail Cave
- Chapter 2 – Bottle Grotto
- Chapter 3 – Key Cavern
- Chapter 4 – Angler’s Tunnel
- Chapter 5 – Catfish’s Maw
- Chapter 6 – Face Shrine
- Chapter 7 – Eagle’s Tower
- Chapter 8 – Turtle Rock
- Chapter 9 – The Awakening
6.1 The Boomerang
Inside this cave there are a few enemies but they are currently invisible. Just quickly walk up a screen and grab the Magnifying Glass that is waiting for you. The Magnifying Glass will allow you to see previously invisible enemies and people, along with small text in certain books. Go back down to find all the enemies that were invisible before. Walk up the steps to exit the cave.Trading Sequence Item #14 - Magnifying Glass


Our next step is in Animal Village where there are now a few goodies we can take care of. Enter the building at the northeast corner of Animal Village and you’ll find a Zora sitting in the pond. Since you now have the magnifying glass, Link can see this previously invisible zora. After finding out that this is a peaceful zora, he will award you with a Secret Seashell.Optional: Secret Seashell #37


Our next step is at the northeast corner of Animal Village. You’ll have to go around and reach this area by walking just north of where the sleeping Walrus was. Drop a bomb against the cracked wall and enter the cave. Drop a second bomb against the wall to the north and head on through. Walk around the corner and you’ll see a cracked block. Toss a bomb towards the block to blow it up. Backtrack around the cave to get to the other side of this room. With the cracked block out of the way, hookshot across the gap and snag the heart piece.Optional: Piece of Heart #23


Trading Sequence Item #15 - Boomerang


Return to the Mysterious Forest and at the north-central part of the forest, there is a cave surrounded by three blocks. Inside the cave, use your hookshot to reach the treasure chest that contains a Purple Rupee. Then use the hookshot to grapple onto the rock. Push the rock out of the way and snag the heart piece.Optional: Piece of Heart #24


Make your way to the Witch’s Hut, located just west of the Cemetery in the Koholint Prairie. Just south of the hut there are a series of rocks that block off a staircase. Climb down the steps and you’ll find a piece of heart in this cave. Blowup the nearby boulder with some bombs and then hookshot across the gap. Jump over with Roc’s Feather to grab the heart piece. Push the blocks out of the way and exit the cave.Optional: Piece of Heart #25


After completing Catfish’s Maw, there are more chambers that Link can complete over in the Chamber Dungeon. Visit Dampe’s Shack to arrange and then complete the chambers. After completing the Passageway Central chamber, Dampe will award Link with a piece of heart.Optional: Piece of Heart #26

Make your way over to the front gate of Kanalet Castle. Just outside the moat on the left side, there are a series of holes. Use the hookshot to grapple across and head down the stairs. Inside, open the treasure chest to find a Secret Seashell.Optional: Secret Seashell #38

6.2 South Face Shrine
Exit Animal Village to the west and then walk up and to the right. If you haven’t ventured in this direction before, the Owl will stop you in your tracks and he mentions that there are two shrines nearby, one to the North and one to the South. We must first head to the shrine to the south, where ancient ruins speak of The Wind Fish. Continue to the far east and then head down to reach the Ancient Ruins.
There are a number of statues here and some of them will come alive once you make contact with them. These enemies are known as Armos and can be defeated with two hits of the boomerang or one hit with an arrow. If you don’t have either of these weapons, use your shield to block them and try to clear a path. Make your way through the maze and once you reach the north-central part of the region, you can touch some Armos to travel east or west. If you travel to the right there are four statues here, and the one at the bottom-right has a staircase underneath him. Awaken the armos and head down steps.


Continue to the left through the maze and you’ll eventually come to a building known as Southern Face Shrine.
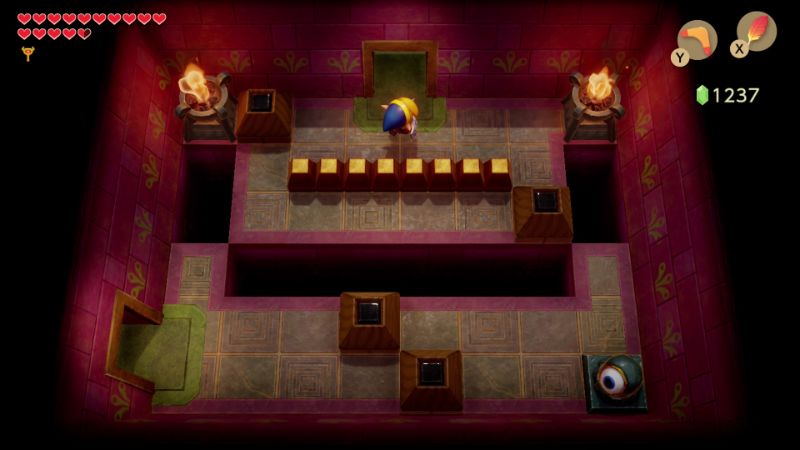
Once you enter the building, go up a screen and you’ll be met with a mini-boss of sorts, an Armos Knight. Walk up to the Armos Knight and it will awaken. Its only attack is to jump up and try to land on top of you. Each time it hits the ground, the ground will shake causing Link to stumble momentarily. The best bet is to equip Roc’s Feather and to jump before the Knight hits the ground, so that Link doesn’t lose his footing. He can be rather difficult as he blocks almost all your attacks with his large shield. The best method is to charge a spin attack and release it when you are close to him. After his armor is down, you can shoot at its face with the bow and arrow.


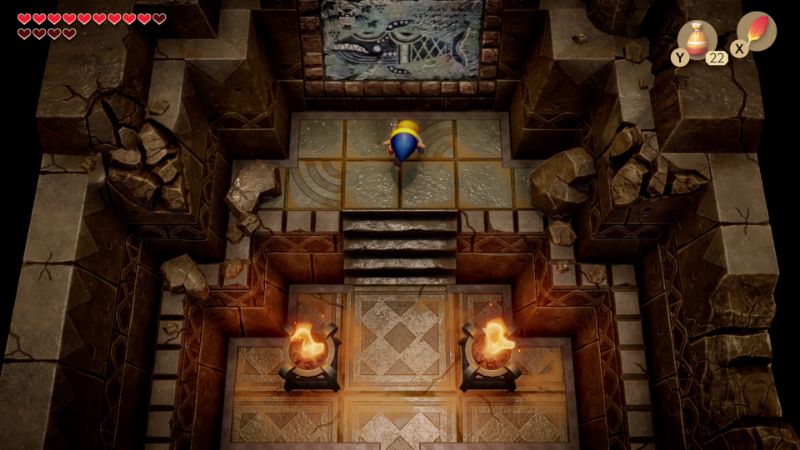
After the Armos Knight has been defeated, pick up the Face Key that he leaves behind and then head up a screen. Light the torches and then read the carving on the wall at the top of the screen.
|
TO THE FINDER… THE ISLE OF KOHOLINT IS BUT AN ILLUSION.
HUMAN, MONSTER, SEA, SKY… A SCENE ON THE LID OF A SLEEPER’S EYE AWAKE THE DREAMER, AND KOHOLINT WILL VANISH MUCH LIKE A BUBBLE ON A NEEDLE CASTAWAY… YOU SHOULD KNOW THE TRUTH! |
Finally some light shed about this strange island. The island is just a dream? If we awake the dreamer (The Wind Fish), then Koholint will vanish? With that in mind, let’s head down a few screens and exit the Shrine. You will immediately be met by the Owl.
| ‘Hoot! I see you have read the relief’ While it does say the island is but a dream of the Wind Fish, no one is really sure’ Just as you cannot know if a chest holds treasure until you open it, so you cannot tell if this is a dream until you awaken’ The only one who knows for sure is the Wind Fish’ Trust your feelings’ Someday you will know for sure” |
That is some deep information that we’ve heard from the owl and from the scripture in South Face Shrine. However, we did collect the Face Key and this will now allow us to enter north Face Shrine, so let’s backtrack through this Ancient Ruins and exit the sandy area.
6.3 Rapids Ride
Before heading to Face Shrine, we can play the Rapids Ride mini-game. Just north of the Ancient Ruins, make your way through the maze of bushes and rocks. Climb down the steps and enter the water to the north. Swim to the right and enter the cave found here.
The cave at the northeast portion of the area outside the Face Shrine leads up to the Rapids Ride. While in the cave you’ll find a Piece of Heart. Use the Hookshot to grapple across the gap and snag the heart piece.Optional: Piece of Heart #27


Once outside, make your way to the building to speak with the shop owner. It costs 100 rupees to play the Rapids Ride mini-game and there are two modes. There is the Rapids Raid, where Link can leisurely take his time through the ride, trying to get as many goodies as he possibly can. Then there is Rapids Race, which as its name implies, is a race to the finish with rewards given depending on how fast Link gets through. I’d suggest playing the Rapids Raid first, to familiarize yourself with the course.


When you start the Rapids Ride, travel all the way to the far left. Drop down the waterfall and stay against the western wall. You’ll find a small island with a piece of heart. Use the hookshot to grapple over to the vines and climb the ladder to reach the heart piece.Optional: Piece of Heart #28

Near the center of the Rapids Ride there is a small island with what appears to have nothing on it. Use the hookshot to grapple onto the vines right next to it and climb up. Use the Shovel to dig up the top-right corner to find a Secret Seashell.Optional: Secret Seashell #39

Play the Rapids Race and finish the race in under 40-seconds to earn a Piece of Heart.Optional: Piece of Heart #29

Play the Rapids Race and finish the race in under 35-seconds to earn a Secret Seashell.Optional: Secret Seashell #40

Play the Rapids Race and finish the race in under 30-seconds to earn a Chamber Stone.Optional: Chamber Stone

Once you have collected 40 Secret Seashells, warp over to the Seashell Mansion. Turn in your 40 seashells to earn the Koholint Sword! This upgraded sword will deal double the amount of damage and will also shoot out a sword beam when Link has full health.Optional: Koholint Sword


6.4 Face Shrine
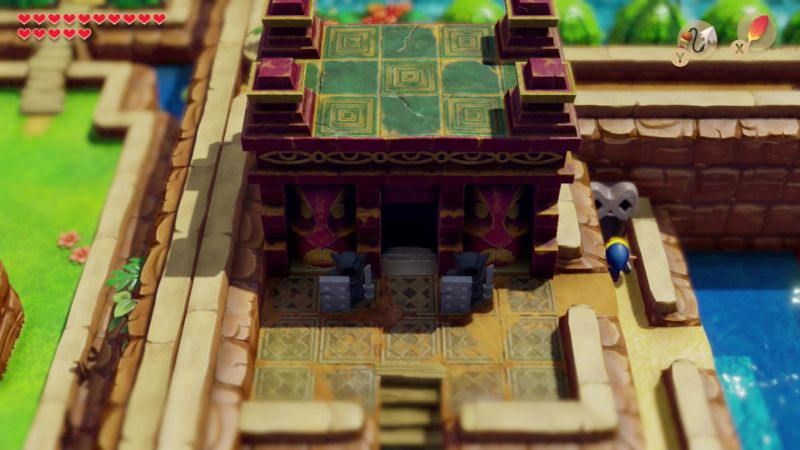
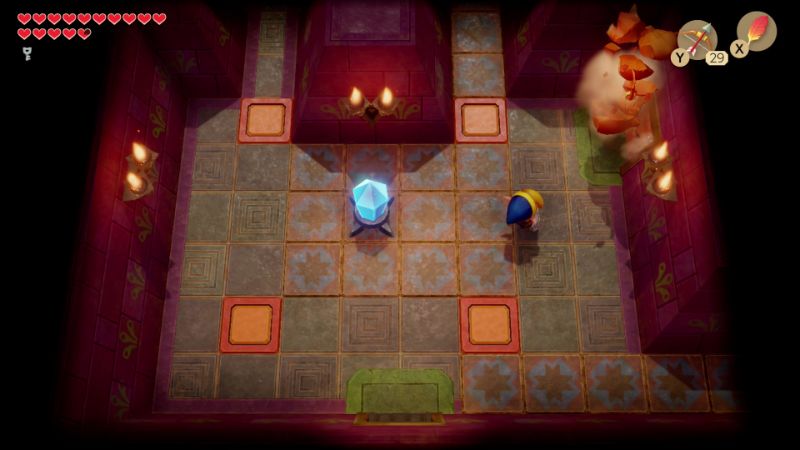
Travel to the area just north of the Ancient Ruins. We need to travel through the maze of bushes and rocks. Make your way through to the northwest part of the area and climb down the steps to enter the water. Swim to the island and hit the Armos Statue on the left to activate it. Defeat it or jump over it and head down the stairs. Make your way through the underwater cave, using the hookshot to get across the gap. Walk up along the right side and put the Face Key we just got into the key hole and this will reveal the entrance to the Face Shrine. Go back down a screen, up the steps, and enter the 6th dungeon of the game, Face Shrine.

Face Shrine continues down the trend of being less linear, offering a number of side quest areas and a bit of backtracking. The dungeon is divided into two halves and this split occurs right at the start of the dungeon where you can either head left or right a screen. Most of the important items are on the west side of the dungeon so we will be tackling that area first.
From the entrance of the dungeon walk to the left a screen and you’ll find three Wizzrobes. These enemies will disappear and reappear, giving just a few moments where you can harm them. Many of your weapons will have no effect on the wizzrobes. Your best bet is to freeze them with the hookshot or boomerang when they appear and then quickly place a bomb to defeat them. Either way, you can ignore this first batch and head up a screen.
There is a spark in this room and if you use a boomerang on it, it will give you a fairy as a reward. Continue heading up a screen and left a screen. Defeat the mask-mimic in this room and then stand near the exit at the top-right part of the room. Toss the boomerang diagonally so it hits the switch, causing the blocks to rise. Alternatively, you can drop a bomb and have it explode. Do this so that you are above the switch and then head up a screen along the right side.
Follow the pathway on the ground and it leads you to the wall on the right side. Place a bomb here and blow open a hole. Walk right a screen and light the torches in this dark room. There are four green zol in this room. Defeat them and head down the staircase that appears at the top-right corner of the room.

There is a Giant Bubble in this underground area that cannot be defeated. Just avoid it, defeating the goomba that is in your way and head left a screen. Avoid a second giant bubble and resurface on the left side. The blocks in this room should be lowered allowing you to maneuver around. Defeat the mini-moldorm that is moving around. You’ll also need to defeat the two wizzrobes, so use the boomerang or hook shot to freeze them and finish them off with a bomb. Alternatively four arrows shots will defeat a wizzrobe. When you have defeated all the enemies, head up through the door that opens up.

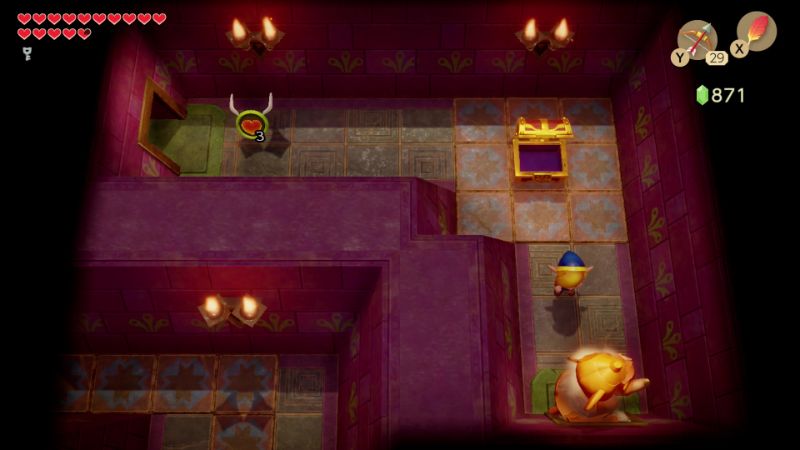
Open up the treasure chest on the left side of the room to get the dungeon item, the Level-2 Power Bracelet! This will now allow you to pick up and move even heavier objects. You can lift up the pot on the right side of the room to find a fairy floating around underneath. Lift up one of the two large statues in the center of the room and then head through the one-way door.
Back inside the room with the mask-mimic, hit the switch once to lower the blocks. Once again you have to hit the switch diagonally, but this time walk up a screen along the left side. Walk over and pick up the block at the top-left part of the room to find a floor switch. Step on it to open the door and then head through to the room to the left.


There are three wizzrobes in this room, along with a floating arrow in the center of the screen. Use your bow and arrow to hit the crystal switch so you can move around the room. Defeat all three of the wizzrobes and a treasure chest will appear containing the Dungeon Map.
Be sure the blocks on the right side are lowered and then head up a screen. Skip passed this room for now and head right a screen. Open the treasure chest found here to get the dungeon’s Stone Beak. Backtrack to the previous room to the left.
Lift up one of the pots and toss it at the door above to open it up and then go up a screen. Walk to the right a screen and open the treasure chest found here to get the Compass. Climb the steps and hit the crystal switch just once and then follow the narrow path down a screen, right two screens, and up a screen.


All the blocks in this room should be lowered. Use the boomerang to hit the anti-fairy and it will turn into a regular fairy. Defeat the two wizzrobes found in this room and collect the small key that drops from the ceiling. With the key in hand, backtrack, down a screen, left two, up one, and left a screen.


Since we hit the crystal switch in the previous room, the blocks have changed. Defeat the sparks if you’d like and then pick up the large statue. Toss it at the closed door to open it and then head up a screen. Walk up the steps and open the treasure chest to get 100 rupees! Then climb up the stairs to actually leave the dungeon.
After exiting the Face Shrine midway through via the northwest corner of the dungeon you’ll appear outside on an island in the Rapids Ride. Open the treasure chest here to get a Secret Seashell.Optional: Secret Seashell #41

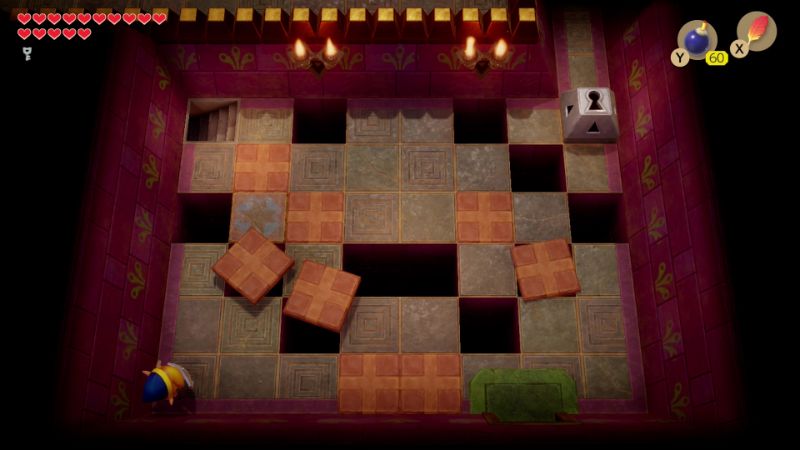
There are two horse head statues found in this room. You need to toss them so that land and fit perfectly in the two squares with green squares. The trick here is to notice that the horse heads resembles chess pieces. In Chess the Horse, or Knight, moves in an L-shape. So stand three squares over and one square down and toss the horse head in that direction. Even then it can be tricky as sometimes you have to throw them diagonally and sometimes you throw them straight, but definitely stand an L-Shape away.

Backtrack down two screens to get back to the room where we got the dungeon map. We want to head back right a screen, but before you go, shoot an arrow to hit the crystal switch and then quickly move towards the door on the right. With the blocks up, head right a screen. Climb the steps in this room and follow along the path for a few screens until you reach an owl statue. Talk to the statue and it states, ‘Enter the space where the eyes have walls’ This is a reference to the dungeon map. If you take a look at the map, it forms a face of sorts. We already walked through to the eye room on the left side of the map and we’ll be doing the same for the right side of the map shortly.
Let’s now backtrack left two screens and down two screens to get back to the room with the mask-mimic. Defeat the enemy once again and then hit the crystal switch in this room so that all four blocks are up. Pick up the large statue and toss it at the closed door on the right side of the room and then head through.
Open the treasure chest here to get 100 rupees! Once again pick up the large statue and this time toss it against the door at the bottom part of the room and head through. Get rid of the statue here and open the treasure chest to get 50 more rupees! Now head down a screen and right a screen to get back to the dungeon entrance.
Now that are done with the west side of the dungeon, let’s now navigate the east side. Walk right a screen and carefully make your way across the moving platforms. You can lift the large statues if you’d like, but then head right a screen. Pull out your shield in this room and then stand in one of the corners of the room. Just hold out your shield the whole time and the Floor Tiles that fly at you will just hit your shield. After all the floor tiles are gone, the door will open, so head up a screen.


There is a locked door above and we should have a small key. However, we’ll need to collect a second key before heading in this direction. Instead, pick up one of the large statues and toss it at the closed door on the right to open it. Walk through to the next room and then use bombs or arrows to defeat the four wizzrobes. Go down through the door that opens up.
Defeat the two enemy stars in this room and then lift the pot. Talk to the owl statue here and it states, ‘Hop on top of the crystals to move forward.’ This is a clue for right here in this room. The blocks on the left side should be down so climb up the steps at the bottom-left part of the room. Drop down on the right to land on the raised blocks. Use Roc’s Feather to jump over to the other block that is raised. Climb the steps at the bottom-right area, jump over the blade trap, and head up a screen. Open the treasure chest found here to get some secret medicine! You can only hold one at a time, so if you purchased one earlier from Crazy Tracy and still have it, then this one will do you no good. Jump off the ledge and head up a screen.


Defeat the star, spark, and water tektites that are found in this room and then head up a screen. Continue up another screen and open the treasure chest that you find here to get a small key. You should now have two small keys in your possession. Now backtrack down three screens and left a screen.
Use the small key on the locked door at the top of the room and head up a screen. Defeat the two zol in this room and then if you look at your map, you’ll notice that the room straight above is where one of the eyes on the map are located. Tap against the north part of the wall to find a secret passage. Use a bomb to blast open a whole and then head up to take on the dungeon mini-boss, Smasher.
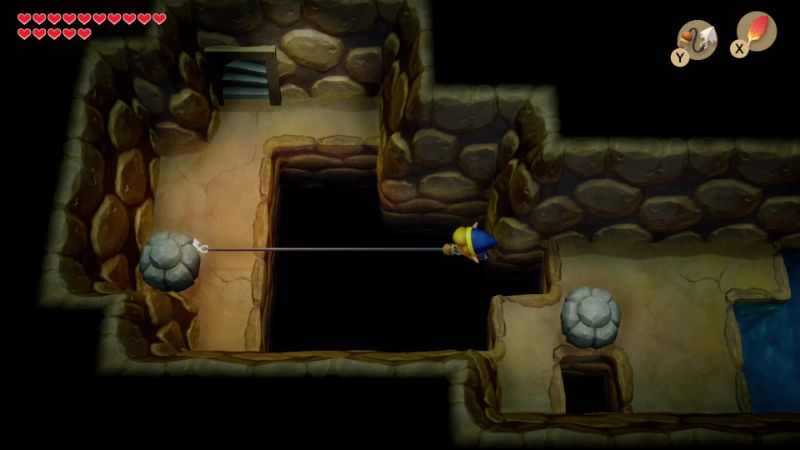
Smasher is a strange looking fellow that has a large bowling ball in the room. He’ll move around the room, picking up the bowling ball and tossing it at you. What you need to do is use the power bracelet, pick up the ball, and toss it back at smasher. After four hits with his own bowling ball, smasher will be defeated, a fairy will be left for you, and a warp portal will appear. Ignore the portal for now and just head up a screen.


If you continue up a screen from this room, you’ll find yourself back in a previous room. If you just keeping head up and up, you’ll be just repeating rooms in an endless maze. Instead, use the power bracelet and lift up the block on the left side of the room to find a staircase. Walk down the steps.
Make your way through this underground area, defeating the sparks and goombas if you’d like. On the second screen, climb the ladder to resurface at another part of the dungeon. There are more floor tiles that will come alive in this room. Stand at the bottom-left portion of the room and use your shield to block them as they fly towards you. After all floor tiles have fallen, grab the small key that fell from the ceiling. Unlock the block and head up a screen.

Lift the large statue in this room and toss it at the closed door to open it, and then head left. There are two horse head statues in this room. Toss them until they both land straight up, opening the doors in the room. Continue left a screen and then head down the steps. In this underground area there are enemy Thwomps that will fall to the ground if you walk underneath. Just use the Pegasus boots to dash across these two screens and then resurface.

There are three Pols Voice found in this room, but we now have a much easier way of defeating them in comparison to the last time we saw them. Just pull out the Ocarina and play the Ballad of the Wind Fish. The noise will affect their large ears, defeating them in the process. Lift up the pot at the top-left of the room to find some spare bombs. Walk up a screen through the open door.


Use the power bracelet and boomerang to make safely make your way through this room. Be sure to grab the bombs and ten head up a screen. Hit the crystal switch once with your boomerang and then open the treasure chest in this room to get 200 rupees. Toss the horse heads until they land correctly and then backtrack down two screens.
Back in the room with the three pols voice, let’s head down a screen. You will find two dodongo snakes in this room, so defeat them just as we did earlier. Use bombs and either place them or toss them into snakes’ mouth. Remember, if the bombs are about to detonate, you can pick them up and the timer will reset. After hitting each dodongo snake with three bombs, head through the door that opens on the left.
Use the hookshot to get across the gap. Use your final small key on the locked block and then head up two screens. Lift the blocks and talk to the owl statue. The owl statue states, ‘To open a treasure chest, use the pots around it.’ If you try opening the treasure chest here, it won’t open. So listen to the owl statue and toss a pot at it to open it up and get the Nightmare Key!


From the treasure chest with the Nightmare Key, walk down and jump off the ledge. Continue down to the room with the wizzrobes and head left a screen. Continue up, passed the room with the mini-boss and once again head down the steps on the left. Make your way through the underground area and resurface back at the tile room.


From the floor tile room, head down a screen and the doors will close. There is an enemy vacuum on the left and four green zols are burrowed under the ground. Walk around the room so the four green zols are revealed and the vacuum will suck them in so they fall into the abyss. Once all four are gone, head right a screen.
Push the block that is at the bottom of the screen to the right. From here, use a bomb and toss it so that it explodes and defeats the wizzrobe in this room. There is an enemy Beamos in this room as well, and if it sees you, it will shoot out a green laser in your direction. After its eye passes, quickly run to the right and use roc’s feather to jump over the gap. Walk up a screen.

You’ll find two unlit torches and some sparks in this room. Either light both torches to get a fairy, or just use the boomerang on one of the sparks to get a fairy. With full power, use the nightmare key and head up a screen to take on the dungeon boss, Facade.
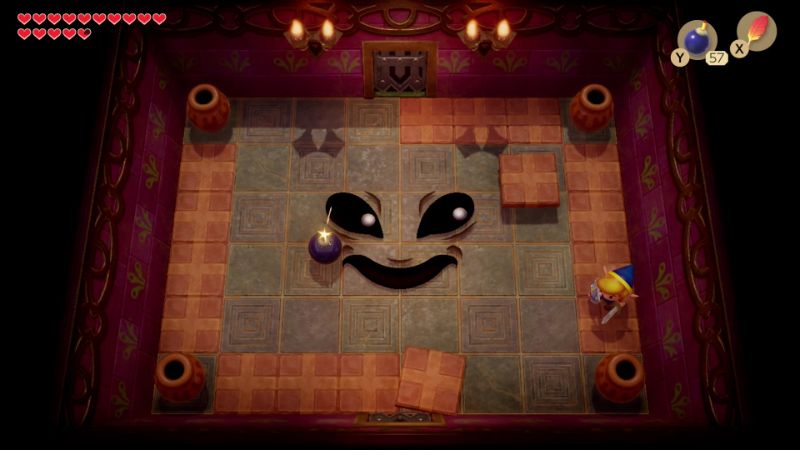
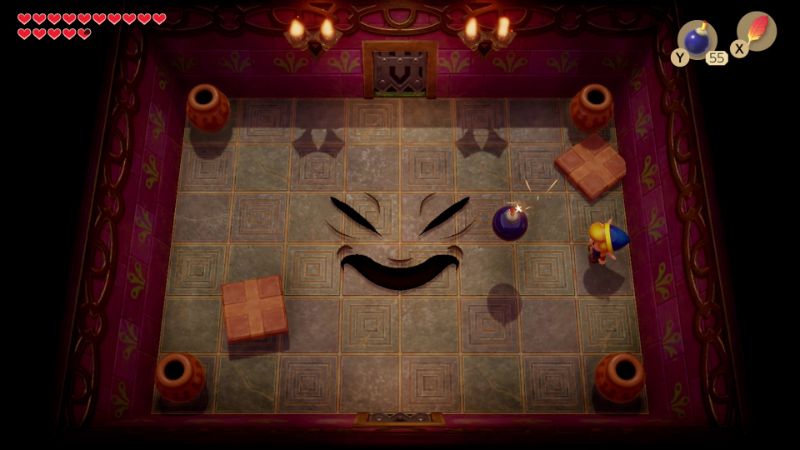
Facade is a rather easy boss. You have to drop bombs so that they explode on his face. In the first phase of the battle, tiles will fly out towards you, as well as flying jars afterward. These flying objects can knock your bombs away. After all the jars are gone, holes will start to appear on the floor, so just keep moving around. Drop a bomb and then run. When it explodes, it will hurt Facade. Repeat this a few times, and Facade will admit defeat.


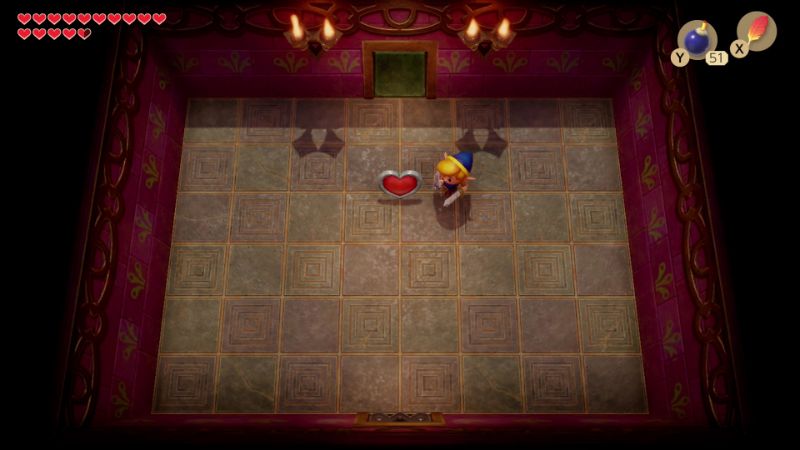
Grab your usual reward for beating a boss, a Heart Container. Walk up the stairs to get the Coral Triangle. Now that we have six out of eight Instruments, we are called to the mountains, where the last two dungeons reside. I hope you didn’t die on this boss, he was very easy. You’re going to need the Secret Medicine for the last two. Leave the dungeon with pride and congrats!

| “…MOUNTAIN… Something calls…from the mountains…” |
