This chapter covers the normal mode of the HD version of Twilight Princess for the Nintendo Wii U. If you are playing on the Nintendo Wii, check out the Lanayru Province: Twilight – Wii Version.
- Chapter 1 – Ordon Village
- Chapter 2 – The Twilight
- Chapter 3 – Faron Woods: Twilight
- Chapter 4 – Forest Temple
- Chapter 5 – Kakariko Village: Twilight
- Chapter 6 – Death Mountain
- Chapter 7 – Goron Mines
- Chapter 8 – Lanayru Province: Twilight
- Chapter 9 – Lake Hylia: Sidequests
- Chapter 10 – Lakebed Temple
- Chapter 11 – The Master Sword
- Chapter 12 – Gerudo Desert
- Chapter 13 – Arbiter’s Grounds
- Chapter 14 – Scaling Snowpeak
- Chapter 15 – Snowpeak Ruins
- Chapter 16 – Sacred Grove: Round Two
- Chapter 17 – Temple of Time
- Chapter 18 – In Search of the Sky
- Chapter 19 – City in the Sky
- Chapter 20 – Palace of Twilight
- Chapter 21 – Cave of Ordeals
- Chapter 22 – Hyrule Castle
8.1 Kakariko Village
You will next appear back at Kakariko Village, speaking with Eldin. After a short discussion Renado and the children appear, and Colin can be seen, having regained consciousness. Renado tells Link to go on with his adventure and he will stay to look after the children.


NOTE: The entirety of this section is completely optional. Furthermore, sections 8.2 and 8.3 are also optional. To continue onward with the main quest, journey north of Kakariko Village and head towards the Bridge of Eldin. Skip ahead to section 8.4 for the main quest guide.
Once you regain control of Link, there is a lot that we can now do here in Kakariko Village and elsewhere in the Eldin Province. Now that relations with the Gorons have normalized, Barnes is able to get the material needed for his Bomb Shop. Run to the north end of town and enter the last building on the right to enter Barnes Bombs. Speak with Barnes and since you don’t have a Bomb Bag, he offers a special deal, a bomb bag filled with 30 bombs for the price of 120 rupees. Go ahead and purchase the bomb bag. NOTE: If you don’t have enough rupees, no worries as we will be getting plenty of rupees in this section.


Walk up the nearby stairs inside the shop to reach the second floor. Climb up the nearby ladder and you will reach a familiar outside area from our adventures in the Twilight. Scale this area to reach a Goron that is standing by the town watchtower. Speak to this Goron and he will launch you up to the higher ledge found here. You can enter the house here to find a chest containing a purple rupee. Once collected, head back outside and climb up the ladder to get all the way to the top of the watchtower where Talo can be found.


Speak with Talo and he will want to learn how to use the bow, and this will trigger an archery mini-game of sorts. Link will appear back all the way near the Eldin Spring and will be talking with Malo. Malo has set up a target for Link to hit. It can be found just ahead and is easy to hit. He then causes another to appear, which can be found on top of Malo Mart and is also an easy target. The final hit though, is the pole found all the way atop the watchtower, right next to Talo. As a reward for your great accuracy, Malo will give Link Piece of Heart #9.


There is another goody for us to get with Malo. Go ahead and enter Malo Mart, and you’ll find that he has a new item for sale known as the Hawkeye for 100 rupees. This item can be used almost like a telescope, allowing Link to see in the distance. Furthermore, the item can be combined with the bow, allowing for distant target practice.


Now that we have bombs, we can also combine them with arrows to make bomb-arrows. To do so make sure that the bow is equipped already. Then select the bombs and drag it over where it says bomb and arrow combo in the ZL box. This will combine the items into one.
Look at the south end of town, near the Eldin Spring. If you look towards the entrance to the Kakariko Village and then look all the way up at the top of the area, you will notice there are two boulders. Use bomb arrows to destroy the boulders, revealing a piece of heart. Target the heart piece with the Boomerang to snag Piece of Heart #10.

Just below those boulders, along the path leading to the Kakariko Gorge, there is another boulder nearby. Destroy it with a bomb and run ahead to reach an area that is behind the Eldin Spring. There is a pool of water and at the bottom a treasure chest can be see. Drop down into the water below and use the Iron Boots. Open the treasure chest found here to collect Piece of Heart #11.


There is another heart piece to get in this area, and it is up along the Death Mountain Trail, so head in that direction. When you first enter the area, talk to the first Goron and he’ll launch you up. Run ahead to the next Goron and he offers to launch you up as well. This time however, don’t progress up the main trail. Instead turn to the left and have the Goron can launch you up and reach the high ledge at the west side of the area.
Note: If it is nighttime you will see a floating lantern in this area. Just ignore it for now as we don’t have the ability to do anything with it just yet.
Run northward along this higher ledge and you’ll eventually see a young Goron in the distance. Before going in that area, turn to the left and you’ll find a hole in the wall that you can drop down. Do so and here you will find a treasure chest. Open it up to get Piece of Heart #12. That’s all there is to do here, so return back to Kakariko Village.


8.2 Kakariko Gorge Cavern
Make your way back to the Kakariko Gorge (the area of Hyrule Field that is southwest from Kakariko Village). Jump the gate with Epona, cross the bridge, and then ride over to the south end of the Gorge, where you’ll find a boulder here that can be blown up. Do so and enter the Kakariko Gorge Cavern.


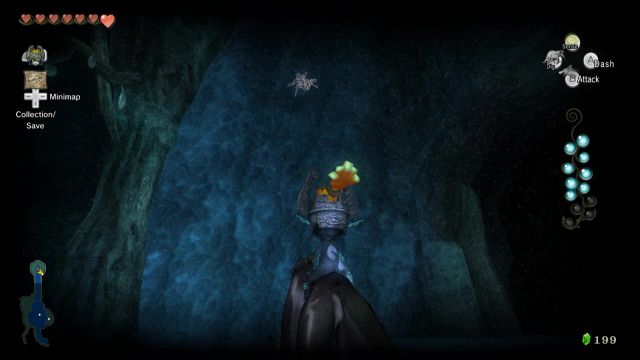
This is one of a few elaborate cave systems found throughout your adventure. There are a pair of rewards for us to collect right now, but there is also a goody that we are not able to collect at the moment and we’ll need to return later in the quest, so you can choose to do it all later, or do part of it now.
The cave is dark so you’ll be tempted to use your lantern, but use it sparingly, as you don’t want to run out of lantern oil. (If you do, a Yellow Chu can be found in this cave, see below.) There are a number of torches that you can light to keep those areas lit. You’ll also need to use the lantern to burn down spiderwebs that are in the way. The cave is filled with skulltulas, rats, and keese. All the enemies are fairly simplistic and can be defeated rather easily.
Here are all the goodies that you can collect and how to get to them. The directions are from the entrance of the cavern, and remember: if you are playing the Wii Version or the Hero Mode on the HD version, these directions will be reversed. The directions are for whenever there is a fork in the path.
Piece of Heart – Right, Right, Left, Right. Light up the two torches to get a treasure chest to appear to find Piece of Heart #13.
Purple Rupee – Right, Right, Right.
Miiverse Stamp of Hylian Letter O – Left, Right.


In addition to the heart piece, Miiverse stamp, and the purple rupee, there is also a Poe Soul to be collected here. However, we do not have the ability to collect it yet, so we will turn here at a later time.
There is also an enemy Yellow Chu. If defeated, the Yellow Chu will leave Yellow Chu Jelly, which can be scooped up in a bottle. Yellow Chu Jelly serves as an alternative to Lantern Oil.
8.3 Bridge of Eldin
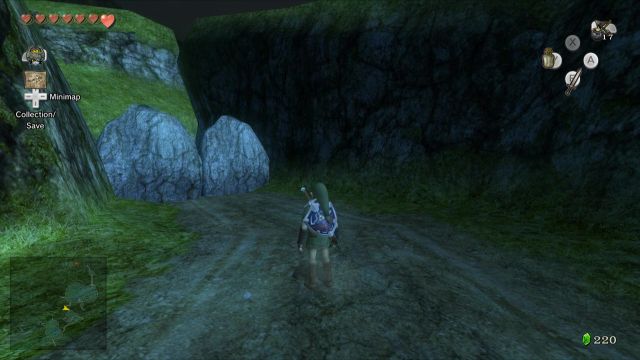
Our next destination is the Bridge of Eldin portion of Hyrule Field. You can reach reach the Bridge of Eldin directly from the Kakariko Gorge. There is a pathway along the north portion of the Kakariko Gorge and there are boulders that are blocking the pathway. You can reach these boulders on either side, but blow them up using some bombs and you’ll now be able to use this pathway.

There are four Golden Bugs for us to collect in the portion of Hyrule Field which contains the Bridge of Eldin, and a piece of heart too. The first bug is found at the northwest portion of the field right out in the open. It can be easily spotted at night time, but you should be able to locate it even during the day. Be careful of the enemy Leever that constantly appear from underground. The bug will hop around so you might want to use the Gale Boomerang to bring it over to you. Once you get a chance, grab the Female Grasshopper.


Next we’ll grab the piece of heart. It is located near the entrance to Kakariko Village. Head east, and turn south to see a canyon leading to the north entrance of Kakariko Village. Before heading down it, just to the left, there are a pair of large boulders that can be blown up with a bomb. Do so and then climb up the ledge. Continue up this ramp and then jump across a series of platforms to reach some vines, and climb them.
Run across the bridge to find some more vines across a gap, but before you jump to them, look closely. There is a boulder just above the vines here, so first use a bomb arrow to destroy the boulder and then jump over to the vines. Climb up and head across. If you look down below and to your right (near where you started, but on this side of the canyon), you’ll find a treasure chest. Drop down and run over to it to collect Piece of Heart #14.


From here, drop back down to ground level, and look a little northeast of your current position. If you look closely at your map you’ll see a vertical line which is a small rock wall. The next golden bug can be found just to the west of the short wall. Use your boomerang to grab the Male Grasshopper.


Travel northwards towards the Bridge of Eldin. Right when you enter the bridge area, along the gateway on the right side, you will see a Golden Bug. It is a bit higher up, so use the boomerang to snag the Male Phasmid.


Ride across the Bridge of Eldin, and once you cross it, turn to the right and look up on the higher platform. It’s a bit hard to see during the day, but at nighttime, the golden bug shines bright. Creep as close as you can to the ledge, while still keeping the bug in sight. Use the Gale Boomerang to snag the Female Phasmid.


8.4 Journey to Lanayru
It’s now time to progress towards the Lanayru Province. From the northern side of the Bridge of Eldin where you battled with King Bulblin, continue north and the pathway straight ahead is blocked off by some boulders. Use some bombs to blow up the boulders.


Once the boulders have blown up, a twilight warp portal will appear and it will suck away a portion of the Bridge of Eldin. It will then leave behind a trio of Shadow Beasts. Return to the Bridge of Eldin and defeat the Shadow Beasts. Since you are in human form, instead of Wolf Form, you’ll have to defeat multiple Shadow Beasts at a time by using the spin attack. Simply just hold the sword button down and release.


Jump back up on Epona and ride northward. The pathway here is rather straightforward and there is nothing of interest that we can do. Ride ahead towards the giant wall of Twilight. Walk up to the wall and agree to allow Midna to let you in. Just as before, Midna will grab Link and pull him in, turning him back into a wolf.
As Wolf Link, run ahead and you’ll find a small pouch on the ground that belongs to Ilia. Sniff the pouch and then forget the Youths’ Scent to learn the Scent of Ilia. Now you can use this scent to track Ilia.


The pathway takes you into North Hyrule Field, but since we are in Wolf Link form, there isn’t much to do here at the moment. Just follow the pathway across the field and it will take you all the way to the next area of Hyrule Field. Continue following the scent and it will eventually lead you across a bridge and into Hyrule Castle Town.


8.5 Hyrule Castle Town
Once you enter Castle Town, you can run around to familiarize yourself with the area, but what you mainly want to do is follow the scent of Ilia. It will eventually lead you into Telma’s Bar in South Castle Town. Inside you will find Ilia, along with owner of the Bar, Telma. They are looking over an injured Zora.


Additionally, if you listen to the guards at the back of the bar, you’ll find out about a water problem. The guard’s leader orders them to head to the location that is marked on the map, but the other guards pretend not to understand. Examine the map on the table next to them yourself and a mark will be copied to your map. Exit Telma’s Bar and then exit Castle Town from the way that you came in.
8.6 Lake Hylia
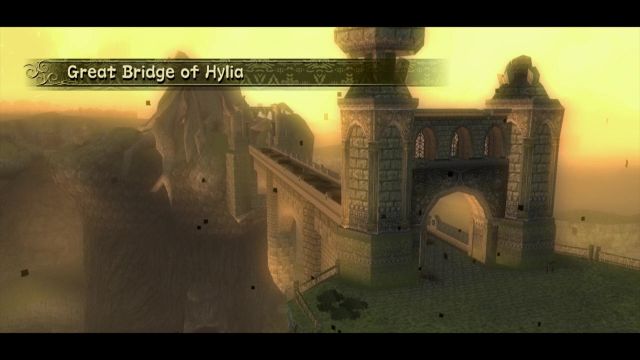
Our next destination is the mark that is now on your map. Travel to the west and you will come across the Great Bridge of Hylia, which extends over Lake Hylia. Run onto the bridge and as you approach the center of the bridge, Midna will comment that something on the bridge smells funny. Some black substance is coating the bridge, which turns out to be flammable, as the shadow bulblin archer will shoot fire arrows, lighting the bridge on fire. Quickly push one of the crates against the wall and then climb up. Leap off the bridge to drop all the way down into Lake Hylia.


You can listen to some of the Zora around and you’ll find that the massive water shortage has something to do with problems at Zora’s Domain. Run to the west side of the Lake and listen to the clown like character known as Fyer. He expresses his concerns and then spots an enemy monster nearby.


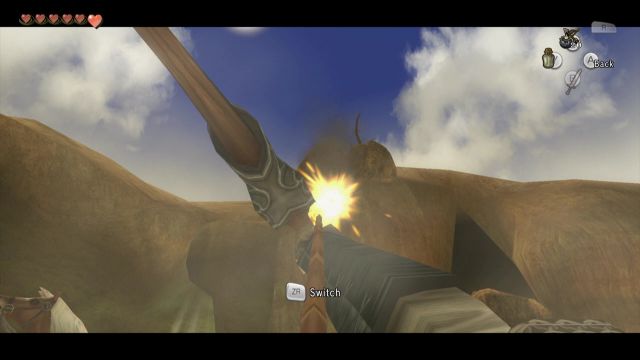
Run over to the Shadow Bulblin, and as you draw near the Bulblin will pick a piece of grass and summon a giant Shadow Kargarok. This is no ordinary Kargarok and is actually somewhat of a mini-boss known as a Twilit Carrier Kargarok. The Shadow Bulblin will jump on its back and begin to fly around. Avoid its attacks and when the Kargarok sweeps down, jump and attack. After enough hits the bulblin will drop to the floor and you can defeat it at the ground level.


After defeating the enemy, Midna will jump on top of the Kargarok and will snatch up Wolf Link. The Kargarok will fly up Zora’s River and you’ll control the massive bird. Use the controller to aim the direction that the Kargarok is flying, and then press A to dash ahead. There are some obstacles along the way and this part can be rather annoying. I would advise not using the dash and just slowly make your way up through the area. It just takes a bit of patience and you’ll eventually get it.

Once you reach the end of the river you’ll come across a new region known as the Upper Zora’s River. Once you arrive, you can drop down to the ground level below where the dried up river can be found. If you glance ahead you can actually see some snow. Head in that direction to reach the next area, Zora’s Domain.


8.7 Zora's Domain
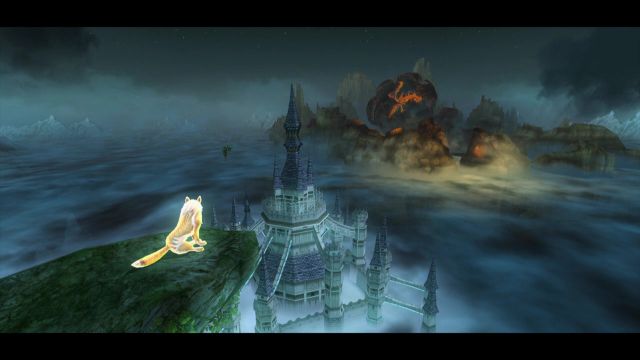
The waterfall ahead is completely frozen, preventing water from flowing down. Run ahead to the frozen waterfall and talk to Midna. You can use Midna to make some large jumps as you scale the frozen waterfall. The pathway is rather linear, so just make a number of Midna-assisted jumps to reach the top of the waterfall and then progress onward to the next area.


Once you arrive, you’ll meet up with three shadow beasts. Defeat the beasts and another warp portal will appear. If you use your senses and look beneath the frozen ice, you will see a number of Zoras frozen down below. Midna suggests that Link needs to find a way to thaw out the Zoras.


Speak to Midna and tell her that you’d like to warp. Choose the Death Mountain warp portal. If you recall earlier, a massive flaming rock spike dropped and landed right at the entrance of Death Mountain. Go and examine that massive boulder and then have Midna warp that boulder back over to Zora’s Domain.


The rock spike will crash down through the frozen ice, immediately thawing out the entire Zora’s Domain, causing the water to rapidly flow out of the area, thawing the waterfall as well. Try to leave the area, heading back to the waterfall and you will be confronted by the voice of the former Zora Queen, Rutela. She mentions that she sent her son to Castle Town to send warning to Princess Zelda of what was happening. Queen Rutela asks Link to rescue her son, Prince Ralis.


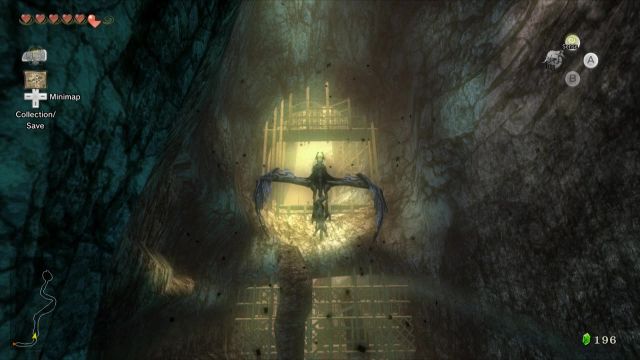
Return to the area with the massive waterfall, and the flow of the water will quickly send you in the direction of the Upper Zora’s River. Wolf Link will flow down the river all the way back to Lake Hylia and he will conveniently appear just outside the cave where the Spirit Lanayru is located. Go ahead and enter the cave.
8.8 Tears of Light
Just like in the previous two regions, you will hear the Spirit of Light, Lanayru. You will be given the Vessel of Light and tasked with the mission of collecting all of the Tears of Light.


Exit the cave and you’ll see the first shadow insect crawl up the wooden bridge. Follow it upwards and use your senses to defeat it and collect Tear of Light #1.


Run to the west and another warp portal will appear with three shadows beasts dropping from the portal. Per usual, use Wolf Link’s charged attack to defeat the enemies. Just on a higher ledge to the west you will find the second shadow insect. This insect will burrow underground when you draw near, so you will need to dig it out. Defeat the enemy to get Tear of Light #2.


If you glance at the map, you’ll find a third tear that can be found here at Lake Hylia, but it is all the way at the other end of the Lake. Jump in the water and swim all the way over to the insect. Use your senses to defeat the insect and collect Tear of Light #3.


Just near this insect, there is a piece of grass that you would ordinarily be able to blow into. Talk to Midna and she says that you should still be able to howl instead. Howl the pattern that appears on the screen and it will summon the Twilit Carrier Kargarok, once again grabbing Wolf Link and taking him up to Zora’s River.
This time through Zora’s River, if you glance at your map, you will find that there are three shadow insects. Fly just as you did before, but once you are close enough to a shadow insect, target the insect and then press A to dash into it. The Kargarok will immediately defeat the insect and will automatically collect the Tear of Light. Make your way through Zora’s River, collecting Tears of Light #4, #5, and #6.


Once you arrive at Upper Zora’s River, walk over and listen to the woman found here, triggering the shadow insect to crawl out from underneath the wooden platform. Defeat the insect and collect Tear of Light #7.


Walk over to the north portion of this area and you will find a Howling Stone. You should be familiar with howling stones by now as we encountered our first one in Chapter 5. Go ahead and howl this haunting and possibly familiar tune to unlock another Golden Wolf location in Hyrule Field, just outside the entrance that we have used to Castle Town.


Back at Upper Zora’s River, walk to the west and you’ll find two Zoras. Listen to them and you’ll find they are in search of Prince Ralis. Jump in the water after them and swim to the next area where you will appear back at North Hyrule Field.


If you glance at your map and zoom specifically to the Castle Town region, you’ll find that there is actually an insect in this area. Make your way back to Castle Town and then travel all the way to just outside of Telma’s Bar. On your way you will once more encounter three shadow beasts and unlock another warp portal, near where the Golden Wolf is (which will have to wait, because you do not have sword in hand. We’ll be back.)


Once you finally make it to Telma’s Bar, use your senses and you will find the shadow insect hidden behind the crates. Break the crates and defeat the insect to collect Tear of Light #8.


The remaining Tears of Light are back at Zora’s Domain, so use Midna to warp up to the top of Zora’s Domain. In the area right where you warp, look at your map and you’ll see that a shadow insect is found near the entrance of this area. It is higher up on the wall and you can get the insect by first dashing into the wall, causing the insect to fly around. Defeat it to collect Tear of Light #9.

Make your way over to Zora’s Waterfall and jump down to the lower area. At the very center of this area, there are a number of lilypads that you can jump on, with a shadow insect right in the middle. Defeat it to get Tear of Light #10.


There is one more shadow insect found at the east side of the room. Swim on over and the shadow insect will burrow underground. Dig it up and defeat it to collect Tear of Light #11.
After getting the first 11 Tears of Light, a 12th location will then appear on your map back at Lake Hylia. Warp on over and then make your way over to the location on the map. Use your senses and you will meet up with the Twilit Bloat, a giant shadow insect.


The massive insect will fly around and occasionally swoop down towards Wolf Link. Side step the attack and when there is an opening, jump and attack the insect. The Twilit Bloat will then rapidly move along the water and will swim right over the platform you are on. Jump into the water or to an adjacent platform to avoid the attack. Repeat this process several times until the Twilit Bloat comes crashing down to the water with its body laying upside down.


Jump onto the Twilight Bloat and hold B to create a charged attack to target all of the legs on the enemy, delivering a finishing blow.
With the Vessel of Light complete, you will be warped over to the Lanayru Spring and you will meet up with the Light Spirit. This is actually a rather lengthy and somewhat disturbing cut-scene giving some backstory about the Fused Shadow and the history of Hyrule. Lanayru will tell you that the dark power that you seek lies at the bottom of Lake Hylia within the Lakebed Temple.
There is still quite a bit we need to do before entering the Lakebed Temple, along with a TON of optional material for us to collect, and that will be covered in the next chapter.


- Chapter 1 – Ordon Village
- Chapter 2 – The Twilight
- Chapter 3 – Faron Woods: Twilight
- Chapter 4 – Forest Temple
- Chapter 5 – Kakariko Village: Twilight
- Chapter 6 – Death Mountain
- Chapter 7 – Goron Mines
- Chapter 8 – Lanayru Province: Twilight
- Chapter 9 – Lake Hylia: Sidequests
- Chapter 10 – Lakebed Temple
- Chapter 11 – The Master Sword
- Chapter 12 – Gerudo Desert
- Chapter 13 – Arbiter’s Grounds
- Chapter 14 – Scaling Snowpeak
- Chapter 15 – Snowpeak Ruins
- Chapter 16 – Sacred Grove: Round Two
- Chapter 17 – Temple of Time
- Chapter 18 – In Search of the Sky
- Chapter 19 – City in the Sky
- Chapter 20 – Palace of Twilight
- Chapter 21 – Cave of Ordeals
- Chapter 22 – Hyrule Castle
