This chapter covers the normal mode of Twilight Princess for the Nintendo Wii. If you are playing on the Nintendo Wii U, check out the Lanayru Province: Twilight – HD Version.
- Chapter 1 – Ordon Village
- Chapter 2 – The Twilight
- Chapter 3 – Faron Woods: Twilight
- Chapter 4 – Forest Temple
- Chapter 5 – Kakariko Village: Twilight
- Chapter 6 – Death Mountain
- Chapter 7 – Goron Mines
- Chapter 8 – Lanayru Province: Twilight
- Chapter 9 – Lake Hylia: Sidequests
- Chapter 10 – Lakebed Temple
- Chapter 11 – The Master Sword
- Chapter 12 – Gerudo Desert
- Chapter 13 – Arbiter’s Grounds
- Chapter 14 – Scaling Snowpeak
- Chapter 15 – Snowpeak Ruins
- Chapter 16 – Sacred Grove: Round Two
- Chapter 17 – Temple of Time
- Chapter 18 – In Search of the Sky
- Chapter 19 – City in the Sky
- Chapter 20 – Palace of Twilight
- Chapter 21 – Cave of Ordeals
- Chapter 22 – Hyrule Castle
8.1 Kakariko Village
You’ll appear in Kakariko Village and speak with the Spirit of Light, Eldin. He speaks of a land to the north of here, guarded by the spirit Lanayru, and Link will find who he seeks. The kids and Renado appear and Colin walks over to Link. He tells Link that he has to save Ilia. Colin seems to be living his dream of wanting to grow up just like Link so you no longer have to worry about him. Renado offers to care for the children as Link goes off on a greater adventure to save Ilia.


There is still plenty to do in Eldin before venturing towards Lanayru Province. Speak with Renado and he’ll mention Talo is now watching guard at top of the highest tower in town. Walk to the north end of town and speak with the Goron that is standing outside of Barnes shop. He will mention that Barnes shop is now re-open for business and offers to launch you up to the roof of the store. Say yes and jump on his back. You have to move in the direction of the house once you are launched upwards in order to land on top of it.
Walk to where the highest building in town is and you’ll see another Goron. He mentions that a kid is now watching guard over the town at the very top of the tower and offers to launch Link upwards. Jump on his back and launch upwards to a balcony. Enter the building here and you’ll see a treasure chest nearby that contains 50 rupees. Afterwards, climb the ladder and speak with Talo. He states is watching over the town in case any monsters appear. He wishes he had a bow and arrow and asks Link if he can show him how to use one. Agree to do so.
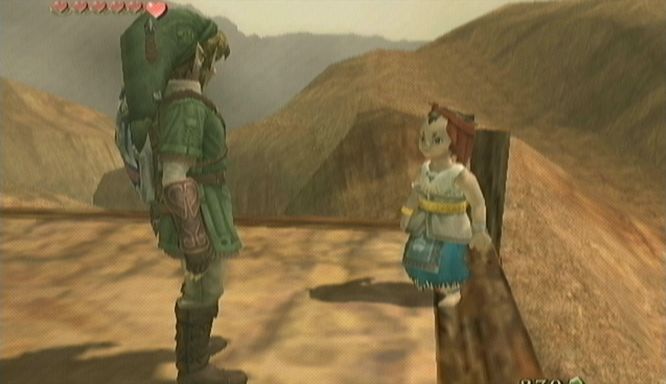
You’ll next appear back at the spring in Kakariko Village and a mini game will start up. Malo appears and he has setup a bunch of targets within the village. After criticizing Link’s ability to target with a bow, he tells Link to shoot at the nearby target. Nail it with an arrow and Malo will say it was an easy one. Shoot the next target that you are asked to aim at and then Talo calls over from on top of the tower and asks Link to try and hit the pole where he is standing. Aim very carefully to hit the pole. Talo jumps for joy when Link hits the pole. Malo still is very critical of Link and reluctantly hands over a Piece of Heart.


The next two items we can get are at Malo Mart and at Barnes bomb shop but they cost a total of 120 rupees. You should be close to that amount now if you’ve gotten all the treasure chests in the dungeons that we’ve been too as well as the few overworld treasure chests. There is also a treasure in the graveyard that we can get right now. Go to the graveyard and the second grave on your right can be pulled back. Do so and it will reveal a yellow rupee. Now go to the back of the graveyard, just before you climb the small step. There are two torches nearby. Light both torches and open the treasure chest that appears to get a purple rupee.

With these extra rupees, walk back to Kakariko Village and enter into Malo Mart. You’ll see there is a new item up for sale, the Hawkeye. It costs 100 rupees and it basically acts as telescope that allows Link to see things in the distance. Combine it with the bow and arrow and you’ll get some amazing accuracy from quite a distance. Leave Malo Mart and you can enter into the building next door. If you walk over to the fireplace in the next room, Link will once again encounter the Postman in one of his strange appearances.


Now make your way on over to Barnes shop to buy some Bombs. You can’t hold bombs unless you have a bomb bag. Thus, Barnes offers a deal of 30 bombs with a Bomb Bag for 120 rupees.
With your new items at your disposal, there are a few more heart pieces to get in the village. Walk towards the Eldin spring and right by the path that leads to Hyrule Field, you’ll see two large rocks up above. Use the arrows and combine them with your bombs to create Bomb Arrows. Just select the arrows, move over to the bombs and press Z. With the boulders crumbled to pieces, a heart piece can be seen in the distance. Equip the gale boomerang and toss it over to get the Heart Piece.


Return to where you just blew up the boulders and back away a bit towards the center of town. If you look near the path you’ll see a large boulder in the wall. Use a bomb to blow up the boulder, revealing a cave. Walk inside the cave and continue through the tunnel to the south. You’ll appear at the top of a ledge with the spring just below. This area of the spring however, was previous inaccessible. Jump down and then use the iron boots in the center of the area. Open the chest that is at the bottom of the spring to get a Piece of Heart. Remove the iron boots and swim back up.

Finally it is time to leave Kakariko Village. Use the horse grass nearby to call over Epona. Jump on top of her and ride her to the north part of town and exit into Hyrule Field where we fought King Bulblin before.
8.2 Bridge of Eldin
Ride forward and you should be getting some letters from the postman. After reading them, you’ll notice there is a long ramp along the left side and at the bottom of it, there is a pair of large boulders. Use the bombs to blow the rocks up and then climb the ramp.

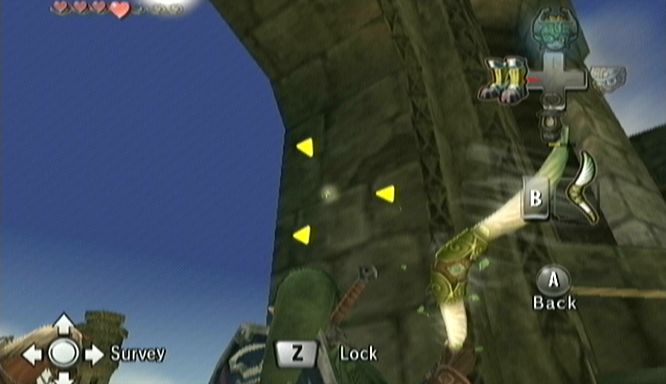
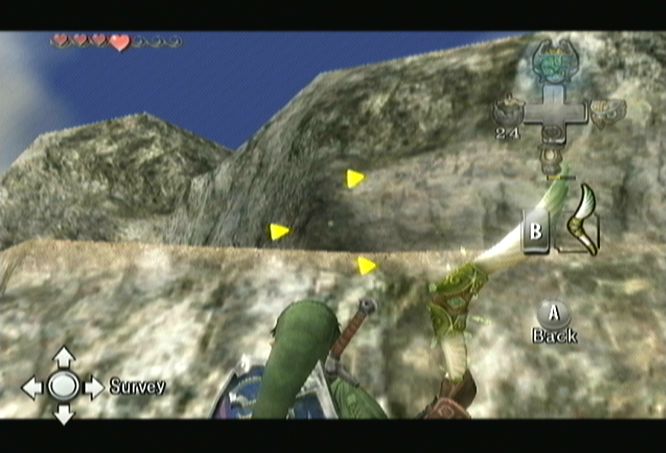
You’ll come to a small gap. Jump over it and then climb the ivy that is against the wall. Jump over to the platform that extends over the road and you’ll see a boulder at the top of another set of vines. Use the bomb arrows to blow it up and then jump on over towards the vines. Look to the north and you’ll see a treasure chest on a cliff below. It is a bit in the distance so use the hawkeye if you need to. Jump down and run over to the chest. Open it up to get another Piece of Heart.


Jump down to the ground level and walk northward just past the ramp we used. You’ll bump into some Leevers from underground. Slash at them with your sword if they become bothersome. Most the time, you can just ignore the Leevers, since they seem hesitant to attack Link. Immediately turn westward and you should see a golden Male Grasshopper jumping around. This golden bug could be a bit tricky to catch, so using your boomerang is not a bad idea.

Jump back on Epona and ride to the northeast corner of the field. Near the far corner, you’ll bump into several more Leevers. In this same area, you’ll find the Female Grasshopper. Like its male counterpart, it is a bit tricky to catch so you’ll either have to walk slowly up to it or simply use you boomerang.


Mount on top of Epona once again and now ride on over to the Bridge of Eldin at the northwest corner of the map. Right as you are entering the bridge, take a look at the wall on the left and you’ll see yet another golden bug. Use the boomerang to knock it down and bring it towards you. Then pick up the Male Phasmid.

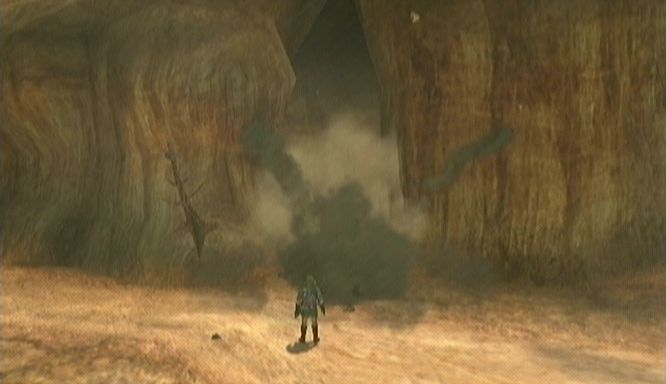
Hop on top of Epona yet again and ride northward. Once you cross the bridge jump off and use a bomb to explode the boulder. A good amount of rupees are left for you so grab them. From the wreckage look directly to the west and up a bit and you should spot another golden bug on the wall. Toss the boomerang over and catch the Female Phasmid.

Run northward and you’ll see a set of three boulders blocking the way towards Lanayru Province. Use your bombs to blow them up and this will trigger a portal to appear in the sky. The middle portion of the Bridge of Eldin will be pulled into the sky and three shadow beasts appear. Run on over and at first you might think to yourself, wait a second, I’m not Wolf Link. No problem. Defeat one of the shadow beasts normally and then wait for the other two to be near each other and use the spin attack. The beasts will be taken into the sky and a warp portal is left open.


Jump back onto Epona and ride her northward. There are some Bokoblins in your path but Link can ride right by them. You’ll eventually come to a wall of twilight leading to Lanayru Province. You’ll have to dismount from Epona. Walk over to the twilight and have Midna pull you in.
8.3 Hyrule Castle Town
After the switch over to Wolf Link, dash eastward either avoiding or defeating the Keese that are flying around. You’ll come to find an item on the ground. Take a sniff of it to realize that it belongs to Ilia. Choose to forget the Youths’ scent and learn the Scent of Ilia. Much like before, just use your senses to follow the scent of Ilia. You’ll eventually come into view of Hyrule Castle and Midna will point this out to you. Follow the scent of Ilia through the north portion of Hyrule Field and you’ll eventually head on over to the eastern portion of the field. From here, continue following the path, avoiding the variety of the enemies until it leads into the Castle Town.


It is a good idea to run around town, using your senses to talk to the various spirit people walking around. You’ll here about a Zora child and Telma’s Bar. We’ll soon find out more information about this. The spirits in the center of town near the fountain will mention problems occurring at Lake Hylia to the east. Resume your trace of the scent of Ilia and it will lead you to the west side of town to the Medical Clinic. You’re not able to enter this building as of yet so follow the scent as it leaves the building and it will go to the southern part of town.


Continue following the scent and it will lead to Telma’s Bar, where the door is left open for Link to enter. Use your senses and you’ll find Ilia speaking with the bar owner Telma. There is a child of the Zora tribe lying at in inch of its breath. They mention some sort of incident that occurred. Walk over to the northwest part of the room and listen in on the soldier’s discussion. Take a look at the map that is on the table and a red dot will appear in the Lake Hylia region. Ilia seems to be able to care for herself right now, so let’s head over to the red dot we saw on the map. Leave the bar and then leave Hyrule Castle town through the same way we came in at the east gate.


8.4 Lake Hylia
Cross the bridge and head all the way east through Hyrule Field. Continue through the eastern passage defeating a few enemies as you go. The route to the north is blocked off by boulders so continue heading eastward. You reach a fork in the road with a sign. Take the right path and you’ll come to the Great Bridge of Hylia. It extends over Lake Hylia which is currently dried up.


As you walk halfway across the bridge a Shadow Bokoblin Archer will light both ends of the bridge on fire. It will be closing in on Wolf Link so push one of the blocks over to the side of the bridge, jump on top of it, and make a suicide dive below.


A scene of Lake Hylia plays and Link will fall into what’s left of the lake. You can walk around and talk to the Zoras that are nearby as well as a shop owner at the southeast part of the dried up lake. The shop owners name is Fyer and he will spot an enemy, causing him to curl up.
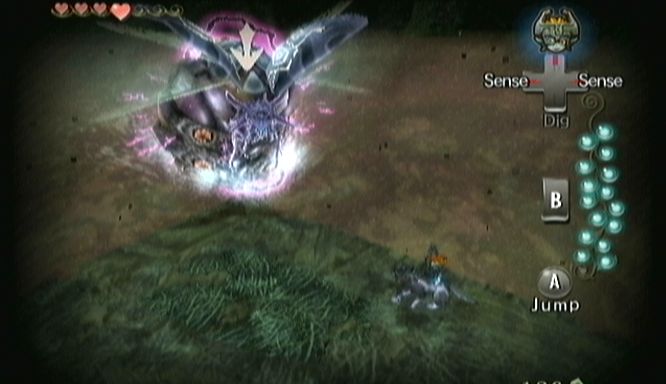
Run over to the Shadow Bokoblin Archer and you’ll see he picks up a piece of grass and blows on it, summoning a Shadow Kargarok. Just try to keep side jumping the archer as it shoots arrows at you. Once the bird is low enough, Z-target it and jump onto it. Attack furiously until you lose your grip and fall off. Repeat this twice and the Bokoblin Archer should fall to the ground. Defeat the Bokoblin just like a normal enemy and then Midna will jump on top of the Shadow Kargarok. Midna will use the bird to take Link to the source of the river.


8.5 Zora's Domain
You’ll now take control of the Shadow Kargarok. Use the Wii remote to direct the bird. Pressing A will dash forward, much like when you control Wolf Link. The falling rocks and walls on the sides are deadly if you touch them so try to avoid them at all costs. Keep the shadow creature as high as possible at all times as you navigate upstream. It looks a lot harder than it really is. You’ll eventually reach an open area. At this point fly to the top towards the bright light.


The bird will set you down at the Upper Zora’s River. Drop down into the river bed and head eastward to see that Zora’s River is full of snow. Continue eastward to Zora’s Domain and you’ll see much of it is solid ice. Run to the north end of the river where the frozen waterfall is.


Climb on top of a snowy platform and you’ll be able to jump over to Midna. Jump up six times to reach a solid platform at a higher area. Walk around the border, watching out for falling icicles that will plunge into the ground. You’ll reach another area where you can jump over to Midna. There are actually nine jumps in total, but take your time with these as Link could slip off the thin platforms. Once you reach the top, head northward to the interior area of Zora’s Domain.
You’ll find three shadow beasts here. Defeat them just as you have done before to create a warp portal above. Walk around and Midna will notice all the Zora are frozen underneath the ice. Hmm, so lets see, where can we find something hot enough to melt this ice? How about that gigantic volcanic rock near the Goron Mines?! Talk to Midna and have her warp you over to Death Mountain.


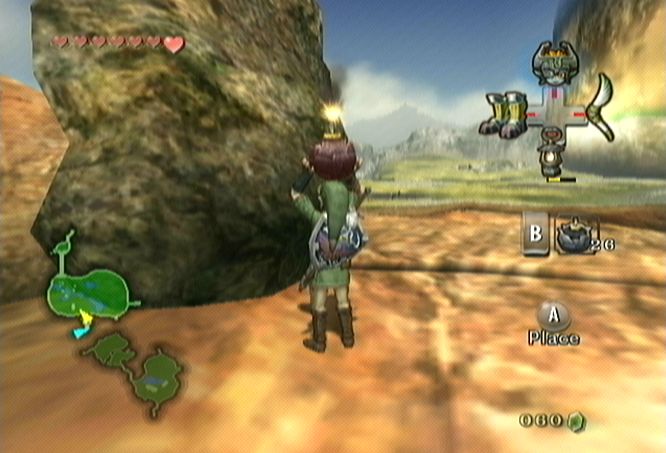
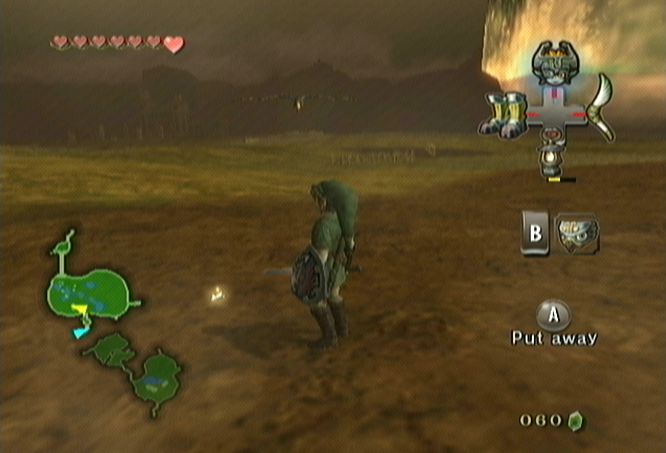
Walk over to the gigantic volcanic rock and talk to Midna to warp back to Zora’s Domain. Midna will pull the rock with you and drop it in the ice at Zora’s Domain. The ice will melt and the river will begin to flow downstream again, melting all the ice and snow in the process.


With the area restored to normal, you can walk around and talk to the Zora, but they are all too cold to give you any valuable information. As you try leaving the area, the voice of Rutela, a deceased Zora Queen will appear. She asks you to save her son, Prince Ralis. He is the Zora that was in Telma’s Bar. If you do so, Rutela promises to grant you the ability to swim deep underwater like a Zora.


Before making an attempt to save Prince Ralis, we must save ourselves and return to human form. In order to do so, we must restore the Light Spirit, Lanaryu. Jump in the water and take it down stream. Back at the waterfall, jump down and let the water take you all the way back down to Lake Hylia. Midna will awaken you and mention that you are right in front of the spirit’s spring. Walk into the cave.
8.6 Sixteen Tears of Light
Walk to the edge of the platform and speak with the final spirit of light, Lanayru. Like before, the spirit will give you the Vessel of Light and ask you to collect the tears. The tears work just like before and will be marked on your map. Leave the cave and begin your quest for the tears of light.


Walk forward and you’ll see a Shadow Insect crawl up the bridge on the right. Don’t mind it for now as we want to head to west part of the Lake for the first bug. Take a look at your map and you’ll see there is an insect is on a small island. Swim on over and easily defeat the insect for the 1st tear.


Now jump back into the water and swim over to where you met Lanayru. Follow the bridge on the right and you’ll come across the 2nd insect. No problems with this one either as it is quite simple to defeat.
Continue eastward and a wall of twilight will be created and it blocks your path. Three shadow beasts will fall from a warp portal in the sky. Defeat them just as before and you’ll be able to use this portal as a warp point. Run towards the southwest portion of this area and climb up the platform. From here, jump three platforms over to get to the far south ledge. Climb up this winding path and use your senses to spot another shadow insect. Defeat it and grab it for the 3rd tear of light.


Jump back down the platforms to get to where you fought the shadow beasts. Run across the bridge to the northeast and follow it to get to a building. Walk around to the back and you’ll see the insect floating around. It is a bit out of reach so wait until it dashes towards Link. Be careful not to hit it while it has its electric shock. Defeat it for the 4th tear.


Return to the front of the shop and cross the bridge. You’ll see a piece of grass on the floor where Link would normally use to call over a hawk. Wolf Link can just howl himself. Howl the tune that appears and that large Shadow Kargarok will return and grab Wolf Link.

This will take you along the same path up to Zora’s Domain. However, the difference is there are four insects that Link must defeat on his way up. All you have to do is use your senses to spot the bugs and fly right into them. Once you are close enough, Z-target the bugs and just dash right into them. Don’t worry about collecting the tear as it is done automatically. Don’t worry if you don’t get them all on your first try. Once you reach the top, call Midna and have her warp you back down to Lake Hylia. Return to the area you just were and howl for the bird. You can retry this unlimited times until you catch all four insects. Once you’ve caught bugs 5-8, just fly to the end of the tunnel.


Now at the Upper Zora’s River, walk over to the house on the west side of the area. Talk to the woman who is sitting here and she’ll get freaked out from the insect. Use your senses to defeat the insect for the 9th tear. The woman you just saw is named Iza, and she is the sister of Coro the lantern salesman.


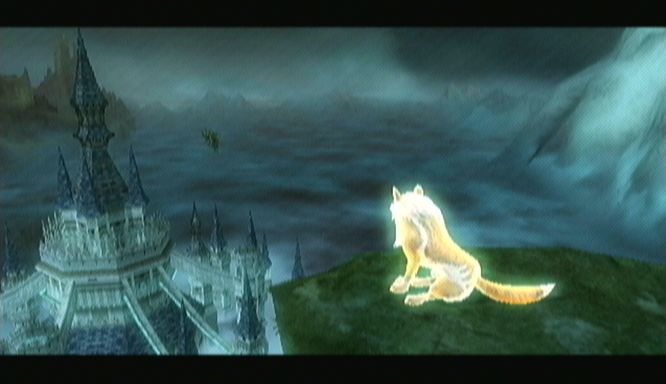
The building here is the boat rental shop and we’ll be visiting it a bit later. Run across the bridge that is next to the shop to get to the northern area of land. Climb up the little hill and you’ll find another Howling Stone. Walk up to it and you’ll hear a howl. Listen to it a few times and try to memorize the pattern. Once you got it down, howl the tune and you’ll be taken to a cliff outside of a Castle. Howl once again and the golden wolf will join you. Another red spot appears on your map near the east gate of Hyrule Castle Town. Keep this in mind when you return to human form.

Walk to the east and you’ll see two Zora spirits talking to each other about Prince Ralis. They’ll jump into the water in hopes of getting to Hyrule Castle. Jump in the water and swim with them as well. Stay along the left side of the water until you reach some steps. Exit the water and then run eastward towards the path to the southeast. Continue to get back into east Hyrule Field. Run over to the bridge that leads into castle town. You’ll see the golden wolf nearby but can’t do anything until you return to human Link. Walk towards the gate and three shadow beasts will fall once again. Defeat them as usual to create another warp portal in the sky. Walk across the bridge and enter Hyrule Castle Town.


The spirit citizens of the town are now a bit happier that the water has returned. Looking at your map, you’ll see a single insect in the southern portion of the town. Run on over towards the bug and uses your senses to spot it under some wooden crates. Break open the crates and defeat the bug to get the 10th tear of light. There isn’t anything left for you in town so speak to Midna and have her warp you all the way back to Zora’s Domain.


You’ll notice on your map there is an insect on the west side of the area. Run up towards it to see that it is hanging along the top of the wall. Dash into the wall and it will start to fly off. Wait until it is low enough and then jump and grab. Defeat the insect for the 11th tear. Then head south to the waterfall area.


Jump down the waterfall and swim towards the center of the area. Climb onto one of the lily pads in the center and use your senses. Spot the two Shadow Insects and defeat both for tears number 12 and 13.
Jump back into the water and swim to the west land area. Climb onto the land and then run up to the top of the area. Use your senses and you’ll see the insect crawling underground. Stand above it and dig it up from underground. Defeat it for the 14th tear.


Jump back into the water and swim to the east side. Talk to the various Zora here and you’ll even notice a frozen cave that leads to Snowpeak. We will be traveling through here in the future. For now, walk a bit northward and you’ll be able to jump over to Midna. Run northward and you’ll be able to make a second jump. Follow the path behind the waterfall and you’ll come to another area where you can make a jump towards Midna. Continue forward and make a double jump towards Midna. You’ll see a small waterfall from the wall. Just continue southward and you’ll see a treasure chest. Open it for a red rupee.
Return to the small waterfall and climb the small area right under it. From here, make two more Midna jumps as you head back eastward. Walk forward and make four more jumps as you pass behind the waterfall. Run forward and you’ll be able to make one more jump towards Midna. Follow to the green rupees and then jump down to a lower platform with another green rupee. From here, just run to the south and you’ll find the shadow insect that roams the eastern area. Grab the 15th tear and then Midna appears and talks to you. Something seems wrong; you have 15 tears but there are no more on your map. All of a sudden one just appears in Lake Hylia. Use Midna to warp over to Lake Hylia.


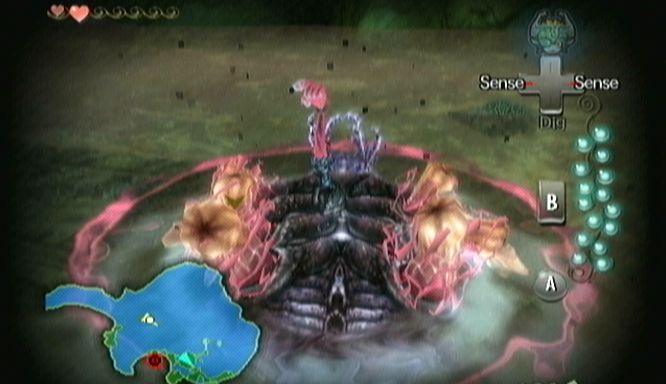
You’ll see a small scene with what seems like a massive insect. Swim towards the last remaining white dot and an electric shock appears from the ground. Use your senses and you’ll see a disgustingly huge electric insect bug. The battle is somewhat similar to that of a regular insect bug, except much bigger.
Twilit Bloat will fly around and electrify itself as it dashes towards Link. It could be hard to avoid but try to just jump to the side. When the electric goes away, Z-target the bug and attack it furiously. The giant insect will fall into the water and then swim around. Just stay on one of the wooden rafts until it returns to the surface. It will just start flying close to the ground and your best bet to avoid the bug is to jump into the water when it nears.
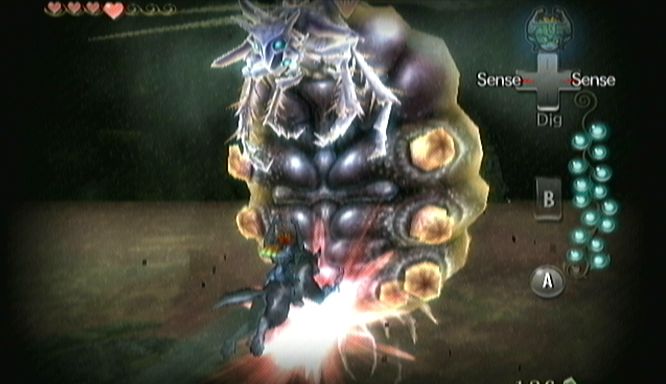

Twilit Bloat will now fly in the air again just as it did at the beginning of the battle. Wait until it is low enough and the electric charge is gone and then attack the bug just as before. It will fall into the water and repeat the same process a second time. Avoid its attacks until it begins to fly again. Attack it a third time and it will now fall on its back and float in the water. Jump onto the bug and the use the B button to attack all of its legs at once. Wolf Link will make rapid jumps and then the Twilit Bloat will be defeated.
Grab the 16th and final tear to fill up the Vessel of Light. You will then automatically be taken to Lanayru. Light has returned to this area and Link will return to his normal form. Lanayru appears and gives the usual, ‘Hero chosen by the Gods’ speech. He then mentions that the fused shadow we are looking for is at the bottom of Lake Hylia in the Lakebed Temple. After a cool, yet creepy scene, you’ll gain control of Link, so leave the spirit spring.


- Chapter 1 – Ordon Village
- Chapter 2 – The Twilight
- Chapter 3 – Faron Woods: Twilight
- Chapter 4 – Forest Temple
- Chapter 5 – Kakariko Village: Twilight
- Chapter 6 – Death Mountain
- Chapter 7 – Goron Mines
- Chapter 8 – Lanayru Province: Twilight
- Chapter 9 – Lake Hylia: Sidequests
- Chapter 10 – Lakebed Temple
- Chapter 11 – The Master Sword
- Chapter 12 – Gerudo Desert
- Chapter 13 – Arbiter’s Grounds
- Chapter 14 – Scaling Snowpeak
- Chapter 15 – Snowpeak Ruins
- Chapter 16 – Sacred Grove: Round Two
- Chapter 17 – Temple of Time
- Chapter 18 – In Search of the Sky
- Chapter 19 – City in the Sky
- Chapter 20 – Palace of Twilight
- Chapter 21 – Cave of Ordeals
- Chapter 22 – Hyrule Castle
