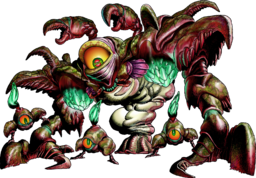
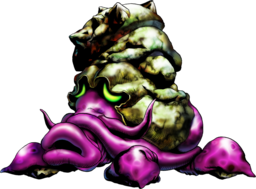
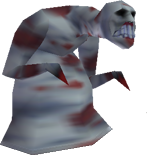
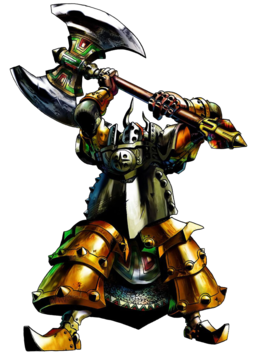
"Gohma It's one of those parasitic monsters inside the Deku Tree! Its eye is vulnerable when its red!"
Threat:
Attacks:
Contact. Lunges at you. Gohma Larva.
0:03
Introduction 0:30 Gohma's Attacks 0:57 How To Stun Her 1:12 The "Stick Trick" 1:22 The Best Way To Defeat Her
- At the start of the battle, use either C-up or your Slingshot to look up
at the queen on the ceiling, which will begin the battle. Although
she looks pretty intimidating, she's a piece of cake.
- Her main attack is to wobble towards you and then try to
basically fall on top of you, which can be easily defended against
using your shield or simply moving out of the way. Her other form of
offense is to climb onto the ceiling and make three eggs, which will
fall to the ground and hatch to become Gohma Larva after a short
bit.
- The Larva are easily defeated with two sword swipes or a Jump Attack,
but they can be killed quickly by simply slashing each egg before they
hatch.
3 Ways To Stun Her
Deku Nuts.
Slingshot (while on the ground).
Slingshot (before she lays eggs).
- To harm Gohma, you have to use either Deku Nuts or your Slingshot
when her eye is red (right before or after either of her "attacks"). This
will cause her to fall down and be vulnerable to your sword. The Slingshot is by far the most effective.
Regardless which way you do it, once she's stunned, smack the heck out of
her for as long as you can.
- The easiest way to defeat her is to simply wait for her to climb
on the ceiling and stun her then (this stun is far longer). If you do it
right, you can finish this boss off in less than a minute.
Summary:
- Use Z/L targeting, defend against her main attack with your shield.
Shoot her with Fairy Slingshot whenever her eyes turn red to stun her
(especially on the ceiling). Slash away. Repeat.
Dungeon Boss:
Infernal Dinosaur,
King Dodongo
Dodongo's Cavern (Past)
Navi:
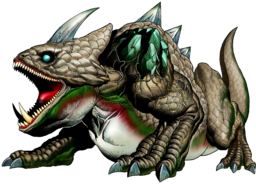
"King Dodongo This is a huge Dodongo that eats anything! Give it a shock, and finish it off with you sword!"
Threat:
Attacks:
Contact Roll Fire breath
0:02 Introduction 0:41 Attacks 0:54 How To Avoid Them 1:05 Stunning Him 1:16 The Best Way To Defeat Him (Whole Battle) 2:09 BLEH! 2:23 Getting The Heart Container 2:41 Leaving
This guy has heartburn =\
Toss bombs in his mouth...
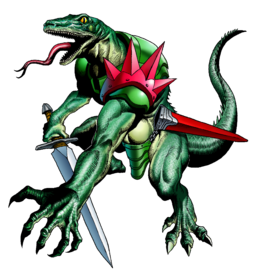
- King Dodongo is another easy boss that just looks big. Its large size
makes for awkward attacks that are easily avoided. It only has two
forms of offense, the first of which is to breathe fire at you,
which takes him a long time to charge up. His second attack is to
roll around half the arena, which he does repeatedly throughout the
battle, usually either immediately after the first attack, or when
there's an awkward situation where he can't hit you that well.
- Both of his attacks are easily avoided by standing close to the lava, or in
one of the insides of the corners. For the rolling attack, you can also just
hold in your shield to avoid taking damage.
His attacks are easily avoided.
...then slash away while he's stunned!
- With that being said, you should follow Navi's advice and try "giving him
a shock." Do so by throwing a Bomb or Bomb Flower into his mouth while he's
inhaling to breathe fire. It will explode in his stomach, stunning him for a
moment. Use the opportunity to slash him with your sword. Just be prepared
to jump to the side with the lava to avoid his roll immediately after, then
circle around to the other side or wait in one of the corners to face him once again.
- Four or five hits will kill this beast. And if you plan ahead, you can throw the
Bomb, whip out your sword while he flings himself in the air, then use A to
do a Jump Attack on him as soon as he hits the ground, dealing extra damage.
Summary:
- Rolls at you and breathes fire. The fire can't be deflected with your
shield, but both are easily avoided by standing close to lava. Avoid
actually touching the lava though... Throw Bombs or Bomb Flowers in King Dodongo's mouth while he's inhaling to
stun him, then slash with your sword. Circle around. Repeat.
Mini Boss:
Bigocto
Inside Jabu-Jabu's Belly (Past)
Navi:
"Bicocto Attack it from behind!"
Threat:
Attacks:
Contact. Spikes along the sides of platform. Turns around suddenly. Burrows and appears on other side.
Skip ahead to the following time frames to see this mini-boss:
- This giant Octorok isn't stuck in the confines of the water alike his
brothers. He circles around a spinning spiked platform of doom
trying to run you over, and he runs just about as fast as you do, so
it's difficult to catch up to him. Once he rams into you, he'll then turn around and start over again. Occasionally, he'll
disappear and reappear on the opposite side of the track. Just watch
the spikes to know which way he's traveling.
- As is pretty obvious, you're going to have to stun him using
your new-found Boomerang. You can hit him anywhere with it to stun him, but
he's only vulnerable to your sword from the backside once stunned. Below are the two ways to defeating him:
Catching Up (Hard)
- The first method is to run away from him, sticking close to
the spikes so you gradually catch up. Once you're close enough, Z
target, Boomerang, slash his backside. Simple, but lengthy and he
can be tricky at times, suddenly turning on you or burrowing to the
opposite side. (When I first played, I thought this was the only way
to do it!)
Standing Still (Easy)
- The easy way is to understand one thing: he turns around if he hits you
or occasionally when you stun him. What does this mean?
Stand still and get mowed over on purpose, then stun him and slash away. Repeat.
OR...
Stun him with Boomerang. Wait until stun wears off, let him spin around a little bit, stun him again while he's facing away. Smack him. Repeat.
- The second method makes this battle pathetically easy once you
notice the way he moves. Either way, after four sword slashes (or two jump attacks) to his
vulnerable spot, Bigocto will be a Bigloser.
Stun him while he's facing you.
Stun him as soon as it wears off.
If it's his back, slash away.
Summary:
- If he gets too close, or you get close enough, use the Boomerang to
stun. Once stunned, get behind him and slash. Run away when he chases you. Be
careful, because he can "teleport" to the other side. To kill him easily, just use your Boomerang, stun him again while he's
turned the other way and slash him. Repeat.
Dungeon Boss:
Bio-electric Anenome,
Barinade
Inside Jabu-Jabu's Belly (Past)
Navi:
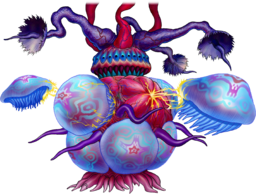
"Barinade Many parasitic jellyfish swarm around this monster. Aim for its body, protected by the jellyfish!"
Threat:
0:03 Introduction 0:35 Quick Note On The Shooting Attack 0:45 Phase 1: Tentacles 0:52 Phase 2: Orbiting Jellyfish 0:59 Killing Jellyfish 1:24 Phase 3: Spinning Defense 1:46 Deku Nuts & Din's Fire 2:09 Phase 4: Vulnerable At Last! 2:26 How To Jump Through The Shooting Attack 2:58 BLEH!!! (aka: Zits) 3:14 Heart Container 3:25 The Blue Light & Princess Ruto
Attacks & Abilities:
Electric Beams. Contact with little jellies. Contact with main body. Hides main body to protect itself.
Phase 1: Tentacles
- The battle starts out by slicing off the three appendages that are
attached to the ceiling, sucking energy out of Lord Jabu-Jabu. The natural conclusion is to use the Boomerang.
Target one at a time and dismember them as you circle around to avoid
the electric beams.
Don't get hit! Keep moving!
Slice the tentacles on the ceiling.
Phase 2: Jellyfish
- The next phase is a little harder. He releases the top row of jellyfish and allows them to
orbit around the main body. The electric
"connection" to them is dangerous as well, so try to weave in and
out to get close. Once you're close enough, use your Boomerang on
the main body (which is now slightly vulnerable). This causes the
connection to the outer jellyfish to break momentarily, making them no
longer invincible. You can also just wait awhile and he'll disconnect, but
he'll shoot while disconnected. Slash up the
jellies, stun the main body again before it comes back to life,
repeat. Your sword and Din's Fire work for killing them, but Deku
Nuts and the Boomerang get my vote for the best methods.
Sneak in and stun it.
Kill the disconnected jellyfish.
Keep the main body stunned!
Phase 3: Spinning Defense
- After the first set of Jellyfish die out, he'll send out his last line
of defense, spinning around the main body quickly as he zips around
the room. Z target the main body and try to keep some distance
between you as you continually use your Boomerang. Once you make it
through the jellyfish, they'll be separated again. This time
however, he can shoot you while stunned. Quickly run forward and
throw a Deku Nut at the main body (to hopefully take them all out at
once), or use the previous methods.
Don't get too close as you stun it.
They're close together, Deku Nuts rock!
Din's Fire is okay too, if you do it fast.
Phase 4: Vulnerable At Last!
- Once all of the jellyfish are gone, he'll zip around the room a little
more aggressively and shoot faster. Just keep moving and using your
Boomerang to stun him once again. Once you get him, go slash away at
the main body with your sword. After a couple slashes, he'll sink
down into the ground to protect the body. Run away for a bit until
he gets back up. Repeat. After a good ten sword slashes or so,
Barinade will explode.
Stun the body as soon as it's close...
...slash away while you can...
...then stay back and wait.
Summary:
- Keep moving to avoid the electricity it shoots. Use your boomerang to
kill the tentacles at the start of the battle, then to stun the main body
afterwards. Kill the jellyfish when they're disconnected with your sword,
Boomerang, Deku Nuts or Din's Fire.
- You can keep the main body stunned by repeatedly hitting it with your
Boomerang. When there's no jellyfish left, attack the main body when he's
stunned. Run away when he ducks into the ground. The end.
Mini-Boss:
Poe Sisters
Forest Temple (Future)
Navi:
"Meg - one of the Poe sisters
If she splits into multiple images,
you need to figure out which one
is the real one. Is it this one?"
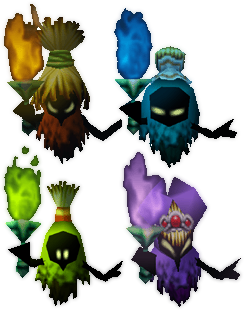
- In the Forest Temple, there are four Poe Sisters that you need to
defeat in order to return their flames to the main room of the dungeon. The
first three are found within paintings you find in the dungeon. Once you
acquire the Fairy Bow, shoot at the painting that has the Poe in it, which
will then move to the remaining portraits. Shoot the others until there's no
frames left to hide in, then follow the Poe and defeat it. They fight just
like the Poes found in the Kakariko Graveyard, so they should give you no
trouble.
- The final Poe Sister, Meg, is a little more tricky. Once the other three
have been defeated, return to the main room and she'll be waiting for you.
Meg will make three other illusions of herself, who then spin around you.
You can use the process of elimination with your Fairy Bow in order to
defeat them, but that's a little awkward. The trick to this battle is to
notice that the true Meg will spin around once just after they all appear as
well as just before she attacks. Watch for this and dodge or attack. After
several hits with the bow, Meg will be defeated.
Joelle
Beth
Amy
Meg
Temple Boss:
Evil Spirit From Beyond,
PHANTOM GANON
Forest Temple (Future)
Navi:
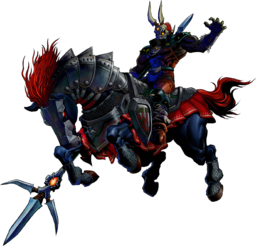
"Phantom Ganon It's an evil ghost of the Forest Temple! He comes out of one of the pictures.
Answer his magic attack with an attack of your own!"
Threat:
Attacks:
Lightning Electric Orb Charge
0:03 Introduction 0:42 Phase 1, The Pictures 0:58 Lightning Attack 1:20 How To Shoot Him 1:52 Phase 2, Ping Pong 1:57 Orb Attack 2:10 Close Reflection: Short Stun 2:23 Back And Forth 2:34 Far Reflection: Long Stun 2:46 Charge Attack 3:00 Fast Way To Kill Him! 3:13 Defeat! 3:48 Heart Container 3:59 The Blue Light
The illusion will turn back. Shoot the one that comes out of the picture.
- Your first temple boss can be difficult if only because he does a lot of
damage and his attacks are hard to avoid if you mess up. The first half
of the battle is similar to your recent
battle with Meg, the fourth Poe Sister. The boss will come out
of one of the six pictures along the wall along with an
illusion. At the last second, the illusion will turn around and
run back up the path, while the real one will come out and zap
the middle of the arena. If you're not fast enough, this will do
a whole two hearts of damage.
- A good method is to stay on one side of the room rather than standing in
the middle. Also, his lightning attack NEVER hits any of the
corners... After three successful shots with your bow, his horse
will abandon him and he'll fight you alone.
He can't hit you from the corners of the room.
- For the second half, he'll float around by himself and shoot less
powerful orbs at you. While they're easily avoided or dispersed
with any other attack or merely holding up your shield, in order
to stun him, you'll have to play ping pong with him until one of
you isn't fast enough. Use your sword to smack his attack back
at him multiple times until you hit him. Try to time your swings
so that the tip of your sword will hit the orb. It is
possible to just get very close to him and hope the first bounce
you get hits him, but it's hard to time it right and the stun
doesn't last as long.
- Very rarely, he'll make some pretty fireworks, then charge at you very
quickly. Simply hold up your shield or move out of the way to
avoid it. If he does hit you though, he'll do three full hearts
of damage! Yikes!
- Once he's been stunned, run up and slash away. Rather simple really, but
can get quite frustrating. After a good thirteen hits, he'll
finally die.
Use the tip of your sword as you bounce it back.
Run over when you finally get him...
...and just keep slashing while you can!
Run away when he charges at you! It hurts a lot!
Summery:
- Stand on one side of the room. Get an idea where both are coming from.
Shoot the real one as soon as you figure it out. Do this three times.
- Use your shield. Get kind of far away, try to reflect his attack by
slashing it with your sword. Try to time it to hit the tip of your sword, you'll
get hurt less doing it that way. When he falls, smack him. Repeat.
Skip ahead to the following time frames to see this mini-boss:
2:43 Flare Dancer
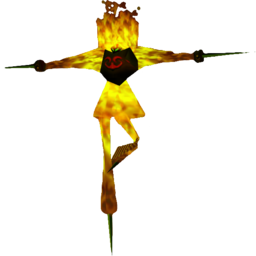
- As soon as the battle begins, this enemy will jump out of the flames and
start spinning. If you don't stop it quickly, it will shoot out
flames in a radius around him. He has two types of flames: red,
which simple sits there, and blue, which slowly inches its way
around the room, similar to a previous Zelda title, the
Adventure of Link.
- The rest of the time, he'll zip around the room like he's skating on
ice, leaving a trail of fire in his wake. He purposely tries to
knock you over while doing this, and while it doesn't do any
damage, it makes it annoying to get your bearings again.
Hurt him before he can...
...make evil flames!
Throw bombs...
...or Hookshot him.
- To hurt him, you have to wait for him to hold still right before he
attacks. While he's spinning around, Z target him and either
throw a Bomb or use your Hookshot to temporarily rid him of his
flaming body. Also, once you get the Megaton Hammer, you can simply smash
the ground to do this as well, which is much easier. He'll be reduced to a black torso, which grows
tiny legs and runs around the room squeaking. He'll
circle the room, then turn around when he sees you and run the
other way repeatedly. Eventually, he'll jump back into the
flames.
- There's three good ways to hurt him at this point: Hookshot him back to
you, circle around the room and use a Jump attack, or circle
around the guy himself after he sees you, so he can't move at
all and sees you on his other side. The last method can be
incredibly effective and make this battle very short if you do
it right.
You can use the Hookshot...
...the Jump Attack...
...or keep circling him to keep him in one place!
He's dying when he changes colors.
- Eventually, he'll take enough damage or be out long enough and jump back
into the flames. If you harmed him enough, he'll change colors,
just like the Torch Slugs. Red to blue to green. It's a nice little gauge to
see how much life he has left. Overall though, disembodying him
with the Hookshot then circling around and using a Jump Attack
is by far the easiest and fastest way to defeat him.
Summery:
- Wait till he stops, use Hookshot or Bombs to disembody him. Smack him
with your sword or Hookshot to hurt his little body. Repeat.
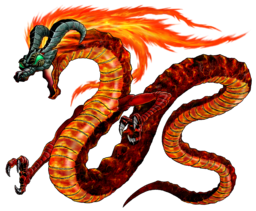
"Volvagia It's the Boss of the Fire Temple, revived by the Evil King. I don't know its weak point..."
Threat:
Attacks:
Contact (on ground). Slash. Contact (in air). Fiery Breath. Rocks.
0:04 Introduction 0:50 Stunning Volvagia 1:14 Chasing You! 1:40 Use A Jump Attack =D 1:54 Boulders Falling From The Ceiling! 2:33 Avoiding His Flying Attack 3:49 Defeat, Mwahaha! 4:20 Heart Container & Blue Light
Stand in the center when it flies around the room.
Avoid the shadows when rocks fall from the ceiling.
You can climb down the sides to avoid damage.
- Wow, thanks Navi for that incredible advice... This worm-like oblong
dragon has you trapped on a hexagon shaped platform surrounded
by lava. Should you fall in, don't worry, cause you can climb up
the sides and back onto the main platform. Should the need
arise, you can actually climb off to the side on purpose to
avoid being attacked by any of his moves. All its attacks are
somewhat awkward to avoid and they all do a great deal more
damage than the other bosses you've faced thus far.
- Volvagia has three main attacks it cycles through
somewhat randomly. The first is flying up to the ceiling and
bumping against it, causing flaming rocks to fall down.
Generally, they fall where you were standing when he first went
up to the ceiling, so going to the opposite side of the arena
usually fixes that problem. In either case, run away from
shadows.
Wait by the flaming holes.
If he pops out...
...he'll blow fire at you...
- The second attack is to come out of the lava and fly around the arena,
trying to breathe fire at you. While this does loads of damage
and knocks you over (potentially into the lava below) it's
easily avoided by simply standing next to the hole he originally
comes out of; the reason being, because he doesn't have a very
tight turn radius and he's too stupid to simply back up.
Alternatively, you can run around like a chicken with your head
cut off, circling the area, or just Z target him and use your
shield. Standing still is easier in my opinion. =)
- His third attack is to stick his head out and lean over the edge,
pausing a moment before breathing fire or smacking you if you're
close enough. This is your chance to teach him a lesson. Each
time he does this, run over and smack him in the head with your
Hammer. This will stun him and give you the opportunity to slash
away with your sword.
- As he takes more damage, he'll stall more in his appearance out of the
nine lava holes, trying to trick you into running to different
ones. It's pretty easy to keep track of though, simply because
he'll have two in a row that are fake, then the third one is
him. The best method is to simply stand near the middle and run
towards the last one. Because lava doesn't hurt you immediately
to walk on it now, feel free to walk over the holes themselves.
...or smack you...
Use your hammer first!
Then your sword!
Summery:
- Run up to it when it pops out of the lava, but not too close. If it's
just sitting there, smack its head with your Hammer to stun it, then slash away.
- If it goes up to the ceiling and makes rocks fall down, avoid the
shadows.
- When it flies around, trying to breathe fire at you, just get inside the
circle because it doesn't turn very fast.
- If you fall into the lava below, or just want to avoid damage (such as
the rocks falling from the ceiling) you can climb on the sides of the main
platform and wait there for a good time to climb back up.
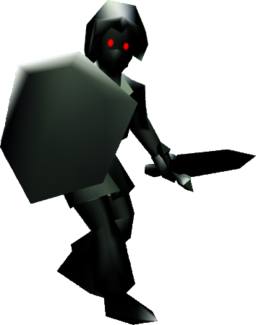
Rolls/Jumps (evading). Slash. Jump Attack Counterattack. Jumps onto your sword if you stab, and slashes.
0:03 Mysterious Room... 0:36 Attacks That Don't Work! 1:09 Attacks That DO Work! 2:08 Sword Attack Types 2:38 Sword Attacks That Don't Work! 3:00 Explanation Of The "Third Attack" 3:23 Third Attack Example 3:37 Direction Manipulation 3:57 No Z-Target Trick 4:23 Shield Trick: Well Timed Retaliation 4:46 Dark Link Battle Continued... 5:31 Water Room Illusion
Copying your every move.
Clang!
Don't stab with the Master Sword! He counterattacks!
No Z targeting, slashing towards him. You can hit him, but he might hit you as well...
- This battle can be intimidating at first, but after you begin seeing the
patterns in his attacks and simply avoid the moves that cause
him to react, he can be quite easily defeated. Basically, he
mirrors your every movement at first, but then gets more
aggressive as the battle progresses.
- Avoid using the Jump Attack
(Z + A) and stabbing with the Master Sword (Z + B + Forward). Each of those cause him
to counterattack, not that regular slashing doesn't, but those
two are guaranteed to fail every time (unless you miraculously catch him at
a good time right after he attacks, very rare, not worth it).
Z targeting: More safe, can sometimes trick him.
No targeting: Risky, tend to take damage yourself at the same time. Much
faster.
- There's two ways to go about this fight: Z targeting or without. While targeting, he mirrors your every move more accurately, but at
the same time, you can angle your slashes as to get past his
defenses, so while it's harder it's also easier to score a hit
if you watch him closely.
Without Z targeting, you can run around and your slashes have a
chance to penetrate his defenses. An example: run away from him,
turn around quickly and use a downward slash on him, or stand
side by side facing opposite directions and continually just
press the B button, eventually your sword will curve around and
hit him in the back because he's using a different type of slash
that won't hit your sword after awhile. A combination of the two methods
will throw him off guard (because he'll continually only roll,
or only be aggressive, etc).
- This battle is quite memorable and hard if you only use the
Master Sword and tricks to defeat him. If you
want this to go quick or are running low on life, you can always
just use other attacks, seeing as he ONLY has the Master Sword,
you can take advantage of that. In other words: Din's Fire or the Biggoron's
Sword. The larger sword + stab is very effective because he doesn't have
that same stab counterattack. Z targeting and just regular slashes are also
very effective.
Din's Fire will always hit, but doesn't hurt much.
You can stab with the Biggoron's Sword...
...or take advantage of the long range.
- If you're out of magic and don't have the Biggoron's Sword, your best
bet is to either have no Z targeting and try to inch your way
along his side while you slash continually. Otherwise, to Z
target and angle your attacks with the Analog Stick to try
getting past his slightly delayed attacks (just don't stab with
the Master Sword). It does work, it just takes a little
persistence.
Summary:
- If you choose to fight with the Master Sword, don't stab or Jump Attack.
Z target + Analog Stick to angle your attacks and get past his defenses. No
targeting + pressing in his direction = you both might take damage. Riskier, but
faster.
- If you want this battle to be easy and quick... Use Din's Fire and/or Biggoron's Sword.
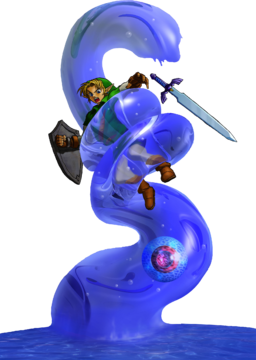
"Morpha Master of the Water Temple. It has absolute control of the water. Pull out its nucleus and attack it!"
Threat:
Attacks:
Contact (with nucleus). Squeezes you and hurls you across the room.
0:03 Introduction 0:54 Morpha's Attacks 1:33 Swirly Invulnerability 1:43 Longshot To Make It Vulnerable! 1:59 Corner Trick (...Wimp...) 2:15 Fighting From The Four Platforms 3:06 Surrounded! Last Minute Jumping Trick 4:30 Longshot In The Water 5:52 Epic Longshot'ness 6:03 Death Cinema 6:45 Heart Container 6:54 How To Defeat Morpha In A Few Seconds 7:32 Blue Light
Watch out for the tentacles...
...they hurt a lot if they grab you!
- Alike the last boss, this one deals out quite a bit of damage
should you accidentally get caught. This boss is rather simple:
it really only consists of a single orb that controls the water
in this room (in the form of tentacles that try to grab you).
You can easily tell where the tentacles are coming from by the
noises they make.
- To avoid taking loads of hurting, simply stay a good distance away from
each tentacle as soon as you see them beginning to appear. It's
pretty easy to stay out of their range. Wait until the nucleus
attacks through a tentacle, use Z targeting and Longshot it.
Make sure there's plenty of room on the ground in front of you
for it to bounce around, lest it fall back into the water as
soon as you get it! As soon as you do get it, smack it with your
sword, quick-like.
- After several hits, it'll summon two tentacles at once, and eventually
three. Repeat the processes just like you did before. If you'd
like this to be a challenging experience, stay ONLY on the four
platforms in the water. If you'd like it the other way... just
hang out in the corner where it can't reach you... *GASP!*
Use your Longshot when it's in a tentacle...
...then slash away!
Or just be a pansy and stay in the corner.
Summary:
- Keep your distance. If you hear bubbling or sounds like a spaceship
floating around, go the opposite direction. Z target the nucleus when it comes
up through a tentacle and Longshot it. Smack it with your sword before it hops
back in the water. Repeat.
Mini-Boss:
Dead Hand
Within The Well (Past) & Shadow Temple (Future)
Navi:
"Dead Hand
Watch out for its infinite hands!
Aim for its head!"
Threat:
Attacks:
Hands grab you! Bite Burrow
- If you have the Lens of Truth, you can use that to see where Dead
Hand is currently burrowed so you can move out of the way. Let the hands grab you to draw him to the surface. Press A and/or B
to get free, then get away from them. Now turn to the body and wait for it
to get close. When it lowers its head, smack with your sword a bunch. If you
wait too long, it'll bite you. Keep doing this till it's dead. Optionally
too, you can slash the hands themselves which will yield recovery hearts or
rupees once defeated, but watch out - they come back after a few seconds.
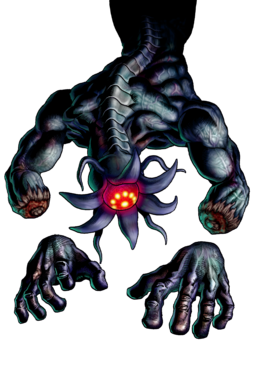
"Bongo Bongo
Boss of the Shadow Temple,
revived from the well. Look at it
with the eye of truth!"
Threat:
Attacks:
Side swipe. (Hold R to duck!) Punch. Slam. Clap. Shake and throw into poison. Grab.
(press A and/or B to get loose!) Charge. (He's vulnerable, use Lens of Truth and attack!)
- Bongo Bongo can be one of the hardest bosses in the game.
Even though he can be killed quickly if you know what to do,
he's all about timing and reacting quickly, which can be hard,
especially the first time you face him. His attacks do quite a
bit of damage, so it's not hard to quickly lose all your life. A couple fairies are recommended for
this battle.
- Ironically enough, the entire battle is on a giant bongo drum, with two
hands hitting it. It may seem as though you should use the Hover Boots, but they
actually make it harder. The drum is floating in a sea of poison, so you'll have
to jump back on as quick as possible should you be cast off.
- This boss attacks by using two hands with generic, predictable punching,
etc. His fastest attack is the swiping move, which is hard to
avoid sometimes. The best way is to simply hold R to duck when
you're not Z targeting. The other moves are generally easily
avoided by simply rolling.
- The object of the battle is to stun both hands, to make Bongo Bongo
vulnerable. You can do this using the Longshot, the
Megaton Hammer, the Fairy Bow, or simply one of your swords. Both
of the first two listed... well... suck... It's possible to
attack the hands while they're in the middle of attacking you, but
some attacks are invulnerable, etc, so it's easier to attack the
stationary one. Here's the two best methods I've found to
attacking the hands:
Method 1
- Stand far back so you can see both hands. Z target and shoot one hand.
Dodge the other when it attacks, and if it's next to you for a
second (such as after slamming the ground) stab it with your sword.
Otherwise, Z target that one, and shoot it when it goes back to
its starting position before it attacks again.
Method 2
- Wait for one hand to attack. Run straight for the other hand that's not
moving. Smack it. Quickly turn and move to where the opposing
hand will return to (left or right). Smack it as soon as it
comes back to its original position.
- Both of those tricks work very well (I like the second method better).
However you end up doing it, you can use the Lens of Truth to see Bongo
Bongo. He'll now open his eyes and rush towards you, with hands
on either sides. Hit his open eye to stun him, with which you
can use all of the weapons listed earlier. A regular sword slash
is kinda fun, but hard to time... The best methods are:
Lens + Z target + Arrow. Gotta be quick!
Just Spin Attack...
...release as soon as the fists are on either side of you.
Either way, slash him up!
- He can be a pretty intimidating boss, but if you use the tricks I have
listed above, and especially if you have the Biggoron's Sword,
this guy can be over within one minute.
Summary:
- Don't get smacked. First you have to hit both hands. Either stand back and use Z target +
Fairy Bow, or get close and attack each hand when they're not moving with your
sword. After that, either use:
- Z target + Bow, or...
- No Z target + No Lens of
Truth + Spin Attack...
- to hit the eye before it hits you. Slash away and repeat.
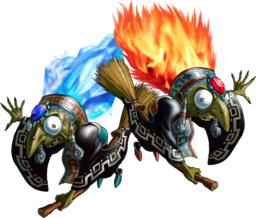
"Twinrova
This is the combined form of
Kotake and Koume. Turn their
magic attack back at them! "
Threat:
Attacks:
Frost beam
Frozen area (freeze) damage (up to this much)
Flame beam
Flaming area (burn) damage (up to this much)
Kotake: "With
my frost, I will freeze him to his soul!"
- For the first phase of the battle, the sisters will circle around the
room, pausing every once in a while and taking turns shooting their magical
beams of opposite types at you.
Koume: "With my
flame, I will burn him to the bone!"
- They're attacks are slow beams that can easily be avoided by continually
moving, but they still have a very wide area of effect. Each beam does about two
hearts of damage, but afterwards, they leave a wide area where the beam hit that
will damage you if you touch it. The Ice one freezes you for awhile, but doesn't
do too much damage, while the fire one hurts you A LOT if you stay there (roll
if you are on fire to make it stop). Together, they're a formidable foe that can
easily kill you in just three hits!
- Logically, you've probably already figured out, (Navi confirms it,) you need
to use your Mirror Shield to reflect their attacks at the opposing sister. I
suggest waiting on the opposite side of the room from wherever they're currently
at. At this point, you can either Z target one of them, or just hold in R
without targeting. Regardless, face the one who's about to shoot. As the beam is
coming towards you, quickly point your shield (or switch targets) to the
opposing sister. If you're close enough (you can move while targeting, just make
sure you stay within the beam) this will cause damage.
- After a several good hits to either sister, (or you take too long,) it
will show a little scene in which they combine to form Twinrova. In this
new, singular form, the attacks differ slightly. Each beam will power up
your shield instead and gathering an opposing element will make your shield
burst energy on you. As a result, as soon as you see her shoot an element
(fire when you're using ice for example) jump out of the way.
- Once you've collected three of either element, your shield will start
releasing the energy. Run towards her and point it towards her (either by
turning left or using R). If you're close enough, and in time, she'll fall
down onto one of the four platforms. Jump over and start slashing her to
bits. You can also use B in mid air to do a jump attack when you're first
going over, but it's tricky. Repeat this process several times to defeat
Twinrova.
Summary:
- This battle isn't so much hard as it is awkward. The goal of the entire
battle is to reflect the magic the sisters shoot at you. If at any time you
don't think you can get a good shot at it: run.
- For the first phase of the battle, face the one that is about to shoot
and aim your shield at her. As you reflect the beam, point it towards the
other sister (either with Z targeting or the analog stick).
- For the second half, they combine into a single powerful witch. Use your
shield to absorb the attacks (but only one type at a time). After you've
collected three of a type, get close and point your shield towards her to
stun her. Jump over and slash her up. Repeat.
Final Boss (Phase One):
King of Evil,
Ganondorf
Ganon's Castle (Future)
Navi:
"Link! I can't help you!
Because of the waves of
darkness, I can't get close!
I'm sorry, Link!"
Threat:
Attacks:
Pounds the center platform, sending out a shockwave. White orb (ping pong). Green orb of electricity (vulnerable).
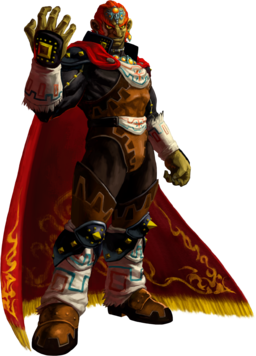
- As soon as the battle begins, run away! He slams the ground with his
first attack, getting rid of the blocks closest to the center
platform. This battle reminds me of the "Don't Break The Ice" game,
except he's trying to break it. All of his attacks have the
potential to remove some of the blocks in the room, making it harder
to get to the center. Ganondorf will only use his punching attack
when you're on the center platform. It has
quite the range, so don't linger too long on his platform.
Ganondorf's three attacks:
Punches the center platform.
A single energy orb.
Multiple, more powerful orbs at once.
- The King of Evil's primary attack is to toss an energy orb at you, which
does four full hearts of damage! You can simply avoid it or use the
Mirror Shield to block it, but you have to smack it with your sword to toss it back,
playing ping pong, just like the Phantom boss of the Forest Temple.
Once you manage to hit him with it, he'll be stunned for a moment...
- His last attack is to raise his hands in the air and collect this nasty,
puke-colored green or black swirlies (depending on the version of
the game you're playing) that he shoots out in the form of
lightning balls that zig-zag towards you. Your shield is no good
against this attack, but it can be
avoided by running at the last second. However, you can shoot him
with a Light Arrow while he's charging up, or simply charge a Spin
Attack and release it to reflect the energy orbs back at him!
Three chances to stun him:
Slash the single orb back at him (like ping pong)
Use a Spin Attack to reflect the multiple orbs.
Simply shoot a Light Arrow while he's charging the big attack.
- Once you've used any of those methods listed above, he'll be
constricted by it, giving you a chance to shoot him with a Light
Arrow, which causes him to fall to the platform defenseless.
Three ways to get to the platform:
Longshot the climbable part.
Run with Hover Boots.
Jump. (press B in mid air!)
- Regardless of the method, smack him up until he begins getting up, then quickly run
away! You can use the Hover Boots for this entire
fight, which actually gives you less to think about, but simply jumping
gives you the chance to do a Jump Attack in mid air, dealing double
damage when you land. Since two of his attacks kill the blocks, it
may be smart to stay in the corners if your methods lead to him
missing a lot (removing blocks).
- That's pretty much all there is to this battle. It's fairly difficult in
that it's odd to get used to, but like all the bosses, once you get
the hang of it, they can be defeated quickly. Using the Biggoron's Sword
will make this process much faster. Remember: if at any time you start
running low on Magic or Arrows, jump down into the lower portion of
the room (he won't attack you down here) and smash the jars for
goodies. Climb back up and quickly jump to the side.
Slash away while you can!
There's goodies below.
You're safe right here....
- For veterans, there's a trick to stand in the center and being prepared
to fall back onto the climbable part of the center platform,
avoiding Ganondorf's attacks, as well as being close by every time
you have a chance to stun him. Doing it this way allows Ganondorf to be defeated
within thirty seconds, easily.
Final Boss (Phase Two):
Ganon
Ganon's Castle (Future)
Navi:
"Ganon I have no idea what his weak point is!"
Threat:
Attacks:
Sword slash.
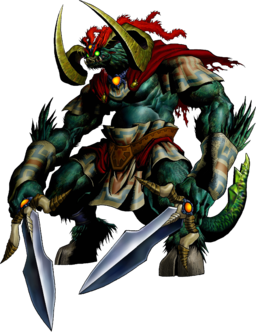
- As soon as you start the battle, Ganon will smack the Master Sword out
of your grasp and outside the barrier. Why doesn't Zelda just toss it back?
Anyway, we'll have to make due until then... This boss is actually very
simple and can be defeated with most of your other weapons and items, so
that's a good thing. His only attack is to slash you with his sword, which
can easily be dodged or rolled to avoid.
- It becomes obvious very quickly that Ganon's weak point is his brightly
colored tail, which can be smacked with anything to hurt him. It's getting to his backside that's the problem. There's two
methods to do this... The first is to stun him (by hitting his face):
5 Ways To Stun Him:
Deku Nut (shortest stun).
Longshot (short stun).
Jump Attack (hard and dangerous).
Din's Fire (long stun).
Light Arrow (longest stun).
Go smack his tail!
- The Jump Attack method is by far the hardest to pull off, especially
without taking loads of damage - don't do it that way. These other ones can
all be done, then a few quick side jumps with A while targeting will get you
a view behind him, allowing you to quickly use a Deku Nut, Longshot, Arrow,
Megaton Hammer or Sword attack on his tail.
- While Navi doesn't have any useful information to speak of for this battle,
her Z targeting is very user friendly and intelligent. If he's facing you,
it'll automatically target his face, but if he's turned to you, it'll target
his tail, meaning you can shoot his tail with an Arrow for example if you're
far enough to one side or behind him...
Attacking The Tail Directly - Rolling:
- The other method is to attack his tail directly, usually using your
sword (or Megaton Hammer). He turns pretty quickly though, so the best way to get behind him
(assuming you don't stun him) is to simply roll.
You can roll between his legs...
...or to one side....
...then smack the tail with a weapon!
- Both of those methods (ranged vs rolling) work well. Surprisingly, for a
last boss, he has a lot of weaknesses. If you begin running low on stuff, you can lure him to attack any
of the "ruins" nearby. Each drop a separate item: fairies, magic jars, bombs
and arrows. Also, using Nayru's Love for this battle might not be a bad idea
if you're having trouble with it.
4 Best Methods In My Opinion:
Roll Turn around Sword/Hammer/Nuts
Light Arrows Side jump (A) Sword/Hammer/Nuts
Deku Nuts Side jump (A) Sword/Hammer/Nuts
Longshot Side jump (A) Longshot
- Suffice to say, after a good ten hits or so, Ganon will fall to the
ground, temporarily dropping the fiery barrier. Quickly run and get the
Master Sword before he gets back up. Return to finish him off, though, this
time he'll be a little faster. Just keep doing what you've been doing and
after another ten hits or so, he'll fall down once again.
"I'm using my power to hold the Evil King! Use your sword and deliver the final blow!"
- Once you finally manage to knock him down, Zelda will stun him for a
bit. Quickly equip the Master Sword and slash it at Ganon's head, then sit
back and enjoy the show...