This chapter covers the Nintendo Switch version of Link’s Awakening. If you are playing the Game Boy Color version, check out the Angler’s Tunnel Walkthrough.
- Chapter 1 – Tail Cave
- Chapter 2 – Bottle Grotto
- Chapter 3 – Key Cavern
- Chapter 4 – Angler’s Tunnel
- Chapter 5 – Catfish’s Maw
- Chapter 6 – Face Shrine
- Chapter 7 – Eagle’s Tower
- Chapter 8 – Turtle Rock
- Chapter 9 – The Awakening
4.1 The Journey to the Desert
| “Hoot! How many Instruments have you gotten so far? When you play the Instruments in front of the Egg, the Wind Fish will wake and you will leave this island. Now, you must hasten to the Yarna Desert! The dark, monstrous inhabitants of the sand will show you the way! Hoot Hoot!” |
There is so much we need to do and so much that we CAN do before heading to the next dungeon. First things first, if you haven’t progressed in the Trading Sequence, that should be the first point of interest. If you haven’t obtained the Honeycomb yet, glance at your map and just northeast of Key Cavern there is a large skull. Once screen north of there is where Tarin is located. Talk to him to trade the Stick for the Honeycomb.
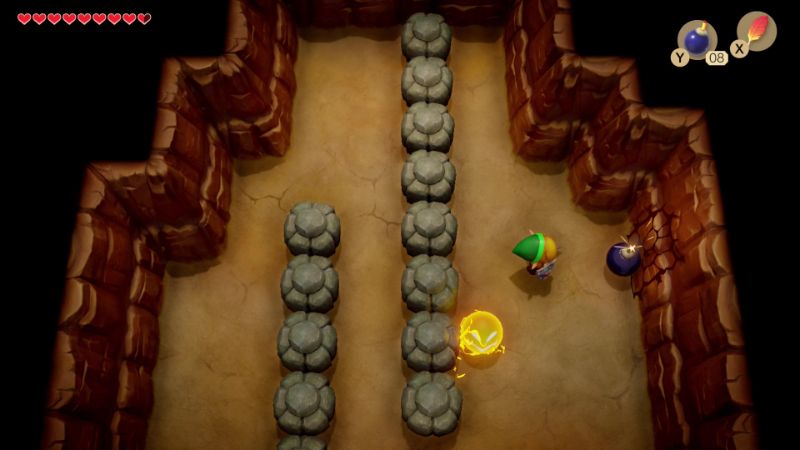
Just to the west of here Link got the Honeycomb from the beehive, there is a wall that can be blasted open with a bomb. Equip the Pegasus Boots and dash through the blocks that are in your way. Avoid the spark and you’ll find a cracked wall on the right. Use a bomb to blast open a hole and head through to find a Piece of Heart. Backtrack to the last room and open the treasure chest to get 50 rupees. Backtrack through the cave and exit to get back to the overworld.Optional: Piece of Heart #13

Back in Mabe Village, walk to the northeast part of town to the screen just above the Mabe Village Shop. Lift the rocks and enter the building known as the Dream Shrine. Walk up and jump into the bed and Link will seemingly fall asleep.
You will then appear in a cave that has several Arm-Mimics. These work just like mask-mimics but are incredibly damaging if you touch them. Use your Pegasus Boots to run right by them. Dash your way up, right, and down. Climb the steps and open the treasure chest to get 100 rupees! Make your way to the left side and acquire the Ocarina! Jump off the ledge and exit this cave.


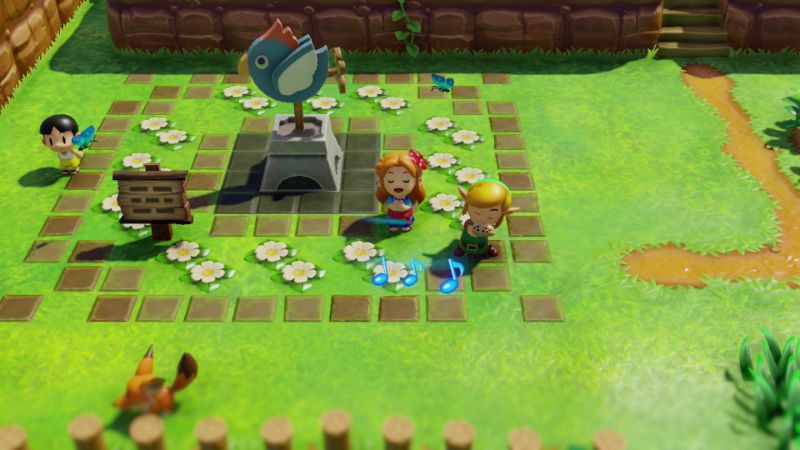
Link will awake back inside the dream shrine. Exit the house and then head to the screen just north of Marin’s House. Speak with Marin and she will teach you the first song on your Ocarina, the Ballad of the Wind Fish. It really is a quite pleasant tune. We will be using this song several times throughout our quest.
Our next destination is Animal Village all the way on the east side of Koholint Island. Make your way to the Seashell Mansion. You want to travel a bit south of Seashell Mansion; maneuver around the trees and you’ll find a lone bush. Slash at it to reveal a staircase and head down. In this underground area, use the Pegasus Boots to dash across and exit the cave, resurfacing at the east side of Koholint. Travel south and east and you’ll find yourself at Animal Village.


4.2 Animal Village and the Yarna Desert
Animal Village is a small town made up of just a few buildings. As you can tell by its name, the residents are exclusively animals! You can walk around town to meet and greet with the townsfolk, but our destination is at the southeast part of town. Enter the house and speak with the gigantic Chef Bear. He sees that you have a honeycomb and asks you for it. Agree to give him the honeycomb. In exchange, he will give you the Pineapple, the 7th item in the Trading Sequence. The bear will also give you a hint about the giant walrus that is blocking the path to the Yarna Desert. He tells you to bring Marin so that she can wake him up with her song.
Trade the Honeycomb to the Chef Bear. In exchange, he will give Link the Pineapple.
Trading Sequence Item #7 - Pineapple


At the northwest corner of Animal Village, there is a piece of heart that is visible. Make your way to the Walrus at the southeast part of Animal Village and from there, head north. Wrap around the top of the buildings and run over to collect the piece of heart.Optional: Piece of Heart #14

Make your way to the southeast corner of Animal Village and you’ll find the sleeping walrus. If you try talking to the Walrus, you’ll see that he is in a deep sleep and has Marin on his mind. In order to wake the Walrus you’ll need to bring Marin here to Animal Village.
Walk back to Animal Village and from Chef Bear’s house walk down and left. You will find another Warp Portal. Activate it and travel back to Ukuku Prairie and head west to reach Mabe Village.
Walk to the center of town where the weathervane is, but you’ll see that Marin is nowhere to be found. Speak to the young boy here and he mentions that Marin went off to stare at the ocean.
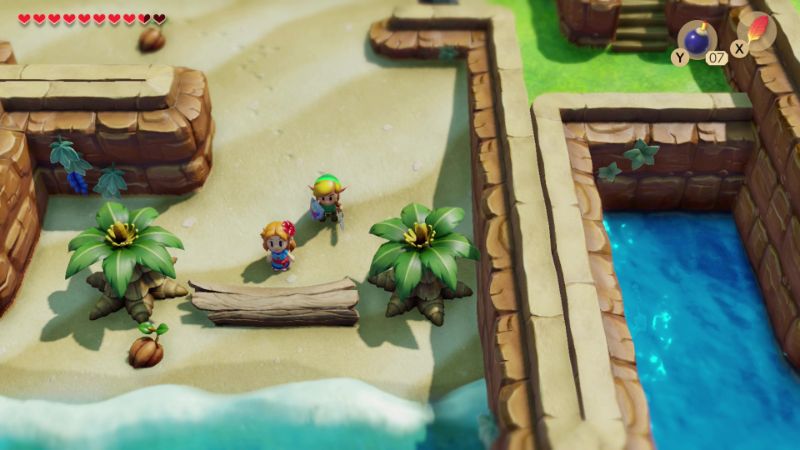
Leave Mabe Village and make your way down to Toronbo Shores. Travel to the southeast edge of the Torono Shores and you’ll find Marin sitting on a log. Speak with Marin and you will join her, staring out towards the endless ocean. Marin talks about what is across the sea and how she wishes to be one with the seagulls, so she can fly across the ocean. After some more romantic speech, Marin finds out the Walrus is blocking the way and agrees to join you. Before we head to Animal Village, there are a few fun things we can do with Marin.

With Marin now following behind you, you can make your way to the far southwest corner of the map. If you walk up to the ledge, a scene will take place with Marin and Link staring out into the ocean. This was actually part of the Photograph sidequest in the original Game Boy Color version of the game, but they kept this scene in the switch version. There are plenty of other fun things to do with Marin. Why not take her to the Trendy Game. Trust me, something magical happens.Fun with Marin


Make your way back to Animal Village and then head over to the Walrus. Talk to the Walrus and Marin will start to sing her Ballad of the Wind Fish. After the song finishes, the Walrus will awake, jumping into the water and swimming away. Marin will say that she is going to stay in the village for awhile to entertain the animals. With the Walrus now out of the way, head right to enter the Yarna Desert.


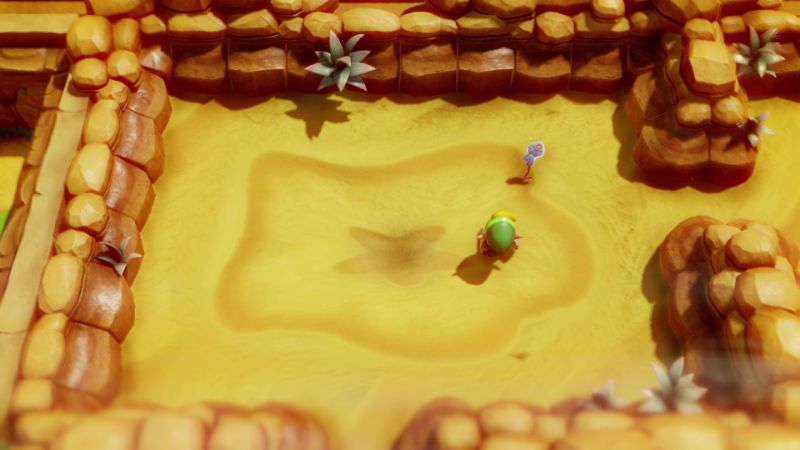
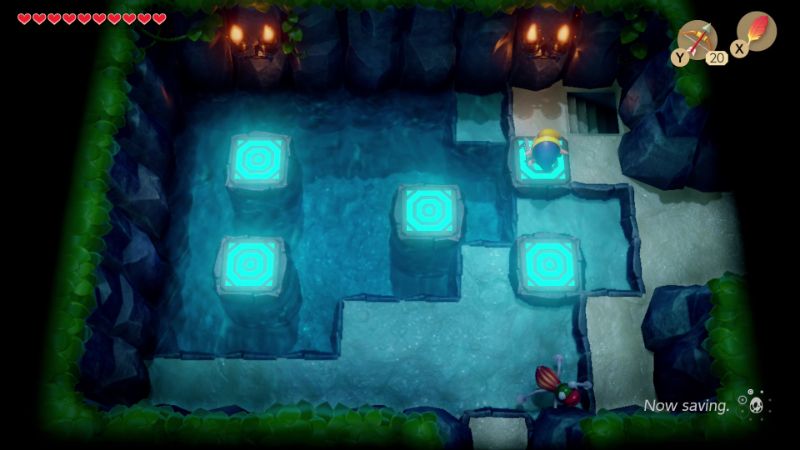
Once you enter the desert, head up and you’ll find a mini boss Lanmola. The Lanmola will come up from under the sand, fly on over to another part of the sand, and then dive under. In fact, the Lanmola won’t even try to directly attack Link. The bigger concern on screen is the quicksand found right in the middle. If you fall to the middle of the quicksand, you will fall under into a cave below. Avoid the center and slash at the Lanmola’s head whenever you get a chance. Slash at the Lanmola a total of eight times to defeat it. Once Lanmola has been defeated, collect the Angler Key that it drops and then allow the quicksand to drop you down into the cave below.

After fighting the Lanmola in the Yarna Desert, allow the quicksand to drop you down into the cave below. From here, place a bomb against the north wall. The piece of heart awaits you in the next room.Optional: Piece of Heart #15


In the Yarna Desert, Link will find an Owl Statue. Use the shovel and dig up the sand just south of the owl statue right up against the cactus to uncover the seashell.Optional: Secret Seashell #21

Make your way to the far southeast corner of the Yarna Desert where you will find two rocks. Lift the bottom one to find the seashell.Optional: Secret Seashell #22

Return to where the Walrus was located and once again play the Ballad of the Wind Fish. The Walrus will appear in the water and will spit out a seashell for Link.Optional: Secret Seashell #23


Exit Animal Village to the west and head southward. Take the path to the west and cross the bridge to reach a small island with an owl statue. Pull out the shovel and dig just to the left of the owl statue to find a seashell.Optional: Secret Seashell #24

Just north of Animal Village is an area known as the Ancient Ruins. To reach the Ancient, leave Animal Village to the west, then travel all the way north, and then travel east. If it is your first time here, you might be stopped by the Owl. Travel east, picking up the rocks that are in your way and then head south to enter the Ancient Ruins. We will visit this area much later, but there is a secret seashell to collect now. Near the north-central portion of the ruins, there are four Armos statues next to each other. Tap the one at the bottom-right to reveal a staircase that leads to the seashell.Optional: Secret Seashell #25

At the east end of the Koholint Island, just north of the Ancient Ruins, there are a series of boulders that Link can pick up. The lonely one at the northeast corner contains a secret seashell.Optional: Secret Seashell #26

Back to the Chamber Dungeon, several new stages are now unlocked. If Link completes four different missions from Dampe, he will be awarded with a Secret Seashell.Optional: Secret Seashell #27

After defeating Key Cavern and completing earlier challenges, Dampe will give Link the Fill Up Your Hearts challenge. If Link completes it, he will be awarded a Piece of Heart.Optional: Piece of Heart #16

Back at Mabe Village, if Link has been collecting all the items from the Trendy Game, after defeating Key Cavern, a new Piece of Heart is now available, this one along the top part with the moving platforms.Optional: Piece of Heart #17

Just east of Mabe Village, there is a telephone booth. Dash into the tree just to the right of it to get a secret seashell.Optional: Secret Seashell #28


Just west of the entrance to Tail Cave, there is a lone tree that is right in the middle of the area. Dash into it with the Pegasus Boots to get the seashell.Optional: Secret Seashell #29


At the southwest corner of the island there are four Palm Trees near the Toronbo Shores. Three of them are on one row and one is just below. Dash into the lower one with the Pegasus Boots to get the seashell to pop out.Optional: Secret Seashell #30

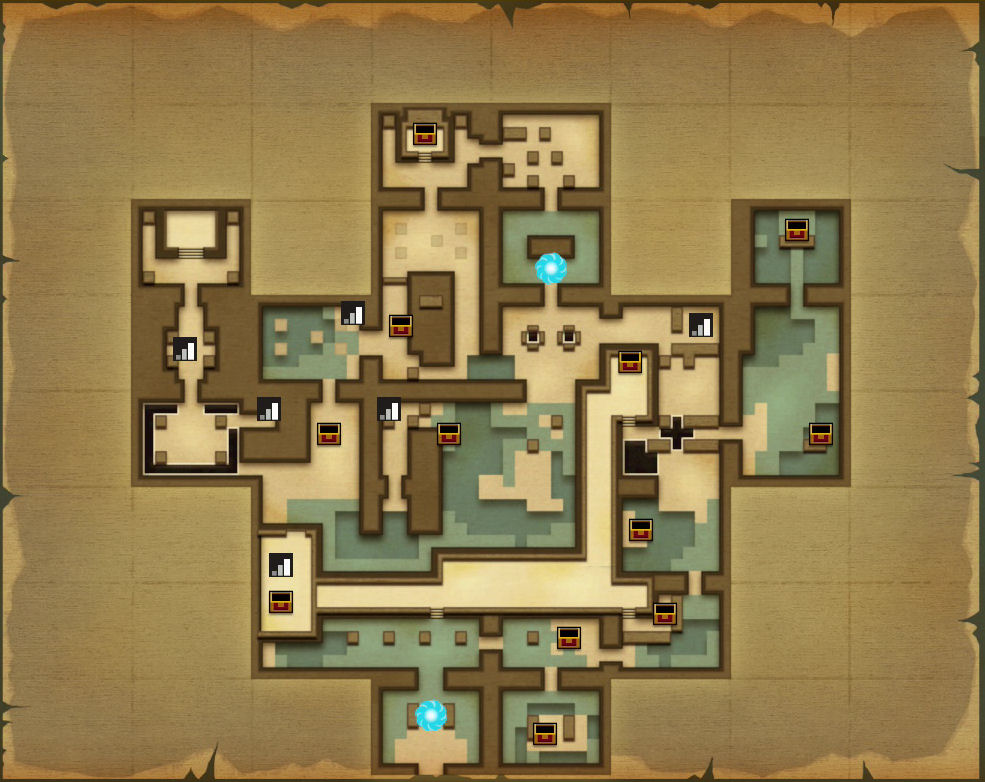
4.3 Color Dungeon
Now that we are back in Mabe Village you can optionally head to the west side of town and enter the library. On top of the shelves near the top of the screen you will see a book that is out of reach. Use the pegasus boots to dash into the shelf and the book will fall to the ground. Read the text to find that it reveals the world of color under the gravestones. It then gives arrows for five of the gravestones. This is actually the secret way to enter the Color Dungeon found within the graveyard.


Our next destination is the actual graveyard, so from the warp portal near Mabe Village, go up three screens and right a screen to enter the graveyard. Walk down a screen and right a screen to find the area with five gravestones. Each time you touch a gravestone a ghini will pop out. However, if you defeat the initial ghini, all other enemies on screen will also be defeated. Before pushing the gravestones let’s awake the remaining ghini and then get rid of them so they don’t give us trouble. Afterwards move the gravestones in the order that was listed in the book and then enter the Color Dungeon.
- Bottom-Middle Gravestone Down
- Bottom-Left Gravestone Left
- Top-Left Gravestone Up
- Top-Middle Gravestone Right
- Top-Right Gravestone Up
Once you enter the dungeon, speak to the two skeleton creatures in this first room and select the color that they are wearing to pass. Walk up a screen and you’ll find yourself fighting new enemies in the form of Red and Green Goblins. Wait until they come above ground and swipe at them with your sword to defeat them. Walk through the door that opens up on the right.

There are some colored eye statues in this room. Slash at the red one at the top-left of the room and then slash at the red one at the bottom-right of the room. This will cause all the statues to be blue and a treasure chest will appear. Open it up to get the dungeon Compass. Also in this room is an owl statue, but we don’t have the stone beak yet. However, all that the owl statue says is to make the statues in the room the same color, which we have done already. Use your sword to tap against the wall at the bottom of the screen and you’ll hear a strange sound revealing a hidden passage. Use a bomb to crack open a wole in the wall and head down a screen.
There are 28 blue rupees found in this room, which totals 140 rupees! Grab the rupees and then head up a screen and right a screen.
You’ll find another new enemy in the form of a Bone Putter. They will fly around the room, but once they are hit, they’ll lose their wings and start to bounce around. Hit the bone putter a second time to defeat it and then head right a screen.
You will find a Red and Green Karakoro in this room, another attempt at a color based enemy. Once you strike one of these foes, they’ll curl up into a ball. You can then lift these karakoros and toss them around the room. You’ll have to toss the red one into the red hole and the green one into the green hole. Once both have been tossed into their respective holes a treasure chest will appear; open it up to get the Stone Beak.


Walk up a screen and defeat or avoid the bone putters. Continue up another screen where you will find another statue puzzle. This time strike the statue at the bottom-right once and then strike the statue at the top-left twice to make them all blue. Grab the small key that falls and then head right a screen.
There are three different colored goblins in this room, including the new Blue Goblin, so defeat them or just avoid them. Use the small key that we just got and then head up through the locked door to take on the first of two mini-bosses, the Giant Buzz Blob.
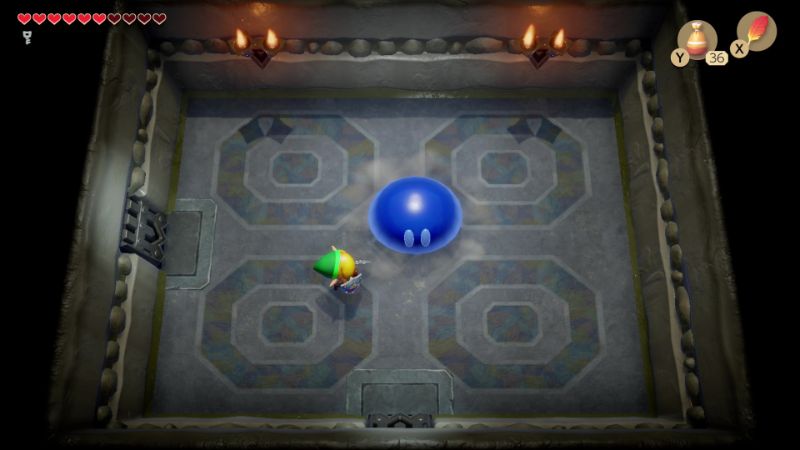
The Giant Buzz Blob is completely immune to your sword strikes at first. However, once you sprinkle some magic powder onto the buzz blob, it will turn into more of a zol like creature and jump around the room. During this time you can slash away with your sword. The Buzz Blob will eventually revert to its regular form, at which point you must restart the process. After 6 sword slashes, the giant buzz blob will be defeated. Grab the fairy that is left behind and head through the door on the left.


Push the top and bottom blocks to the left and then move the middle block so you can pass. Open the treasure chest found here to get the Nightmare Key! With the key in hand, let’s backtrack right a screen, down, left, and down two screens to get back to where we fought some karakoros.
Continue down a screen and you’ll find several colored goblins. Defeat the four goblins and then head left a screen. Defeat the two bone putters in this room and open the treasure chest to get a small key. Go through the one-way door and head up a screen. Use the small key we just got and continue up another screen to take on the second mini-boss Dekudon.
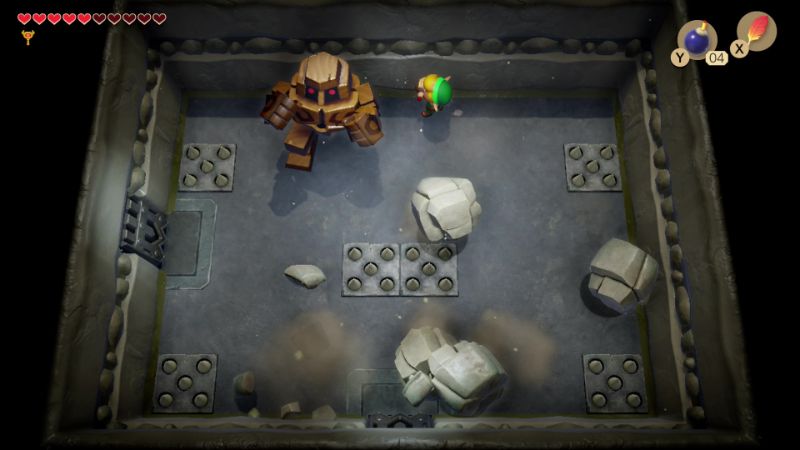
Dekudon will stand near the top of the room and jump up and down. Each time it crashes to the ground, Link will be stunned for a short while and a series of boulders will fall from the top of the room. You can just slash Dekudon with your sword and it takes a total of 8 strikes to defeat him. However, another method is to use bombs, at which five bombs will do him in. Alternatively, if you have the bow and arrow, two arrows will defeat Dekudon as well. Once he has been defeated, grab the fairy that is left behind and head left a screen.

Defeat the two bone putters in this room and then pull out the power bracelet. Lift the pot at the top-left part of the room and step on the switch to open the doors. Let’s first head through the door at the top of the room.
Defeat the two red zols and the four green zols that are hidden underground to reveal a treasure chest. Open it up to get the Dungeon Map! Walk to the right a screen and you’ll find four karakoros. Slash at all four of them and then toss them into the holes based on their color. Once all four have been placed properly, grab the small key that falls from the ceiling! With the key in hand let’s backtrack left a screen, down a screen, and this time head left a screen.


There are nine statues found in this room and the puzzle can be tricky if you don’t know what to do. Hit the top-middle, left-middle, right-middle, and bottom-middle statues to make them all blue, causing the doors to open up. Let’s head up a screen through the door that opens.
Defeat the four green zols in this room and then use the key we got earlier to go to the room to the left. Once you are ready, use the nightmare’s key and head up a screen to take on the dungeon boss, Hardhit Beetle.
Hardhit Beetle looks like an oversized switch and each time you hit its crystal, it will change color. It starts out as a blue color, but will change to green, yellow, orange, and then red. However, if you don’t hit the crystal, it will slowly revert back in color to blue. Additionally, Hardhit Beetle will occasionally toss these plus-sign like projectiles at you.
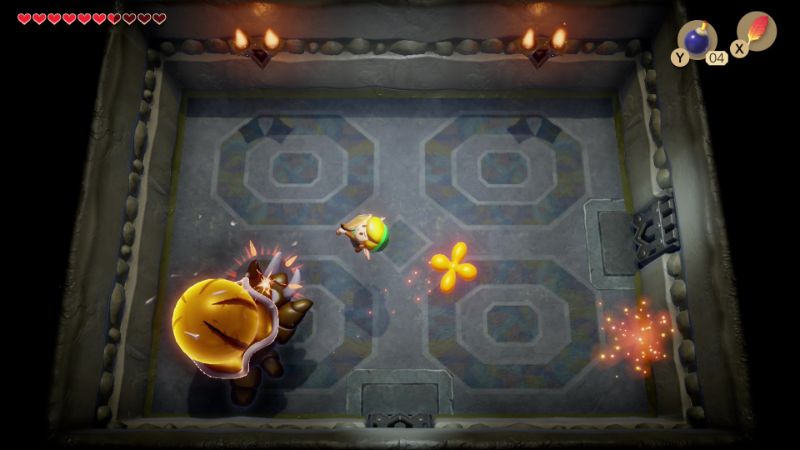


The key to defeat Hardhit Beetle is to use Roc’s Feather and slash multiple times while you are still in the air. Just keep relentlessly jumping and slashing at him with your sword. Once his color has turned a light red, he’ll start to summon green stalfos. Just ignore them and keep slashing away until Hardhit Beetle has turned fully red and is defeated. Grab the fairy that is left for you and then head right a screen.
Speak with the Great Fairy and you’ll have an option to choose the Red Tunic or the Blue Tunic. The Red Tunic will double your sword’s strength, while the Blue Tunic causes a reduction in damage by half. I would almost always choose the Blue Tunic since in the near future we will be upgrading our sword’s power already and defense will be more important. Either way, once you’ve made your decision, the Great Fairy will transfer you outside of the Color Dungeon. You can always come back and change tunics if you’d like, however.
4.4 Tal Tal Heights and the Waterfall
We are now ready to make our way to the next dungeon, Angler’s Tunnel. If you just completed the Color Dungeon, make your way north to Dampe’s Shack. From there head around and make your way eastward.
Lift the rock that is blocking your way and then head right to find the the entrance to Angler’s Tunnel. It might not appear like the entrance to a dungeon, but if you walk up to the key hole and toss in the Angler Key, the waterfall will disappear, revealing an entrance to the dungeon! Unfortunately, we cannot quite reach it from here, so we’ll have to find our way around.


From where we used the Angler Key, walk right a screen and activate the warp portal found here. Now you can quickly warp between just outside Mabe Village, Animal Village, and now Tal Tal Heights. We now need to make our way up Mt. Tamaranch to reach Angler’s Tunnel. From the warp point go down a screen, left three screens, up the ladder, left two screens, and then up to reach the mountain.
Tal Tal Mountain Range is a large mountain range that takes up most of the northern portion of Koholint Island. It’s a vast range but we will only be able to navigate a portion of it right now. Lift one of the rocks in this first area and enter the cave. Watch for the keese, hardhat beetles, and green zol found through this cave. Walk to the right a screen and then push the block up so it falls into the abyss. Break the crystal here, push the block to the right, then push the adjacent block down, and head down the steps.


Walk to the right, avoiding the enemies, and then head up the stairs. You’ll see a piece of heart on the left side of the screen, but unfortunately we won’t be able to reach this heart for quite a long time. Walk to the right a screen and then exit the cave found here. Open the treasure chest found here to get 50 rupees and then walk back into the cave. Use the pegasus boots to dash through the green blocks and head right a screen. Dash once again and then exit the cave.
Walk down a screen and left a screen to find Papahl, the father of the Quadruplet Family from Mabe Village. If you recall, we gave his wife the Yoshi Doll much earlier in the game as part of the Training Sequence. If you talked to him then, he mentioned that he would eventually become lost in the mountain later on. Well, as strange as that sounds, here is he, lost in the mountain. Speak to him and he asks for some vittles. Agree to give him some and Link will give him the Pineapple. In return for the Pineapple, Papahl will give you the Hibiscus, the 8th item found in the Link’s Awakening Trading Sequence.Trading Sequence Item #8 - Hibiscus


Jump off the ledge on the left and then head to the right. You’ll find a large cliff in which you can jump off, so do just that. You will make a jump off the mountain and land right at the entrance to Angler’s Tunnel. So once you are ready, let’s head up take on the fourth dungeon of the game, Angler’s Tunnel.

4.5 Angler's Tunnel
Angler’s Tunnel follows suite in that it is more difficult than Key Cavern, but not by much. It is a bit less linear and there are more optional items to be found. From the start screen head up a defeat the zol and some spiked beetles. Remember, you must use your shield against these beetles in order to flip them over. Walk to the left and you can collect some bombs that are hovering above the ground. Walk back to the right and climb the steps.


Walk up and to the right to find a treasure chest containing the Dungeon Map! Walk down and use a combination of pegasus boots and roc’s feather to jump across the gap. Continue to the right a screen and bomb the cracked block that is found in this room. Push the other block out of the way and open the treasure chest to get a small key.


Walk up and avoid the anti-fairies, Peahats, and Water Tektites that can be found here. Continue up and bomb a second block that is in your path. Open the treasure chest to get a second small key! Grab the hovering recovery heart if you’d like and then backtrack a few screens to get back across the large gap we jumped over.


From here head back left and down. On the higher ledge, make your way to the southeast and you’ll come across a treasure chest. Open it up to get the dungeon’s Stone Beak. Then backtrack to the room just north of the dungeon entrance.
Use your shield to defeat the spiked beetles if you haven’t already, causing the door to the right to open. Continue through and defeat another set of enemies. Open the treasure chest to get the Compass and then head south through the door that opens.


Maneuver around the room, defeating the four water tektites that are moving around. Slash at the purple crystals so that you can reach the treasure chest to get yet another small key. Walk back up a screen and then head through the locked door on the right.
Defeat the water tektites and then use another small key on the locked door near the top of the room. There is a treasure chest on the left side of the room but we cannot reach it quite yet, so just progress upward. Get rid of the zols if they are in your way and then once again use the pegasus boots and roc’s feather combination to get across the gap and continue upward.
Unlock the block found here and then push the adjacent block up to get by. There is a new enemy simply known as a Star. Fortunately they don’t give you much trouble and one sword slash will do them in. Defeat the enemies and head left a screen. Defeat the two red zols in this room and a small key will fall from the ceiling, but unfortunately, it falls right through the holes in the ground. If we walk back to the right a screen and go down the stairs we will see the key, but we cannot get it quite yet. Instead, from where you defeated the zols, just head south.


Speak with the owl statue and it gives you a hint about the glint of the tiles that we will find in one of the rooms ahead. Keep that in mind as you avoid the enemies and head down and left. Use roc’s feather to jump over the deep water that is marked by the dark blue color. Avoid the water tektites and peahats as you head left and then up. There is a treasure chest in this room, but it is a dud and only contains an enemy zol inside. Avoid the enemies and then head up a screen.


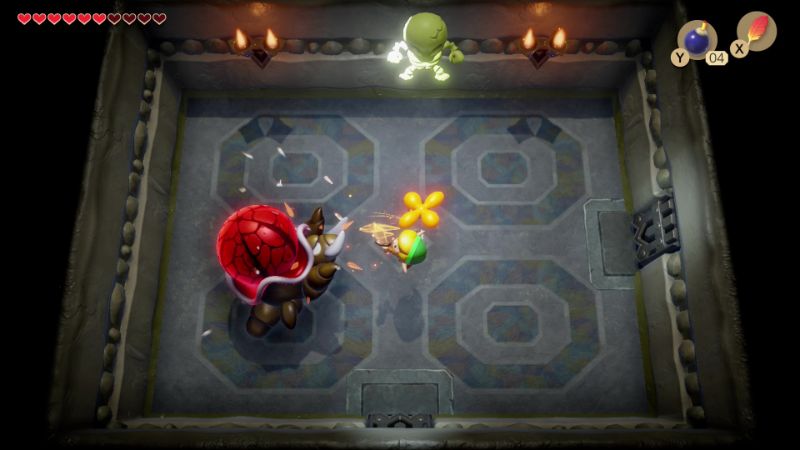
There are five strange tiles found on the ground in this room, but we cannot do much with them just yet. Just ignore them for now and head right a screen. Open the treasure chest that is found in this room to get a small key. With the small key in hand, we need to backtrack left a screen, down a screen, and that make your way all the way to where we defeated two red zols and a small key dropped. From here head up a screen to take on the dungeon mini-boss, Cue Ball.
Cue Ball can be confusing at first, but is really one of the easiest mini-bosses in the game. Its weak spot is its giant head and there are multiple ways to go about attacking him. Cue Ball will simple move around the room trying to dash into you. One way to defeat him is to equip your pegasus boots and dash around the room and eventually strike him in the back of his head. Another way is to equip roc’s feather and jump over Cue Ball and then deliver a sword slash. Perhaps the easiest way is to stand near one of the corners of the room so you are facing an area where Cue Ball has to change direction. Before he gets a chance to change the way he’s moving, slash him at the side of its body and you’ll deliver a blow. After a number of sword slashes, Cue Ball will be defeated and the door above will open up, so head through.


Equip the power bracelet and pull the lever back in this room as far as it goes to move the blocks apart. Quickly run to the left and go through the door before the blocks close in. Watch out for the fireballs that are shot towards you and defeat the red zol that are found in this room. Open the treasure chest here to get the dungeon item, the Flippers! These will now let Link swim in deep water as well as underwater. They are automatically equipped as part of your equipment and thus, they are not an equipable item. With our new goodies in hand, head down a screen.


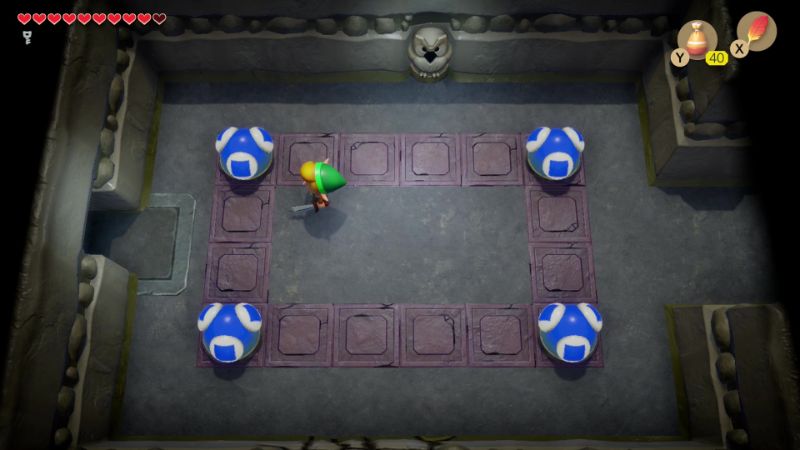
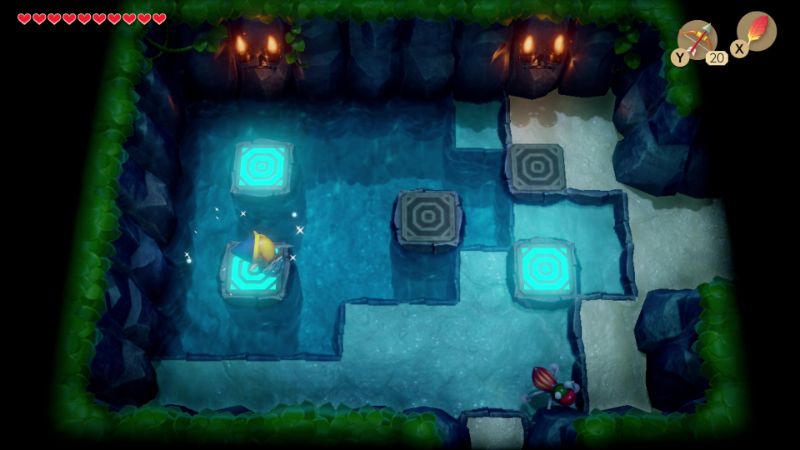
The new enemies here are known as Iron Masks and they can only be hit from behind. Use roc’s feather to jump over them and then quickly deliver a blow to the back to defeat them. This is the room that the owl statue was referring to earlier when it was talking about the glint of the tiles. There is a glint on the middle tile and once you walk over it, it moves to the tile at the bottom-left. What you need to do is just walk over the five tiles in a row, without walking over any of the other tiles. Once you’ve walked over all five of them the door above will open up. The correct order of the tiles differs each time your journey into the dungeon, so make a mental note of it. With that in mind let’s head down, push the block, and then head left a screen.
There are five tiles on the ground in this screen and you have to walk over them in that correct order, based on the solution from the prior room. Once you’ve done so a staircase appears at the top-right part of the screen; head down it.
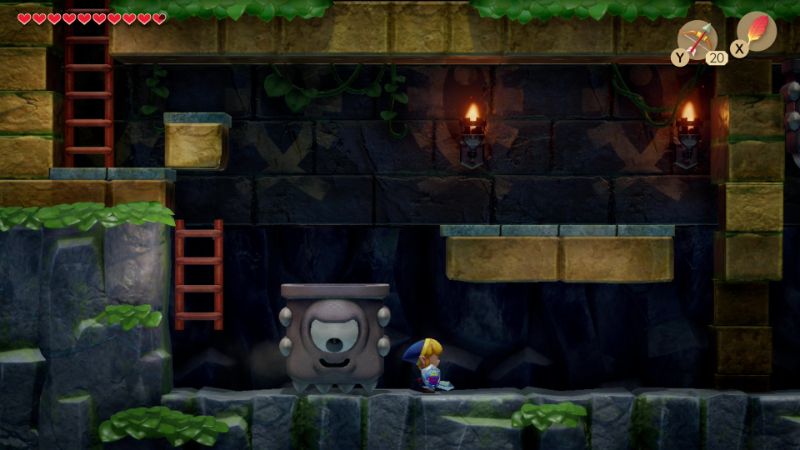
There is another Mario based enemy here known as a Thwomp. Walk underneath it and it will slam to the ground, so quickly step back. As it retracts to its original position, walk by it and continue to the left. Trigger this second thwomp and walk by this one as well. Trigger it once more and then quickly climb the staircase, jump on top of it, and then jump to the ladder to resurface.

Walk down a screen and open the treasure to get the Nightmare Key! With that goodie in hand let’s head up a screen, jump off the ledge, and swim to the right. Swim up a screen and open the treasure chest found here to get a 50 rupees. With that in hand let’s go right and up to get back to the room just before the mini-boss.
If you haven’t already, defeat the red zols in this room to cause a small key to drop from the ceiling through one of the holes. Then walk right a screen and head down the staircase. Jump over to the screen on the left and then jump into the water to get the small key. Go back right a screen and climb the steps to resurface.


We are now ready to fight the dungeon boss, but there is still that one treasure chest that we passed up earlier in the dungeon. Push the left-most block down and then head down across the gap. Swim over to the treasure chest and open it to get 50 rupees! With all the treasure chests out of the way, let’s head back up and left. From here head down and left. You’ll see a switch at the north part of the screen so swim on over. Step on the floor switch and the door above will open up. Get the recovery heart that is floating in the room and then unlock the block with your last small key. Go down the steps to reach an underwater area.


Defeat the Cheep-Cheep fish enemies that are swimming around. Go left and then climb the steps to resurface. Walk to the left a screen and get rid of the red zols. Use the nightmare key and head up through the locked door. Once you are ready, climb down the steps and head down a screen to take on the dungeon boss, the Angler Fish.
The Angler Fish is one of the easier bosses found within the game, but its difficulty is a step up from its Game Boy counterpart. All the giant fish will do is swim back and forth, occasionally ramming into the wall, causing blocks to fall down. He will summon some smaller fish from the right side of the room that will try to swim towards you.
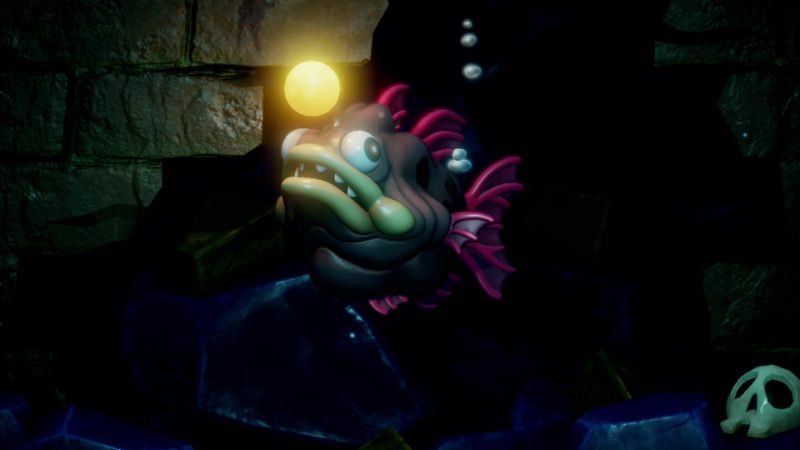


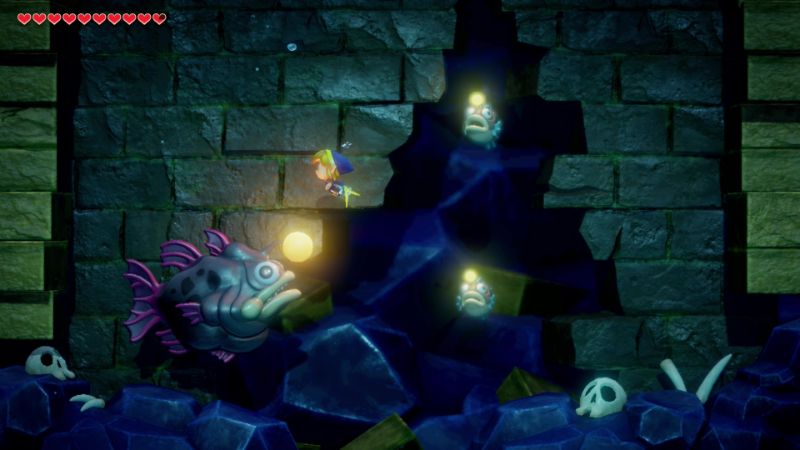
To defeat the Angler Fish, just immediately start to strike at the small antenna sticking out of its head. Just quickly slash at him rapidly, moving out of the way when he starts charging. Repeat this process until he has been defeated.
Once The Angler Fish has been defeated, pick up the full Heart Container that is left as your reward, increasing your total health to eight heart containers. Swim up a screen and climb the ladder to resurface. Walk up and collect the fourth Instrument of the Sirens, the Surf Harp.


| “…BAY… Your road goes into the bay” |
