Gallery:Hyrule Warriors Characters: Difference between revisions
Jump to navigation
Jump to search
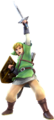
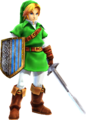
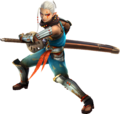
Link - Hylian Sword
Link - Magic Rod
Link - Gauntlets
Link - Spinner
Link - Horse
(Master Quest Pack)
Link's Costumes
Impa - Giant Blade
Impa - Naginata
Zelda - Rapier
Zelda - Baton
Zelda's Costumes
Lana - Book of Sorcery
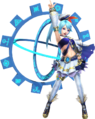
Lana - Spear
Agitha - Parasol
Midna - Shackle
Fi - Goddess Blade
Ruto - Zora Scale
Darunia - Hammer
Sheik - Harp
Ganondorf - Great Sword
Ganondorf's Costumes
Zant - Scimitars
Ghirahim - Demon Blade
Cia - Flail
Volga - Lance
Wizzro - Ring
Twili Midna - Mirror
Zelda - Dominion Rod
(Twilight Princess Pack)


Want an adless experience? Log in or Create an account.
m (Added trailer) |
(replacing images with transparent backgrounds) |
||
| (33 intermediate revisions by 6 users not shown) | |||
| Line 2: | Line 2: | ||
{{Youtube|xm7u4TGao_U|300|Link - Hylian Sword}} | {{Youtube|xm7u4TGao_U|300|Link - Hylian Sword}} | ||
{{Youtube|dVqdGllmDjc|300|Link - Magic Rod}} | {{Youtube|dVqdGllmDjc|300|Link - Magic Rod}} | ||
{{Youtube|6Te8JaWMP_E|300|Link - | {{Youtube|6Te8JaWMP_E|300|Link - Gauntlets}} | ||
{{Youtube|b0dLxPvyN88|300|Link - Spinner}} | |||
{{Youtube|x6lxPoKmmpM|300|Link - Horse<br/>(Master Quest Pack)}} | |||
{{Youtube|jdOqP5JAlfc|300|Link's Costumes}} | |||
{{Youtube|1Ub83PeWYAE|300|Impa - Giant Blade}} | {{Youtube|1Ub83PeWYAE|300|Impa - Giant Blade}} | ||
{{Youtube|4Me0zP9vuvg|300|Impa - Naginata}} | |||
{{Youtube|h-cOQcIJGp4|300|Zelda - Rapier}} | {{Youtube|h-cOQcIJGp4|300|Zelda - Rapier}} | ||
{{Youtube|n5FqyNh9Ua8|300|Zelda - Baton}} | {{Youtube|n5FqyNh9Ua8|300|Zelda - Baton}} | ||
{{Youtube|t0jWGmwEiPI|300|Zelda's Costumes}} | |||
{{Youtube|S9Bj_8UkI-0|300|Lana - Book of Sorcery}} | {{Youtube|S9Bj_8UkI-0|300|Lana - Book of Sorcery}} | ||
{{Youtube|dwQK4dX-fpQ|300|Lana - Spear}} | |||
{{Youtube|J32H38Feftc|300|Agitha - Parasol}} | {{Youtube|J32H38Feftc|300|Agitha - Parasol}} | ||
{{Youtube|Jtvgfh-m_40|300|Midna - Shackle}} | {{Youtube|Jtvgfh-m_40|300|Midna - Shackle}} | ||
{{Youtube|0UVGireF02o|300|Fi - Goddess Blade}} | {{Youtube|0UVGireF02o|300|Fi - Goddess Blade}} | ||
{{Youtube|_wcGAG_Zgok|300|Ruto - Zora Scale}} | {{Youtube|_wcGAG_Zgok|300|Ruto - Zora Scale}} | ||
{{Youtube| | {{Youtube|g-xnwRuLkVE|300|Darunia - Hammer}} | ||
{{Youtube| | {{Youtube|9EeyG18Ez2M|300|Sheik - Harp}} | ||
{{Youtube|4Vfh3YpvxHQ|300|Ganondorf - Great Sword}} | |||
{{Youtube|g1p7aha2vkU|300|Ganondorf's Costumes}} | |||
{{Youtube|C4woCgbjrh8|300|Zant - Scimitars}} | |||
{{Youtube|2Sm2lq-myQs|300|Ghirahim - Demon Blade}} | |||
{{Youtube|76MAZVdo3OU|300|Cia - Flail}} | |||
{{Youtube|42FzoCiYn58|300|Volga - Lance}} | |||
{{Youtube|fhIN5jkgH-o|300|Wizzro - Ring}} | |||
{{Youtube|a2KP7kWR4mE|300|Twili Midna - Mirror<br/>Zelda - Dominion Rod<br/>(Twilight Princess Pack)}} | |||
{{Clear}} | {{Clear}} | ||
| Line 19: | Line 33: | ||
{{Gallery/Box|file=Hyrule Warriors Artwork Link.png|caption=[[Link]]}} | {{Gallery/Box|file=Hyrule Warriors Artwork Link.png|caption=[[Link]]}} | ||
{{Gallery/Box|file=Hyrule Warriors Artwork Link Hylian Sword.png|caption=[[Link]] with the [[Hylian Sword]]}} | {{Gallery/Box|file=Hyrule Warriors Artwork Link Hylian Sword.png|caption=[[Link]] with the [[Hylian Sword]]}} | ||
{{Gallery/Box|file=Hyrule Warriors Artwork Link Magic Rod.png|caption=[[Link]] with the [[Magic Rod]]}} | {{Gallery/Box|file=Hyrule Warriors Artwork Link Magic Rod.png|caption=[[Link]] with the [[Magic Rod (Hyrule Warriors)|Magic Rod]]}} | ||
{{Gallery/Box|file=Hyrule Warriors Artwork Link | {{Gallery/Box|file=Hyrule Warriors Artwork Link Great Fairy.png|caption=[[Link]] with the [[Great Fairy (Hyrule Warriors)|Great Fairy]]}} | ||
{{Gallery/Box|file=Hyrule Warriors Artwork Link Twilight Princess Costume.png|caption=[[Link]] from ''[[The Legend of Zelda: Twilight Princess|Twilight Princess]]''}} | {{Gallery/Box|file=Hyrule Warriors Artwork Link Gauntlets.png|caption=[[Link]] with the [[Gauntlets]]}} | ||
{{Gallery/Box|file=Hyrule Warriors Artwork Link Skyward Sword Costume.png|caption=[[Link]] from ''[[The Legend of Zelda: Skyward Sword|Skyward Sword]]''}} | {{Gallery/Box|file=Hyrule Warriors Artwork Link Master Sword.png|caption=[[Link]] with the [[Master Sword (Hyrule Warriors)|Master Sword]]}} | ||
{{Gallery/Box|file=Hyrule Warriors Artwork Link Ocarina of Time Costume.png|caption=[[Link]] from ''[[The Legend of Zelda: Ocarina of Time|Ocarina of Time]]''}} | {{Gallery/Box|file=Hyrule Warriors Artwork Link Master Sword 2.png|caption=[[Link]] with the [[Master Sword (Hyrule Warriors)|Master Sword]]}} | ||
{{Gallery/Box|file=Hyrule Warriors Artwork Link Horse.png|caption=[[Link]] with the [[Horse (Hyrule Warriors)|Horse]]}} | |||
{{Gallery/Box|file=Hyrule Warriors Artwork Link Spinner.png|caption=[[Link]] with the [[Spinner (Hyrule Warriors)|Spinner]]}} | |||
{{Gallery/Box|file=Hyrule Warriors Artwork Link Twilight Princess Costume.png|caption=[[Link]] from ''[[The Legend of Zelda: Twilight Princess| Twilight Princess]]''}} | |||
{{Gallery/Box|file=Hyrule Warriors Artwork Link Skyward Sword Costume.png|caption=[[Link]] from ''[[The Legend of Zelda: Skyward Sword| Skyward Sword]]''}} | |||
{{Gallery/Box|file=Hyrule Warriors Artwork Link Ocarina of Time Costume.png|caption=[[Link]] from ''[[The Legend of Zelda: Ocarina of Time| Ocarina of Time]]''}} | |||
{{Gallery/Box|file=Hyrule Warriors Artwork Link Postman Costume.png|caption=[[Link]] as the [[Postman]] from ''[[The Legend of Zelda: Twilight Princess| Twilight Princess]]''}} | |||
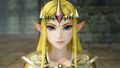
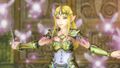
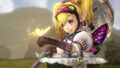
{{Gallery/Box|file=Hyrule Warriors Artwork Zelda.png|caption=[[Zelda]]}} | {{Gallery/Box|file=Hyrule Warriors Artwork Zelda.png|caption=[[Zelda]]}} | ||
{{Gallery/Box|file=Hyrule Warriors Artwork Zelda Rapier.png|caption=[[Zelda]] with the [[Rapier]]}} | {{Gallery/Box|file=Hyrule Warriors Artwork Zelda Rapier.png|caption=[[Zelda]] with the [[Rapier]]}} | ||
{{Gallery/Box|file=Hyrule Warriors Artwork Zelda | {{Gallery/Box|file=Hyrule Warriors Artwork Zelda Baton.png|caption=[[Zelda]] with the [[Baton]]}} | ||
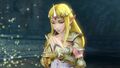
{{Gallery/Box|file=Hyrule Warriors Artwork Zelda Twilight Princess Costume.png|caption=[[Zelda]] from ''[[The Legend of Zelda: Twilight Princess|Twilight Princess]]''}} | {{Gallery/Box|file=Hyrule Warriors Artwork Zelda Dominion Rod.png|caption=[[Zelda]] with the [[Dominion Rod (Hyrule Warriors)|Dominion Rod]]}} | ||
{{Gallery/Box|file=Hyrule Warriors Artwork Zelda Skyward Sword Costume.png|caption=[[Zelda]] from ''[[The Legend of Zelda: Skyward Sword|Skyward Sword]]''}} | {{Gallery/Box|file=Hyrule Warriors Artwork Zelda Twilight Princess Costume.png|caption=[[Zelda]] from ''[[The Legend of Zelda: Twilight Princess| Twilight Princess]]''}} | ||
{{Gallery/Box|file=Hyrule Warriors Artwork Zelda Ocarina of Time Costume.png|caption=[[Zelda]] from ''[[The Legend of Zelda: Ocarina of Time|Ocarina of Time]]''}} | {{Gallery/Box|file=Hyrule Warriors Artwork Zelda Skyward Sword Costume.png|caption=[[Zelda]] from ''[[The Legend of Zelda: Skyward Sword| Skyward Sword]]''}} | ||
{{Gallery/Box|file=Hyrule Warriors Artwork Zelda Ocarina of Time Costume.png|caption=[[Zelda]] from ''[[The Legend of Zelda: Ocarina of Time| Ocarina of Time]]''}} | |||
{{Gallery/Box|file=Hyrule Warriors Artwork Zelda Ilia Costume.png|caption=[[Zelda]] as [[Ilia]] from ''[[The Legend of Zelda: Twilight Princess| Twilight Princess]]''}} | |||
{{Gallery/Box|file=Hyrule Warriors Artwork Impa.png|caption=[[Impa]]}} | {{Gallery/Box|file=Hyrule Warriors Artwork Impa.png|caption=[[Impa]]}} | ||
{{Gallery/Box|file=Hyrule Warriors Artwork Impa Giant Blade.png|caption=[[Impa]] with the [[Giant Blade]]}} | {{Gallery/Box|file=Hyrule Warriors Artwork Impa Giant Blade.png|caption=[[Impa]] with the [[Giant Blade]]}} | ||
| Line 36: | Line 58: | ||
{{Gallery/Box|file=Hyrule Warriors Artwork Midna Shackle.png|caption=[[Midna]] with the [[Shackle]]}} | {{Gallery/Box|file=Hyrule Warriors Artwork Midna Shackle.png|caption=[[Midna]] with the [[Shackle]]}} | ||
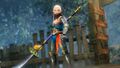
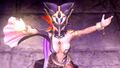
{{Gallery/Box|file=Hyrule Warriors Artwork Lana.png|caption=[[Lana]]}} | {{Gallery/Box|file=Hyrule Warriors Artwork Lana.png|caption=[[Lana]]}} | ||
{{Gallery/Box|file=Hyrule Warriors Artwork Lana Book of Sorcery. | {{Gallery/Box|file=Hyrule Warriors Artwork Lana Book of Sorcery.png|caption=[[Lana]] with the [[Book of Sorcery]]}} | ||
{{Gallery/Box|file=Hyrule Warriors Artwork Lana | {{Gallery/Box|file=Hyrule Warriors Artwork Lana Spear.png|caption=[[Lana]] with the [[Spear]]}} | ||
{{Gallery/Box|file=Hyrule Warriors Artwork Lana Summoning Gate.png|caption=[[Lana]] with the [[Summoning Gate]]}} | |||
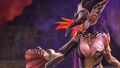
{{Gallery/Box|file=Hyrule Warriors Artwork Agitha.png|caption=[[Agitha]]}} | {{Gallery/Box|file=Hyrule Warriors Artwork Agitha.png|caption=[[Agitha]]}} | ||
{{Gallery/Box|file=Hyrule Warriors Artwork Agitha Parasol. | {{Gallery/Box|file=Hyrule Warriors Artwork Agitha Parasol.png|caption=[[Agitha]] with the [[Parasol]]}} | ||
{{Gallery/Box|file=Hyrule Warriors Artwork Fi.png|caption=[[Fi]]}} | {{Gallery/Box|file=Hyrule Warriors Artwork Fi.png|caption=[[Fi]]}} | ||
{{Gallery/Box|file=Hyrule Warriors Artwork Fi Goddess | {{Gallery/Box|file=Hyrule Warriors Artwork Fi Goddess Blade.png|caption=[[Fi]] with the [[Goddess Blade]]}} | ||
{{Gallery/Box|file=Hyrule Warriors Artwork Ruto.png|caption=[[Ruto]]}} | {{Gallery/Box|file=Hyrule Warriors Artwork Ruto.png|caption=[[Ruto]]}} | ||
{{Gallery/Box|file=Hyrule Warriors Artwork Ruto Zora Scale.png|caption=[[Ruto]] with the [[Zora Scale]]}} | {{Gallery/Box|file=Hyrule Warriors Artwork Ruto Zora Scale.png|caption=[[Ruto]] with the [[Zora Scale (Hyrule Warriors)|Zora Scale]]}} | ||
{{Gallery/Box|file=Hyrule Warriors Artwork Darunia.png|caption=[[Darunia]]}} | {{Gallery/Box|file=Hyrule Warriors Artwork Darunia.png|caption=[[Darunia]]}} | ||
{{Gallery/Box|file=Hyrule Warriors Artwork Darunia Hammer.png|caption=[[Darunia]] with the [[Hammer]]}} | {{Gallery/Box|file=Hyrule Warriors Artwork Darunia Hammer.png|caption=[[Darunia]] with the [[Hammer]]}} | ||
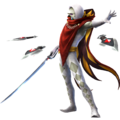
{{Gallery/Box|file=Hyrule Warriors Artwork Sheik.png|caption=[[Sheik]]}} | {{Gallery/Box|file=Hyrule Warriors Artwork Sheik.png|caption=[[Sheik]]}} | ||
{{Gallery/Box|file=Hyrule Warriors Artwork Sheik Harp.png|caption=[[Sheik]] with the [[Harp]]}} | |||
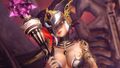
{{Gallery/Box|file=Hyrule Warriors Artwork Cia.png|caption=[[Cia]]}} | {{Gallery/Box|file=Hyrule Warriors Artwork Cia.png|caption=[[Cia]]}} | ||
{{Gallery/Box|file=Hyrule Warriors Artwork | {{Gallery/Box|file=Hyrule Warriors Artwork Cia 2.png|caption=[[Cia]]}} | ||
{{Gallery/Box|file=Hyrule Warriors Artwork Cia Scepter.png|caption=[[Cia]] with the [[Scepter]]}} | |||
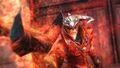
{{Gallery/Box|file=Hyrule Warriors Artwork Volga.png|caption=[[Volga]]}} | |||
{{Gallery/Box|file=Hyrule Warriors Artwork Volga Dragon Spear.png|caption=[[Volga]] with the [[Dragon Spear]]}} | |||
{{Gallery/Box|file=Hyrule Warriors Artwork Wizzro.png|caption=[[Wizzro]]}} | {{Gallery/Box|file=Hyrule Warriors Artwork Wizzro.png|caption=[[Wizzro]]}} | ||
{{Gallery/Box|file=Hyrule Warriors Artwork Wizzro Ring.png|caption=[[Wizzro]] with the [[Ring (Hyrule Warriors)|Ring]]}} | |||
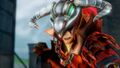
{{Gallery/Box|file=Hyrule Warriors Artwork Zant.png|caption=[[Zant]]}} | {{Gallery/Box|file=Hyrule Warriors Artwork Zant.png|caption=[[Zant]]}} | ||
{{Gallery/Box|file=Hyrule Warriors Artwork Zant Scimitars.png|caption=[[Zant]] with his [[Scimitars]]}} | |||
{{Gallery/Box|file=Hyrule Warriors Artwork Ghirahim.png|caption=[[Ghirahim]]}} | |||
{{Gallery/Box|file=Hyrule Warriors Artwork Ghirahim Demon Blade.png|caption=[[Ghirahim]] with the [[Demon Blade]]}} | |||
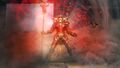
{{Gallery/Box|file=Hyrule Warriors Artwork Ganondorf.png|caption=[[Ganon|Ganondorf]]}} | |||
{{Gallery/Box|file=Hyrule Warriors Artwork Ganondorf Great Swords.png|caption=[[Ganon|Ganondorf]] with the [[Great Swords]]}} | |||
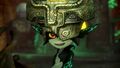
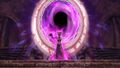
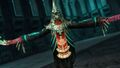
{{Gallery/Box|file=Hyrule Warriors Artwork Twili Midna.png|caption=[[Twili]] [[Midna]]}} | |||
{{Gallery/Box|file=Hyrule Warriors Artwork Twili Midna Mirror.png|caption=[[Twili]] [[Midna]] with the [[Mirror (Hyrule Warriors)|Mirror]]}} | |||
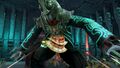
{{Gallery/Box|file=Hyrule Warriors Artwork Argorok.png|caption=[[Argorok]]}} | {{Gallery/Box|file=Hyrule Warriors Artwork Argorok.png|caption=[[Argorok]]}} | ||
{{Gallery/Box|file=Hyrule Warriors Artwork The Imprisoned.png|caption=[[The Imprisoned]]}} | {{Gallery/Box|file=Hyrule Warriors Artwork The Imprisoned.png|caption=[[The Imprisoned]]}} | ||
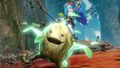
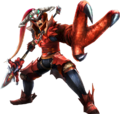
{{Gallery/Box|file=Hyrule Warriors Artwork Gohma.png|caption=[[Gohma (Hyrule Warriors)|Gohma]]}} | {{Gallery/Box|file=Hyrule Warriors Artwork Gohma.png|caption=[[Gohma (Hyrule Warriors)|Gohma]]}} | ||
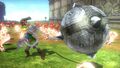
{{Gallery/Box|file=Hyrule Warriors Artwork King Dodongo.png|caption=[[King Dodongo (Hyrule Warriors)|King Dodongo]]}} | |||
{{Gallery/Box|file=Hyrule Warriors Artwork Manhandla.png|caption=[[Manhandla (Hyrule Warriors)|Manhandla]]}} | |||
{{Gallery/Bottom}} | {{Gallery/Bottom}} | ||
| Line 133: | Line 169: | ||
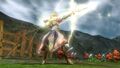
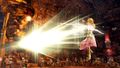
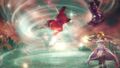
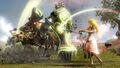
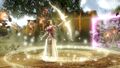
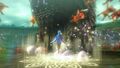
{{Gallery/Box|file=Hyrule Warriors Screenshot Zelda Wind Waker Cyclone.jpg}} | {{Gallery/Box|file=Hyrule Warriors Screenshot Zelda Wind Waker Cyclone.jpg}} | ||
{{Gallery/Box|file=Hyrule Warriors Screenshot Zelda Wind Waker Lightning.jpg}} | {{Gallery/Box|file=Hyrule Warriors Screenshot Zelda Wind Waker Lightning.jpg}} | ||
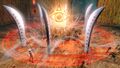
{{Gallery/Box|file=Hyrule Warriors Screenshot Zelda Dominion Rod Owl Statue.jpg}} | |||
{{Gallery/Box|file=Hyrule Warriors Screenshot Zelda Dominion Rod Ancient Statue.jpg}} | |||
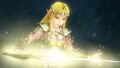
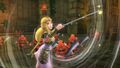
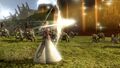
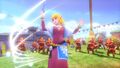
{{Gallery/Box|file=Hyrule Warriors Screenshot Zelda Twilight Princess Costume Light Arrow.jpg}} | {{Gallery/Box|file=Hyrule Warriors Screenshot Zelda Twilight Princess Costume Light Arrow.jpg}} | ||
{{Gallery/Box|file=Hyrule Warriors Screenshot Zelda Twilight Princess Costume Light Arrow Shot.jpg}} | {{Gallery/Box|file=Hyrule Warriors Screenshot Zelda Twilight Princess Costume Light Arrow Shot.jpg}} | ||
| Line 162: | Line 200: | ||
{{Gallery/Box|file=Hyrule Warriors Screenshot Lana Special Finish.jpg}} | {{Gallery/Box|file=Hyrule Warriors Screenshot Lana Special Finish.jpg}} | ||
{{Gallery/Box|file=Hyrule Warriors Screenshot Lana Faron Woods.jpg}} | {{Gallery/Box|file=Hyrule Warriors Screenshot Lana Faron Woods.jpg}} | ||
{{Gallery/Box|file=Hyrule Warriors Screenshot Lana | {{Gallery/Box|file=Hyrule Warriors Screenshot Lana Spear Small Deku Tree.jpg}} | ||
{{Gallery/Box|file=Hyrule Warriors Screenshot Lana | {{Gallery/Box|file=Hyrule Warriors Screenshot Lana Spear Deku Leaf.jpg}} | ||
{{Gallery/Box|file=Hyrule Warriors Screenshot Lana | {{Gallery/Box|file=Hyrule Warriors Screenshot Lana Spear Deku Tree Sprout.jpg}} | ||
{{Gallery/Box|file=Hyrule Warriors Screenshot Agitha Butterfly.jpg}} | {{Gallery/Box|file=Hyrule Warriors Screenshot Agitha Butterfly.jpg}} | ||
{{Gallery/Box|file=Hyrule Warriors Screenshot Agitha Cornered.jpg}} | {{Gallery/Box|file=Hyrule Warriors Screenshot Agitha Cornered.jpg}} | ||
| Line 200: | Line 238: | ||
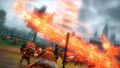
{{Gallery/Box|file=Hyrule Warriors Screenshot Cia Fire.jpg}} | {{Gallery/Box|file=Hyrule Warriors Screenshot Cia Fire.jpg}} | ||
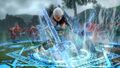
{{Gallery/Box|file=Hyrule Warriors Screenshot Wizzro.jpg}} | {{Gallery/Box|file=Hyrule Warriors Screenshot Wizzro.jpg}} | ||
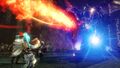
{{Gallery/Box|file=Hyrule Warriors Screenshot | {{Gallery/Box|file=Hyrule Warriors Screenshot Volga.jpg}} | ||
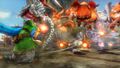
{{Gallery/Box|file=Hyrule Warriors Screenshot | {{Gallery/Box|file=Hyrule Warriors Screenshot Volga Claw.jpg}} | ||
{{Gallery/Box|file=Hyrule Warriors Screenshot | {{Gallery/Box|file=Hyrule Warriors Screenshot Volga Shout.jpg}} | ||
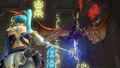
{{Gallery/Box|file=Hyrule Warriors Screenshot Zant.jpg}} | {{Gallery/Box|file=Hyrule Warriors Screenshot Zant.jpg}} | ||
{{Gallery/Box|file=Hyrule Warriors Screenshot Zant Midna.jpg}} | {{Gallery/Box|file=Hyrule Warriors Screenshot Zant Midna.jpg}} | ||
{{Gallery/Box|file=Hyrule Warriors Screenshot Zant Giant.jpg}} | {{Gallery/Box|file=Hyrule Warriors Screenshot Zant Giant.jpg}} | ||
{{Gallery/Box|file=Hyrule Warriors Screenshot Zant Scimitars.jpg}} | {{Gallery/Box|file=Hyrule Warriors Screenshot Zant Scimitars.jpg}} | ||
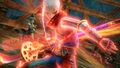
{{Gallery/Box|file=Hyrule Warriors Screenshot Ghirahim.jpg}} | {{Gallery/Box|file=Hyrule Warriors Screenshot Ghirahim.jpg}} | ||
{{Gallery/Box|file=Hyrule Warriors Screenshot Ghirahim Gate of Souls.jpg}} | {{Gallery/Box|file=Hyrule Warriors Screenshot Ghirahim Gate of Souls.jpg}} | ||
| Line 216: | Line 251: | ||
{{Gallery/Box|file=Hyrule Warriors Screenshot Ghirahim Parry.jpg}} | {{Gallery/Box|file=Hyrule Warriors Screenshot Ghirahim Parry.jpg}} | ||
{{Gallery/Box|file=Hyrule Warriors Screenshot Ghirahim Jump.jpg}} | {{Gallery/Box|file=Hyrule Warriors Screenshot Ghirahim Jump.jpg}} | ||
{{Gallery/Box|file=Hyrule Warriors Screenshot Ganondorf Keys.jpg}} | |||
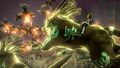
{{Gallery/Box|file=Hyrule Warriors Screenshot Twili Midna Mirror.jpg}} | |||
{{Gallery/Box|file=Hyrule Warriors Screenshot Twili Midna Wolf.jpg}} | |||
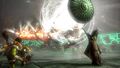
{{Gallery/Box|file=Hyrule Warriors Screenshot Argorok.jpg}} | |||
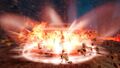
{{Gallery/Box|file=Hyrule Warriors Screenshot Argorok Fire.jpg}} | |||
{{Gallery/Box|file=Hyrule Warriors Screenshot Argorok Weakpoint.jpg}} | |||
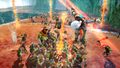
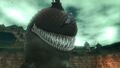
{{Gallery/Box|file=Hyrule Warriors Screenshot The Imprisoned.jpg}} | {{Gallery/Box|file=Hyrule Warriors Screenshot The Imprisoned.jpg}} | ||
{{Gallery/Box|file=Hyrule Warriors Screenshot The Imprisoned Attacked.jpg}} | {{Gallery/Box|file=Hyrule Warriors Screenshot The Imprisoned Attacked.jpg}} | ||
Revision as of 20:22, May 5, 2019
Videos
Link - Hylian Sword
Link - Magic Rod
Link - Gauntlets
Link - Spinner
Link - Horse
(Master Quest Pack)
Link's Costumes
Impa - Giant Blade
Impa - Naginata
Zelda - Rapier
Zelda - Baton
Zelda's Costumes
Lana - Book of Sorcery
Lana - Spear
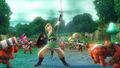
Agitha - Parasol
Midna - Shackle
Fi - Goddess Blade
Ruto - Zora Scale
Darunia - Hammer
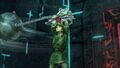
Sheik - Harp
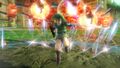
Ganondorf - Great Sword
Ganondorf's Costumes
Zant - Scimitars
Ghirahim - Demon Blade
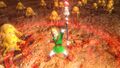
Cia - Flail
Volga - Lance
Wizzro - Ring
Twili Midna - Mirror
Zelda - Dominion Rod
(Twilight Princess Pack)
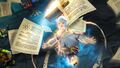
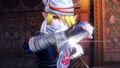
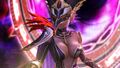
Artwork
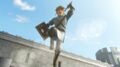
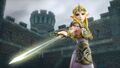
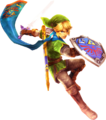
Link with the Hylian Sword
Link with the Great Fairy
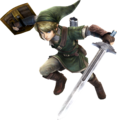
Link with the Master Sword
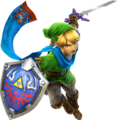
Link with the Master Sword
Link from Twilight Princess
Link from Skyward Sword
Link from Ocarina of Time
Link as the Postman from Twilight Princess
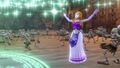
Zelda with the Dominion Rod

Zelda from Twilight Princess

Zelda from Skyward Sword

Zelda from Ocarina of Time

Zelda as Ilia from Twilight Princess
Impa with the Giant Blade
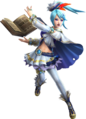
Lana with the Book of Sorcery
Lana with the Summoning Gate

Fi with the Goddess Blade

Ruto with the Zora Scale
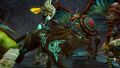
Volga with the Dragon Spear
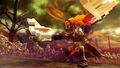
Ghirahim with the Demon Blade

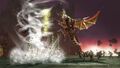
Ganondorf with the Great Swords


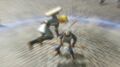
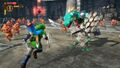
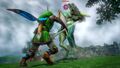
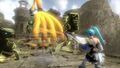
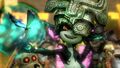
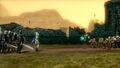
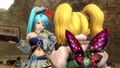
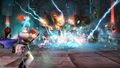
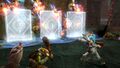
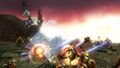
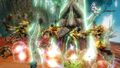
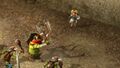
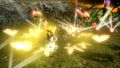
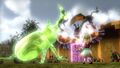
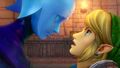
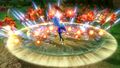
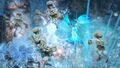
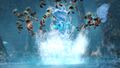
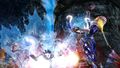
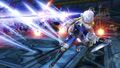
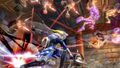
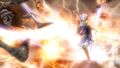
Screenshots


