Gallery:A Link to the Past Items: Difference between revisions
Jump to navigation
Jump to search
Want an adless experience? Log in or Create an account.
mNo edit summary |
|||
| Line 180: | Line 180: | ||
==Item Artwork== | ==Item Artwork== | ||
===Equipment=== | ===Equipment=== | ||
< | <gallery> | ||
File:Fighters Sword - LTTP art.png|[[Fighter's Sword]] | |||
File:MasterSwordlttp.png|[[Master Sword]] | |||
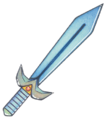
File:TemperedSword.png|[[Tempered Sword]] | |||
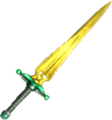
File:Golden Sword.png|[[Golden Sword]] | |||
File:FightersShield.png|[[Fighter's Shield]] | |||
File:FireShield.png|[[Fire Shield]] | |||
File:MirrorShield.png|[[Mirror Shield]] | |||
File:GreenMail.png|[[Green Jerkin]] | |||
File:BlueMail.png|[[Blue Mail]] | |||
File:RedMail.png|[[Red Mail]] | |||
File:PegasusBoots.png|[[Pegasus Boots]] | |||
File:PowerGlove.png|[[Power Glove]] | |||
File:TitansMitt.png|[[Titan's Mitt]] | |||
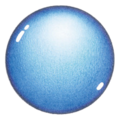
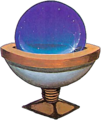
File:MoonPearl.png|[[Moon Pearl]] | |||
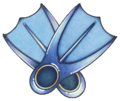
File:ZoraFlippers - LTTP art.png|[[Flippers]] | |||
</gallery> | |||
===Items=== | ===Items=== | ||
< | <gallery> | ||
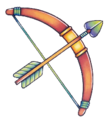
File:Bowlttp.png|[[Bow]] and [[Arrow]] | |||
File:Boomeranglttp.png|[[Boomerang]] | |||
File:Magic boomerang.jpg|[[Magic Boomerang|Magical Boomerang]] | |||
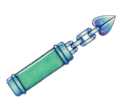
File:HookShot.png|[[Hookshot]] | |||
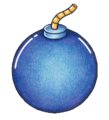
File:Bomblttp.png|[[Bomb]] | |||
File:MagicPowderlttp.png|[[Magic Powder]] | |||
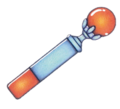
File:FireRodlttp.png|[[Fire Rod]] | |||
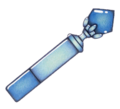
File:Ice Rod.png|[[Ice Rod]] | |||
File:BombosMedallion.png|[[Bombos Medallion]] | |||
File:EtherMedallion.png|[[Ether Medallion]] | |||
File:QuakeMedallion.png|[[Quake Medallion]] | |||
File:Lamp.png|[[Lamp]] | |||
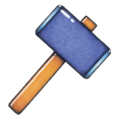
File:MagicHammer.png|[[Magic Hammer]] | |||
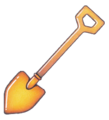
File:Shovellttp.png|[[Shovel]] | |||
File:Flutelttp.png|[[Flute]] | |||
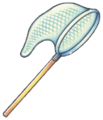
File:BugCatchingNetlttp.png|[[Bug Net]] | |||
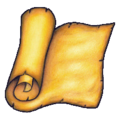
File:BookOfMudora.png|[[Book of Mudora]] | |||
File:Bottlelttp.png|[[Bottle|Magic Bottle]] | |||
File:CaneOfSomaria.png|[[Cane of Somaria]] | |||
File:CaneOfByrna.png|[[Cane of Byrna]] | |||
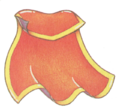
File:MagicCape.png|[[Magic Cape]] | |||
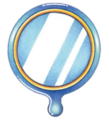
File:MagicMirror.png|[[Magic Mirror]] | |||
</gallery> | |||
===Bottle Items=== | ===Bottle Items=== | ||
< | <gallery> | ||
File:RedPotion.png|[[Red Potion]] | |||
</gallery> | |||
===Dungeon Items=== | ===Dungeon Items=== | ||
< | <gallery> | ||
File:Compass.png|[[Compass]] | |||
File:DungeonMaplttp.png|[[Dungeon Map]] | |||
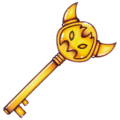
File:Keylttp.png|[[Small Key]] | |||
File:BigKeylttp.png|[[Big Key]] | |||
</gallery> | |||
===Quest Items=== | ===Quest Items=== | ||
< | <gallery> | ||
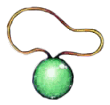
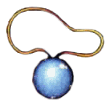
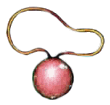
File:PendantOfCourage.png|[[Pendant of Courage]] | |||
File:PendantOfPower.png|[[Pendant of Power]] | |||
File:PendantOfWisdom.png|[[Pendant of Wisdom]] | |||
File:Crystals.png|[[Crystal]]s | |||
</gallery> | |||
===Other Items=== | ===Other Items=== | ||
< | <gallery> | ||
File:Rupeeslttp.png|[[Rupee]] | |||
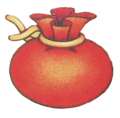
File:MagicJarslttp.png|[[Magic Jar]] | |||
File:RecoveryHeartlttp.png|[[Recovery Heart]] | |||
File:HeartPiecelttp.png|[[Piece of Heart]] | |||
File:HeartContainerlttp.png|[[Heart Container]] | |||
File:Crystal-Switch-Artwork-ALttP.png|[[Crystal Switch]] | |||
File:SuperBomb.png|[[Super Bomb]] | |||
</gallery> | |||
{{Galleries}} | {{Galleries}} | ||
{{cat|A Link to the Past Items| Gallery}} | {{cat|A Link to the Past Items| Gallery}} | ||
Revision as of 21:11, March 20, 2021
A gallery for items from A Link to the Past.
Overworld Sprites
Equipment
Items
Bow w/Silver Arrows
Bottle Items
Red Potion (Bottled)
Green Potion (Bottled)
Blue Potion (Bottled)
Bee (Bottled)
Fairy (Bottled)
Dungeon Items
Quest Items
1st Crystal-encased Maiden, Dark Palace
2nd Crystal-encased Maiden, Swamp Palace
3rd Crystal-encased Maiden, Skull Woods
4th Crystal-encased Maiden, Gargoyle's Domain
5th Crystal-encased Maiden, Ice Palace
6th Crystal-encased Maiden, Misery Mire
7th Crystal with Zelda, Turtle Rock
Other Items
Green Rupee (1)
Magic Jar (Small)
Inventory Sprites
Equipment
- MoonPearl-ALttP-Icon.png
Items
Bottle Items
Dungeon Items
Quest Items
Other Items
Item Artwork
Equipment
- TemperedSword.png


