Gallery:A Link to the Past Items: Difference between revisions
Jump to navigation
Jump to search
Want an adless experience? Log in or Create an account.
m (Text replacement - "ZoraFlipperslttp.png" to "ZoraFlippers - LTTP art.png") |
(Working on disentangling the inventory sprites & overworld sprites...) |
||
| Line 1: | Line 1: | ||
==Item | {{Editing}} | ||
==Overworld Sprites== | |||
===Equipment=== | |||
<gallery widths="64" heights="64"> | |||
File:Item mastersword.gif | |||
File:FightersShield-ALttP-Sprite.png | |||
File:FireShield-ALttP-Sprite.png | |||
File:MirrorShield-ALttP-Sprite.png | |||
File:GreenJerkin-ALttP-Sprite.png | |||
File:BlueMail-ALttP-Sprite.png | |||
File:RedMail-ALttP-Sprite.png | |||
File:PegasusShoes-ALttP-Sprite.png | |||
File:PowerGlove-ALttP-Sprite.png | |||
File:TitanMitt-ALttP-Sprite.png | |||
File:Moon-Pearl.png | |||
File:ZoraFlippers-ALttP-Sprite.png | |||
</gallery> | |||
===Items=== | |||
<gallery widths="64" heights="64"> | |||
File:Bow-ALttP-Sprite.png | |||
File:Arrow-ALttP-Sprite.png | |||
File:BowArrows-ALttP-Sprite.png | |||
File:BowSilverArrows-ALttP-Sprite.png | |||
File:Boomerang-ALttP-Sprite.png | |||
File:MagicalBoomerang-ALttP-Sprite.png | |||
File:Hookshot-ALttP-Sprite.png | |||
File:Bomb-ALttP-Sprite.png | |||
File:Ten-Bombs-ALttP.png | |||
File:30bombs-ALttP-Sprite.png | |||
File:Mushroom-ALttP-Sprite.png | |||
File:MagicPowder-ALttP-Sprite.png | |||
File:FireRod-ALttP-Sprite.png | |||
File:IceRod-ALttP-Sprite.png | |||
File:BombosMedallion-ALttP-Sprite.png | |||
File:EtherMedallion-ALttP-Sprite.png | |||
File:QuakeMedallion-ALttP-Sprite.png | |||
File:Lamp-ALttP-Sprite.png | |||
File:MagicHammer-ALttP-Sprite.png | |||
File:Shovel-ALttP-Sprite.png | |||
File:Flute-ALttP-Sprite.png | |||
File:BugCatchingNet-ALttP-Sprite.png | |||
File:BookOfMudora-ALttP-Sprite.png | |||
File:CaneOfSomaria-ALttP-Sprite.png | |||
File:Cane-of-Byrna-Sprite.png | |||
File:MagicCape-ALttP-Sprite.png | |||
File:MagicMirror-ALttP-Sprite.png | |||
</gallery> | |||
===Bottle Items=== | |||
<gallery widths="64" heights="64"> | |||
File:BottleEmpty-ALttP-Sprite.png | |||
File:BottlePotionRed-ALttP-Sprite.png | |||
File:BottlePotionGreen-ALttP-Sprite.png | |||
File:BottlePotionBlue-ALttP-Sprite.png | |||
File:BottleBee-ALttP-Sprite.png | |||
File:BottleFairy-ALttP-Sprite.png | |||
</gallery> | |||
===Dungeon Items=== | |||
<gallery widths="64" heights="64"> | |||
File:Compass-ALttP-Sprite.png | |||
File:Dungeon-Map-Sprite.png | |||
File:BigKey-ALttP-Sprite.png | |||
File:Key-Sprite-LTTP.png | |||
</gallery> | |||
===Quest Items=== | |||
<gallery widths="64" heights="64"> | |||
File:Pendant-of-Courage.png|[[Pendant of Courage]] | |||
File:Pendant-of-Power.png|[[Pendant of Power]] | |||
File:Pendant-of-Wisdom.png|[[Pendant of Wisdom]] | |||
File:Crystal-ALttP-Sprite.png|[[Crystal]] | |||
File:Lttp crystal1.gif|1st Crystal-encased [[Seven Maidens|Maiden]], [[Dark Palace (A Link to the Past)|Dark Palace]] | |||
File:Lttp crystal2.gif|2nd Crystal-encased Maiden, [[Swamp Palace (A Link to the Past)|Swamp Palace]] | |||
File:Lttp crystal3.gif|3rd Crystal-encased Maiden, [[Skull Woods (A Link to the Past)|Skull Woods]] | |||
File:Lttp crystal4.gif|4th Crystal-encased Maiden, [[Gargoyle's Domain]] | |||
File:Lttp crystal5.gif|5th Crystal-encased Maiden, [[Ice Palace]] | |||
File:Lttp crystal6.gif|6th Crystal-encased Maiden, [[Misery Mire (A Link to the Past)|Misery Mire]] | |||
File:Lttp crystal7.gif|7th Crystal with [[Zelda]], [[Turtle Rock (A Link to the Past)|Turtle Rock]] | |||
</gallery> | |||
===Other Items=== | |||
<gallery widths="64" heights="64"> | |||
File:Green-Rupee-ALttP.png | |||
File:Blue-Rupee-ALttP.png | |||
File:Red-Rupee-ALttP.png | |||
File:MagicJarSmall.png | |||
File:Magic-Jar-Large.png | |||
File:Apple-ALttP-Sprite.png | |||
File:Recovery-Heart-Sprite.png | |||
File:Heart-Piece.png | |||
File:HeartContainer-ALttP-Sprite.png | |||
File:Fake Master Sword - LTTP.png | |||
File:Super-Bomb.png | |||
File:CauldronRedPotion-ALttP-Sprite.png | |||
File:CauldronGreenPotion-ALttP-Sprite.png | |||
File:CauldronBluePotion-ALttP-Sprite.png | |||
File:Fairy-Sprite.png | |||
File:CrystalSwitchBlue.png|[[Crystal Switch|Blue Crystal Switch]]}} | |||
File:CrystalSwitchRed.png|[[Crystal Switch|Red Crystal Switch]]}} | |||
</gallery> | |||
==Inventory Sprites== | |||
===Equipment=== | ===Equipment=== | ||
< | <gallery widths="64" heights="64"> | ||
File:Fighters-Sword.png|[[Fighter's Sword]] | |||
File:MasterSword.png|[[Master Sword]] | |||
File:Tempered-Sword.png|[[Tempered Sword]] | |||
File:Golden-Sword.png|[[Golden Sword]] | |||
File:Fighters-Shield.png|[[Fighter's Shield]] | |||
File:Fire-Shield.png|[[Fire Shield]] | |||
File:Mirror-Shield.png|[[Mirror Shield]] | |||
File:Green-Tunic-Sprite.png|[[Green Jerkin]] | |||
File:Blue-Mail.png|[[Blue Mail]] | |||
File:Red-Mail.png|[[Red Mail]] | |||
File:Pegasus Boots.png|[[Pegasus Boots]] | |||
File:Power-Glove.png|[[Power Glove]] | |||
File:Titans-Mitt.png|[[Titan's Mitt]] | |||
File:MoonPearl-ALttP-Icon.png|[[Moon Pearl]] | |||
File:ZoraFlippers.png|[[Flippers]] | |||
</gallery> | |||
===Items=== | ===Items=== | ||
< | <gallery widths="64" heights="64"> | ||
File:Bow-Arrows-Sprite.png|[[Bow]] and [[Arrow]] | |||
File:Silver-Arrows-Sprite.png|[[Silver Arrow|Silver Arrows]] | |||
File:Boomerang-Sprite.png|[[Boomerang]] | |||
File:MagicBoomerang.png|[[Magic Boomerang|Magical Boomerang]] | |||
File:Hookshot-ALTTP.png|[[Hookshot]] | |||
File:Bombs.png|[[Bomb]] | |||
File:Mushrooms.png|[[Mushroom]] | |||
File:MagicPowder.png|[[Magic Powder]] | |||
File:FireRodMiniature.png|[[Fire Rod]] | |||
File:IceRod.png|[[Ice Rod]] | |||
File:Bombos-Medallion.png|[[Bombos Medallion]] | |||
File:Ether-Medallion.png|[[Ether Medallion]] | |||
File:Quake-Medallion.png|[[Quake Medallion]] | |||
File:Lamp-Sprite.png|[[Lamp]] | |||
File:Magic-Hammer.png|[[Magic Hammer]] | |||
File:Shovel-ALTTP.png|[[Shovel]] | |||
File:Flute.png|[[Flute]] | |||
File:BugCatchingNet.png|[[Bug Net]] | |||
File:Book-Of-Mudora.png|[[Book of Mudora]] | |||
File:Bottle-Sprite.png|[[Bottle|Magic Bottle]] | |||
File:Cane-Of-Somaria.png|[[Cane of Somaria]] | |||
File:CaneOfByrnaSprite.png|[[Cane of Byrna]] | |||
File:MagicCapeSprite.png|[[Magic Cape]] | |||
File:Magic-Mirror.png|[[Magic Mirror]] | |||
</gallery> | |||
===Bottle Items=== | ===Bottle Items=== | ||
< | <gallery widths="64" heights="64"> | ||
File:GreenPotion.png|[[Green Potion]] | |||
File:Red-Potion.png|[[Red Potion]] | |||
File:BluePotion.png|[[Blue Potion]] | |||
</gallery> | |||
===Dungeon Items=== | ===Dungeon Items=== | ||
< | <gallery widths="64" heights="64"> | ||
File:Compass-Sprite.png|[[Compass]] | |||
File:DungeonMap-ALttP-Icon.png|[[Dungeon Map]] | |||
File:BigKey-ALttP-Icon.png|[[Big Key]] | |||
</gallery> | |||
===Quest Items=== | ===Quest Items=== | ||
< | <gallery widths="64" heights="64"> | ||
File:Crystals-ALTTP.png|[[Crystal]]s | |||
</gallery> | |||
===Other Items=== | ===Other Items=== | ||
< | <gallery widths="64" heights="64"> | ||
File:HeartContainer.png|[[Heart Container]] | |||
</gallery> | |||
==Item Artwork== | ==Item Artwork== | ||
===Equipment=== | ===Equipment=== | ||
<center>{{Gallery}} | <center>{{Gallery}} | ||
{{Gallery/Box|file=FightersSword (1).png|link=Fighter' | {{Gallery/Box|file=FightersSword (1).png|link=Fighter's Sword|caption=[[Fighter's Sword]]}} | ||
{{Gallery/Box|file=MasterSwordlttp.png|link= | {{Gallery/Box|file=MasterSwordlttp.png|link=Master Sword|caption=[[Master Sword]]}} | ||
{{Gallery/Box|file=TemperedSword.png|link= | {{Gallery/Box|file=TemperedSword.png|link=Tempered Sword|caption=[[Tempered Sword]]}} | ||
{{Gallery/Box|file= | {{Gallery/Box|file=Golden Sword.png|link=Golden Sword|caption=[[Golden Sword]]}} | ||
{{Gallery/Box|file=FightersShield.png|link=Fighter' | {{Gallery/Box|file=FightersShield.png|link=Fighter's Shield|caption=[[Fighter's Shield]]}} | ||
{{Gallery/Box|file=FireShield.png|link= | {{Gallery/Box|file=FireShield.png|link=Fire Shield|caption=[[Fire Shield]]}} | ||
{{Gallery/Box|file=MirrorShield.png|link= | {{Gallery/Box|file=MirrorShield.png|link=Mirror Shield|caption=[[Mirror Shield]]}} | ||
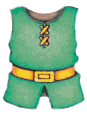
{{Gallery/Box|file=GreenMail.png|link= | {{Gallery/Box|file=GreenMail.png|link=Green Jerkin|caption=[[Green Jerkin]]}} | ||
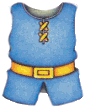
{{Gallery/Box|file=BlueMail.png|link= | {{Gallery/Box|file=BlueMail.png|link=Blue Mail|caption=[[Blue Mail]]}} | ||
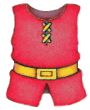
{{Gallery/Box|file=RedMail.png|link= | {{Gallery/Box|file=RedMail.png|link=Red Mail|caption=[[Red Mail]]}} | ||
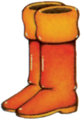
{{Gallery/Box|file=PegasusBoots.png|link= | {{Gallery/Box|file=PegasusBoots.png|link=Pegasus Boots|caption=[[Pegasus Boots]]}} | ||
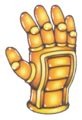
{{Gallery/Box|file=PowerGlove.png|link= | {{Gallery/Box|file=PowerGlove.png|link=Power Glove|caption=[[Power Glove]]}} | ||
{{Gallery/Box|file=TitansMitt.png|link= | {{Gallery/Box|file=TitansMitt.png|link=Titans Mitt|caption=[[Titan's Mitt]]}} | ||
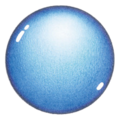
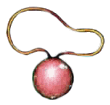
{{Gallery/Box|file=MoonPearl.png|link= | {{Gallery/Box|file=MoonPearl.png|link=Moon Pearl|caption=[[Moon Pearl]]}} | ||
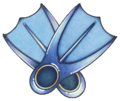
{{Gallery/Box|file=ZoraFlippers - LTTP art.png|link=Flippers|caption=[[Flippers]]}} | {{Gallery/Box|file=ZoraFlippers - LTTP art.png|link=Flippers|caption=[[Flippers]]}} | ||
{{Gallery/Bottom}}</center> | {{Gallery/Bottom}}</center> | ||
| Line 112: | Line 200: | ||
{{Gallery/Box|file=Bowlttp.png|link=Bow|caption=[[Bow]] and [[Arrow]]}} | {{Gallery/Box|file=Bowlttp.png|link=Bow|caption=[[Bow]] and [[Arrow]]}} | ||
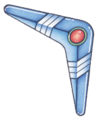
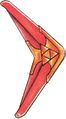
{{Gallery/Box|file=Boomeranglttp.png|link=Boomerang|caption=[[Boomerang]]}} | {{Gallery/Box|file=Boomeranglttp.png|link=Boomerang|caption=[[Boomerang]]}} | ||
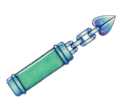
{{Gallery/Box|file= | {{Gallery/Box|file=Magic boomerang.jpg|link=Magic Boomerang|caption=[[Magic Boomerang|Magical Boomerang]]}} | ||
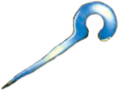
{{Gallery/Box|file=HookShot.png|link=Hookshot|caption=[[Hookshot]]}} | {{Gallery/Box|file=HookShot.png|link=Hookshot|caption=[[Hookshot]]}} | ||
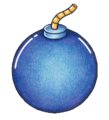
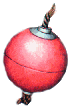
{{Gallery/Box|file=Bomblttp.png|link=Bomb|caption=[[Bomb]]}} | {{Gallery/Box|file=Bomblttp.png|link=Bomb|caption=[[Bomb]]}} | ||
{{Gallery/Box|file=MagicPowderlttp.png|link= | {{Gallery/Box|file=MagicPowderlttp.png|link=Magic Powder|caption=[[Magic Powder]]}} | ||
{{Gallery/Box|file=FireRodlttp.png|link= | {{Gallery/Box|file=FireRodlttp.png|link=Fire Rod|caption=[[Fire Rod]]}} | ||
{{Gallery/Box|file=Ice Rod.png|link= | {{Gallery/Box|file=Ice Rod.png|link=Ice Rod|caption=[[Ice Rod]]}} | ||
{{Gallery/Box|file=BombosMedallion.png|link= | {{Gallery/Box|file=BombosMedallion.png|link=Bombos Medallion|caption=[[Bombos Medallion]]}} | ||
{{Gallery/Box|file=EtherMedallion.png|link= | {{Gallery/Box|file=EtherMedallion.png|link=Ether Medallion|caption=[[Ether Medallion]]}} | ||
{{Gallery/Box|file=QuakeMedallion.png|link= | {{Gallery/Box|file=QuakeMedallion.png|link=Quake Medallion|caption=[[Quake Medallion]]}} | ||
{{Gallery/Box|file=Lamp.png|link=Lamp|caption=[[Lamp]]}} | {{Gallery/Box|file=Lamp.png|link=Lamp|caption=[[Lamp]]}} | ||
{{Gallery/Box|file=MagicHammer.png|link= | {{Gallery/Box|file=MagicHammer.png|link=Magic Hammer|caption=[[Magic Hammer]]}} | ||
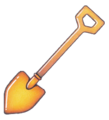
{{Gallery/Box|file=Shovellttp.png|link=Shovel|caption=[[Shovel]]}} | {{Gallery/Box|file=Shovellttp.png|link=Shovel|caption=[[Shovel]]}} | ||
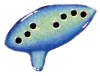
{{Gallery/Box|file=Flutelttp.png|link=Flute|caption=[[Flute]]}} | {{Gallery/Box|file=Flutelttp.png|link=Flute|caption=[[Flute]]}} | ||
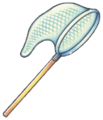
{{Gallery/Box|file=BugCatchingNetlttp.png|link= | {{Gallery/Box|file=BugCatchingNetlttp.png|link=Bug Net|caption=[[Bug Net]]}} | ||
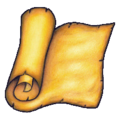
{{Gallery/Box|file=BookOfMudora.png|link= | {{Gallery/Box|file=BookOfMudora.png|link=Book of Mudora|caption=[[Book of Mudora]]}} | ||
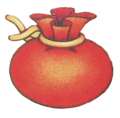
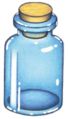
{{Gallery/Box|file=Bottlelttp.png|link=Bottle|caption=[[Bottle|Magic Bottle]]}} | {{Gallery/Box|file=Bottlelttp.png|link=Bottle|caption=[[Bottle|Magic Bottle]]}} | ||
{{Gallery/Box|file=CaneOfSomaria.png|link= | {{Gallery/Box|file=CaneOfSomaria.png|link=Cane of Somaria|caption=[[Cane of Somaria]]}} | ||
{{Gallery/Box|file=CaneOfByrna.png|link= | {{Gallery/Box|file=CaneOfByrna.png|link=Cane of Byrna|caption=[[Cane of Byrna]]}} | ||
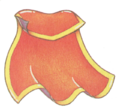
{{Gallery/Box|file=MagicCape.png|link= | {{Gallery/Box|file=MagicCape.png|link=Magic Cape|caption=[[Magic Cape]]}} | ||
{{Gallery/Box|file=MagicMirror.png|link= | {{Gallery/Box|file=MagicMirror.png|link=Magic Mirror|caption=[[Magic Mirror]]}} | ||
{{Gallery/Bottom}}</center> | {{Gallery/Bottom}}</center> | ||
===Bottle Items=== | ===Bottle Items=== | ||
<center>{{Gallery}} | <center>{{Gallery}} | ||
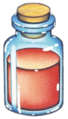
{{Gallery/Box|file=RedPotion.png|link= | {{Gallery/Box|file=RedPotion.png|link=Red Potion|caption=[[Red Potion]]}} | ||
{{Gallery/Bottom}}</center> | {{Gallery/Bottom}}</center> | ||
| Line 142: | Line 230: | ||
<center>{{Gallery}} | <center>{{Gallery}} | ||
{{Gallery/Box|file=Compass.png|link=Compass|caption=[[Compass]]}} | {{Gallery/Box|file=Compass.png|link=Compass|caption=[[Compass]]}} | ||
{{Gallery/Box|file=DungeonMaplttp.png|link= | {{Gallery/Box|file=DungeonMaplttp.png|link=Dungeon Map|caption=[[Dungeon Map]]}} | ||
{{Gallery/Box|file=Keylttp.png|link= | {{Gallery/Box|file=Keylttp.png|link=Small Key|caption=[[Small Key]]}} | ||
{{Gallery/Box|file=BigKeylttp.png|link= | {{Gallery/Box|file=BigKeylttp.png|link=Big Key|caption=[[Big Key]]}} | ||
{{Gallery/Bottom}}</center> | {{Gallery/Bottom}}</center> | ||
===Quest Items=== | ===Quest Items=== | ||
<center>{{Gallery}} | <center>{{Gallery}} | ||
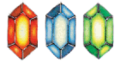
{{Gallery/Box|file=PendantOfCourage.png|link= | {{Gallery/Box|file=PendantOfCourage.png|link=Pendant of Courage|caption=[[Pendant of Courage]]}} | ||
{{Gallery/Box|file=PendantOfPower.png|link= | {{Gallery/Box|file=PendantOfPower.png|link=Pendant of Power|caption=[[Pendant of Power]]}} | ||
{{Gallery/Box|file=PendantOfWisdom.png|link= | {{Gallery/Box|file=PendantOfWisdom.png|link=Pendant of Wisdom|caption=[[Pendant of Wisdom]]}} | ||
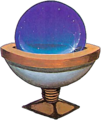
{{Gallery/Box|file=Crystals.png|link=Crystal|caption=[[Crystal]]s}} | {{Gallery/Box|file=Crystals.png|link=Crystal|caption=[[Crystal]]s}} | ||
{{Gallery/Bottom}}</center> | {{Gallery/Bottom}}</center> | ||
| Line 158: | Line 246: | ||
<center>{{Gallery}} | <center>{{Gallery}} | ||
{{Gallery/Box|file=Rupeeslttp.png|link=Rupee|caption=[[Rupee]]}} | {{Gallery/Box|file=Rupeeslttp.png|link=Rupee|caption=[[Rupee]]}} | ||
{{Gallery/Box|file=MagicJarslttp.png|link= | {{Gallery/Box|file=MagicJarslttp.png|link=Magic Jar|caption=[[Magic Jar]]}} | ||
{{Gallery/Box|file=RecoveryHeartlttp.png|link= | {{Gallery/Box|file=RecoveryHeartlttp.png|link=Recovery Heart|caption=[[Recovery Heart]]}} | ||
{{Gallery/Box|file=HeartPiecelttp.png|link= | {{Gallery/Box|file=HeartPiecelttp.png|link=Piece of Heart|caption=[[Piece of Heart]]}} | ||
{{Gallery/Box|file=HeartContainerlttp.png|link= | {{Gallery/Box|file=HeartContainerlttp.png|link=Heart Container|caption=[[Heart Container]]}} | ||
{{Gallery/Box|file=Crystal-Switch-Artwork-ALttP.png|link= | {{Gallery/Box|file=Crystal-Switch-Artwork-ALttP.png|link=Crystal Switch|caption=[[Crystal Switch]]}} | ||
{{Gallery/Box|file=SuperBomb.png|link= | {{Gallery/Box|file=SuperBomb.png|link=Super Bomb|caption=[[Super Bomb]]}} | ||
{{Gallery/Bottom}}</center> | {{Gallery/Bottom}}</center> | ||
{{Galleries}} | {{Galleries}} | ||
{{cat|A Link to the Past Items| Gallery}} | {{cat|A Link to the Past Items| Gallery}} | ||
Revision as of 18:38, March 20, 2021
| This article is currently being edited. To avoid revision conflicts, please do not make changes to this article at this time. If this notice hasn't been taken down after several hours, please remove it. |
Overworld Sprites
Equipment


Items

Bottle Items
Dungeon Items
Quest Items

1st Crystal-encased Maiden, Dark Palace

2nd Crystal-encased Maiden, Swamp Palace

3rd Crystal-encased Maiden, Skull Woods

4th Crystal-encased Maiden, Gargoyle's Domain

5th Crystal-encased Maiden, Ice Palace

6th Crystal-encased Maiden, Misery Mire

7th Crystal with Zelda, Turtle Rock


Other Items


Inventory Sprites
Equipment
- MoonPearl-ALttP-Icon.png


Items


Bottle Items


Dungeon Items
- DungeonMap-ALttP-Icon.png
- BigKey-ALttP-Icon.png
Quest Items

Other Items


