A Link Between Worlds Items: Difference between revisions
(New System) |
mNo edit summary |
||
| (10 intermediate revisions by 2 users not shown) | |||
| Line 1: | Line 1: | ||
<noinclude>{{ALBW-Stub}}</noinclude> | |||
This is a list of items found in ''[[The Legend of Zelda: A Link Between Worlds|A Link Between Worlds]]''. | This is a list of items found in ''[[The Legend of Zelda: A Link Between Worlds|A Link Between Worlds]]''. | ||
| Line 6: | Line 7: | ||
{{Main|Bomb}} | {{Main|Bomb}} | ||
{{ | <!--{{quote||In-game description}}--> | ||
{{clear}} | |||
=== Boomerang === | === Boomerang === | ||
| Line 12: | Line 14: | ||
{{Main|Boomerang}} | {{Main|Boomerang}} | ||
{{ | <!--{{quote||In-game description}}--> | ||
{{clear}} | |||
=== Bottles (5) === | === Bottles (5) === | ||
[[File:Bottle - ALBW icon.png|50px|right]] | [[File:Bottle - ALBW icon.png|50px|right]] | ||
{{Main|A Link Between Worlds | {{Main|A Link Between Worlds Bottles}} | ||
{{ | {{quote|A container that can hold many things. You'll need one to buy potions.|In-game description}} | ||
{{clear}} | |||
=== Bow === | === Bow === | ||
| Line 24: | Line 28: | ||
{{Main|Bow}} | {{Main|Bow}} | ||
{{ | <!--{{quote||In-game description}}--> | ||
{{clear}} | |||
=== Bow of Light === | === Bow of Light === | ||
| Line 30: | Line 35: | ||
{{Main|Bow of Light}} | {{Main|Bow of Light}} | ||
{{ | {{quote|A bow imbued with the light of the Triforce.|In-game description}} | ||
{{clear}} | |||
=== Bug Net === | === Bug Net === | ||
| Line 36: | Line 42: | ||
{{Main|Bug Net}} | {{Main|Bug Net}} | ||
{{ | <!--{{quote||In-game description}}--> | ||
{{clear}} | |||
=== Fire Rod === | === Fire Rod === | ||
| Line 42: | Line 49: | ||
{{Main|Fire Rod}} | {{Main|Fire Rod}} | ||
{{ | <!--{{quote||In-game description}}--> | ||
{{clear}} | |||
=== Foul Fruit === | === Foul Fruit === | ||
| Line 48: | Line 56: | ||
{{Main|Foul Fruit}} | {{Main|Foul Fruit}} | ||
{{ | {{quote|A seriously sour fruit. One bite will make you squal so loud you can stun nearby enemies|In-game description (shop)}} | ||
{{quote|Knocks out all the enemies in your vicinity. They'll never know what hit 'em!|In-game description (menu)}} | |||
{{clear}} | |||
=== Hammer === | === Hammer === | ||
| Line 54: | Line 64: | ||
{{Main|Hammer}} | {{Main|Hammer}} | ||
{{ | <!--{{quote||In-game description}}--> | ||
{{clear}} | |||
=== Hint Glasses === | === Hint Glasses === | ||
| Line 60: | Line 71: | ||
{{Main|Hint Glasses}} | {{Main|Hint Glasses}} | ||
{{ | {{quote|Mysterious spectacles that let you see the unseen.|In-game description}} | ||
{{clear}} | |||
=== Hookshot === | === Hookshot === | ||
| Line 66: | Line 78: | ||
{{Main|Hookshot}} | {{Main|Hookshot}} | ||
{{ | <!--{{quote||In-game description}}--> | ||
{{clear}} | |||
=== Ice Rod === | === Ice Rod === | ||
| Line 72: | Line 85: | ||
{{Main|Ice Rod}} | {{Main|Ice Rod}} | ||
{{ | <!--{{quote||In-game description}}--> | ||
{{clear}} | |||
=== Lamp === | === Lamp === | ||
| Line 78: | Line 92: | ||
{{Main|Lamp}} | {{Main|Lamp}} | ||
{{ | {{quote|A little light makes it a little safer...right? You can also use it to scorch enemies!|In-game description}} | ||
{{clear}} | |||
=== Sand Rod === | === Sand Rod === | ||
| Line 84: | Line 99: | ||
{{Main|Sand Rod}} | {{Main|Sand Rod}} | ||
{{ | <!--{{quote||In-game description}}--> | ||
{{clear}} | |||
=== Scoot Fruit === | === Scoot Fruit === | ||
| Line 90: | Line 106: | ||
{{Main|Scoot Fruit}} | {{Main|Scoot Fruit}} | ||
{{ | {{quote|A mysterious fruit that takes you to a dungeon's entrance. Essential for any adventurer.|In-game description (shop)}} | ||
{{quote|Lets you escape a dungeon in the blink of an eye!|In-game description (menu)}} | |||
{{clear}} | |||
=== Tornado Rod === | === Tornado Rod === | ||
| Line 101: | Line 119: | ||
{{Main|Nice Bombs}} | {{Main|Nice Bombs}} | ||
{{ | {{quote|Caution! Twice as big for twice the oomph! Set 'em and RUN!|In-game description}} | ||
{{clear}} | |||
=== Nice Boomerang === | === Nice Boomerang === | ||
| Line 107: | Line 126: | ||
{{Main|Nice Boomerang}} | {{Main|Nice Boomerang}} | ||
{{ | {{quote|You can now throw three in a row! Speed and flying distance are also improved!|In-game description}} | ||
{{clear}} | |||
=== Nice Bow === | === Nice Bow === | ||
| Line 113: | Line 133: | ||
{{Main|Nice Bow}} | {{Main|Nice Bow}} | ||
{{ | {{quote|Don't worry if your aim is a little bit off. You can fire three arrows at once now!|In-game description}} | ||
{{clear}} | |||
=== Nice Fire Rod === | === Nice Fire Rod === | ||
| Line 119: | Line 140: | ||
{{Main|Nice Fire Rod}} | {{Main|Nice Fire Rod}} | ||
{{ | {{quote|Caution! You're wielding bigger fire now!|In-game description}} | ||
{{clear}} | |||
=== Nice Hammer === | === Nice Hammer === | ||
| Line 125: | Line 147: | ||
{{Main|Nice Hammer}} | {{Main|Nice Hammer}} | ||
{{ | {{quote|Shockwave range and attack power are now doubled!|In-game description}} | ||
{{clear}} | |||
=== Nice Hookshot === | === Nice Hookshot === | ||
| Line 131: | Line 154: | ||
{{Main|Nice Hookshot}} | {{Main|Nice Hookshot}} | ||
{{ | {{quote|The Hookshot got mightier. Its attack speed is faster, and it inflicts damage!|In-game description}} | ||
{{clear}} | |||
=== Nice Ice Rod === | === Nice Ice Rod === | ||
| Line 137: | Line 161: | ||
{{Main|Nice Ice Rod}} | {{Main|Nice Ice Rod}} | ||
{{ | {{quote|Freeze lots of things in a wide area with four icicles!|In-game description}} | ||
{{clear}} | |||
=== Nice Sand Rod === | === Nice Sand Rod === | ||
| Line 143: | Line 168: | ||
{{Main|Nice Sand Rod}} | {{Main|Nice Sand Rod}} | ||
{{ | {{quote|Lets you make and break your own sand pillars!|In-game description}} | ||
{{clear}} | |||
=== Nice Tornado Rod === | === Nice Tornado Rod === | ||
| Line 149: | Line 175: | ||
{{Main|Nice Tornado Rod}} | {{Main|Nice Tornado Rod}} | ||
{{ | {{quote|Use a powered-up tornado to snare your enemies in one fell swoop!|In-game description}} | ||
{{clear}} | |||
=== Super Lamp === | === Super Lamp === | ||
| Line 155: | Line 182: | ||
{{Main|Super Lamp}} | {{Main|Super Lamp}} | ||
{{ | {{quote|Eight times the attack power of your old lamp! Wait–is this a weapon?|In-game description}} | ||
{{clear}} | |||
=== Super Net === | === Super Net === | ||
| Line 161: | Line 189: | ||
{{Main|Super Net}} | {{Main|Super Net}} | ||
{{ | {{quote|Eight times the attack power of your old net! Whatever that means!|In-game description}} | ||
{{clear}} | |||
==Bottled Items== | ==Bottled Items== | ||
| Line 168: | Line 197: | ||
{{Main|Apple}} | {{Main|Apple}} | ||
{{ | <!--{{quote||In-game description}}--> | ||
{{clear}} | |||
=== Bee === | === Bee === | ||
| Line 174: | Line 204: | ||
{{Main|Bee}} | {{Main|Bee}} | ||
{{ | {{quote|That guy who's fond of bees will buy these from you. Time to earn some Rupees!|In-game description}} | ||
{{clear}} | |||
=== Blue Potion === | === Blue Potion === | ||
| Line 180: | Line 211: | ||
{{Main|Blue Potion}} | {{Main|Blue Potion}} | ||
{{ | {{quote|Restores all of your hearts. You can never go wrong with one!|In-game description}} | ||
{{clear}} | |||
=== Fairy === | === Fairy === | ||
| Line 186: | Line 218: | ||
{{Main|Fairy}} | {{Main|Fairy}} | ||
{{ | {{quote|A welcome friend in times of need! Restores five hearts and will revive you too!|In-game description}} | ||
{{clear}} | |||
=== Golden Bee === | === Golden Bee === | ||
| Line 192: | Line 225: | ||
{{Main|Golden Bee}} | {{Main|Golden Bee}} | ||
{{ | <!--{{quote||In-game description}}--> | ||
{{clear}} | |||
=== Heart === | |||
[[File:Bottled Heart - ALBW icon.png|right]] | |||
{{Main|Recovery Heart}} | |||
{{quote|Restores one heart. Perfect for a little pick-me-up!|In-game description}} | |||
{{clear}} | |||
=== Letter in a Bottle === | === Letter in a Bottle === | ||
| Line 198: | Line 239: | ||
{{Main|Letter in a Bottle}} | {{Main|Letter in a Bottle}} | ||
{{ | <!--{{quote||In-game description}}--> | ||
{{clear}} | |||
=== Milk === | === Milk === | ||
| Line 204: | Line 246: | ||
{{Main|Milk}} | {{Main|Milk}} | ||
{{ | {{quote|Restores five hearts. Straight from the noted Lon Lon Ranch.|In-game description}} | ||
{{clear}} | |||
=== Premium Milk === | === Premium Milk === | ||
| Line 210: | Line 253: | ||
{{Main|Premium Milk}} | {{Main|Premium Milk}} | ||
{{ | <!--{{quote||In-game description}}--> | ||
{{clear}} | |||
=== Purple Potion === | === Purple Potion === | ||
| Line 216: | Line 260: | ||
{{Main|Purple Potion}} | {{Main|Purple Potion}} | ||
{{ | <!--{{quote||In-game description}}--> | ||
{{clear}} | |||
{{ | |||
=== Red Potion === | === Red Potion === | ||
| Line 228: | Line 267: | ||
{{Main|Red Potion}} | {{Main|Red Potion}} | ||
{{ | {{quote|Restores eight hearts! This will definitely come in handy.|In-game description}} | ||
{{clear}} | |||
=== Yellow Potion === | === Yellow Potion === | ||
| Line 234: | Line 274: | ||
{{Main|Yellow Potion}} | {{Main|Yellow Potion}} | ||
{{ | {{quote|Drink it to make yourself invulnerable for a brief time.|In-game description}} | ||
{{clear}} | |||
==Gear== | ==Gear== | ||
=== Captain's Sword === | === Captain's Sword === | ||
[[File:ALBW | [[File:Captain Sword - ALBW icon.png|50px|right]] | ||
{{Main|Captain's Sword}} | {{Main|Captain's Sword}} | ||
{{ | <!--{{quote||In-game description}}--> | ||
{{clear}} | |||
=== Master Sword === | === Master Sword === | ||
| Line 247: | Line 289: | ||
{{Main|Master Sword}} | {{Main|Master Sword}} | ||
{{ | <!--{{quote||In-game description}}--> | ||
{{clear}} | |||
=== Master Sword Lv2 === | |||
[[File:Master Sword Lv2 - ALBW icon.png|right]] | |||
{{Main|Master Sword}} | |||
{{quote|The Master Sword, made stronger! Now it's even fiercer in your hand!|In-game description}} | |||
{{clear}} | |||
=== Master Sword Lv3 === | |||
[[File:Master Sword Lv3 - ALBW icon.png|right]] | |||
{{Main|Master Sword}} | |||
{{quote|The Master Sword, made ultimate! Now it's the fiercest blade imaginable!|In-game description}} | |||
{{clear}} | |||
=== Green Tunic === | === Green Tunic === | ||
| Line 253: | Line 311: | ||
{{Main|Green Tunic}} | {{Main|Green Tunic}} | ||
{{ | {{quote|Clothing made by the blacksmith's wife. It's a perfect fit for you!|In-game description}} | ||
{{clear}} | |||
=== Blue Mail === | === Blue Mail === | ||
| Line 259: | Line 318: | ||
{{Main|Blue Mail}} | {{Main|Blue Mail}} | ||
{{ | {{quote|Sturdy mail that provides great defense.|In-game description}} | ||
{{clear}} | |||
=== Red Mail === | === Red Mail === | ||
| Line 265: | Line 325: | ||
{{Main|Red Mail}} | {{Main|Red Mail}} | ||
{{ | {{quote|Superb mail that provides excellent defense.|In-game description}} | ||
{{clear}} | |||
=== Shield === | === Shield === | ||
[[File:ALBW | [[File:Shield - ALBW icon.png|right]] | ||
{{Main|Shield#A Link Between Worlds}} | {{Main|Shield#A Link Between Worlds}} | ||
{{ | {{quote|A tough shield that will defend you from all sorts of attacks. Hold it up with [R].|In-game description (shop)}} | ||
{{quote|A must-have for any adventurer. Raise it with [R] to block arrows and stones.|In-game description (menu)}} | |||
{{clear}} | |||
=== Hylian Shield === | === Hylian Shield === | ||
| Line 277: | Line 340: | ||
{{Main|Hylian Shield}} | {{Main|Hylian Shield}} | ||
{{ | {{quote|A shield that's based on Hylian design. Raise it with [R] to block flames and beams.|In-game description}} | ||
{{clear}} | |||
=== Ravio's Bracelet === | === Ravio's Bracelet === | ||
| Line 283: | Line 347: | ||
{{Main|Ravio's Bracelet}} | {{Main|Ravio's Bracelet}} | ||
{{ | {{quote|An old bracelet that Ravio gave you in exchange for staying at your house.|In-game description (initial)}} | ||
{{quote|A bracelet Ravio gave you that now gives you the ability to merge into walls!|In-game description (powered)}} | |||
{{clear}} | |||
=== Power Glove === | === Power Glove === | ||
| Line 289: | Line 355: | ||
{{Main|Power Glove}} | {{Main|Power Glove}} | ||
{{ | <!--{{quote||In-game description}}--> | ||
{{clear}} | |||
=== Titan's Mitt === | === Titan's Mitt === | ||
| Line 295: | Line 362: | ||
{{Main|Titan's Mitt}} | {{Main|Titan's Mitt}} | ||
{{ | {{quote|A powered-up version of the Power Glove. Pick up large boulders by pressing Ⓐ!|In-game description}} | ||
{{clear}} | |||
=== Pegasus Boots === | === Pegasus Boots === | ||
| Line 301: | Line 369: | ||
{{Main|Pegasus Boots}} | {{Main|Pegasus Boots}} | ||
{{ | {{quote|Boots that let you dash incredibly fast when you press [L].|In-game description}} | ||
{{clear}} | |||
=== Smooth Gem === | |||
[[File:Smooth Gem - ALBW icon.png|right]] | |||
{{Main|Smooth Gem}} | |||
{{quote|This beautifully polished gemstone is eerily smooth.|In-game description}} | |||
{{clear}} | |||
=== Zora's Flippers === | === Zora's Flippers === | ||
[[File:Flippers - ALBW icon.png|right]] | [[File:Flippers - ALBW icon.png|right]] | ||
{{Main| | {{Main|Flippers}} | ||
{{ | {{quote|Flippers given to you by the Zoras. Dive with Ⓐ and swim with Ⓑ!|In-game description}} | ||
{{clear}} | |||
=== Bee Badge === | === Bee Badge === | ||
[[File:Bee Badge - ALBW icon.png|right]] | [[File:Bee Badge - ALBW icon.png|38px|right]] | ||
{{Main|Bee Badge}} | {{Main|Bee Badge}} | ||
{{ | {{quote|No more stings! This badge makes you the friend of every bee.|In-game description}} | ||
{{clear}} | |||
=== Stamina Scroll === | === Stamina Scroll === | ||
| Line 319: | Line 397: | ||
{{Main|Stamina Scroll}} | {{Main|Stamina Scroll}} | ||
{{ | {{quote|Contains the secrets of great stamina and expands your energy gauge.|In-game description}} | ||
{{clear}} | |||
==Collectible== | ==Collectible== | ||
| Line 326: | Line 405: | ||
{{Main|Piece of Heart}} | {{Main|Piece of Heart}} | ||
{{ | {{quote|Collect four pieces of heart to gain another heart container.|In-game description}} | ||
{{clear}} | |||
=== Heart Container === | === Heart Container === | ||
| Line 332: | Line 412: | ||
{{Main|Heart Container}} | {{Main|Heart Container}} | ||
{{ | {{quote|You got a heart container! Your maximum hearts increase by one, and your hearts are replenished!|In-game description}} | ||
{{clear}} | |||
=== | === Rupees === | ||
[[File:Rupee - ALBW.png|right]] | [[File:Rupee - ALBW.png|right]] | ||
{{Main|Rupee}} | {{Main|Rupee}} | ||
{{ | {{quote|Hyrulean currency. Needed for buying items and playing games.|In-game description}} | ||
{{clear}} | |||
=== Lost Maiamai === | === Lost Maiamai === | ||
| Line 344: | Line 426: | ||
{{Main|Maiamai}} | {{Main|Maiamai}} | ||
{{ | {{quote|Maiamais on hand: (number). Return the lost children to their mother, OK?|In-game description (quest ongoing)}} | ||
{{quote|All Maiamais have been returned to their mother. She was glowing with joy!|In-game description (quest complete)}} | |||
{{clear}} | |||
=== Monster Tail === | === Monster Tail === | ||
| Line 350: | Line 434: | ||
{{Main|Monster Tail}} | {{Main|Monster Tail}} | ||
{{ | {{quote|The witch will make you some blue potion if you bring her 10 of these.|In-game description}} | ||
{{clear}} | |||
=== Monster Horn === | === Monster Horn === | ||
| Line 356: | Line 441: | ||
{{Main|Monster Horn#A Link Between Worlds}} | {{Main|Monster Horn#A Link Between Worlds}} | ||
{{ | {{quote|The witch will make you some yellow potion if you bring her 10 of these.|In-game description}} | ||
{{clear}} | |||
=== Monster Guts === | === Monster Guts === | ||
| Line 362: | Line 448: | ||
{{Main|Monster Guts}} | {{Main|Monster Guts}} | ||
{{ | {{quote|The witch will make you some purple potion if you bring her 10 of these.|In-game description}} | ||
{{clear}} | |||
=== Master Ore === | === Master Ore === | ||
| Line 368: | Line 455: | ||
{{Main|Master Ore}} | {{Main|Master Ore}} | ||
{{ | {{quote|Take these to the blacksmith so that he can strengthen the Master Sword.|In-game description}} | ||
{{clear}} | |||
==Misc== | ==Misc== | ||
| Line 375: | Line 463: | ||
{{Main|Bell}} | {{Main|Bell}} | ||
{{ | {{quote|You got the bell! Now you can call Irene any time!|In-game description}} | ||
{{clear}} | |||
=== Big Key === | === Big Key === | ||
| Line 381: | Line 470: | ||
{{Main|Big Key}} | {{Main|Big Key}} | ||
{{ | {{quote|You got the Big Key! Now you can open the dungeon's huge door!|In-game description}} | ||
{{clear}} | |||
=== Compass === | === Compass === | ||
| Line 388: | Line 477: | ||
{{Main|Compass}} | {{Main|Compass}} | ||
{{ | <!--{{quote||In-game description}}--> | ||
{{clear}} | |||
=== Energy Potion === | === Energy Potion === | ||
| Line 394: | Line 484: | ||
{{Main|Energy Potion}} | {{Main|Energy Potion}} | ||
{{ | <!--{{quote||In-game description}}--> | ||
{{clear}} | |||
=== Pouch === | === Pouch === | ||
[[File:Pouch - ALBW Get Item.png|right]] | [[File:Pouch - ALBW Get Item.png|right]] | ||
{{Main|Pouch}} | {{Main|Pouch}} | ||
<!--{{quote||In-game description}}--> | |||
{{clear}} | |||
=== Small Key === | === Small Key === | ||
| Line 404: | Line 498: | ||
{{Main|Small Key}} | {{Main|Small Key}} | ||
{{ | {{quote|You got a small key! It will open a locked door!|In-game description}} | ||
{{clear}} | |||
==Quest== | ==Quest== | ||
| Line 410: | Line 505: | ||
[[File:Pendant of Courage - ALBW icon.png|right]] | [[File:Pendant of Courage - ALBW icon.png|right]] | ||
{{Main|Pendant of Courage}} | {{Main|Pendant of Courage}} | ||
Initially identified only as "Charm." | |||
{{ | {{quote|A special gift that you received from Princess Zelda.|In-game description (as "Charm")}} | ||
{{quote|A pendant you got from Princess Zelda, needed for claiming the Master Sword.|In-game description}} | |||
{{clear}} | |||
=== Pendant of Power === | === Pendant of Power === | ||
| Line 417: | Line 514: | ||
{{Main|Pendant of Power}} | {{Main|Pendant of Power}} | ||
{{ | {{quote|A pendant you found at the Tower of Hera, needed for claiming the Master Sword.|In-game description}} | ||
{{clear}} | |||
=== Pendant of Wisdom === | === Pendant of Wisdom === | ||
| Line 423: | Line 521: | ||
{{Main|Pendant of Wisdom}} | {{Main|Pendant of Wisdom}} | ||
{{ | {{quote|A pendant you found at the House of Gales, needed for claiming the Master Sword.|In-game description}} | ||
{{clear}} | |||
=== Sage Gulley === | === Sage Gulley === | ||
| Line 429: | Line 528: | ||
{{Main|Gulley}} | {{Main|Gulley}} | ||
{{ | {{quote|The portrait of Gulley. His smile is as bright as it ever was.|In-game description}} | ||
{{clear}} | |||
=== Sage Impa === | === Sage Impa === | ||
| Line 435: | Line 535: | ||
{{Main|Impa}} | {{Main|Impa}} | ||
{{ | {{quote|The portrait of Lady Impa. It is clear to see the years have been kind to her.|In-game description}} | ||
{{clear}} | |||
=== Sage Irene === | === Sage Irene === | ||
| Line 441: | Line 542: | ||
{{Main|Irene}} | {{Main|Irene}} | ||
{{ | {{quote|The portrait of Irene. For all her brashness, she really misses her grandma.|In-game description}} | ||
{{clear}} | |||
=== Sage Oren === | === Sage Oren === | ||
[[File:Oren-Painting.png|100px|right]] | [[File:Oren-Painting.png|100px|right]] | ||
{{Main|Oren}} | {{Main|Queen Oren}} | ||
{{ | {{quote|The portrait of Queen Oren. Her beauty shines through, even as a painting.|In-game description}} | ||
{{clear}} | |||
=== Sage Osfala === | === Sage Osfala === | ||
| Line 453: | Line 556: | ||
{{Main|Osfala}} | {{Main|Osfala}} | ||
{{ | {{quote|The portrait of Osfala. The light in his eyes shows confidence and assurance.|In-game description}} | ||
{{clear}} | |||
=== Sage Rosso === | === Sage Rosso === | ||
| Line 459: | Line 563: | ||
{{Main|Rosso}} | {{Main|Rosso}} | ||
{{ | {{quote|The portrait of Rosso. His broad chest and beefy arms are well-captured.|In-game description}} | ||
{{clear}} | |||
=== Sage Seres === | === Sage Seres === | ||
| Line 465: | Line 570: | ||
{{Main|Seres}} | {{Main|Seres}} | ||
{{ | {{quote|The portrait of Seres. Her smile projects boundless love for all living things.|In-game description}} | ||
{{clear}} | |||
{{Cat|A Link Between Worlds Items| }} | {{Cat|A Link Between Worlds Items| }} | ||
{{Cat|A Link Between Worlds|Items}} | {{Cat|A Link Between Worlds|Items}} | ||
{{Cat|Items|A Link Between Worlds}} | {{Cat|Items|Link Between Worlds, A}} | ||
{{cat|Listings|Link Between Worlds, A}} | |||
Latest revision as of 12:57, September 22, 2024
| This A Link Between Worlds article is a stub. You can help the Zelda Dungeon Wiki by expanding it. |
This is a list of items found in A Link Between Worlds.
Items
Bombs
- Main article: Bomb
Boomerang
- Main article: Boomerang
Bottles (5)
- Main article: A Link Between Worlds Bottles
"A container that can hold many things. You'll need one to buy potions."
Bow
- Main article: Bow
Bow of Light
- Main article: Bow of Light
"A bow imbued with the light of the Triforce."
Bug Net
- Main article: Bug Net
Fire Rod
- Main article: Fire Rod
Foul Fruit
- Main article: Foul Fruit
"A seriously sour fruit. One bite will make you squal so loud you can stun nearby enemies"
"Knocks out all the enemies in your vicinity. They'll never know what hit 'em!"
Hammer
- Main article: Hammer
Hint Glasses
- Main article: Hint Glasses
"Mysterious spectacles that let you see the unseen."
Hookshot
- Main article: Hookshot
Ice Rod
- Main article: Ice Rod
Lamp
- Main article: Lamp
"A little light makes it a little safer...right? You can also use it to scorch enemies!"
Sand Rod
- Main article: Sand Rod
Scoot Fruit
- Main article: Scoot Fruit
"A mysterious fruit that takes you to a dungeon's entrance. Essential for any adventurer."
"Lets you escape a dungeon in the blink of an eye!"
Tornado Rod
- Main article: Tornado Rod
Upgraded Items
Nice Bombs
- Main article: Nice Bombs
"Caution! Twice as big for twice the oomph! Set 'em and RUN!"
Nice Boomerang
- Main article: Nice Boomerang
"You can now throw three in a row! Speed and flying distance are also improved!"
Nice Bow
- Main article: Nice Bow
"Don't worry if your aim is a little bit off. You can fire three arrows at once now!"
Nice Fire Rod
- Main article: Nice Fire Rod
"Caution! You're wielding bigger fire now!"
Nice Hammer
- Main article: Nice Hammer
"Shockwave range and attack power are now doubled!"
Nice Hookshot
- Main article: Nice Hookshot
"The Hookshot got mightier. Its attack speed is faster, and it inflicts damage!"
Nice Ice Rod
- Main article: Nice Ice Rod
"Freeze lots of things in a wide area with four icicles!"
Nice Sand Rod
- Main article: Nice Sand Rod
"Lets you make and break your own sand pillars!"
Nice Tornado Rod
- Main article: Nice Tornado Rod
"Use a powered-up tornado to snare your enemies in one fell swoop!"
Super Lamp
- Main article: Super Lamp
"Eight times the attack power of your old lamp! Wait–is this a weapon?"
Super Net
- Main article: Super Net
"Eight times the attack power of your old net! Whatever that means!"
Bottled Items
Apple
- Main article: Apple
Bee
- Main article: Bee
"That guy who's fond of bees will buy these from you. Time to earn some Rupees!"
Blue Potion
- Main article: Blue Potion
"Restores all of your hearts. You can never go wrong with one!"
Fairy
- Main article: Fairy
"A welcome friend in times of need! Restores five hearts and will revive you too!"
Golden Bee
- Main article: Golden Bee
Heart
- Main article: Recovery Heart
"Restores one heart. Perfect for a little pick-me-up!"
Letter in a Bottle
- Main article: Letter in a Bottle
Milk
- Main article: Milk
"Restores five hearts. Straight from the noted Lon Lon Ranch."
Premium Milk
- Main article: Premium Milk
Purple Potion
- Main article: Purple Potion
Red Potion
- Main article: Red Potion
"Restores eight hearts! This will definitely come in handy."
Yellow Potion
- Main article: Yellow Potion
"Drink it to make yourself invulnerable for a brief time."
Gear
Captain's Sword
- Main article: Captain's Sword
Master Sword
- Main article: Master Sword
Master Sword Lv2
- Main article: Master Sword
"The Master Sword, made stronger! Now it's even fiercer in your hand!"
Master Sword Lv3
- Main article: Master Sword
"The Master Sword, made ultimate! Now it's the fiercest blade imaginable!"
Green Tunic
- Main article: Green Tunic
"Clothing made by the blacksmith's wife. It's a perfect fit for you!"
Blue Mail
- Main article: Blue Mail
"Sturdy mail that provides great defense."
Red Mail
- Main article: Red Mail
"Superb mail that provides excellent defense."
Shield
- Main article: Shield#A Link Between Worlds
"A tough shield that will defend you from all sorts of attacks. Hold it up with [R]."
"A must-have for any adventurer. Raise it with [R] to block arrows and stones."
Hylian Shield
- Main article: Hylian Shield
"A shield that's based on Hylian design. Raise it with [R] to block flames and beams."
Ravio's Bracelet
- Main article: Ravio's Bracelet
"An old bracelet that Ravio gave you in exchange for staying at your house."
"A bracelet Ravio gave you that now gives you the ability to merge into walls!"
Power Glove
- Main article: Power Glove
Titan's Mitt
- Main article: Titan's Mitt
"A powered-up version of the Power Glove. Pick up large boulders by pressing Ⓐ!"
Pegasus Boots
- Main article: Pegasus Boots
"Boots that let you dash incredibly fast when you press [L]."
Smooth Gem
- Main article: Smooth Gem
"This beautifully polished gemstone is eerily smooth."
Zora's Flippers
- Main article: Flippers
"Flippers given to you by the Zoras. Dive with Ⓐ and swim with Ⓑ!"
Bee Badge
- Main article: Bee Badge
"No more stings! This badge makes you the friend of every bee."
Stamina Scroll
- Main article: Stamina Scroll
"Contains the secrets of great stamina and expands your energy gauge."
Collectible
Piece of Heart
- Main article: Piece of Heart
"Collect four pieces of heart to gain another heart container."
Heart Container
- Main article: Heart Container
"You got a heart container! Your maximum hearts increase by one, and your hearts are replenished!"
Rupees
- Main article: Rupee
"Hyrulean currency. Needed for buying items and playing games."
Lost Maiamai
- Main article: Maiamai
"Maiamais on hand: (number). Return the lost children to their mother, OK?"
"All Maiamais have been returned to their mother. She was glowing with joy!"
Monster Tail
- Main article: Monster Tail
"The witch will make you some blue potion if you bring her 10 of these."
Monster Horn
- Main article: Monster Horn#A Link Between Worlds
"The witch will make you some yellow potion if you bring her 10 of these."
Monster Guts
- Main article: Monster Guts
"The witch will make you some purple potion if you bring her 10 of these."
Master Ore
- Main article: Master Ore
"Take these to the blacksmith so that he can strengthen the Master Sword."
Misc
Bell
- Main article: Bell
"You got the bell! Now you can call Irene any time!"
Big Key
- Main article: Big Key
"You got the Big Key! Now you can open the dungeon's huge door!"
Compass
- Main article: Compass
Energy Potion
- Main article: Energy Potion
Pouch
- Main article: Pouch
Small Key
- Main article: Small Key
"You got a small key! It will open a locked door!"
Quest
Pendant of Courage
- Main article: Pendant of Courage
Initially identified only as "Charm."
"A special gift that you received from Princess Zelda."
"A pendant you got from Princess Zelda, needed for claiming the Master Sword."
Pendant of Power
- Main article: Pendant of Power
"A pendant you found at the Tower of Hera, needed for claiming the Master Sword."
Pendant of Wisdom
- Main article: Pendant of Wisdom
"A pendant you found at the House of Gales, needed for claiming the Master Sword."
Sage Gulley
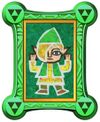
- Main article: Gulley
"The portrait of Gulley. His smile is as bright as it ever was."
Sage Impa
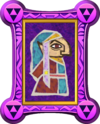
- Main article: Impa
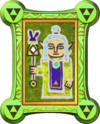
"The portrait of Lady Impa. It is clear to see the years have been kind to her."
Sage Irene
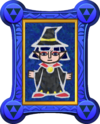
- Main article: Irene
"The portrait of Irene. For all her brashness, she really misses her grandma."
Sage Oren
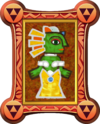
- Main article: Queen Oren
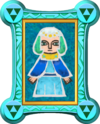
"The portrait of Queen Oren. Her beauty shines through, even as a painting."
Sage Osfala
- Main article: Osfala
"The portrait of Osfala. The light in his eyes shows confidence and assurance."
Sage Rosso
- Main article: Rosso
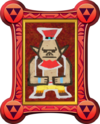
"The portrait of Rosso. His broad chest and beefy arms are well-captured."
Sage Seres
- Main article: Seres
"The portrait of Seres. Her smile projects boundless love for all living things."


