Gallery:Breath of the Wild Locations: Difference between revisions
Jump to navigation
Jump to search
Want an adless experience? Log in or Create an account.
(Got to stop here for now, may come back in like an hour.) |
No edit summary |
||
| Line 16: | Line 16: | ||
<center>{{Gallery}} | <center>{{Gallery}} | ||
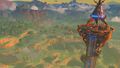
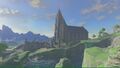
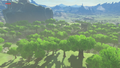
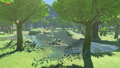
{{Gallery/Box|file=Great-Plateau.jpg|link= | {{Gallery/Box|file=Great-Plateau.jpg|link=Outpost Ruins|caption=[[Outpost Ruins]]}} | ||
{{Gallery/Box|file=Great-Plateau.jpg|link= | {{Gallery/Box|file=Great-Plateau.jpg|link=Scout's Hill|caption=[[Scout's Hill]]}} | ||
{{Gallery/Box|file=Great-Plateau.jpg|link= | {{Gallery/Box|file=Great-Plateau.jpg|link=Proxim Bridge|caption=[[Proxim Bridge]]}} | ||
{{Gallery/Box|file=Great-Plateau.jpg|link= | {{Gallery/Box|file=Great-Plateau.jpg|link=Hylia River|caption=[[Hylia River]]}} | ||
{{Gallery/Box|file=Great-Plateau.jpg|link= | {{Gallery/Box|file=Great-Plateau.jpg|link=Hills of Baumer|caption=[[Hills of Baumer]]}} | ||
{{Gallery/Box|file=Great-Plateau.jpg|link= | {{Gallery/Box|file=Great-Plateau.jpg|link=Squabble River|caption=[[Squabble River]]}} | ||
{{Gallery/Box|file=Great-Plateau.jpg|link= | {{Gallery/Box|file=Great-Plateau.jpg|link=Duleing Peaks|caption=[[Dueling Peaks]]}} | ||
{{Gallery/Box|file=Great-Plateau.jpg|link= | {{Gallery/Box|file=Great-Plateau.jpg|link=Big Twin Bridge|caption=[[Big Twin Bridge]]}} | ||
{{Gallery/Box|file=Great-Plateau.jpg|link= | {{Gallery/Box|file=Great-Plateau.jpg|link=Little Twin Bridge|caption=[[Little Twin Bridge]]}} | ||
{{Gallery/Box|file=Great-Plateau.jpg|link= | {{Gallery/Box|file=Great-Plateau.jpg|link=Hickaly Woods|caption=[[Hickaly Woods]]}} | ||
{{Gallery/Box|file=Great-Plateau.jpg|link= | {{Gallery/Box|file=Great-Plateau.jpg|link=Mount Rozudo|caption=[[Mount Rozudo]]}} | ||
{{Gallery/Box|file=Great-Plateau.jpg|link= | {{Gallery/Box|file=Great-Plateau.jpg|link=Bubinga Forest|caption=[[Bubinga Forest]]}} | ||
{{Gallery/Box|file=Great-Plateau.jpg|link= | {{Gallery/Box|file=Great-Plateau.jpg|link=Oakle's Navel|caption=[[Oakle's Navel]]}} | ||
{{Gallery/Box|file=Great-Plateau.jpg|link= | {{Gallery/Box|file=Great-Plateau.jpg|link=Blatchery Plain|caption=[[Blatchery Plain]]}} | ||
{{Gallery/Box|file=Great-Plateau.jpg|link= | {{Gallery/Box|file=Great-Plateau.jpg|link=Ash Swamp|caption=[[Ash Swamp]]}} | ||
{{Gallery/Box|file=Great-Plateau.jpg|link= | {{Gallery/Box|file=Great-Plateau.jpg|link=Kakariko Bridge|caption=[[Kakariko Bridge]]}} | ||
{{Gallery/Box|file=Great-Plateau.jpg|link= | {{Gallery/Box|file=Great-Plateau.jpg|link=Lake Siela|caption=[[Lake Siela]]}} | ||
{{Gallery/Box|file=Great-Plateau.jpg|link= | {{Gallery/Box|file=Great-Plateau.jpg|link=Bonooru's Stand|caption=[[Bonooru's Stand]]}} | ||
{{Gallery/Box|file=Great-Plateau.jpg|link= | {{Gallery/Box|file=Great-Plateau.jpg|link=Pillars of Levia|caption=[[Pillars of Levia]]}} | ||
{{Gallery/Box|file=Great-Plateau.jpg|link= | {{Gallery/Box|file=Great-Plateau.jpg|link=Lantern Lake|caption=[[Lantern Lake]]}} | ||
{{Gallery/Box|file=Great-Plateau.jpg|link= | {{Gallery/Box|file=Great-Plateau.jpg|link=Great Fairy Cotera|caption=[[Great Fairy Fountain]]}} | ||
{{Gallery/Box|file=Great-Plateau.jpg|link= | {{Gallery/Box|file=Great-Plateau.jpg|link=Sahasra Slope|caption=[[Sahasra Slope]]}} | ||
{{Gallery/Box|file=Great-Plateau.jpg|link= | {{Gallery/Box|file=Great-Plateau.jpg|link=Nabi Lake|caption=[[Nabi Lake]]}} | ||
{{Gallery/Box|file=Great-Plateau.jpg|link= | {{Gallery/Box|file=Great-Plateau.jpg|link=Floret Sandbar|caption=[[Floret Sandbar]]}} | ||
{{Gallery/Box|file=Great-Plateau.jpg|link= | {{Gallery/Box|file=Great-Plateau.jpg|link=Eagus Bridge|caption=[[Eagus Bridge]]}} | ||
{{Gallery/Box|file=Great-Plateau.jpg|link= | {{Gallery/Box|file=Great-Plateau.jpg|link=Batrea Lake|caption=[[Batrea Lake]]}} | ||
{{Gallery/Box|file=Great-Plateau.jpg|link= | {{Gallery/Box|file=Great-Plateau.jpg|link=Owlan Bridge|caption=[[Owlan Bridge]]}} | ||
{{Gallery/Box|file=Great-Plateau.jpg|link= | {{Gallery/Box|file=Great-Plateau.jpg|link=Horwell Bridge|caption=[[Horwell Bridge]]}} | ||
{{Gallery/Box|file=Great-Plateau.jpg|link= | {{Gallery/Box|file=Great-Plateau.jpg|link=Mable Ridge|caption=[[Mable Ridge]]}} | ||
{{Gallery/Box|file=Great-Plateau.jpg|link= | {{Gallery/Box|file=Great-Plateau.jpg|link=South Nabi Lake|caption=[[South Nabi Lake]]}} | ||
Revision as of 02:47, July 8, 2020
Guys I might have to stop creating this page at any moment, in which case could someone pls start where I left off? Thanks!