Lanmola: Difference between revisions
No edit summary |
mNo edit summary |
||
| (4 intermediate revisions by 2 users not shown) | |||
| Line 1: | Line 1: | ||
{{Infobox|enemy | {{Infobox|enemy | ||
| image = [[File:Lanmola-LoZ-Art.png|200px]] | | image = [[File:Lanmola-LoZ-Art.png|200px]] | ||
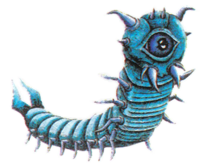
| caption = | | caption = Artwork from ''[[The Legend of Zelda Instruction Manual|The Legend of Zelda Instruction Booklet]]'' | ||
| game = ''[[The Legend of Zelda]]''<br/>''[[The Legend of Zelda: A Link to the Past|A Link to the Past]]''<br/>''[[The Legend of Zelda: Link's Awakening|Link's Awakening]]''<br/>''[[The Legend of Zelda: The Wind Waker|The Wind Waker]]'' | | game = ''[[The Legend of Zelda]]''<br/>''[[The Legend of Zelda: A Link to the Past|A Link to the Past]]''<br/>''[[The Legend of Zelda: Link's Awakening|Link's Awakening]]''<br/>''[[The Legend of Zelda: The Wind Waker|The Wind Waker]]'' | ||
| location = '''''The Legend of Zelda'''''<br/>[[Level 9: Death Mountain]]<br/>'''''A Link to the Past'''''<br/>[[Desert Palace (A Link to the Past)|Desert Palace]]<br/>[[Ganon's Tower (A Link to the Past)|Ganon's Tower]]<br/>'''''Link's Awakening'''''<br/>[[Yarna Desert]]<br/>[[Wind Fish's Egg]]<br/>'''''The Wind Waker'''''<br/>[[Wind Temple]] | | location = '''''The Legend of Zelda'''''<br/>[[Level 9: Death Mountain]]<br/>'''''A Link to the Past'''''<br/>[[Desert Palace (A Link to the Past)|Desert Palace]]<br/>[[Ganon's Tower (A Link to the Past)|Ganon's Tower]]<br/>'''''Link's Awakening'''''<br/>[[Yarna Desert]]<br/>[[Wind Fish's Egg]]<br/>'''''The Wind Waker'''''<br/>[[Wind Temple (The Wind Waker)|Wind Temple]] | ||
| weapon = [[Sword]]<br/>[[Bow]]<br/>[[Magic Rod]] | | weapon = [[Sword]]<br/>[[Bow]]<br/>[[Magic Rod (Link's Awakening)|Magic Rod]] | ||
| related = [[Moldorm]] | | related = [[Moldorm]] | ||
}} | }} | ||
| Line 23: | Line 23: | ||
==''The Wind Waker''== | ==''The Wind Waker''== | ||
In ''The Wind Waker'', Lanmolas are found in the [[Wind Temple]] and are a component of the boss fight with [[Molgera]]. Every cycle of damaging the boss when he burrows back underground and flies up into the air, multiple Lanmola will appear in the sand and leap at Link, increasing in number the more damage Link deals to Molgera. The most effective way of dealing with them is to L-Target them and [[Hookshot]] them while they are swimming in the sand near Link, pulling them out of the sand and right next to Link. They can then be attacked with Link's sword. | In ''The Wind Waker'', Lanmolas are found in the [[Wind Temple (The Wind Waker)|Wind Temple]] and are a component of the boss fight with [[Molgera]]. Every cycle of damaging the boss when he burrows back underground and flies up into the air, multiple Lanmola will appear in the sand and leap at Link, increasing in number the more damage Link deals to Molgera. The most effective way of dealing with them is to L-Target them and [[Hookshot]] them while they are swimming in the sand near Link, pulling them out of the sand and right next to Link. They can then be attacked with Link's sword. | ||
==Gallery== | ==Gallery== | ||
<gallery> | <gallery> | ||
File:Lanmola-Red-LoZ-Art.png|Red Lanmola | File:Lanmola-Red-LoZ-Art.png|Red Lanmola artwork from ''[[Million Publications The Legend of Zelda Strategy Guide]]'' | ||
File:Lanmola-Blue-LoZ-Art.png|Blue Lanmola | File:Lanmola-Blue-LoZ-Art.png|Blue Lanmola artwork from ''Million Publications The Legend of Zelda Strategy Guide'' | ||
File:Lanmola-Artwork-LoZ-Kodokawa-Shoten-Guide.png| | File:Lanmola-Artwork-LoZ-Kodokawa-Shoten-Guide.png|Artwork from ''[[Kadokawa Shoten The Legend of Zelda Strategy Guide]]'' | ||
File:Lanmola-Red-LoZ-Sprite.png|Red Lanmola | File:Lanmola-Red-LoZ-Sprite.png|Red Lanmola sprite from ''[[The Legend of Zelda]]'' | ||
File:Lanmola-Blue-LoZ-Sprite.png|Blue Lanmola | File:Lanmola-Blue-LoZ-Sprite.png|Blue Lanmola sprite from ''The Legend of Zelda'' | ||
File:Lanmola-ALTTP-Sprite.png| | File:Lanmola-ALTTP-Sprite.png|Sprite from ''[[The Legend of Zelda: A Link to the Past|A Link to the Past]]'' | ||
File:Lanmola-LA-Artwork.png| | File:Lanmola-LA-Artwork.png|Artwork from The Legend of Zelda 4 Koma Manga Kingdom Volume 2 | ||
File:Lanmola-LA.png| | File:Lanmola-LA.png|Sprite from ''[[The Legend of Zelda: Link's Awakening|Link's Awakening]]'' | ||
</gallery> | </gallery> | ||
Latest revision as of 19:53, June 16, 2023
Games | ||
Location | The Legend of Zelda | |
Effective | ||
Related | ||
Lanmolas are recurring enemies in The Legend of Zelda series. In A Link to the Past, Lanmolas serve as the Boss of the Desert Palace, and in Link's Awakening, they serve as Mini-Bosses. However, in the original The Legend of Zelda, they appear as a regular enemy.
The Legend of Zelda
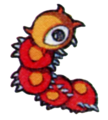
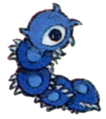
There are two types of Lanmolas found in The Legend of Zelda: A slower red one and a faster blue one. Both types are only found in the final dungeon of the game, Death Mountain. They can be defeated with constant Sword strikes to their head. They appear multiple times throughout the dungeon.
A Link to the Past
- Main article: Lanmola (A Link to the Past)
In A Link to the Past, the Lanmolas are the boss of the Desert Palace. However, instead of fighting one Lanmola, Link will have to fight three of them at once. The Lanmolas later appear as a Mini-Boss in Ganon's Tower.
Link's Awakening
- Main article: Desert Lanmola
- Main article: Shadow Nightmares
There are only two Lanmolas in Link's Awakening, similarly to A Link to the Past. The first Lanmola is found in the Yarna Desert, guarding the Angler Key, which is needed to gain access to the fourth dungeon in the game, Angler's Tunnel. The second time is during the final boss battle, where The Shadow Nightmares takes a form of the Lanmola.
The Wind Waker
In The Wind Waker, Lanmolas are found in the Wind Temple and are a component of the boss fight with Molgera. Every cycle of damaging the boss when he burrows back underground and flies up into the air, multiple Lanmola will appear in the sand and leap at Link, increasing in number the more damage Link deals to Molgera. The most effective way of dealing with them is to L-Target them and Hookshot them while they are swimming in the sand near Link, pulling them out of the sand and right next to Link. They can then be attacked with Link's sword.
Gallery
Red Lanmola artwork from Million Publications The Legend of Zelda Strategy Guide
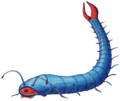
Artwork from Kadokawa Shoten The Legend of Zelda Strategy Guide
Red Lanmola sprite from The Legend of Zelda
Sprite from A Link to the Past
Sprite from Link's Awakening


