Walkthrough:Goron City (Tears of the Kingdom)
Jump to navigation
Jump to search
Want an adless experience? Log in or Create an account.
The Goron City Walkthrough is a guide for part of the Regional Phenomena quest, including parts of the Yunobo of Goron City main quest.
Traveling to Goron City
- After acquiring the Paraglider at Lookout Landing and activating the Lookout Landing Skyview Tower, Link can speak with Purah again to begin the Regional Phenomena main quest. While Link can travel to any of the four major regions, the game initially gives a suggested route to travel to Rito Village.
- If Link has completed the Regional Phenomena at Rito Village, the game will guide Link towards Goron City. Purah mentions that there are three Regional Phenomena left, and suggest visiting Goron City as it is the closest. Furthermore, a Hylian named Zorona and a Goron named Kairo can be found at the center of Lookout Landing. They are looking for directions to Goron City. Scorpis advises them to travel northeast towards Death Mountain. They will arrive at Woodland Stable and from there, they can travel a bit north. Zorona suggests stopping at the Bedrock Bistro next.
- From Lookout Landing, Link can follow the path that heads northeast. Link can follow the path as it turns northward and crosses over the Boneyard Bridge, east of Hyrule Castle. Following this path eventually leads to the Woodland Stable.
- From the stable, Link can travel north a bit to a fork in the road, with the east path heading towards Goron City. Follow this path to scale the mountain just a bit. Heading to the east, Link will also be walking to the Eldin Canyon Skyview Tower in the distance. The path eventually turns to the north, but it is worth getting off the path and continuing along the cliffiside to reach the Skyview Tower. While it is a bit bumpy, it is a clear pathway to reach the tower. Link can enter and activate the tower by using Recall on some nearby fallen ruins and glide in from the open hole at the top of the tower.
- Following the main marked pathway, Link eventually gets to a fork in the road. The path to the southeast leads to the Bedrock Bistro, while the path north leads to Goron City. Goron City is the main destination, but Link can travel to the Bedrock Bistro to complete a pair of side quests, including Meat for Meat, followed by Cash In on Ripened Flint.
- Link can then travel north, along the Goronbi River path. The road eventually merges with another path at the YunoboCo Mineral Market. From there, Link can continue heading north to reach Goron City. Right on the outskirts, he'll be confronted by Bayge and Heehl, two Gorons trying to scam Link out of rupees. They are chased off by a Gerudo named Ramella, which will begin the Amber Dealer quest. Link can then head into Goron City.
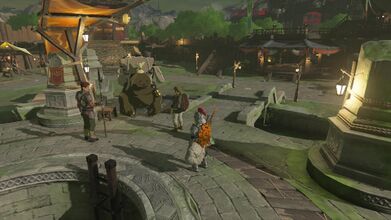
Zorona and Kairo appear at the center of Lookout Landing, trying to find their way to Goron City 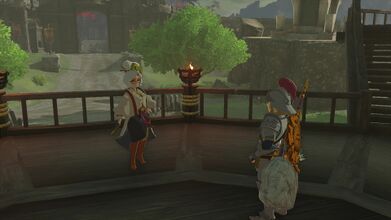
After completing one of the Regional Phenomena, speak with Purah and she'll mention the remaining Regional Phenomena. 
If Rito Village is completed, Purah will guide Link towards Goron City. 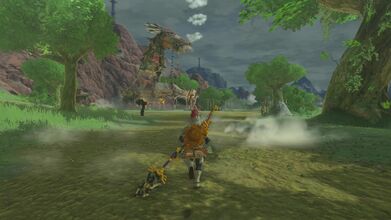
Follow the path to the northeast, eventually arriving at Woodland Stable. 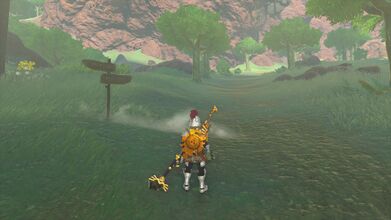
From there travel north until you reach the fork in the road, and then head east, steadily climbing the mountain. 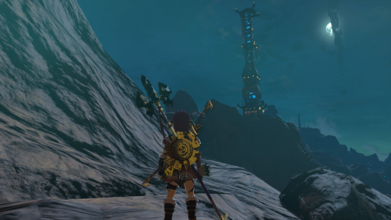
It is worth taking a detour to the east to activate the Eldin Canyon Skyview Tower. 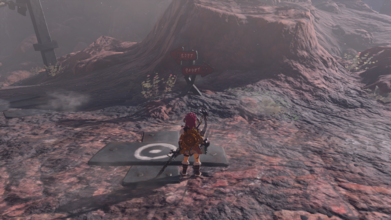
The fork in the road, with the south path leading to Bedrock Bistro and the north path leading to Goron City 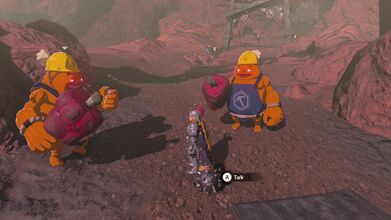
Bayge and Heehl will be just outside of Goron City, trying to scam Link, beginning the Amber Dealer quest


YunoboCo HQ
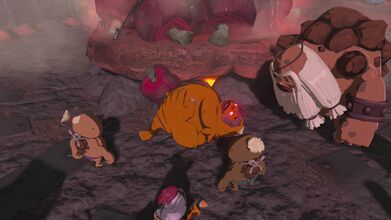
- When Link first arrives at Goron City, he can walk forward and speak with Bludo and a few other Gorons. They are soon joined by Yunobo, who eventually departs with Offrak and Slergo, the two younger Gorons. They are heading to YunoboCo HQ to gathered more Marbled Rock Roast. This will begin the Yunobo of Goron City quest.
- Within Goron City, Link can stop at the Ripped and Shredded armor shop to pickup some of the Flamebreaker set if needed. This will allow Link to enter caves with lava, as the set gives Link Flame Guard protection.
- Exit Goron City to the northeast and YunoboCo HQ can be found further north. Link can speak with a young Goron Dugby to begin a side quest, The Ancient City Gorondia!. After putting a Mine Cart on a rail, he can speak with Dugby and he'll hop into the cart. Link can attach a Fan to the cart and then get in, to ride the cart along the rail. The track leads directly to YunoboCo HQ.
- After getting off the cart, Link can turn to the north to find Offrak and Slergo. Link can speak with them and they'll let him pass. They suggest visiting the nearby Yunobo HQ as they have Flamebreaker Armor for sale for 700 Rupees and Link will need flame guard protection in the cave ahead.
- After Link enters the area, a scene will play out with Yunobo and the blond woman speaking. This will begin a boss battle with Yunobo. Yunobo will charge up an attack and aim right at Link. Keep your distance and keep on the move. Allow Yunobo to charge passed Link and smash into the wall. This will cause Yunobo to be confused for a short while and Link can get a hit in. After each hit, Yunobo's Mask will begin to crumble. After three hits, the mask will break and the battle will be over.
- After defeating Yunobo, the walls will cave in, preventing the group from being able to leave. Use Yunobo's Power of Fire to roll into the rock, opening up an exit for the group to leave. A cut-scene will commence where Yunobo indicates he'll travel with Link to Death Mountain to search for Princess Zelda.
Arrive at Goron City and speak with Bludo to find a Goron effected by Marbled Rock Roast 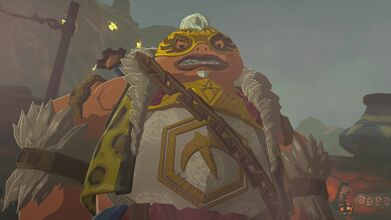
Yunobo will soon arrive before departing to YunoboCo HQ to gather more marbled rock roast 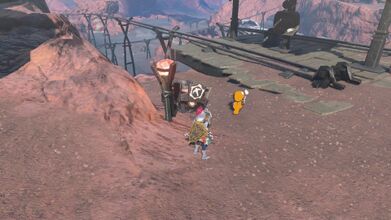
Speak with Dugby to start the The Ancient City Gorondia! quest 
The blond lady will speak with Yunobo, which will commence a boss battle 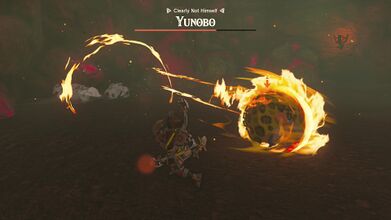
Step aside to dodge Yunobo's attacks and he'll crash right into the wall 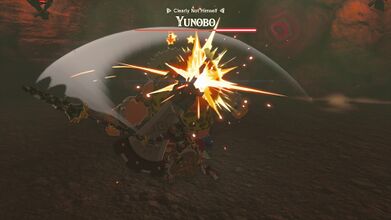
When Yunobo is stunned, slash with your sword three times to defeat him 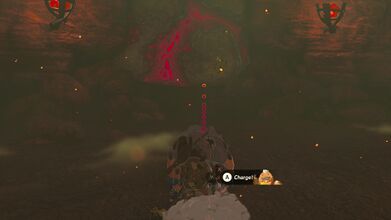
Use Yunobo's Power of Fire to launch Yunobo against the marbled rock 
This will open up a whole, allowing the group to exit the cave


Scaling Death Mountain
- With Yunobo now following Link, the pair needs to make their way up to Death Mountain. They want to reach the Death Mountain West Site. Just north of Goron City there is a rail track. Slightly north down the path, there is another rail track. Grab a Fan from higher up and attach it to the Mine Cart. Activate the fan and ride it to arrive at the Death Mountain West Site. Alternatively, a simple way to reach the area is follow the main path through Goron City, leading south and east towards the Bridge of Eldin and head north.
- Link will find a railway here that circles around Death Mountain. The rail on the inside track is the rail we want to use. A Goron can be found next to the Death Mountain West Site Station who mentions that this rail travels up to the summit of Death Mountain. Attach a Mine Cart and a Fan to the rail and travel up the railway.
- There is some Marbled Rock that blocks the path of the rail. Link can launch Yunobo out towards the rock to clear the path.
- As the pair progresses up the rail, there are some enemy Moblins, Keese, and Octoroks along the way. Link can launch Yunobo to defeat these enemies. Eventually the rail stop where there is a small Bokoblin camp. Link can defeat the enemies, move the obstacles in the way, and continue upward along the rail, clearing more marbled rock along the way.
- Once the pair reaches the top of the rail, they can climb up a bit where they will see the woman who resembles Princess Zelda. She seemingly summons the massive enemy Moragia from the crater of Death Mountain.
- There is a Zonai Device nearby which includes a Wing, some Fans, a Steering Stick, and some Batteries. Take control of the vehicle and begin to fly higher up. The goal here is to launch Yunobo at the three heads of Moragia. While flying around, the enemy will try to shoot flaming boulders out towards Link. As long as you keep moving, Link should be able to avoid them. A single shot from Yunobo will defeat one of the heads. Fly around and hit all three heads to defeat Moragia.

Ride the rail north of Goron City that heads east towards Death Mountain 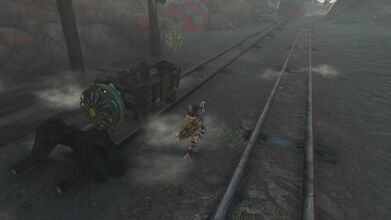
Attach a Fan and Mine Cart to the rail at the Death Mountain West Site Station 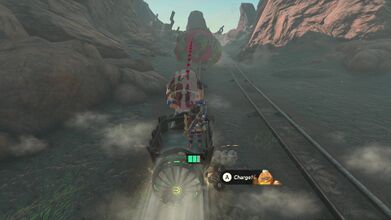
Use Yunobo to blast the marbled rock that is on the rail 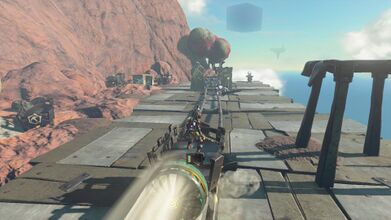
The rail stops at a small enemy base 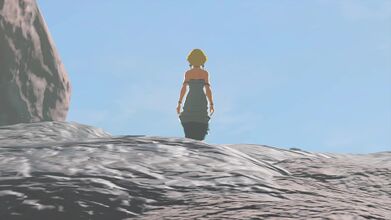
At the top of the rail walk up the ramp to find the woman who looks like Princess Zelda 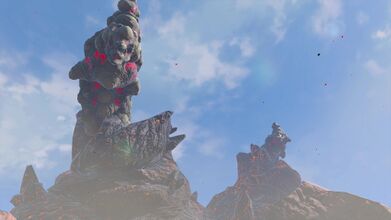
This will trigger a scene with Moragia comes out of the crater of Death Mountain. 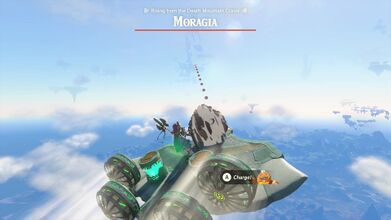
Link can use the nearby Zonai Device to fly into the air 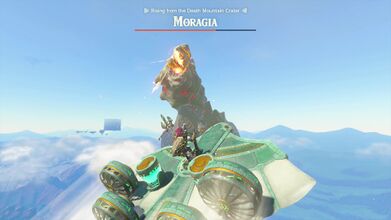
Get close and launch Yunobo at the three heads of Moragia


Into the Depths
- After defeating Moragia, Link can jump down into the Death Mountain Chasm. Once arriving down in the Depths, Link can walk over to the nearby Mustis Lightroot and activate it, illuminating the area.
- After speaking with Yunobo, Link will be able to work with him to navigate across the depths. To the west there is some marbled rock that Link can use Yunobo to break.
- Just east of the Lightroot, there is a giant Goron statue facing the northwest. Follow the direction it is facing to find a second Goron Statue. Link wants to follow a number of these Goron Statues, continuously walking in the direction the Gorons are facing. After passing by the Device Dispenser, Link can use some Brightbloom Seeds to illuminate the area. Use Yunobo to break the Marbled Rock along the way and scale the path to the northwest.
- After climbing the hill, the Goron statue here is facing to the south, leading to a base with some enemy Blue Bokoblin and Moblin.
- Travel south, beyond the enemy base, and then turn back west, ignoring the Goron statues for now. Scale up the hill and use Yunobo to break some more Marbled Rock. Beyond the marbled rock, Link will find a much more illuminated area in the distance.
- Link should turn to the north, to find a Lightroot nearby. Link will fight some Blue Bokoblin and a Blue Boss Bokoblin before reaching the Misisi Lightroot.
- From the Lightroot, Link can walk to the southwest, eventually reaching some rails, where there are a bunch of Horriblin. Link can follow the rails to the west, and when it gets a little dark, turn to the north. After walking up the ramp, Link will arrive at the Fire Temple.
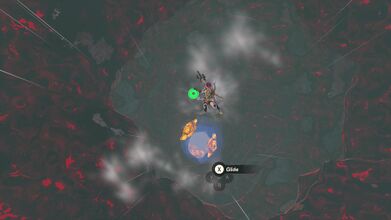
Leap down into the Death Mountain Chasm at the center of the crater, gliding down into the Depths 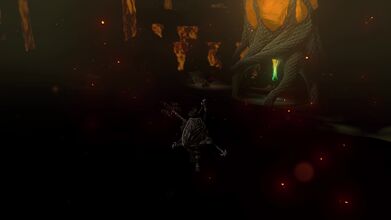
Activate the Mustis Lightroot just west of the chasm 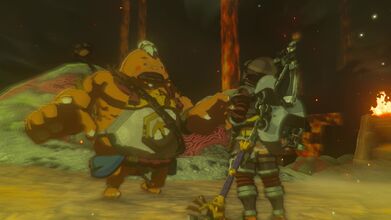
Speak with Yunobo who will hear a voice in the distance 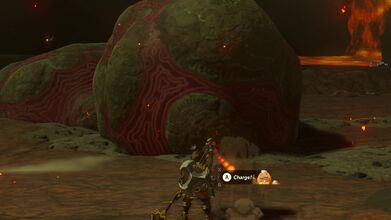
Use Yunobo to destroy the Marbled Rock as they pair travels west 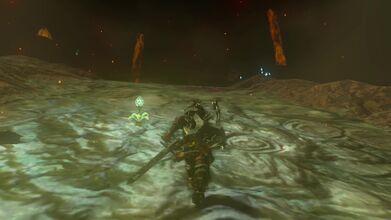
Use Brightbloom Seeds to illumunate the area and scale the path westward 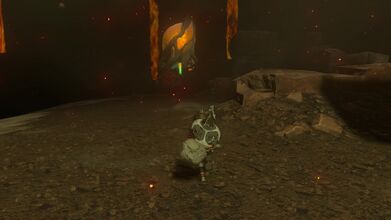
Travel north to the Misisi Lightroot to illuminate the area 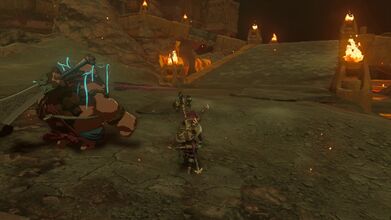
Link and Yunobo reach the Fire Temple 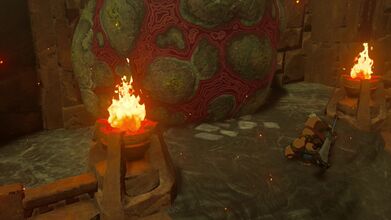
Yunobo chases Zelda, but she disappears through the Marbled Rock.


