Dawn Publications The Legend of Zelda Strategy Guide: Difference between revisions
Jump to navigation
Jump to search
Want an adless experience? Log in or Create an account.
(→Scans) |
No edit summary |
||
| (3 intermediate revisions by the same user not shown) | |||
| Line 1: | Line 1: | ||
{{Infobox| | {{Infobox|publication | ||
|name | | name = ''Family Computer Strategy Guidebook 1: The Legend of Zelda'' | ||
|image | | name2 = ファミリーコンピュータ 攻略ガイドブック ① THE HYRULE FANTASY ゼルダの伝説 | ||
|type | | image = [[File:Legend-of-Zelda-Dawn-Publications.jpg|250px]] | ||
|developer | | type = [[Strategy Guides|Strategy Guide]] | ||
|manufacturer = | | developer = | ||
|publisher | | manufacturer = | ||
|author | | publisher = Dawn Publications<br/>Akebono Publishing Co., Ltd | ||
|artist | | author = Famikonburazazu | ||
|director | | artist = | ||
|designer | | director = | ||
|editor | | designer = | ||
|composer | | editor = | ||
|game | | composer = | ||
|model | | game = ''[[The Legend of Zelda]]'' | ||
| release | | model = | ||
|language | | release = {{region|jp|y=1986|m=5|d=22}} | ||
| language = Japanese | |||
|cost | | cost = ¥350 (yen) | ||
|length | | length = 64 Pages | ||
|size | | size = 11 × 18 cm | ||
|weight | | weight = | ||
|color | | color = | ||
|ISBN | | ISBN = 4-7508-0521-1<br/>9784750805214 | ||
| gallery = | |||
|gallery | |||
}} | }} | ||
| Line 33: | Line 32: | ||
*Plenty of screenshots throughout the guide. | *Plenty of screenshots throughout the guide. | ||
*Several pages at the end of the guide dedicated to secrets and how to get various items in the overworld. | *Several pages at the end of the guide dedicated to secrets and how to get various items in the overworld. | ||
*No guide provided for the | *No guide provided for the [[Second Quest]]. | ||
==Art Gallery== | ==Art Gallery== | ||
< | <gallery widths=200 heights=200> | ||
File:Dawn-Publications-Link-Battling.jpg|Fighting Overworld Enemies | |||
File:Dawn-Publications-Link-Stalfos.jpg|Fighting Underworld Enemies | |||
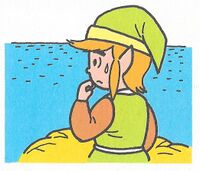
File:Dawn-Publications-Link-Looking-at-Ocean.jpg|Link Looking at the Ocean | |||
File:Dawn-Publications-Link-Thinking.jpg|Link Thinking | |||
File:Dawn-Publications-Link-Entering-Dungeon.jpg|Entering a Dungeon | |||
File:Dawn-Publications-Link-Potion-Bomb.jpg|Link Holding a Potion and Bomb | |||
File:Dawn-Publications-Link-Swinging-Sword.jpg|Link Swinging His Sword | |||
File:Dawn-Publications-Draw-Your-Own-Maps.jpg|Draw Your Own Maps | |||
</gallery> | |||
===Boss Artwork=== | ===Boss Artwork=== | ||
< | <gallery widths=200 heights=200> | ||
File:Dawn-Publications-Aquamentus.jpg|[[Aquamentus (The Legend of Zelda)|Aquamentus]] | |||
File:Dawn-Publications-Dodongo.jpg|[[Dodongo]] | |||
File:Dawn-Publications-Manhandla.jpg|[[Manhandla (The Legend of Zelda)|Manhandla]] | |||
File:Dawn-Publications-Gleeok-Two-Heads.jpg|[[Gleeok (The Legend of Zelda)|Gleeok]] | |||
File:Dawn-Publications-Gleeok-Three-Heads.jpg|[[Gleeok (The Legend of Zelda)|Gleeok]] | |||
File:Dawn-Publications-Gleeok-Four-Heads.jpg|[[Gleeok (The Legend of Zelda)|Gleeok]] | |||
File:Dawn-Publications-Digdogger.jpg|[[Digdogger (The Legend of Zelda)|Digdogger]] | |||
File:Dawn-Publications-Gohma.jpg|[[Gohma]] | |||
</gallery> | |||
===Enemy Artwork=== | ===Enemy Artwork=== | ||
< | <gallery widths=200 heights=200> | ||
File:Dawn-Publications-Armos.jpg|[[Armos]] | |||
File:Dawn-Publications-Boulder.jpg|[[Boulder]] | |||
File:Dawn-Publications-Blade-Trap.jpg|[[Blade Trap]] | |||
File:Dawn-Publications-Bubble.jpg|[[Bubble]] | |||
File:Dawn-Publications-Darknut.jpg|[[Darknut]] | |||
File:Dawn-Publications-Gel.jpg|[[Gel]] | |||
File:Dawn-Publications-Ghini.jpg|[[Ghini]] | |||
File:Dawn-Publications-Gibdo.jpg|[[Gibdo]] | |||
File:Dawn-Publications--Blue-Goriya.jpg|[[Goriya|Goriya (Blue)]] | |||
File:Dawn-Publications-Goriya.jpg|[[Goriya|Goriya (Red)]] | |||
File:Dawn-Publications-Keese.jpg|[[Keese]] | |||
File:Dawn-Publications-Lanmolas.jpg|[[Lanmola]] | |||
File:Dawn-Publications-Leever.jpg|[[Leever]] | |||
File:Dawn-Publications-Like-Like.jpg|[[Like Like]] | |||
File:Dawn-Publications-Red-Lynel.jpg|[[Lynel]] | |||
File:Dawn-Publications-Moblin.jpg|[[Moblin]] | |||
File:Dawn-Publications-Moldorm.jpg|[[Moldorm]] | |||
File:Dawn-Publications-Red-Octorok.jpg|[[Octorok]] | |||
File:Dawn-Publications-Patra.jpg|[[Patra]] | |||
File:Dawn-Publications-Peahat.jpg|[[Peahat]] | |||
File:Dawn-Publications-Pols-Voice.jpg|[[Pols Voice]] | |||
File:Dawn-Publications-River-Zora.jpg|[[River Zora]] | |||
File:Dawn-Publications-Rope.jpg|[[Rope]] | |||
File:Dawn-Publications-Stalfos.jpg|[[Stalfos]] | |||
File:Dawn-Publications-Stone-Statue.jpg|[[Stone Statue]] | |||
File:Dawn-Publications-Tektite.jpg|[[Tektite]] | |||
File:Dawn-Publications-Vire.jpg|[[Vire]] | |||
File:Dawn-Publications-Wallmaster.jpg|[[Wallmaster]] | |||
File:Dawn-Publications-Blue-Wizzrobe.jpg|[[Wizzrobe|Wizzrobe (Blue)]] | |||
File:Dawn-Publications-Orange-Wizzrobe.jpg|[[Wizzrobe|Wizzrobe (Orange)]] | |||
File:Dawn-Publications-Zol.jpg|[[Zol]] | |||
</gallery> | |||
==Scans== | ==Scans== | ||
Latest revision as of 11:45, March 13, 2023
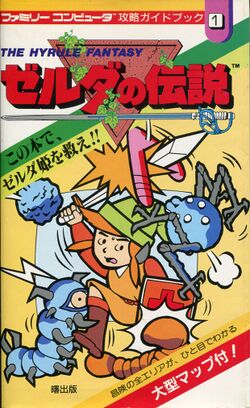
Family Computer Strategy Guidebook 1: The Legend of Zelda
ファミリーコンピュータ 攻略ガイドブック ① THE HYRULE FANTASY ゼルダの伝説
ファミリーコンピュータ 攻略ガイドブック ① THE HYRULE FANTASY ゼルダの伝説

Games | ||
Cost | ¥350 (yen) | |
Release Date |
| |
| Credits | ||
|---|---|---|
Publisher | Dawn Publications | |
Author | Famikonburazazu | |
| Attributes | ||
Type | ||
Language | Japanese | |
Length | 64 Pages | |
Size | 11 × 18 cm | |
ISBN | 4-7508-0521-1 | |
Features
- A colorful guide with great cover artwork that is very nice to flip through.
- Unique artwork for every single enemy, along with several scene artwork pieces.
- Huge foldout map, complete with a table highlighting the contents of all 128 overworld screens.
- Plenty of screenshots throughout the guide.
- Several pages at the end of the guide dedicated to secrets and how to get various items in the overworld.
- No guide provided for the Second Quest.
Art Gallery
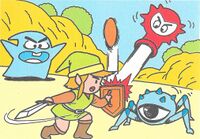
Fighting Overworld Enemies
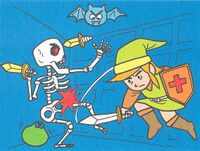
Fighting Underworld Enemies
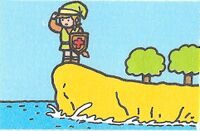
Link Looking at the Ocean
Link Thinking
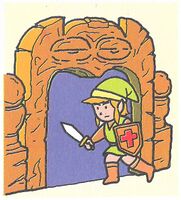
Entering a Dungeon
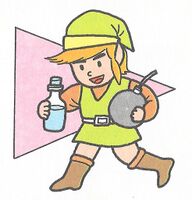
Link Holding a Potion and Bomb
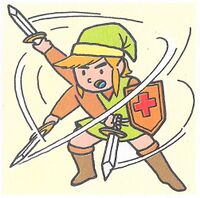
Link Swinging His Sword
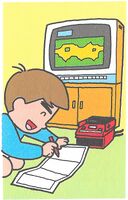
Draw Your Own Maps


Boss Artwork


Enemy Artwork


Scans
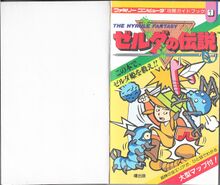
Page 1 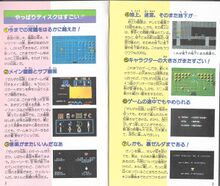
Page 2 - 3 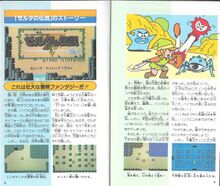
Page 4 - 5 
Page 6 - 7 
Page 8 - 9 
Page 10 - 11 
Page 12 - 13 
Page 14 - 15 
Page 16 - 17 
Page 18 - 19 
Page 20 - 21 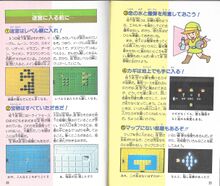
Page 22 - 23 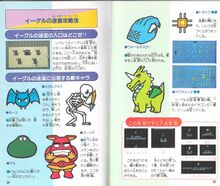
Page 24 - 25 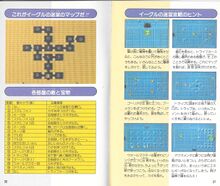
Page 26 - 27 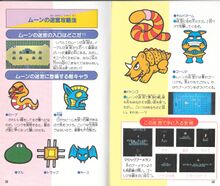
Page 28 - 29 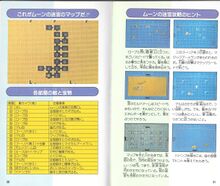
Page 30 - 31 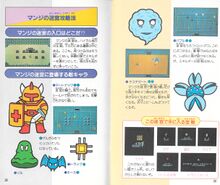
Page 32 - 33 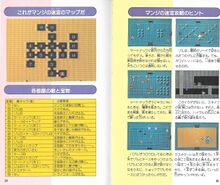
Page 34 - 35 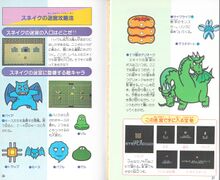
Page 36 - 37 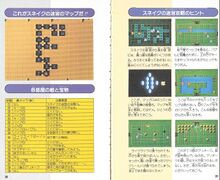
Page 38 - 39 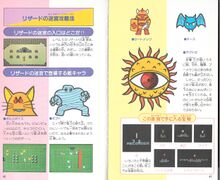
Page 40 - 41 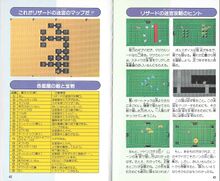
Page 42 - 43 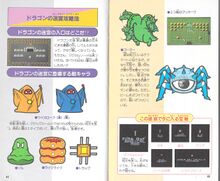
Page 44 - 45 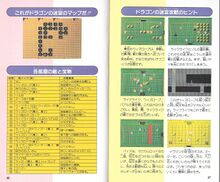
Page 46 - 47 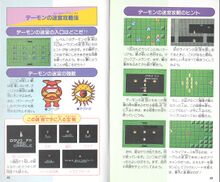
Page 48 - 49 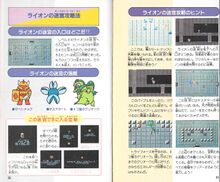
Page 50 - 51 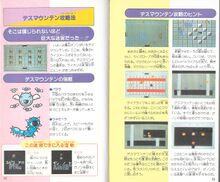
Page 52 - 53 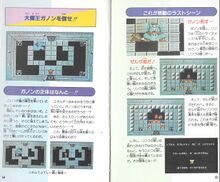
Page 54 - 55 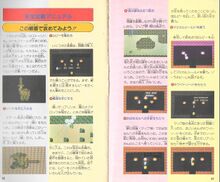
Page 56 - 57 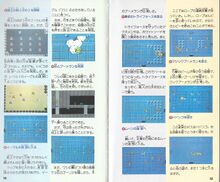
Page 58 - 59 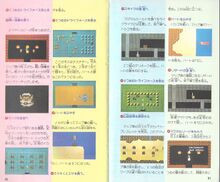
Page 60 - 61 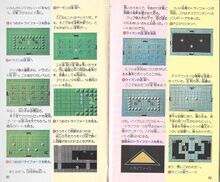
Page 62 - 63 
Page 64 - 65


