Trilby Valley: Difference between revisions
mNo edit summary |
mNo edit summary |
||
| Line 23: | Line 23: | ||
===Animals=== | ===Animals=== | ||
<gallery mode=nolines> | |||
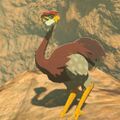
File:Eldin-ostrich.jpg|link=Eldin_Ostrich|[[Eldin Ostrich]] | |||
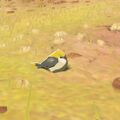
File:Golden-sparrow.jpg|link=Golden_Sparrow|[[Golden Sparrow]] | |||
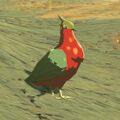
File:Hotfeather-pigeon.jpg|link=Hotfeather_Pigeon|[[Hotfeather Pigeon]] | |||
</gallery> | |||
===Enemies=== | ===Enemies=== | ||
<gallery mode=nolines> | |||
File:Blue-Bokoblin-Model.png|link=Blue_Bokoblin|[[Blue Bokoblin]] | |||
File:Black-Bokoblin-Model.png|link=Black_Bokoblin|[[Black Bokoblin]] | |||
File:Blue-Lizalfos.png|link=Blue_Lizalfos|[[Blue Lizalfos]] | |||
File:Fire-chuchu.jpg|link=Fire_Chuchu|[[Fire Chuchu]] | |||
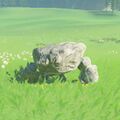
File:Stone-pebblit.jpg|link=Stone_Pebblit|[[Stone Pebblit]] | |||
</gallery> | |||
===Materials=== | ===Materials=== | ||
<gallery mode=nolines> | |||
File:Fireproof-lizard.png|link=Fireproof_Lizard|[[Fireproof Lizard]] | |||
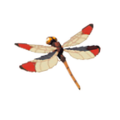
File:Warm-darner.png|link=Warm_Darner|[[Warm Darner]] | |||
</gallery> | |||
===Nearby Korok Seeds=== | ===Nearby Korok Seeds=== | ||
<section begin=Seed821summary />[[File:Korok821.png|200px|thumb|left|Find the seed platform uphill. Glide or surf in time to the target to reveal the Korok.]]<section end=Seed821summary />Find the seed platform located up the hill toward Foothill Stable. Head from it to the target before time runs out to reveal the Korok. Shield surfing or paragliding makes this a breeze.{{Korok Seed|Seed821}}{{Clear|left}} | <section begin=Seed821summary />[[File:Korok821.png|200px|thumb|left|Find the seed platform uphill. Glide or surf in time to the target to reveal the Korok.]]<section end=Seed821summary />Find the seed platform located up the hill toward Foothill Stable. Head from it to the target before time runs out to reveal the Korok. Shield surfing or paragliding makes this a breeze.{{Korok Seed|Seed821}}{{Clear|left}} | ||
{{Cat|Breath of the Wild Locations}} | {{Listbox|Breath of the Wild Eldin Locations}} | ||
{{Cat|Breath of the Wild Eldin Locations}} | |||
Revision as of 13:09, March 30, 2023

Trilby Valley is a location in Breath of the Wild.
Breath of the Wild
Trilby Valley is a massive area filled with large rocks and hills, located just southwest of the Foothill Stable.
There are a number of enemy bases throughout the valley, with a variety of goodies. At the far southwest, there are numerous Bokoblin and Lizalfos, with a treasure chest inside that has a Silver Rupee. Another base can be found at a higher ledge to the east, and after defeating all the enemies, another chest with a Silver Rupee will appear. A third base can be found at the far northeast end of the valley, with either a Knight's Bow or Royal Bow in the chest.
Nearby Shrines
Animals
Enemies


Materials

Nearby Korok Seeds

Find the seed platform located up the hill toward Foothill Stable. Head from it to the target before time runs out to reveal the Korok. Shield surfing or paragliding makes this a breeze.