Tower of Hera (A Link to the Past): Difference between revisions
mNo edit summary |
|||
| (23 intermediate revisions by 12 users not shown) | |||
| Line 1: | Line 1: | ||
{{ | {{Infobox|dungeon | ||
|name = Tower of Hera | | name = Tower of Hera | ||
|image = [[File:Tower_of_Hera.png| | | image = [[File:Tower_of_Hera.png|400px]] | ||
|game = ''[[The Legend of Zelda: A Link to the Past|A Link to the Past]]'' | | caption = Illustration from ''[[A Link to the Past Nintendo Player's Guide]]'' | ||
|boss = [[Moldorm]] | | game = ''[[The Legend of Zelda: A Link to the Past|A Link to the Past]]'' ([[The Legend of Zelda: A Link to the Past (GBA)|GBA]]) | ||
|miniboss = | | location = [[Death Mountain]], [[Light World]] | ||
|item = [[Piece of Heart]]<br>[[Moon Pearl]] | | boss = [[Moldorm (A Link to the Past)|Moldorm]] | ||
|reward = [[Heart Container]]<br>[[Pendant of Wisdom]] | | miniboss = | ||
|walkthrough = [ | | enemies = | ||
| inhab = | |||
| pointsint = | |||
| item = [[Piece of Heart]]<br/>[[Moon Pearl]] | |||
| reward = [[Heart Container]]<br/>[[Pendant of Wisdom]] | |||
| quest = | |||
| counterpart_header = Dark World Counterpart | |||
| counterpart = [[Ganon's Tower (A Link to the Past)|Ganon's Tower]] | |||
| related = [[Tower of Hera (A Link Between Worlds)]] | |||
| walkthrough = [https://www.zeldadungeon.net/a-link-to-the-past-walkthrough/tower-of-hera/ Text Walkthrough] | |||
}} | }} | ||
{{ZD|[https://www.zeldadungeon.net/a-link-to-the-past-walkthrough/tower-of-hera/ ''A Link to the Past'' Walkthrough<br/>Chapter 4: Tower of Hera]}} | |||
The '''Tower of Hera''' is the third [[Light World]] [[dungeon]] in ''[[The Legend of Zelda: A Link to the Past]]''. | The '''Tower of Hera''', also known as the '''Mountain Tower''', is the third [[Light World]] [[dungeon]] in ''[[The Legend of Zelda: A Link to the Past|A Link to the Past]]''. It is the Light World form of [[Ganon's Tower (A Link to the Past)|Ganon's Tower]]. The Tower of Hera introduces the game mechanic of [[Crystal Switch]]es. The [[Star Tile]]s are also introduced in the Tower of Hera. While exploring the Tower of Hera, [[Link (A Link to the Past)|Link]] gets the [[Moon Pearl]], the main treasure of Tower of Hera. Link encounters the boss, [[Moldorm]], on the Sixth Floor. After Link defeats Moldorm, he acquires the [[Pendant of Wisdom]] and a [[Heart Container]]. | ||
==Lore== | ==Lore== | ||
''"The Massive Tower of Hera"''<br> | ''"The Massive Tower of Hera"''<br/> | ||
''"Standing six stories tall, the Tower of Hera dominated the mountain region. It was built in traditional Hyrulian style, with a brick facade, carved stone pillars and elaborate marble tile. Because the stone and marble were hand-quarried by Hyrulian miners, it took many years to finish the building."'' | ''"Standing six stories tall, the Tower of Hera dominated the mountain region. It was built in traditional Hyrulian style, with a brick facade, carved stone pillars and elaborate marble tile. Because the stone and marble were hand-quarried by Hyrulian miners, it took many years to finish the building."'' | ||
| Line 20: | Line 30: | ||
''"The multi-leveled Tower of Hera was an intimidating structure that had many block barriers controlled by Crystal Switches. It also had Star Tiles that suddenly changed the floor plans, sometimes creating pits that claimed many intruders. From the grand foyer, a stairway on the left led down, another on the right led up to the Third Floor and beyond. The huge Moldorm, which was not fond of guests, occupied the entire Sixth Floor."'' | ''"The multi-leveled Tower of Hera was an intimidating structure that had many block barriers controlled by Crystal Switches. It also had Star Tiles that suddenly changed the floor plans, sometimes creating pits that claimed many intruders. From the grand foyer, a stairway on the left led down, another on the right led up to the Third Floor and beyond. The huge Moldorm, which was not fond of guests, occupied the entire Sixth Floor."'' | ||
''"Unexpected Pitfalls"''<br> | ''"Unexpected Pitfalls"''<br/> | ||
''"The floors in the Tower of Hera were riddled with holes, and people who fell into them disappeared from sight and landed elsewhere in the tower. Some even reported falling several floors and finding Faeries in a room that was completely sealed off, and others deliberately jumped into the pits to land in places that they could reach no other way. Stepping on Star Tiles was known to change the positions of some pits."'' | ''"The floors in the Tower of Hera were riddled with holes, and people who fell into them disappeared from sight and landed elsewhere in the tower. Some even reported falling several floors and finding Faeries in a room that was completely sealed off, and others deliberately jumped into the pits to land in places that they could reach no other way. Stepping on Star Tiles was known to change the positions of some pits."'' | ||
'''''--Nintendo | '''''--[[A Link to the Past Nintendo Player's Guide]]''''' | ||
==Dungeon Map== | ==Dungeon Map== | ||
| Line 30: | Line 40: | ||
<gallery> | <gallery> | ||
File:Tile ALttP.png|[[Flying Tile]] | File:Tile ALttP.png|[[Flying Tile]] | ||
File: | File:Blue-Hardhat-Beetle-1.png|[[Hardhat Beetle|Blue Hardhat Beetle]] | ||
File: | File:Red-Hardhat-Beetle-1.png|[[Hardhat Beetle|Red Hardhat Beetle]] | ||
File: | File:Kodondo-Red-2.png|[[Kodongo]] (Red) | ||
File:Mini-Moldorm-1.png|[[Mini-Moldorm]] | File:Mini-Moldorm-1.png|[[Mini-Moldorm]] | ||
File:Stalfos-ALTTP-Blue-2.png|[[Stalfos]] | File:Stalfos-ALTTP-Blue-2.png|[[Stalfos (A Link to the Past)|Blue Stalfos]] | ||
File:Stalfos-ALTTP-Red-1.png|[[Stalfos (A Link to the Past)|Red Stalfos]] | |||
File:SparkALttP.png|[[Spark]] | |||
</gallery> | </gallery> | ||
==Gallery== | |||
<gallery> | |||
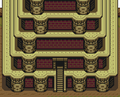
File:Tower of Hera Entrance.png|Tower of Hera Entrance | |||
</gallery> | |||
{{Listbox|A Link to the Past|Dungeons}} | |||
{{Cat|A Link to the Past Dungeons}} | {{Cat|A Link to the Past Dungeons}} | ||
{{Cat|A Link to the Past Locations}} | {{Cat|A Link to the Past Locations}} | ||
Latest revision as of 22:19, June 24, 2023

Games | ||
Location | ||
Boss | ||
Dark World Counterpart | ||
Items | ||
Rewards | ||
Related | ||
| Guides | ||
|---|---|---|
Walkthrough | ||
In-depth guide:
A Link to the Past Walkthrough Chapter 4: Tower of Hera |
The Tower of Hera, also known as the Mountain Tower, is the third Light World dungeon in A Link to the Past. It is the Light World form of Ganon's Tower. The Tower of Hera introduces the game mechanic of Crystal Switches. The Star Tiles are also introduced in the Tower of Hera. While exploring the Tower of Hera, Link gets the Moon Pearl, the main treasure of Tower of Hera. Link encounters the boss, Moldorm, on the Sixth Floor. After Link defeats Moldorm, he acquires the Pendant of Wisdom and a Heart Container.
Lore
"The Massive Tower of Hera"
"Standing six stories tall, the Tower of Hera dominated the mountain region. It was built in traditional Hyrulian style, with a brick facade, carved stone pillars and elaborate marble tile. Because the stone and marble were hand-quarried by Hyrulian miners, it took many years to finish the building."
"The entrance to the Tower of Hera lead to the second floor, an interesting architectural feature which perhaps aided its ancient inhabitants in defending the structure from attack."
"The multi-leveled Tower of Hera was an intimidating structure that had many block barriers controlled by Crystal Switches. It also had Star Tiles that suddenly changed the floor plans, sometimes creating pits that claimed many intruders. From the grand foyer, a stairway on the left led down, another on the right led up to the Third Floor and beyond. The huge Moldorm, which was not fond of guests, occupied the entire Sixth Floor."
"Unexpected Pitfalls"
"The floors in the Tower of Hera were riddled with holes, and people who fell into them disappeared from sight and landed elsewhere in the tower. Some even reported falling several floors and finding Faeries in a room that was completely sealed off, and others deliberately jumped into the pits to land in places that they could reach no other way. Stepping on Star Tiles was known to change the positions of some pits."
--A Link to the Past Nintendo Player's Guide
Dungeon Map
Enemies

Kodongo (Red)


Gallery
Tower of Hera Entrance
