Rental Hammer: Difference between revisions
Jump to navigation
Jump to search
Want an adless experience? Log in or Create an account.
mNo edit summary |
mNo edit summary |
||
| (3 intermediate revisions by the same user not shown) | |||
| Line 2: | Line 2: | ||
{{Stub}} | {{Stub}} | ||
{{Infobox|weapon | {{Infobox|weapon | ||
|game = ''[[Hyrule Warriors]]'' (DLC) | |game = ''[[Hyrule Warriors]]'' (DLC) | ||
|image = [[File:Hyrule Warriors Artwork Ravio Rental Hammer.png | |image = [[File:Hyrule Warriors Artwork Ravio Rental Hammer.png]] | ||
|used by = [[Ravio]] | |used by = [[Ravio]] | ||
|element = {{Darkness}} Darkness | |element = {{Darkness}} Darkness<br/>{{Lightning}} Lightning (4+) | ||
|related = | |related = | ||
}} | }} | ||
{{TODO|languages}} | {{TODO|languages}} | ||
| Line 16: | Line 16: | ||
==Variations== | ==Variations== | ||
*'''Wooden Hammer:''' The Level 1 variation. Resembles the Hammer from ''[[The Legend of Zelda: A Link Between Worlds|A Link Between Worlds]]''. | *'''Wooden Hammer:''' The Level 1 variation. Resembles the Hammer from ''[[The Legend of Zelda: A Link Between Worlds|A Link Between Worlds]]''. | ||
*'''White Bunny Hammer:''' The Level 2 variation. The hammer's head is white, with a blue spiral design with a red outline on either end, and is paired with an orange grip. A white bunny model can be seen atop the head. | *'''White Bunny Hammer:''' The Level 2 variation. The hammer's head is white, with a blue spiral design with a red outline on either end, and is paired with an orange grip, referencing the color palette of [[Sheerow]]. A white bunny model can be seen atop the head. | ||
*'''Nice Hammer:''' The Level 3 variation. Resembles the Nice Hammer from ''A Link Between Worlds''. | *'''Nice Hammer:''' The Level 3 variation. Resembles the Nice Hammer from ''A Link Between Worlds''. | ||
*'''Nice Hammer +:''' The Level 4 variation. | *'''Nice Hammer +:''' The Level 4 variation. Appears identical to the Nice Hammer. | ||
*'''Crackling Nice Hammer:''' The Level 4+ variation | *'''Crackling Nice Hammer:''' The Level 4+ variation. It appears similar to the Nice Hammer, but is orange instead of red. | ||
{|class="wikitable" style="text-align:center" | {|class="wikitable" style="text-align:center" | ||
| Line 65: | Line 65: | ||
|- | |- | ||
| style="text-align:center"|Base String{{Tt|YYYYYY/BBBBBB}} | | style="text-align:center"|Base String{{Tt|YYYYYY/BBBBBB}} | ||
|Ravio performs a | |Ravio performs a string of six attacks; He swings left, swings up to scatter debris ahead, swings down, places a [[Giant Bomb]] and smacks it ahead, charges forward with a spinning attack, and enlarges the hammer before smashing down in front of him. | ||
|- | |- | ||
| style="text-align:center"|C1{{Tt|X/Y}} | | style="text-align:center"|C1{{Tt|X/Y}} | ||
|Ravio uses the [[Rented Ice Rod]] to | |Ravio uses the [[Rented Ice Rod]] to create an ice block in mid-air, which crashes down onto the immediate area and knocks enemies back. Holding {{HW Button|strong}} has Ravio charge up, before creating four stalagmites in a square formation that shatter, knocking enemies toward him. | ||
|- | |- | ||
| style="text-align:center"|C2 | | style="text-align:center"|C2 | ||
|Ravio throws the [[Gale Boomerang]], creating a | |Ravio throws the [[Gale Boomerang]] ahead, creating a tornado in front of him that knocks enemies into the air. | ||
|- | |- | ||
| style="text-align:center"|C3 | | style="text-align:center"|C3{{Tt|YYX/BBY}} | ||
|Ravio takes out a | |Ravio takes out a Giant Bomb, rolls it forward a short distance, and pushes it away, which detonates after a few seconds. The control stick can be used to move Ravio as he rolls the Giant Bomb. | ||
|- | |- | ||
| style="text-align:center"|C4 | | style="text-align:center"|C4{{Tt|YYYX/BBBY}} | ||
|Ravio uses the Rented Ice Rod to | |Ravio creates a large magic circle, uses the Rented Ice Rod to create four ice blocks in a square formation, and smashes them all together, hitting all enemies inside the circle. | ||
|- | |- | ||
| style="text-align:center"|C5 | | style="text-align:center"|C5{{Tt|YYYYX/BBBBY}} | ||
|Ravio throws the Gale Boomerang, creating a | |Ravio throws the Gale Boomerang ahead, creating a tornado in front of him that knocks enemies into the air, before using the Rented Ice Rod to create a tall stalagmite where the tornado was, shattering it. | ||
|- | |- | ||
| style="text-align:center"|Special Attack | | style="text-align:center"|Special Attack | ||
|Ravio fires three [[Bomb Arrow|Bomb Arrows]] from the [[Sacred Bow]], before | |Ravio fires three [[Bomb Arrow|Bomb Arrows]] from the [[Sacred Bow]], which detonate a fair distance from him, before he throws the Gale Boomerang, creating two tornadoes that move together and catch enemies directly in front of him. | ||
|- | |- | ||
| style="text-align:center"|Focus Spirit Finisher | | style="text-align:center"|Focus Spirit Finisher | ||
| Line 95: | Line 93: | ||
{{Listbox|Hyrule Warriors|Weapons}} | {{Listbox|Hyrule Warriors|Weapons}} | ||
{{ | {{Cat|Hyrule Warriors Weapons}} | ||
Latest revision as of 18:01, April 6, 2024
| This article describes a subject that is or may be outside the core Zelda canon. |
| This article is a stub. You can help the Zelda Dungeon Wiki by expanding it. |
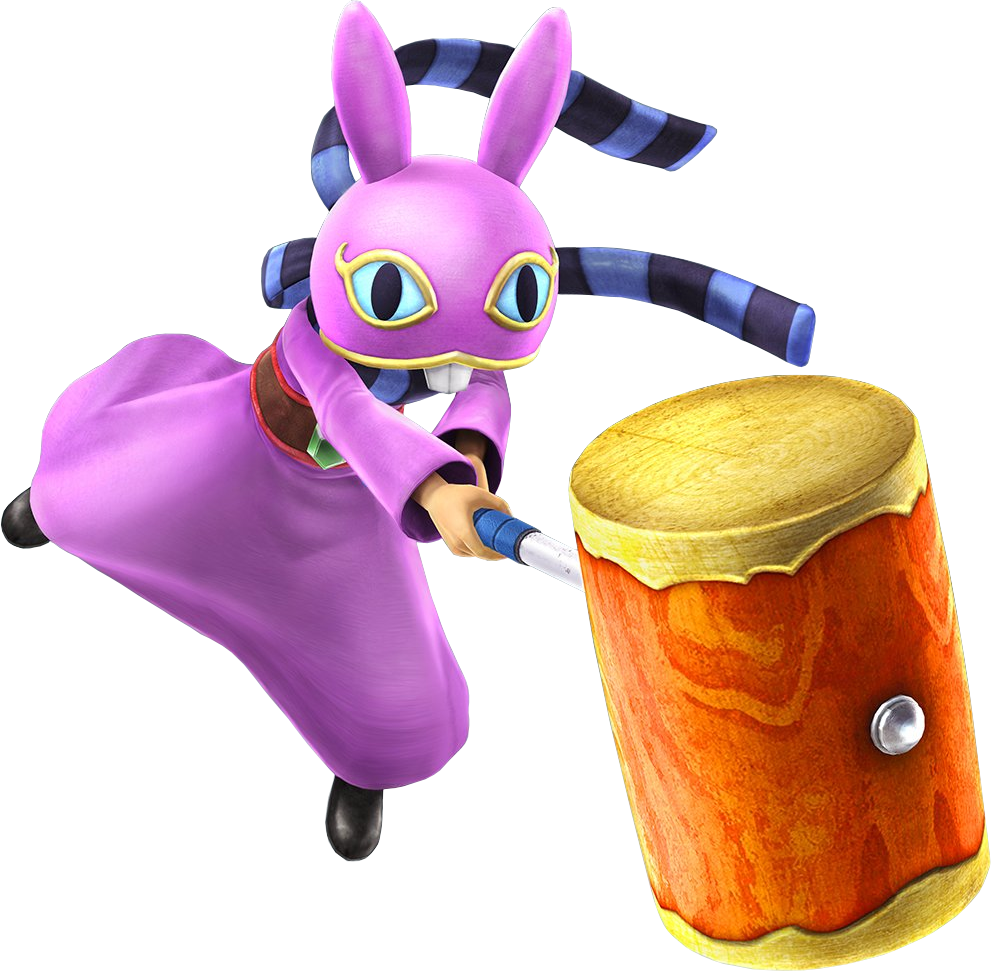
Rental Hammer

Games | Hyrule Warriors (DLC) | |
Used by | ||
Element |
| |
TODO: languages
Care to do so?
"This massive hammer and a myriad of items will unleash fierce explosions and cyclones upon your enemies. A Strong Attack will summon ice. Hold down ![]() /
/ ![]() to boost your attack range!"
to boost your attack range!"
— In-game description, Hyrule Warriors
The Rental Hammer is the weapon class used by Ravio in Hyrule Warriors. He fights using an assortment of his wares and the powered-up Items.
Variations
- Wooden Hammer: The Level 1 variation. Resembles the Hammer from A Link Between Worlds.
- White Bunny Hammer: The Level 2 variation. The hammer's head is white, with a blue spiral design with a red outline on either end, and is paired with an orange grip, referencing the color palette of Sheerow. A white bunny model can be seen atop the head.
- Nice Hammer: The Level 3 variation. Resembles the Nice Hammer from A Link Between Worlds.
- Nice Hammer +: The Level 4 variation. Appears identical to the Nice Hammer.
- Crackling Nice Hammer: The Level 4+ variation. It appears similar to the Nice Hammer, but is orange instead of red.
| Weapon | Level | Elements | Strength | Location |
|---|---|---|---|---|
Wooden Hammer |
1 | 80 (+8 per ★) |
Unlocked from start. | |
White Bunny Hammer |
2 | 150 (+15 per ★) |
Lorule Map, D-3? | |
Nice Hammer |
3 | 280 (+28 per ★) |
Lorule Map, H-1? | |
Nice Hammer + |
4 | 500 (+50 per ★) |
3DS: Lorule Map, C-8? Switch: Lorule Map, E-8? | |
| Crackling Nice Hammer | 4+ | 500 (+50 per ★) |
Lorule Map, C-8? |
Moveset
| Attack | Explanation |
|---|---|
| Base String? | Ravio performs a string of six attacks; He swings left, swings up to scatter debris ahead, swings down, places a Giant Bomb and smacks it ahead, charges forward with a spinning attack, and enlarges the hammer before smashing down in front of him. |
| C1? | Ravio uses the Rented Ice Rod to create an ice block in mid-air, which crashes down onto the immediate area and knocks enemies back. Holding |
| C2 | Ravio throws the Gale Boomerang ahead, creating a tornado in front of him that knocks enemies into the air. |
| C3? | Ravio takes out a Giant Bomb, rolls it forward a short distance, and pushes it away, which detonates after a few seconds. The control stick can be used to move Ravio as he rolls the Giant Bomb. |
| C4? | Ravio creates a large magic circle, uses the Rented Ice Rod to create four ice blocks in a square formation, and smashes them all together, hitting all enemies inside the circle. |
| C5? | Ravio throws the Gale Boomerang ahead, creating a tornado in front of him that knocks enemies into the air, before using the Rented Ice Rod to create a tall stalagmite where the tornado was, shattering it. |
| Special Attack | Ravio fires three Bomb Arrows from the Sacred Bow, which detonate a fair distance from him, before he throws the Gale Boomerang, creating two tornadoes that move together and catch enemies directly in front of him. |
| Focus Spirit Finisher | Manual: Ravio fires three Arrows into the air from the Sacred Bow, which crash down in front of him with explosions of light. Automatic: Ravio takes out a Giant Bomb, only to trip and drop it, which creates an explosion of darkness. |
| Weak Point Smash | Enemy Captain/Warrior: TBA Giant Boss: TBA |