Three-Eye Rock Palace: Difference between revisions
Limp Bizkit (talk | contribs) (→Cross: replaced) |
mNo edit summary |
||
| (5 intermediate revisions by 3 users not shown) | |||
| Line 7: | Line 7: | ||
| enemies = [[Armored Stalfos]]<br/>[[Bubble]]<br/>[[Doomknocker]]<br/>[[Iron Knuckle]]<br/>[[Mau]]<br/>[[Moa]]<br/>[[Myu]]<br/>[[Ra]]<br/>[[Wizard]]<br/>[[Wosu]] | | enemies = [[Armored Stalfos]]<br/>[[Bubble]]<br/>[[Doomknocker]]<br/>[[Iron Knuckle]]<br/>[[Mau]]<br/>[[Moa]]<br/>[[Myu]]<br/>[[Ra]]<br/>[[Wizard]]<br/>[[Wosu]] | ||
| reward = Placement of one of the [[Crystal]]s | | reward = Placement of one of the [[Crystal]]s | ||
| walkthrough = [ | | walkthrough = [https://www.zeldadungeon.net/the-adventure-of-link-walkthrough/hidden-palace/ Text Walkthrough]<br/>[https://www.youtube.com/watch?v=xWlZG3DgUoY Video Walkthrough (Part 1)]<br/>[https://www.youtube.com/watch?v=VRl4ct9kmwY Video Walkthrough (Part 2)] | ||
}} | }} | ||
{{ZD|[ | {{ZD|[https://www.zeldadungeon.net/the-adventure-of-link-walkthrough/hidden-palace/ '''The Adventure of Link''' Walkthrough<br/>Chapter 6: Hidden Palace]}} | ||
The '''Three-Eye Rock Palace''', also known as the '''Hidden Palace''', is the sixth [[ | The '''Three-Eye Rock Palace''', also known as the '''Hidden Palace''', is the sixth [[dungeon]] in ''[[Zelda II: The Adventure of Link|The Adventure of Link]]''. Without any [[Small Key]]s in the dungeon, [[Link (The Legend of Zelda)#The Adventure of Link|Link]] needs to have the [[Magical Key]] to open all the locked doors in the dungeon. The dungeon contains fake floors that Link has to avoid. The dungeon is constructed from purple bricks. Link finds the [[Cross]] here and the boss is [[Barba]]. | ||
==Enemies== | ==Enemies== | ||
| Line 26: | Line 26: | ||
File:RaBlue-Sprite-AOL.png|[[Ra]] | File:RaBlue-Sprite-AOL.png|[[Ra]] | ||
File:Ironknuckle-AoL-Sprite.png|[[Rebonack]] | File:Ironknuckle-AoL-Sprite.png|[[Rebonack]] | ||
File: | File:Wizard-Sprite-AOL.png|[[Wizard]] | ||
File:Tinsuit-Sprite-AOL.png|[[Wosu]] | File:Tinsuit-Sprite-AOL.png|[[Wosu]] | ||
</gallery> | </gallery> | ||
| Line 32: | Line 32: | ||
==Barba== | ==Barba== | ||
{{Main|Barba}} | {{Main|Barba}} | ||
The dragon-like [[Barba]] stands between [[Link]] and placing the final [[Crystal]]. Barba attacks by rising from one of the four lava pools in his chamber and fires a stream of fire in Link's direction. Activating the [[Reflect Spell]] will allow Link to block the attack directly. The boss' | The dragon-like [[Barba]] stands between [[Link (The Legend of Zelda)#The Adventure of Link|Link]] and placing the final [[Crystal]]. Barba attacks by rising from one of the four lava pools in his chamber and fires a stream of fire in Link's direction. Activating the [[Reflect Spell]] will allow Link to block the attack directly. The boss' only weak point, like many others, is his head. | ||
==Cross== | ==Cross== | ||
{{Main|Cross}} | {{Main|Cross}} | ||
[[File:AOL Cross.png|100px|left]] | [[File:AOL Cross.png|100px|left]] | ||
The [[Cross]] reveals invisible [[Moa]]s that infest the ruined [[Kasuto]] town and the [[Valley of Death]]. While an optional item, [[Link]]'s quest becomes substantially more difficult without it. The Cross is guarded by a [[Rebonack]] identical to the one faced at the end of the [[Island Palace]], though this encounter is much less harrowing than the first due to Link's increased power. | The [[Cross]] reveals invisible [[Moa]]s that infest the ruined [[Kasuto]] town and the [[Valley of Death]]. While an optional item, [[Link (The Legend of Zelda)#The Adventure of Link|Link]]'s quest becomes substantially more difficult without it. The Cross is guarded by a [[Rebonack]] identical to the one faced at the end of the [[Island Palace]], though this encounter is much less harrowing than the first due to Link's increased power. | ||
{{Clear}} | {{Clear}} | ||
==Gallery== | ==Gallery== | ||
<gallery> | <gallery> | ||
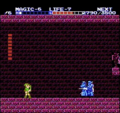
File:HiddenPalace1.png| | File:HiddenPalace1.png|What seems like a completely innocuous floor... | ||
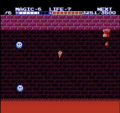
File:HiddenPalace2.png| | File:HiddenPalace2.png|...hides a pit that puts Link in the basement | ||
File:HiddenPalace3.png| | File:HiddenPalace3.png|YOU! | ||
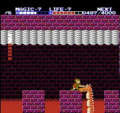
File:HiddenPalace4.png| | File:HiddenPalace4.png|Not only must Link use the [[Fairy Spell]] to cross the lava, he must also avoid magic-stealing [[Bubble]]s. | ||
File:HiddenPalace5.png| | File:HiddenPalace5.png|Link must take care to conserve enough magic power to reach this ledge that leads to Barba. | ||
File:HiddenPalace6.png| | File:HiddenPalace6.png|Casting [[Reflect Spell|Reflect]], [[Shield Spell|Shield]], and [[Jump Spell|Jump]] make surviving the encounter with Barba easier. | ||
File:HiddenPalace7.png| | File:HiddenPalace7.png|It is easier for Link to strike Barba when he descends and is not shooting fire. | ||
</gallery> | </gallery> | ||
{{ | {{Listbox|The Adventure of Link|Dungeons}} | ||
{{ | {{Listbox|The Adventure of Link|Locations}} | ||
{{Cat|The Adventure of Link Dungeons}} | {{Cat|The Adventure of Link Dungeons}} | ||
{{Cat|The Adventure of Link Locations}} | {{Cat|The Adventure of Link Locations}} | ||
Latest revision as of 17:48, April 12, 2024
Games | ||
Boss | ||
Mini-bosses | ||
Enemies | ||
Items | ||
Rewards | Placement of one of the Crystals | |
| Guides | ||
|---|---|---|
Walkthrough | ||
In-depth guide:
The Adventure of Link Walkthrough Chapter 6: Hidden Palace |
The Three-Eye Rock Palace, also known as the Hidden Palace, is the sixth dungeon in The Adventure of Link. Without any Small Keys in the dungeon, Link needs to have the Magical Key to open all the locked doors in the dungeon. The dungeon contains fake floors that Link has to avoid. The dungeon is constructed from purple bricks. Link finds the Cross here and the boss is Barba.
Enemies

Armored Stalfos (Blue)
Iron Knuckle (Red)
Iron Knuckle (Blue)

Barba
- Main article: Barba
The dragon-like Barba stands between Link and placing the final Crystal. Barba attacks by rising from one of the four lava pools in his chamber and fires a stream of fire in Link's direction. Activating the Reflect Spell will allow Link to block the attack directly. The boss' only weak point, like many others, is his head.
Cross
- Main article: Cross

The Cross reveals invisible Moas that infest the ruined Kasuto town and the Valley of Death. While an optional item, Link's quest becomes substantially more difficult without it. The Cross is guarded by a Rebonack identical to the one faced at the end of the Island Palace, though this encounter is much less harrowing than the first due to Link's increased power.
Gallery
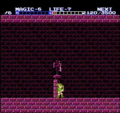
What seems like a completely innocuous floor...
...hides a pit that puts Link in the basement
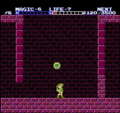
YOU!
Not only must Link use the Fairy Spell to cross the lava, he must also avoid magic-stealing Bubbles.
Link must take care to conserve enough magic power to reach this ledge that leads to Barba.
It is easier for Link to strike Barba when he descends and is not shooting fire.


