Lost Isle
| This article describes a subject that is or may be outside the core Zelda canon. |

Title Screen
| Release | ||
|---|---|---|
Platform | Date | |
PC (Zelda Classic) | 2007 | |
| Credits | ||
Developer | DarkFlameWolf | |
Lost Isle is a Zelda Classic custom quest developed by DarkFlameWolf and Peteo. This game has been under production for almost 2 years, and it is finally released in 2007. Lost Isle is quite similar to Link's Awakening that took place on Koholint Island. However, this time Link ends up on a deserted and hostile island, and he has to find a way out of the island.[1]
Lost Isle offers:-
- Almost 20 hours of game-play.
- Pretty 2D graphics, fitting music and solid game-play.
- One gigantic world to explore, with an entire island-wide cave system.
- Various terrains such as ghost towns, graveyards, swamps, forests, volcanoes, wastelands and canyons.
- 5 huge dungeons.
- 36 pieces of heart, 6 optional Triforce pieces, 10 potions, and 6 magic shields are available on the island.
- 13 warp portals across the island.
- Many hidden secrets and mics.
Beginning in January of 2013, Webmaster of Zelda Dungeon Mases, began a Let's Play of Lost Isle.
Story
Link has crash-landed on a seemingly deserted island out in the middle of the ocean. With no real reference point to indicate where exactly he is in the world, he has no choice but to explore the island and find some way of getting off of it and back to the mainland.
Though it appears that there was once a civilization here that was thriving, all that has turned to dust and dead bodies. Undead and foul creatures fill the villages and take shelter in the woods and creep through the dark corners of the island. What could have caused this great catastrophe and is this great evil still alive and well as Link explore the very land that it destroyed?[2][3]
Download
In order to play Lost Isle, Zelda Classic must first be downloaded and installed. Lost Isle will run in v2.5.0 and it can be downloaded at the official Zelda Classic Website
After Zelda Classic has been installed. The Lost Isle Fan-Game can be downloaded from PureZC.
How to Play
- In the Zelda Classic folder, open the file titled zlaunch-w.
- In the Zelda Classic tab, configure your settings that you'd like to use and then click Launch ZC.
- Click Register Your Name and type out your name.
- Select your name but DO NOT click Play Game, as that will just start a game of The Legend of Zelda. Instead, press whatever button is chosen as the A button Default. (On Windows installs of Zelda Classic, this is the ALT button).
- Select the A button once again to click Custom Quest. Find the folder where Lost Isle was installed and open it. Now that record will permanently be linked to your Lost Isle file and you can start the game.
Heart Pieces
| # | Location | Requirements | Description | Screenshot |
|---|---|---|---|---|
| Before Entering Level 1 | ||||
| 01 | Chovian Fields | None | From the Weathercock in the center of Oderra Village, walk two screens right and one screen down. Next to the red building, slash at some bushes to the left. Follow this pathway and you'll eventually run into the heart piece in Chovian Fields. | 
|
| 02 | Oderra Village | Bombs | At the north part of Oderra Village, northwest of the Windmill. From the Windmill, walk up a screen and left a screen through the narrow passageway. Use a bomb to blowup the bombable wall and enter the cave. Walk along the pathway to the left and it will eventually lead to a treasure chest containing a piece of a heart. | File:LI-HP-02.png |
| 03 | Vasshinghon Flows | Bombs | This heart piece can technically be reached before acquiring the Power Gauntlet, but you'll have to take a longer pathway through the Oderra Graveyard.
From the blue flower that opened up after beating the Ancient Temple, go up a screen right across the bridge to enter Vasshinghon Flows. From the bridge, go up a screen and move the rock with your Power Gauntlet. Walk up a screen and move another rock out of the way. Walk right a screen and cross the bridge. From here a screen and you'll find a Longhorn-looking skull. Bomb the wall to the left and enter the cave. Walk through the cave, and you'll come across a chest with a Heart Piece in it. |
|
| 04 | Vasshinghon Flows | None | Looking at the map of the Vasshinghon Flows, the Piece of Heart is located on the top row of screens, three screens from the right. This heart piece can technically be reached right from the start of the game without the need of any item by traversing through the Oderra Graveyard. However, acquiring the Power Gauntlet and more heart containers will make the pathway much easier. | 
|
| 05 | Chovian Fields | Bow and Arrow | Found two screens to the right of the initial starting screen. However, it is on the higher ledge. It can be reached from the screen to the right. Link will need to shoot the statue with an arrow, causing the large rock to disappear, clearing the pathway to the heart piece. | 
|
| 06 | Akavir Swamp | Bombs | One screen north of the Warp Portal in Akavir Swamp there is a bombable wall. From the warp portal, head down a screen and cut through some bushes to find a narrow path to the right. Navigate the narrow pathway through the trees and you'll eventually reach the bombable wall. Go through the cave to find the piece of heart! | |
| Before Entering Level 2 | ||||
| 07 | Akavir Swamp | Raft | Located three screens up and one screen to the right of the first dungeon. Link will need to use the Raft in order to reach it. | 
|
| 08 | Vasshinghon Flows | Bow and Arrow Power Gauntlet |
Located at the top-right most screen of the map while in Vasshinghon Flows. One screen to the left, Link will need to use the Power Gauntlet to push the rock out of the way. From there, Link can shoot the statue with his Bow, causing the large rock to crumble, giving him access to the heart piece. | 
|
| 09 | Tahou Woods | Bow and Arrow | This heart piece is a reward for the arrow shooting mini-game. The game can be found at the far east portion of the Tahou Woods. | 
|
| 10 | Glathriel Canyon | Power Gauntlet | At the far northwest corner of the Yeven Basin, Link can use the Power Gauntlet to push a rock out of the way. Walk up a screen to find the Heart Piece on the higher ledge within the Glathriel Canyon. | 
|
| 11 | Zackerand Fields | Bombs | In the maze where you got the Big Quiver, head to the south-east part of the maze. Inside the room, you will find a piece of heart! If you're having trouble getting there, just head south of where you got the Big Quiver. | 
|
| 12 | Akavir Swamp | Ocarina | From Dasa Wood's warp portal cave; head down three screens, left a screen, and down a screen. Use the Ocarina on Gossip Stone there to make it disappear. Then head down, and pick up Piece of Heart there. | 
|
| 13 | Ebenar Temple | Ocarina | Go back to Ebenar Temple. On floor B2 is a room with bats and floating logs. In that room is a Gossip Stone. Use the Ocarina and it will go away. Go up through the door. Get the Heart Piece, and take the warp back to the beginning. | |
| Before Entering Level 3 | ||||
| 14 | Dasa Woods | [Bombs and Power Rod]] | Warp to the Dasa Woods entrance. Go down a screen, and right a screen. Use the Power Rod on the gem to make the flowers disappear. North of there is 3 Dodongos. After killing them, a Heart Piece appears! Collect it, and go north for another prize, the Candle. | |
| 15 | Glathriel Canyon | Candle | South of the first Glathriel Canyon Heart Piece is a tree. Burn it down and go north. Go north until you're in a screen with a lake in the top-right corner and a rock blocking it. Take the raft over, and the Heart Piece is back on land. | |
| 16 | Oderra Village | Power Rod | In the graveyard there are three tombstones that can be pushed. Push them into the flowers and it will cause the gem to change colors. So, that the Power Rod can be used on it. Then travel west and push a lonely tombstone and a stair case will appear. (in this cave which needs to be explored in a previous section to open up the path way to the Heart Piece.) | 
|
Magic Potions
Magic Potion can be used to restore Link's hearts. There are 10 Magic Potions that can be found across the island. Here is the location of these potions.
| # | Location | Requirements | Description | Screenshot |
|---|---|---|---|---|
| 01 | Oderra Village | None (You can get it before entering Level 1) |
From the red-roofed house with narrow pathway that lead to a Piece of Heart #1; walk two screens right, and open the chest for Magic Potion #1. | 
|
| 02 | Dasa Woods | None (You can get it before entering Level 1) |
From Dasa Wood's entrance; head up a screen, and right a screen. Open the chest there for Magic Potion #2. | 
|
| 03 | Vasshinghon Flows | Raft (You can get it before entering Level 2) |
From Chovian Field's warp portal cave; head down three screens, and use raft to reach the screen in the right. Go up a screen, and you'll arrive at the screen that had the blue flower disappear after clearing level 1. From here; head up a screen, right a screen, down two screens (through the lower path), and open the chest for Magic Potion #3. | 
|
| 04 | ||||
| 05 | ||||
| 06 | ||||
| 07 | ||||
| 08 | ||||
| 09 | ||||
| 10 |
Walkthrough
The Lost Isle Walkthrough below only consists of the main quest. For the optional items, heart pieces, and upgrades, see the other appendices within the Wiki page. Editors, please don't include optional items.
Basic Overworld Secrets
Hidden Caves Most bombable caves are easy to spot with their bouldery surfaces. However, some are more difficult to find, as they only have a small crack on them. The caves they lead to contain a large stone with info about the area you are located in. Slashing a certain plant in each cave will get you 20-50 arrows.
Fairy Flowers Throughout Lost Isle, you are bound to notice larger patches of flowers, each two tiles high and three tiles long. Playing the Ocarina while standing on them will instantly refill your hearts. If you're close to one of these and are low on hearts, these flowers can be a godsend.
Magic Caves Some caves in the game have shield-like emblems close to the entrance. By navigating these specific caves, you will find a Magic Upgrade, which increases your magic bar by a small amount.
Finding Level 1
Link's Sword
- Once you gain control of Link, walk two screens to the right and enter the cave. You will find Link's Sword within this cave.
Bombs
- Once you arrive at Oderra Village; head left four screens, and up a screen. Slash the bushes in the north to find a free Bombs.
Magic Shield #1
- You'll need some bombs. After you get the sword, go left for a bit, then up, and then some more to the left. You'll pass by a bombable cave below, just work around a few screens to that spot. Bomb open the cave and make your way to the end to get the Magic Shield, which will help for Aquamentus.
Oderra Bow
- The Oderra Bow is found inside of a secret Cave within Oderra Village. Bomb the purple-roofed house that is one screen west of the Weathercock. Make your way through the Cave and defeat Aquamentus to get the Oderra Bow.
Wooden Arrow
- The Wooden Arrows are also found in the same Cave within Oderra Village, but you need to find a different entrance. Bomb the green-roofed building that is one screen south and east of the Weathercock. Make your way through and defeat Aquamentus to find the Arrow.
Bomb Bag Upgrade #1
Once you enter Oderra Graveyard; head up a screen, right two screens, down a screen, right two screens, and up a screen. Bomb the cracked large stone in the south-east to uncover the cave. Inside, go left a screen, and bomb the stones in the north. Go up a screen, and you can buy the Bomb Bag Upgrade for 165 Arrows. It will allow you to carry 12 bombs.
Level 1: Ancient Temple
Also known as the Ebenar Temple, the Ancient Temple is the first level of the fan-game Lost Isle. Similar to the Water Tempe in Ocarina of time, the player must raise and lower the water in order to progress to the next area. Consisting of only two keys and simple enemies, it is a fairly easy level apart from its size. The miniboss, four Red Darknuts, gaurd a switch that will allow the player to obtain the raft on the first floor. The boss of the Ebenar temple are two Landmolas and one Mother Landmola. Defeating them earns you a Heart Container and access to the Vasshinghon Flows.
Finding Level 2
Big Quiver and piece of heart
After Ebenar Temple, after Power Gauntlet From the start screen, go left though the beach past the movable rock that requires the Gauntlet. In that overworld box, go to the top left corner of the map screen. (the map you see is only a fraction of the overworld, and there are many big squares..) From there you'll reenter Dasa Woods from somewhere north of Ebenar Temple. Go through them. Go up a few sets of stairs to get to Zackerand Fields. Around there are two caves. The one you need you can enter from the screen with the movable block in the top right corner. In that cave is a pirate. In the maze the is a Big Quiver is up some stairs in the top right raft port. The piece of heart is in the bottom right corner.
Magic Upgrade
Keep looking one screen south of Oderra village (More towards the west side) for a strange looking emblem. Next to the emblem should be a cave. Make your way around the screens to get to the cave. Inside, you find a very helpful magic upgrade!
Power Gauntlet
Make your way to the screen that had the blue flower disappear after clearing level 1. Continue across the bridge into Vasshinghon Flows. Go a bit south and then right until you see a path splitting to go up. Take the up path and you should reach a cave below a big eye statue. You'll trap yourself in the cave, in which you'll get Power Gauntlets at the end of the cave path to help you get out of the cave.
Ocarina
Start where the blue flower was that died after you beat Ebenar Temple. From there, travel up, right, and cross the bridge. From there, go up. Move the block with your Gauntlets. Go up again, and move this block too. Go right, and over the bridge. From there, and go right until you can move up a screen. Move up. From the longhorn skull, move right to where the sign is. From there, travel up until you reach a staircase being blocked by a tree. Go right, and up. Move past the stairs, and go up some more. This will bring you to the Veven Basin. Go right all the way. Travel up through the log. You should be in Tahou Woods. Bomb the warp portal so you can get here easier. Go up a screen. Right a screen, up a screen. Go up the stairs and move the rock. Go up two screens. Behind a tree is a hidden chest. Open it and get an Ocarina!
The Ocarina can be used to make the eye of truth statues to vanish. <need to check for the name> Stand next to one of those statues and use the Ocarina.
Also very useful to help you warp to those purple trees you may have seen. This of course is only after you clear the corresponding Triforce Dungeon near the tree.
Magic Upgrade
From the cave with the Big Quiver, go left and then up a few screens to find a cave with that emblem to find another Magic Jar upgrade
Magic Scroll
In a house in Oderra. The house has an open door. Costs 260 Arrows. Gives Link a spin attack! Hold the sword to charge. Also useful to detect bombable walls and blocks by stabbing at the object of interest while charging for spin attack
Level 2: Sky Garden
The Sky Garden is level two of the fan-game Lost Isle. It is highly reccomended that the player brings a level 2 shield, as flying projectiles are not a rare sight. Consisting of two main ideas, the Tower of Hera's block-raising and lowering switches(Link to the Past) and the ability to fall to the other side of the level and enemies such as Peahats, Flying Jars, and Lynels, the Sky Garden is massive compared to level 1. Two keys will get you through it. The midbosses are multiple red wizzrobes who guard the Power Rod(Wand), and the bosses are four Digdoggers in two stages. Defeating the Digdoggers will get you a Heart Container and access to level 3.
Finding Level 3
Long Bow
In Oderra Village, there is a windmill with a hungry Moblin inside. Dropping a fish for him will grant you access to the room behind him. By entering the bed, you will be warped to an area called "Link's Dream". The minidungeon is a maze that tests the player's ability to see through cunning tricks and defeat difficult enemies. Elements such as warping you back to the minidungeon's entrance and walking into dead ends to progress can be frustrating, so trial and error will most likely play a role in beating it. After completing the level, the player will be warped back to the bed in the windmill, but a path to the right will be there. In that room, a monster will sell you the Long Bow for 500 arrows.
Piece Of Heart and Candle
Take the Warp to Dasa Woods. Go one down and one right. Two flowers are blocking your path. Use your Power Rod on the gemstone and the flowers will move out of your way. Go up through the log. There are 3 Dodongo here. Place a bomb in their mouths twice to beat them. After they die, collect the Piece of Heart! Afterwards, go up another screen. Open the chest. This will give you a Candle!
Weird Fish
The entrance to Glathriel Canyon is the same screen you got a Heart Piece on. From there, go down, burn the tree, and continue north. You'll reenter the canyon. Go north until you find a screen with a lake in the top-right corner, a pier, and a rock. From there, go left, then up. There's an open cave door here. In the cave, cross under the bridge. Keep going, and you'll find a chest. Open it, and get a Weird Fish(bait).
Glathriel Sword
Start at the raft screen again. From there, go up two sets of stairs. Continue to go North past another staircase. Go right when possible. Cut through the bushes and get through the secret path. Go down the stairs. Find your way through the cave. At the end (downstairs), open the chest and get the Glathriel Sword! This is more powerful. (Crikets now take one hit to kill instead of two.) Also, it has slightly longer range than the Wooden Sword.
Heart Piece
Go back to the Raft screen. Sail across, and you'll be right next to a Heart Piece!
Magic Shield
In Tahou Woods, two flowers die after Temple 2. From there, go up until you reach the Castle entrance. Go left through the bushes, then left and up. In the cave, kill all the enemies, and the chest will appear.
Level 3: Bhalstok Castle
Directly north of the flowers that died in Tahou Woods after the Sky Garden boss was defeated.
Bhalstok Castle is possibly the most difficult and rage-inducing level in the entire game. It is EXTREMELY recommended that you come here with the Glathriel Sword and the level 2 tunic. The level consists of multiple keys, difficult enemies, puzzle aspects, and painful footwork. The most difficult parts of the dungeon are traversing disappearing floor tiles and crossing narrow ledges while avoiding flying projectiles and other enemies. One misstep on either of these could cause you to start from floor 1 unless you opened up a shortcut. Most of the level is inside the castle, but occasionally you must loop around the castle walls to enter a different section of the castle's interior. One key requires that you exit the level entirely and to a cave leading to another key. There is also a hidden extra key, but finding it is almost a pure stroke of luck. Navigate level 3 with caution, or you'll regret it.
Compass
At the first fork, go right. Go right again. Enter the bottom left screen. Go left again. Kill the enemies. Behind the bottom right pillar is a block. Move it to the square above the top left pillar. This will make a chest appear. Open it for the Compass!
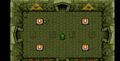
Triforce Dungeon 1
The first Triforce Dungeon can be found back in the swamp when the Ocarina is found. There is a eye of truth statue in the swamp to the far left and far north. Go there and play the Ocarina to go north and there will be a cave. Bomb the cave and enter. Inside the cave there will be a boulder that will need to be bombed. Keep going and there will be a Triforce Dungeon.
A few chambers in there will be a room that contains four paths and there will be letters on the ground. (R means right L means left and U means up) The pattern is: right up left up
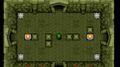
In the next puzzle room there will be blocks pointing in the direction of the pattern. The pattern is: right down right up
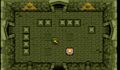
In the third puzzle room there will be blocks that go increasing order. there will be one block to the right and two blocks and three blocks in the north part of the room. The last part will be 4 blocks to the left. The pattern is: right up up left
The final room: (give credit to where credit is due) http://www.youtube.com/watch?v=sr2P9Ub9jfc view at 1:17 to 1:37 (if someone can figure this out and explain the puzzle that would be great.)
This last maze is a bit tricky. As you went through this place, you should have noticed letters on the floor in the rooms between the other mazes. From beginning to end, you saw an E, then an N, then an E and finally an N on the floor of the non-maze rooms. So in the last maze, you go East, North, East, North to reach the end.
Also takes some foot work to dodge the traps well. The trick to step forward just enough to trip the traps so that you can then move past them.
Triforce Room #1
Triforce Room #2
Triforce Room #3

Triforce Room #4


Triforce Dungeon 3
Go to the Southwestern entrance to Oderra Village. Go down to the first screen in Chovian Fields. To your right is a tree. Burn it down and continue right until you see a wall. Bomb it, and enter. Through the cave is Triforce Dungeon 3.
Overworld Map

Let's Play Lost Isle
Beginning in January of 2013, Webmaster of Zelda Dungeon Mases, began a Let's Play of Lost Isle. The first video can be found below while the complete playlist can be found at the Zelda Dungeon YouTube Channel.
Let's Play the Legend of Zelda: Lost Isle - Part 01