Level 6: The Dragon: Difference between revisions
(added gallery, improved infobox) |
Justac00lguy (talk | contribs) m (Adding walkthrough box) |
||
| Line 10: | Line 10: | ||
| walkthrough = [http://www.zeldadungeon.net/Zelda01-the-legend-of-zelda-walkthrough-07.php Text Walkthrough]<br>[http://www.zeldadungeon.net/Zelda01-the-legend-of-zelda-video-walkthrough-08.php Video Walkthrough] | | walkthrough = [http://www.zeldadungeon.net/Zelda01-the-legend-of-zelda-walkthrough-07.php Text Walkthrough]<br>[http://www.zeldadungeon.net/Zelda01-the-legend-of-zelda-video-walkthrough-08.php Video Walkthrough] | ||
}} | }} | ||
{{ZD|[http://www.zeldadungeon.net/Zelda01-the-legend-of-zelda-walkthrough-07.php#c7_2 '''Legend of Zelda''' Walkthrough Chapter 7: The Dragon]}} | |||
'''Level 6: The Dragon''' is the sixth [[dungeon]] in ''[[The Legend of Zelda]]''. Inside this dungeon lies the sixth [[Triforce Shard]], and that is the reason [[Link]] travels through this dungeon. The shape of this dungeon is of a head of a dragon, hence the name. This dungeon is located one screen up, one screen right, four screens up, two screens left, one screen down, one screen left, one screen up, two screens left, one screen down, one screen left, and finally one screen up from the [[Starting Screen]]. The [[Boss]] of The Dragon is known as [[Gohma (The Legend of Zelda)|Gohma]], the first version of the legendary [[The Legend of Zelda (Series)|''The Legend of Zelda'' series]] boss. | '''Level 6: The Dragon''' is the sixth [[dungeon]] in ''[[The Legend of Zelda]]''. Inside this dungeon lies the sixth [[Triforce Shard]], and that is the reason [[Link]] travels through this dungeon. The shape of this dungeon is of a head of a dragon, hence the name. This dungeon is located one screen up, one screen right, four screens up, two screens left, one screen down, one screen left, one screen up, two screens left, one screen down, one screen left, and finally one screen up from the [[Starting Screen]]. The [[Boss]] of The Dragon is known as [[Gohma (The Legend of Zelda)|Gohma]], the first version of the legendary [[The Legend of Zelda (Series)|''The Legend of Zelda'' series]] boss. | ||
Revision as of 11:28, June 12, 2013

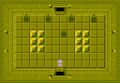
The Entrance to the Dungeon
Games | ||
Boss | ||
Mini-bosses | ||
Enemies | ||
Items | ||
Rewards | ||
| Guides | ||
|---|---|---|
Walkthrough | ||
In-depth guide:
Legend of Zelda Walkthrough Chapter 7: The Dragon |
Level 6: The Dragon is the sixth dungeon in The Legend of Zelda. Inside this dungeon lies the sixth Triforce Shard, and that is the reason Link travels through this dungeon. The shape of this dungeon is of a head of a dragon, hence the name. This dungeon is located one screen up, one screen right, four screens up, two screens left, one screen down, one screen left, one screen up, two screens left, one screen down, one screen left, and finally one screen up from the Starting Screen. The Boss of The Dragon is known as Gohma, the first version of the legendary The Legend of Zelda series boss.
Items
The main item of this dungeon is called the Magical Rod. This item attacks very similar to a fully powered Magical Sword. It shoots beams regardless of the amounts of hearts Link has left. It does the same amount of damage as the Magical Sword, as is a very reasonable option when considering how to defeat some of the harder enemies in the game. It is found in a side-scrolling section of the dungeon, which entrance is one screen left, six screens up, one screen right, and one screen up from the entrance of the dungeon. This item is actually not required to complete the game; it is completely optional.
Enemies
The Dragon introduces a single new enemy, called the Wizzrobe. These enemies are spell casting villians that are considered by many to be the hardest enemy in the game. All of the enemies found in this dungeon are listed below.
- Enemies in Level 6: The Dragon
Gleeok
A repeating boss from a previous dungeon, Gleeok is a fierce three-headed dragon that has been lowered to a Mini-Boss status in this dungeon. Gleeok guards the door that leads to the second half of the dungeon, and its defeat is required to complete the game. The battle is exactly the same as the last battle, the main difference beeing there is an extra head on this version. If Link has obtained the Magical Sword, each head takes only two hits to kill, making this battle muich easier. Affer defeating Gleeok, Link can immediately access the rooms that contain both the Map and the Magical Rod.
Gohma
The Boss of Level 6: The Dragon is known as Gohma, and is a single-eyed spider-like creature that is quite simple for a Boss this late in the game. Its only attack is to shoot fire-balls at Link that are unblockable; he must dodge them. The only difficult aspect of this Boss is figuring out what weapon to use against it. The Bow is the only item that can inflict damage upon Gohma, and it only requires one shot and its dead. After Link has successfully defeated Gohma, he can walk into the room where the sixth Triforce Shard is and collect it.
Old Man Location
There are two separate Old Man locations that can be found throughout the dungeon. The first location is very close to the entrance, only one screen right and one screen up. Inside this room, the Old Man gives Link a hint on how to defeat Gohma, the Boss. He says, "AIM AT THE EYES OF GOHMA".[1] This is a reference to how Link can use his Bow & Arrow to kill Gohma with one shot. The second location is located a lot closer to the end of the dungeon, and is a hint to how to access the next dungeon. The hint is, "THERE ARE SECRETS WHERE FAIRIES DON'T LIVE".[2] This is a reference to how Link can use his Recorder to dry up all the water in a Fairy Fountain that doesn't house a Fairy to reveal the entrance to Level 7: The Demon. These two hints are aguably the two best hints the Old Man gives Link all game.
Compass & Dungeon Map
Both the Compass and Dungeon Map appear in this dungeon, and are exactly the same as their previous versions.
Compass
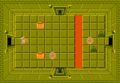
The Compass is used by Link to show him the location of the Triforce Shard that can be found in the dungeon via a blinking spot on the map. This helps give Link a sense of direction as he travels through the dungeon. The room that contains the Compass consists of five Green Zols. After Link has defeated all five of the Zols, the Compass appears. This room is located one room left and one room up from the entrance.
Dungeon Map
The Dungeon Map is also found in this dungeon, and it serves the function of displaying the entire layout of the dungeon for Link to see. This allows Link to find all the secret rooms in the dungeon. The room that the Dungeon Map is found in contains two Like Likes, two Zols, and two Bubbles. After Link kills all these enemies, the map appears. This room is one screen left, six screens up, and one screen right from the entrance to the dungeon.
Keys & Locked Doors
Level 6: The Dragon contains both Small Keys and Locked Doors all over the dungeon. In total, there are both five keys and Locked Doors throughout the dungeon. It is possible to only open four of the Locked Doors, as the fifth and final one can be avoided by using a Bomb to destroy a fake wall.
Gallery
Room with the Compass
Room with the Dungeon Map

Room with Gohma


References
- ↑ "AIM AT THE EYES OF GOHMA" — Old Man, The Legend of Zelda.
- ↑ "THERE ARE SECRETS WHERE FAIRIES DON'T LIVE" — Old Man, The Legend of Zelda.