Gallery:Zelda: Difference between revisions
| Line 139: | Line 139: | ||
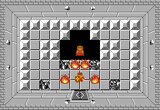
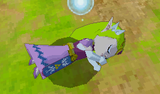
File:North Palace.png|Sleeping Zelda I in ''[[Zelda II: The Adventure of Link|The Adventure of Link]]'' | File:North Palace.png|Sleeping Zelda I in ''[[Zelda II: The Adventure of Link|The Adventure of Link]]'' | ||
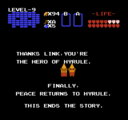
File:Zelda I thanks Link - TAOL.png|Zelda I thanks Link in the ending of ''The Adventure of Link'' | File:Zelda I thanks Link - TAOL.png|Zelda I thanks Link in the ending of ''The Adventure of Link'' | ||
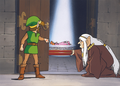
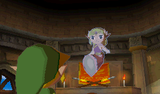
File:Zelda thanks Link in Hyrule Castle Basement - LTTPSNES.png|Zelda thanks Link for opening her cell early in ''[[The Legend of Zelda: A Link to the Past|A Link to the Past]]'' | |||
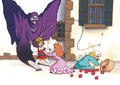
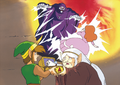
File:Zelda zapped by Agahnim - LTTPSNES.png|Zelda being sent to the [[Dark World]] by [[Agahnim]] in ''A Link to the Past''. | |||
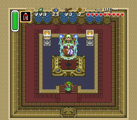
File:Return-Of-The-King.png|Zelda, with her father the [[King of Hyrule]] and the rest of the [[Seven Maidens]], in the ending of ''A Link to the Past''. | |||
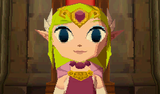
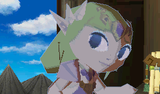
File:Enter-Zelda.jpg|Surprising Princess Zelda in ''Ocarina of Time 3D''. | File:Enter-Zelda.jpg|Surprising Princess Zelda in ''Ocarina of Time 3D''. | ||
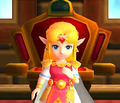
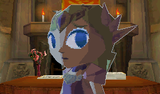
File:OoT3D-Princess-Zelda.png|Meeting Princess Zelda in ''Ocarina of Time 3D''. | File:OoT3D-Princess-Zelda.png|Meeting Princess Zelda in ''Ocarina of Time 3D''. | ||
Revision as of 20:43, September 6, 2020
A gallery of official artwork, sprites, models and screenshots focusing on Zelda.
Sprites and in-game models

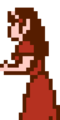
Zelda Sprite from The Legend of Zelda.

The sleeping Zelda I.
Sprite of Zelda I awake

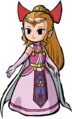
Princess Zelda sprite from A Link to the Past

Princess Zelda being sent to the Dark World by Agahnim.

N64 model of Child Zelda, as she appears in Ocarina of Time.
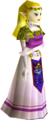
N64 model of Adult Zelda, as she appears in Ocarina of Time.

Princess Zelda opening a gate in Ganon's Castle in Ocarina of Time.

Zelda Sprite from Oracle of Seasons and Oracle of Ages.

Zelda Nintendo Gallery figurine from The Wind Waker.

Zelda front-facing sprite from Four Swords
Zelda left-facing sprite from Four Swords

Zelda front-facing sprite from Four Swords Adventures

Zelda Sprite from The Minish Cap.
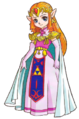
Zelda from A Link Between Worlds.
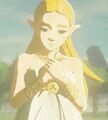
Zelda in her maiden's outfit from Breath of the Wild

Costume Mario sprite of Zelda from Super Mario Maker

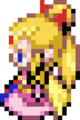
Cadence of Hyrule Zelda sprite


.png)


Artwork
The Legend of Zelda
- The Legend of Zelda

Zelda artwork from The Legend of Zelda.

Zelda Artwork from The Legend of Zelda.

Zelda Artwork from Million Publications The Legend of Zelda Strategy Guide


The Adventure of Link
- The Adventure of Link
The Prince of Hyrule siding with the Magician against Zelda I.
Impa tells Link of Zelda I being cast into a deep sleep
Impa shows Link the sleeping Zelda I.


A Link to the Past
- A Link to the Past & A Link to the Past (GBA)
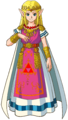
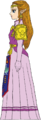
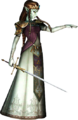
Key art of Zelda in her formal dress from A Link to the Past (GBA)

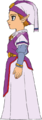
Key art of Zelda in her casual dress from A Link to the Past (GBA)


Ocarina of Time
- Ocarina of Time & Ocarina of Time 3D

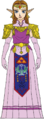
Artwork from Ocarina of Time.

Artwork from Ocarina of Time 3D.

Child Zelda Ocarina of Time colour design sketch, front view.
Child Zelda Ocarina of Time colour design sketch, side view.

Child Zelda Ocarina of Time colour design sketch, back view
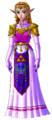
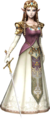
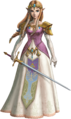
Adult Zelda key art from Ocarina of Time
Adult Zelda Ocarina of Time colour design sketch, front view.
Adult Zelda Ocarina of Time colour design sketch, side view.

Adult Zelda Ocarina of Time colour design sketch, back view


Oracle of Seasons & Oracle of Ages
- Oracle of Seasons & Oracle of Ages
Key art of Zelda from the Oracle games

The Wind Waker
- The Wind Waker & The Wind Waker HD

Zelda key art from The Wind Waker

Zelda key art from The Wind Waker HD


Four Swords & Four Swords Adventures
- Four Swords & Four Swords Adventures
Key art for both games

The Minish Cap
- The Minish Cap

Key art of Zelda from The Minish Cap

Twilight Princess
- Twilight Princess & Twilight Princess HD
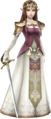
Zelda key art from Twilight Princess
Puppet Zelda from Twilight Princess.
Zelda art for Twilight Princess HD


Spirit Tracks
- Spirit Tracks

Key art of Zelda from Spirit Tracks

Key art of Zelda in Ghost form from Spirit Tracks


Skyward Sword
- Skyward Sword
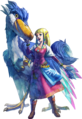
Zelda with her Loftwing.
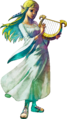
Zelda in her prayer outfit, with Goddess Harp

.png)
A Link Between Worlds
- A Link Between Worlds
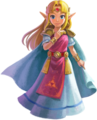
Key art

Hyrule Warriors
- Hyrule Warriors, Hyrule Warriors Legends & Hyrule Warriors: Definitive Edition
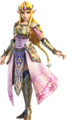
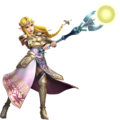
Zelda's main outfit from Hyrule Warriors
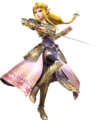
With Rapier weapon
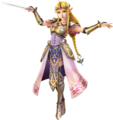
With Baton weapon
With Dominion Rod weapon

Ocarina of Time costume (DLC)
Twilight Princess costume (DLC)

Skyward Sword costume (DLC)

Ilia costume
Breath of the Wild costume from Definitive Edition


Breath of the Wild
- Breath of the Wild

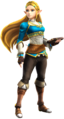
Zelda as she appears in Breath of the Wild
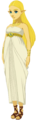
"Maiden's Outfit" Zelda concept art.

Crossovers
- Crossovers
![Super Smash Bros. Melee trophy 19: Zelda [Smash]](/wiki/images/thumb/f/ff/Zelda_-_SSB_Melee_Trophy_19_%28Zelda_Smash_1%29.png/70px-Zelda_-_SSB_Melee_Trophy_19_%28Zelda_Smash_1%29.png)
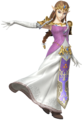
Super Smash Bros. Melee trophy 19: Zelda [Smash]
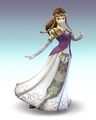
Zelda key art for Super Smash Bros. Brawl
Zelda key art for Super Smash Bros. for Nintendo 3DS and Wii U

Zelda key art for Super Smash Bros. Ultimate

Artwork of Zelda in Cadence of Hyrule
![Super Smash Bros. Melee trophy 19: Zelda [Smash]](/wiki/File:Zelda_-_SSB_Melee_Trophy_19_(Zelda_Smash_1).png)


Screenshots
The Legend of Zelda First Quest ending.
Zelda in the Second Quest of The Legend of Zelda
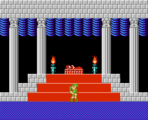
Sleeping Zelda I in The Adventure of Link
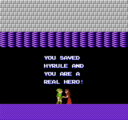
Zelda I thanks Link in the ending of The Adventure of Link
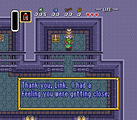
Zelda thanks Link for opening her cell early in A Link to the Past
Zelda being sent to the Dark World by Agahnim in A Link to the Past.
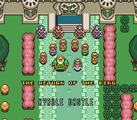
Zelda, with her father the King of Hyrule and the rest of the Seven Maidens, in the ending of A Link to the Past.

Surprising Princess Zelda in Ocarina of Time 3D.
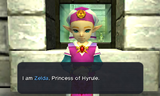
Meeting Princess Zelda in Ocarina of Time 3D.
Princess Zelda from Spirit Tracks.
Princess Zelda from Spirit Tracks.
Princess Zelda from Spirit Tracks.
Princess Zelda in Ghost form from Spirit Tracks.
Princess Zelda in Ghost form from Spirit Tracks.
Princess Zelda in Ghost form from Spirit Tracks.

Link and Zelda looking at the Tower of Spirits in Spirit Tracks.
Link and Zelda inside the Tower of Spirits in Spirit Tracks.


