Komo Shoreline Cave: Difference between revisions
mNo edit summary |
No edit summary |
||
| Line 1: | Line 1: | ||
{{Infobox|location | {{Infobox|location | ||
| image = | | image = [[File:Komo-Shoreline-Cave.jpg|400px]] | ||
| caption = | | caption = | ||
| game = ''[[The Legend of Zelda: Tears of the Kingdom|Tears of the Kingdom]]'' | | game = ''[[The Legend of Zelda: Tears of the Kingdom|Tears of the Kingdom]]'' | ||
| Line 13: | Line 13: | ||
| type = [[Cave]] | | type = [[Cave]] | ||
}} | }} | ||
'''Komo Shoreline Cave''' is a [[cave]] from ''[[The Legend of Zelda: Tears of the Kingdom|Tears of the Kingdom]]''. | '''Komo Shoreline Cave''' is a [[cave]] from ''[[The Legend of Zelda: Tears of the Kingdom|Tears of the Kingdom]]''. | ||
| Line 20: | Line 21: | ||
On top of the bridge like stone path are multiple [[Bokoblin]]s (exact levels depends on [[World Level]]), seemingly guarding a [[Treasure Chest|Wooden Treasure Chest]]. Following the path to the end, a small path to a smaller cavern with a small, shallow lake can be found. It appears to have been used as a campsite. The [[Treasure Chest]] beside it holds an [[Ancient Blade]]. | On top of the bridge like stone path are multiple [[Bokoblin]]s (exact levels depends on [[World Level]]), seemingly guarding a [[Treasure Chest|Wooden Treasure Chest]]. Following the path to the end, a small path to a smaller cavern with a small, shallow lake can be found. It appears to have been used as a campsite. The [[Treasure Chest]] beside it holds an [[Ancient Blade]]. | ||
Climbing up the wall at the small lake and moving forward receals another expansive cavern with five columns, where two [[ | Climbing up the wall at the small lake and moving forward receals another expansive cavern with five columns, where two [[Shock Like]]s reside, as well as more bokoblins. Looking west on the wall, between the first two columns, reveals a small alcove that is obstructed by grey rocks. Removing the rocks and following the pathway leads to another, smaller cave with a large column in the middle, filled with nine [[Ore Deposit]]s, one [[Luminous Ore Deposit]] and a [[Bubbulfrog]] just behind the column itself. | ||
Climbing up a little shallow lake at the end of the cavern before, leads to another set of red rocks. Breaking those reveals a small cave with a ladder, leading up to [[Highland Stable]] through the [[Highland Stable Well]]. | Climbing up a little shallow lake at the end of the cavern before, leads to another set of red rocks. Breaking those reveals a small cave with a ladder, leading up to [[Highland Stable]] through the [[Highland Stable Well]]. | ||
===Enemies=== | |||
<gallery mode=nolines> | |||
File:Blue_Bokoblin_-_TotK_Compendium.png|[[Blue Bokoblin]] | |||
File:Bubbulfrog_-_TotK_Compendium.png|[[Bubbulfrog]] | |||
File:Electric_Chuchu_-_TotK_Compendium.png|[[Electric Chuchu]] | |||
</gallery> | |||
===Bugs and Materials=== | |||
<gallery mode=nolines> | |||
File:Bomb_Flower_-_TotK_icon.png|[[Bomb Flower]] | |||
File:Brightbloom_Seed_-_TotK_icon.png|[[Brightbloom Seed]] | |||
File:Hylian_Shroom_-_TotK_icon.png|[[Hylian Shroom]] | |||
File:Stamella_Shroom_-_TotK_icon.png|[[Stamella Shroom]] | |||
File:Sticky_Lizard_-_TotK_icon.png|[[Sticky Lizard]] | |||
</gallery> | |||
{{references}} | {{references}} | ||
{{Cat|Tears of the Kingdom Caves}} | {{Cat|Tears of the Kingdom Caves}} | ||
Revision as of 21:38, January 19, 2024
Games | ||
Location | ||
Enemies | ||
Points of | ||
Items | ||
Materials | ||
| Attributes | ||
|---|---|---|
Type | ||
Komo Shoreline Cave is a cave from Tears of the Kingdom.
Tears of the Kingdom
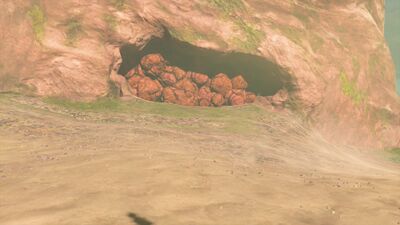
The Komo Shoreline Cave is located on the cliffside between Puffer Beach and the Komo Shoreline, southwest of the Horse God Bridge. The entrance is obstructed by red rocks and being removed, opens up to an expansive cavern which features a winding stone path encircled by a lake, with another bridge like path where the original one ends. The lake itself is filled with Mighty- and Armored Porgys.
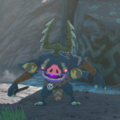
On top of the bridge like stone path are multiple Bokoblins (exact levels depends on World Level), seemingly guarding a Wooden Treasure Chest. Following the path to the end, a small path to a smaller cavern with a small, shallow lake can be found. It appears to have been used as a campsite. The Treasure Chest beside it holds an Ancient Blade.
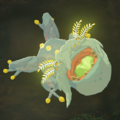
Climbing up the wall at the small lake and moving forward receals another expansive cavern with five columns, where two Shock Likes reside, as well as more bokoblins. Looking west on the wall, between the first two columns, reveals a small alcove that is obstructed by grey rocks. Removing the rocks and following the pathway leads to another, smaller cave with a large column in the middle, filled with nine Ore Deposits, one Luminous Ore Deposit and a Bubbulfrog just behind the column itself.
Climbing up a little shallow lake at the end of the cavern before, leads to another set of red rocks. Breaking those reveals a small cave with a ladder, leading up to Highland Stable through the Highland Stable Well.


