A Link Between Worlds Item Upgrades: Difference between revisions
Jump to navigation
Jump to search
Want an adless experience? Log in or Create an account.
No edit summary |
No edit summary |
||
| Line 13: | Line 13: | ||
|- | |- | ||
| [[Master Sword]] Lvl 1 || [[Lost Woods]] || Have all 3 [[Pendants of Virtue|Pendants]] || Greater Damage || [[File:ALBW-forgotten-sword.png|100px]] || [[File:ALBW-MasterSword.jpg|100px]] | | [[Master Sword]] Lvl 1 || [[Lost Woods]] || Have all 3 [[Pendants of Virtue|Pendants]] || || Greater Damage || [[File:ALBW-forgotten-sword.png|100px]] || [[File:ALBW-MasterSword.jpg|100px]] | ||
|- | |- | ||
| [[Master Sword]] Lvl 2 (Red) || [[Blacksmith (Hyrule)|Blacksmith]] (Hyrule) || 2 [[Master Ore]] || Double Damage || [[File:ALBW-MasterSword.jpg|100px]] || [[File:ALBW-master-sword2.png|100px]] | | [[Master Sword]] Lvl 2 (Red) || [[Blacksmith (Hyrule)|Blacksmith]] (Hyrule) || 2 [[Master Ore]] || || Double Damage || [[File:ALBW-MasterSword.jpg|100px]] || [[File:ALBW-master-sword2.png|100px]] | ||
|- | |- | ||
| [[Master Sword]] Lvl 3 (Gold) || [[Blacksmith (Lorule)|Blacksmith]] (Lorule) || 2 [[Master Ore]] || Doubles Damage further || [[File:ALBW-master-sword2.png|100px]] || [[File:ALBW-master-sword3.png|100px]] | | [[Master Sword]] Lvl 3 (Gold) || [[Blacksmith (Lorule)|Blacksmith]] (Lorule) || 2 [[Master Ore]] || || Doubles Damage further || [[File:ALBW-master-sword2.png|100px]] || [[File:ALBW-master-sword3.png|100px]] | ||
|- | |- | ||
| [[Hylian Shield]] || [[Turtle Rock (A Link Between Worlds)|Turtle Rock Dungeon]] || [[Ice Rod]] || Shield protects against magic attacks || [[File:ALBW-wood-shield.jpg|100px]] || [[File:ALBW hylian shield.png|100px]] | | [[Hylian Shield]] || [[Turtle Rock (A Link Between Worlds)|Turtle Rock Dungeon]] || [[Ice Rod]] || || Shield protects against magic attacks || [[File:ALBW-wood-shield.jpg|100px]] || [[File:ALBW hylian shield.png|100px]] | ||
|- | |- | ||
| [[Blue Mail]] || [[Swamp Palace (A Link Between Worlds)|Swamp Palace Dungeon]] || None || All damage taken is halved || [[File:ALBW-green-tunic.png|100px]] || [[File:ALBW-blue-mail.png|100px]] | | [[Blue Mail]] || [[Swamp Palace (A Link Between Worlds)|Swamp Palace Dungeon]] || None || || All damage taken is halved || [[File:ALBW-green-tunic.png|100px]] || [[File:ALBW-blue-mail.png|100px]] | ||
|- | |- | ||
| [[Red Mail]] || [[Lorule Castle|Lorule Castle Dungeon]] || None || All damage taken gets halved again, decreasing the damage to 1/4 of original || [[File:ALBW-blue-mail.png|100px]] || [[File:ALBW-red-mail.png|100px]] | | [[Red Mail]] || [[Lorule Castle|Lorule Castle Dungeon]] || None || || All damage taken gets halved again, decreasing the damage to 1/4 of original || [[File:ALBW-blue-mail.png|100px]] || [[File:ALBW-red-mail.png|100px]] | ||
|- | |- | ||
| [[Titan's Mitt]] || [[Desert Palace (A Link Between Worlds)|Desert Palace Dungeon]] || [[Sand Rod]] || Pick up bigger rocks || [[File:ALBW-power-glove.png|100px]] || [[File:ALBW-titans-mitt.png|100px]] | | [[Titan's Mitt]] || [[Desert Palace (A Link Between Worlds)|Desert Palace Dungeon]] || [[Sand Rod]] || || Pick up bigger rocks || [[File:ALBW-power-glove.png|100px]] || [[File:ALBW-titans-mitt.png|100px]] | ||
|- | |- | ||
| [[Nice Fire Rod]] || [[Mother Maiamai]] || | | [[Nice Fire Rod]] || [[Mother Maiamai]] || 10 [[Maiamai]]s* || || Bigger, longer lasting, and more powerful fire || [[File:ALBW-fire-rod.png|100px]] || [[File:nicefirerod.jpg|100px]] | ||
|- | |- | ||
| [[Nice Ice Rod]] || [[Mother Maiamai]] || | | [[Nice Ice Rod]] || [[Mother Maiamai]] || 10 Maiamais* || || Throw 4 ice shards at once || [[File:ALBW-ice-rod.png|100px]] || [[File:60px-Nice_Ice_Rod.png|100px]] | ||
|- | |- | ||
| [[Nice Sand Rod]] || [[Mother Maiamai]] || | | [[Nice Sand Rod]] || [[Mother Maiamai]] || 10 Maiamais* || || Sand pillars last longer, off sand range higher || [[File:ALBW-sand-rod.png|100px]] || [[File:60px-ALBW_Nice_Sand_Rod.png|100px]] | ||
|- | |- | ||
| [[Nice Boomerang]] || [[Mother Maiamai]] || | | [[Nice Boomerang]] || [[Mother Maiamai]] || 10 Maiamais* || ||Throw up to three boomerangs at once and improved speed and range || [[File:ALBW-boomerang.png|100px]] || [[File:niceboomerang.jpg|100px]] | ||
|- | |- | ||
| [[Nice Tornado Rod]] || [[Mother Maiamai]] || | | [[Nice Tornado Rod]] || [[Mother Maiamai]] || 10 Maiamais* || || Larger affected area || [[File:ALBW-tornado-rod.png|100px]] || [[File:60px-Nice_Tornado_Rod.png|100px]] | ||
|- | |- | ||
| [[Nice Hammer]] || [[Mother Maiamai]] || | | [[Nice Hammer]] || [[Mother Maiamai]] || 10 Maiamais* || || Doubled Damage and Range || [[File:ALBW-hammer.png|100px]] || [[File:Nice_Hammer.png|100px]] | ||
|- | |- | ||
| [[Nice Bow]] || [[Mother Maiamai]] || | | [[Nice Bow]] || [[Mother Maiamai]] || 10 Maiamais* || || 3 arrows at once || [[File:Bow_(ALBW).png|100px]] || [[File:nicebow.jpg|100px]] | ||
|- | |- | ||
| [[Nice Bombs]] || [[Mother Maiamai]] || | | [[Nice Bombs]] || [[Mother Maiamai]] || 10 Maiamais* || || Wider Range, more damage, and bigger bomb || [[File:ALBW-bomb.png|100px]] || [[File:Nice Bombs.png|100px]] | ||
|- | |- | ||
| [[Nice Hookshot]] || [[Mother Maiamai]] || | | [[Nice Hookshot]] || [[Mother Maiamai]] || 10 Maiamais* || || Faster shot that deals damage || [[File:Hookshot_(ALBW).png|100px]] || [[File:nicehookshot.jpg|100px]] | ||
|- | |- | ||
| [[Great Spin Attack]] || [[Mother Maiamai]] || | | [[Great Spin Attack]] || [[Mother Maiamai]] || All 100 Maiamais || || Wider range spin || [[File:No Image.png|100px]] || [[File:No Image.png|100px]] | ||
|- | |- | ||
| [[Super Lamp]] || [[Treacherous Tower]] || Complete [[Treacherous Tower]] on Advanced Mode once || Damage multiplied 8 times || [[File:ALBW-lamp.png|100px]] || [[File:Super Lamp.png|100px]] | | [[Super Lamp]] || [[Treacherous Tower]] || [[Ravio's Bracelet]] || Complete [[Treacherous Tower]] on Advanced Mode once || Damage multiplied 8 times || [[File:ALBW-lamp.png|100px]] || [[File:Super Lamp.png|100px]] | ||
|- | |- | ||
| [[Super Net]] || [[Treacherous Tower]] || Complete [[Treacherous Tower]] on Advanced Mode twice || Damage multiplied 8 times || [[File:ALBW-net.png|100px]] || [[File:55px-Super Net.png|100px]] || | | [[Super Net]] || [[Treacherous Tower]] || [[Ravio's Bracelet]] || Complete [[Treacherous Tower]] on Advanced Mode twice || Damage multiplied 8 times || [[File:ALBW-net.png|100px]] || [[File:55px-Super Net.png|100px]] || | ||
|} | |} | ||
(*) Each time Link returns 10 [[Maiamai]], he can choose one of the items he bought from Ravio to have it upgraded. | (*) Each time Link returns 10 [[Maiamai]], he can choose one of the items he bought from Ravio to have it upgraded. | ||
Revision as of 05:51, April 20, 2016
| This article is a stub. You can help the Zelda Dungeon Wiki by expanding it. |
In A Link Between Worlds, Link can upgrade the weapons that he has obtained. This feature, however, only applies to owned items; those rented from Ravio cannot be upgraded. Upgrades are available for each weapon when certain conditions are met, each of them described below.
| Item | Location | Requirement* | How to get it | Upgrade | Original | Upgraded | |
|---|---|---|---|---|---|---|---|
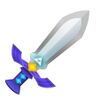
| Master Sword Lvl 1 | Lost Woods | Have all 3 Pendants | Greater Damage | 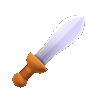 |
| ||
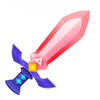
| Master Sword Lvl 2 (Red) | Blacksmith (Hyrule) | 2 Master Ore | Double Damage |  |
| ||
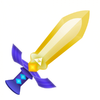
| Master Sword Lvl 3 (Gold) | Blacksmith (Lorule) | 2 Master Ore | Doubles Damage further |  |
| ||
| Hylian Shield | Turtle Rock Dungeon | Ice Rod | Shield protects against magic attacks | 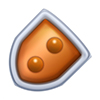 |
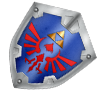
| ||
| Blue Mail | Swamp Palace Dungeon | None | All damage taken is halved | 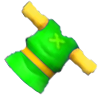 |
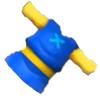
| ||
| Red Mail | Lorule Castle Dungeon | None | All damage taken gets halved again, decreasing the damage to 1/4 of original |  |
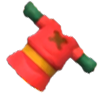
| ||
| Titan's Mitt | Desert Palace Dungeon | Sand Rod | Pick up bigger rocks | 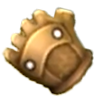 |
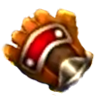
| ||
| Nice Fire Rod | Mother Maiamai | 10 Maiamais* | Bigger, longer lasting, and more powerful fire | 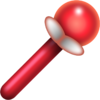 |

| ||
| Nice Ice Rod | Mother Maiamai | 10 Maiamais* | Throw 4 ice shards at once | 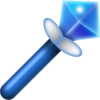 |

| ||
| Nice Sand Rod | Mother Maiamai | 10 Maiamais* | Sand pillars last longer, off sand range higher | 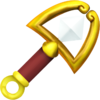 |

| ||
| Nice Boomerang | Mother Maiamai | 10 Maiamais* | Throw up to three boomerangs at once and improved speed and range |  |

| ||
| Nice Tornado Rod | Mother Maiamai | 10 Maiamais* | Larger affected area |  |

| ||
| Nice Hammer | Mother Maiamai | 10 Maiamais* | Doubled Damage and Range |  |

| ||
| Nice Bow | Mother Maiamai | 10 Maiamais* | 3 arrows at once | 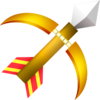 |

| ||
| Nice Bombs | Mother Maiamai | 10 Maiamais* | Wider Range, more damage, and bigger bomb | 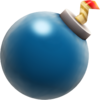 |

| ||
| Nice Hookshot | Mother Maiamai | 10 Maiamais* | Faster shot that deals damage |  |

| ||
| Great Spin Attack | Mother Maiamai | All 100 Maiamais | Wider range spin |  |

| ||
| Super Lamp | Treacherous Tower | Ravio's Bracelet | Complete Treacherous Tower on Advanced Mode once | Damage multiplied 8 times |  |

| |
| Super Net | Treacherous Tower | Ravio's Bracelet | Complete Treacherous Tower on Advanced Mode twice | Damage multiplied 8 times | 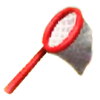 |
 |
(*) Each time Link returns 10 Maiamai, he can choose one of the items he bought from Ravio to have it upgraded.


