Boné Pond East Cave: Difference between revisions
RoseBadWolf (talk | contribs) mNo edit summary |
|||
| (10 intermediate revisions by 2 users not shown) | |||
| Line 1: | Line 1: | ||
{{Infobox|location | {{Infobox|location | ||
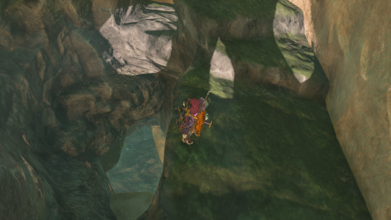
| image = | | image = [[File:Bone-Pond-East-Cave-2.jpg|400px]] | ||
| caption = | | caption = The central entrance to the cave | ||
| game = ''[[The Legend of Zelda: Tears of the Kingdom|Tears of the Kingdom]]'' | | game = ''[[The Legend of Zelda: Tears of the Kingdom|Tears of the Kingdom]]'' | ||
| location = East of [[Boné Pond]], [[Lanayru Wetlands]] | | location = East of [[Boné Pond]], [[Lanayru Wetlands]] | ||
| enemies = [[Horriblin]] ([[World Level|level may vary]])<br/>[[Rock Like]]<br/>[[Boss Bokoblin]] (level may vary)<br/>[[Bokoblin]] (level may vary) | | enemies = [[Horriblin]] ([[World Level|level may vary]])<br/>[[Rock Like]]<br/>[[Boss Bokoblin]] ([[World Level|level may vary]])<br/>[[Bokoblin]] ([[World Level|level may vary]]) | ||
| inhab = [[Hino]] | | inhab = [[Hino]] | ||
| pointsint = [[Maoikes Shrine]] | | pointsint = [[Maoikes Shrine]] | ||
| item = [[Bubbul Gem]] | | item = [[Bubbul Gem]] | ||
| materials = [[Brightbloom Seed]]<br/>[[Giant Brightbloom Seed]]<br/>[[Ore Deposit]]<br/>[[Rare Ore Deposit]]<br/>[[Hearty Truffle]]<br/>[[Brightcap]]<br/>[[ | | materials = [[Brightbloom Seed]]<br/>[[Giant Brightbloom Seed]]<br/>[[Sticky Lizard]]s<br/>[[Ore Deposit]]<br/>[[Rare Ore Deposit]]<br/>[[Hearty Truffle]]<br/>[[Brightcap]]<br/>[[Broadsword]] ([[World Level|level may vary]])<br/>[[Ruby]]<br/>[[Diamond]] | ||
| quest = | | quest = | ||
| related = | | related = | ||
| type = [[Cave]] | | type = [[Cave]] | ||
}} | }} | ||
'''Boné Pond East Cave''' is a location in ''[[The Legend of Zelda: Tears of the Kingdom|Tears of the Kingdom]]''. | '''Boné Pond East Cave''' is a location in ''[[The Legend of Zelda: Tears of the Kingdom|Tears of the Kingdom]]''. | ||
==''Tears of the Kingdom''== | ==''Tears of the Kingdom''== | ||
The Boné Pond East Cave is an expansive cave system, found east of [[Boné Pond]]. The cave system has four different entrance points and depending on the direction Link is traveling in from, the cave can be accessed in different ways. | |||
Traveling east of [[Boné Pond]], Link can follow the [[Blupee]] into the canyon to find the lowest cave entrance, near the waterfall. A [[Rock Like]] can be found at this entrance, with two [[Horriblin]]s right down the corridor. This leads out to the northern entrance of the cave. Between these two entrances to the cave, the [[Bubbulfrog]] can be found right in the middle, higher up on the east side. Near the Bubbulfrog, there is also some boulders that Link can break, leading to a location where Link can [[Ascend]]. This leads out to the western exit of the cave. | |||
Near the west entrance of the cave, there is a [[Blue Boss Bokoblin]], and several [[Blue Bokoblin]]. There is a treasure chest here that contains a [[Soldier's Broadsword]] that could scale up to a [[Royal Broadsword]], depending on [[World Level]]. After defeating the Bokoblin here, Link can rescue [[Hino]], the [[Blood Moon]]-obsessed researcher, from the iron cage to receive his rewards. Just outside of the west entrance of the cave, there is a treasure chest that holds a [[Purple Rupee]]. Just to the west of this entrance, in a small pond by the waterfall down the cliff, there is a chest in the water that contains a [[Ruby]]. | |||
From the room with the Boss Bokoblin, Link can ascend further up the cave. This leads Link to the [[Maoikes Shrine]]. Link can ascend even further here, leading to the exit found at the top of the cave. | |||
Outside the cave, just to the south, there is a massive enemy camp structure. While there is no rewards here, this camp extends up the cliffside and makes traversing the area much easier. | |||
===Maoikes Shrine=== | |||
{{main|Maoikes Shrine}} | |||
The Maoikes Shrine can be found in the room just above the [[Blue Boss Bokoblin]]. The shrine itself is one of [[Rauru's Blessings]]. There is a single treasure chest in the shrine which contains a [[Diamond]]. | |||
===Korok Seeds=== | |||
*Just southwest of the peak, there is a Korok block puzzle. There are three arrangements of blocks on the walls, making numbers on the dice of 1, 2, and 3. There is a fourth arrangement on the ground. Place the blocks in the ground to make the number 4 and get the [[Korok Seed]]. | |||
*Southeast of the peak there is a body of water with a circle of lilypads. Dive into the circle to get the Korok Seed. | |||
*Just northeast of the peak, there is a small shack. Shoot the bottle hanging here to get the Korok Seed. | |||
===Enemies=== | |||
<gallery mode=nolines> | |||
File:Blue_Bokoblin_-_TotK_Compendium.png|[[Blue Bokoblin]] | |||
File:Blue_Boss_Bokoblin_-_TotK_Compendium.png|[[Blue Boss Bokoblin]] | |||
File:Horriblin_-_TotK_Compendium.png|[[Horriblin]] | |||
File:Blue_Horriblin_-_TotK_Compendium.png|[[Blue Horriblin]] | |||
File:Bubbulfrog_-_TotK_Compendium.png|[[Bubbulfrog]] | |||
File:Rock_Like_-_TotK_Compendium.png|[[Rock Like]] | |||
</gallery> | |||
===Bugs and Materials=== | |||
<gallery mode=nolines> | |||
File:Brightbloom_Seed_-_TotK_icon.png|[[Brightbloom Seed]] | |||
File:Brightcap_-_TotK_icon.png|[[Brightcap]] | |||
File:Giant_Brightbloom_Seed_-_TotK_icon.png|[[Giant Brightbloom Seed]] | |||
File:Hearty_Truffle_-_TotK_icon.png|[[Hearty Truffle]] | |||
File:Sticky_Lizard_-_TotK_icon.png|[[Sticky Lizard]] | |||
</gallery> | |||
==Gallery== | |||
<gallery widths="400px" heights="220px"> | |||
File:Bone-Pond-East-Cave-1.jpg|The northern entrance of the cave | |||
File:Bone-Pond-East-Cave-3.png|The eastern entrance of the cave | |||
File:Bone-Pond-East-Cave-4.jpg|The southern entrance of the cave | |||
</gallery> | |||
{{references}} | {{references}} | ||
{{Cat|Tears of the Kingdom Caves}} | {{Cat|Tears of the Kingdom Caves}} | ||
Latest revision as of 14:40, February 9, 2024

The central entrance to the cave
Games | ||
Location | East of Boné Pond, Lanayru Wetlands | |
Enemies | ||
Inhabitants | ||
Points of | ||
Items | ||
Materials | ||
| Attributes | ||
|---|---|---|
Type | ||
Boné Pond East Cave is a location in Tears of the Kingdom.
Tears of the Kingdom
The Boné Pond East Cave is an expansive cave system, found east of Boné Pond. The cave system has four different entrance points and depending on the direction Link is traveling in from, the cave can be accessed in different ways.
Traveling east of Boné Pond, Link can follow the Blupee into the canyon to find the lowest cave entrance, near the waterfall. A Rock Like can be found at this entrance, with two Horriblins right down the corridor. This leads out to the northern entrance of the cave. Between these two entrances to the cave, the Bubbulfrog can be found right in the middle, higher up on the east side. Near the Bubbulfrog, there is also some boulders that Link can break, leading to a location where Link can Ascend. This leads out to the western exit of the cave.
Near the west entrance of the cave, there is a Blue Boss Bokoblin, and several Blue Bokoblin. There is a treasure chest here that contains a Soldier's Broadsword that could scale up to a Royal Broadsword, depending on World Level. After defeating the Bokoblin here, Link can rescue Hino, the Blood Moon-obsessed researcher, from the iron cage to receive his rewards. Just outside of the west entrance of the cave, there is a treasure chest that holds a Purple Rupee. Just to the west of this entrance, in a small pond by the waterfall down the cliff, there is a chest in the water that contains a Ruby.
From the room with the Boss Bokoblin, Link can ascend further up the cave. This leads Link to the Maoikes Shrine. Link can ascend even further here, leading to the exit found at the top of the cave.
Outside the cave, just to the south, there is a massive enemy camp structure. While there is no rewards here, this camp extends up the cliffside and makes traversing the area much easier.
Maoikes Shrine
- Main article: Maoikes Shrine
The Maoikes Shrine can be found in the room just above the Blue Boss Bokoblin. The shrine itself is one of Rauru's Blessings. There is a single treasure chest in the shrine which contains a Diamond.
Korok Seeds
- Just southwest of the peak, there is a Korok block puzzle. There are three arrangements of blocks on the walls, making numbers on the dice of 1, 2, and 3. There is a fourth arrangement on the ground. Place the blocks in the ground to make the number 4 and get the Korok Seed.
- Southeast of the peak there is a body of water with a circle of lilypads. Dive into the circle to get the Korok Seed.
- Just northeast of the peak, there is a small shack. Shoot the bottle hanging here to get the Korok Seed.
Enemies


Bugs and Materials
Gallery
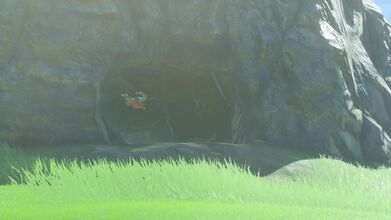
The northern entrance of the cave
The eastern entrance of the cave
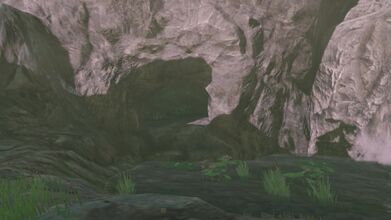
The southern entrance of the cave


