Ash Swamp: Difference between revisions
No edit summary Tags: Mobile edit Mobile web edit |
mNo edit summary |
||
| Line 2: | Line 2: | ||
| image = [[File:Ash-Swamp.png|400px]] | | image = [[File:Ash-Swamp.png|400px]] | ||
| caption = | | caption = | ||
| game = ''[[The Legend of Zelda: Breath of the Wild|Breath of the Wild]]'' | | game = ''[[The Legend of Zelda: Breath of the Wild|Breath of the Wild]]''<br/>''[[The Legend of Zelda: Tears of the Kingdom|Tears of the Kingdom]]'' | ||
| location= [[Blatchery Plain]], [[Necluda]] | | location= [[Blatchery Plain]], [[Necluda]] | ||
| inhab = | | inhab = | ||
| Line 9: | Line 9: | ||
}} | }} | ||
The '''Ash Swamp''' is a location found in ''[[The Legend of Zelda: Breath of the Wild|Breath of the Wild]]'' in the western half of [[Blatchery Plain]]{{ref|[[Creating a Champion]] p385, bottom-left image}}. | The '''Ash Swamp''' is a location found in ''[[The Legend of Zelda: Breath of the Wild|Breath of the Wild]]'' & ''[[The Legend of Zelda: Tears of the Kingdom|Tears of the Kingdom]]'', in the western half of [[Blatchery Plain]]{{ref|[[Creating a Champion]] p385, bottom-left image}}. | ||
==''Breath of the Wild''== | ==''Breath of the Wild''== | ||
| Line 19: | Line 19: | ||
===Animals=== | ===Animals=== | ||
<gallery mode=nolines> | |||
File:Bladed-rhino-beetle.png|[[Bladed Rhino Beetle]] | |||
File:Fairy-botw.png|[[Fairy]] | |||
File:Hightail-lizard.png|[[Hightail Lizard]] | |||
File:Restless-cricket.png|[[Restless Cricket]] | |||
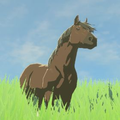
File:Hyrule-Compendium-Horse.png|[[Horse (Breath of the Wild)|Horse]] | |||
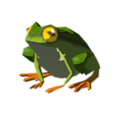
File:Hot-footed-frog.png|[[Hot-Footed Frog]] | |||
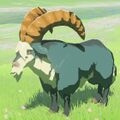
File:Mountain-goat.jpg|[[Mountain Goat]] | |||
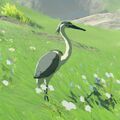
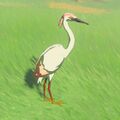
File:Blue-winged-heron.jpg|[[Blue-Winged Heron]] | |||
File:Pink-heron.jpg|[[Pink Heron]] | |||
File:Sneaky_River_Snail.png|[[Sneaky River Snail]] | |||
</gallery> | |||
===Items=== | ===Items=== | ||
<gallery mode=nolines> | |||
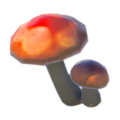
File:Hylian_Shroom.png|[[Hylian Shroom]] | |||
File:Hyrule Herb.png|[[Hyrule Herb]] | |||
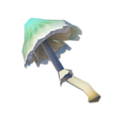
File:Silent_Shroom.png|[[Silent Shroom]] | |||
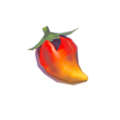
File:Spicy_Pepper.png|[[Spicy Pepper]] | |||
File:Stamella-Shroom.png|[[Stamella Shroom]] | |||
</gallery> | |||
===Enemies=== | ===Enemies=== | ||
<gallery mode=nolines> | |||
File:Decayed-guardian.jpg|[[Decayed Guardian]] | |||
File:Red-Bokoblin.png|[[Bokoblin|Red Bokoblin]] | |||
File:Blue-Bokoblin-Model.png|[[Blue Bokoblin]] | |||
File:Stalkoblin-Model.png|[[Stalkoblin]] | |||
</gallery> | |||
{{references}} | {{references}} | ||
{{Cat|Breath of the Wild Locations}} | {{Cat|Breath of the Wild Necluda Locations}} | ||
{{cat|Tears of the Kingdom Necluda Locations}} | |||
Revision as of 18:03, June 22, 2023
Games | ||
Location | ||
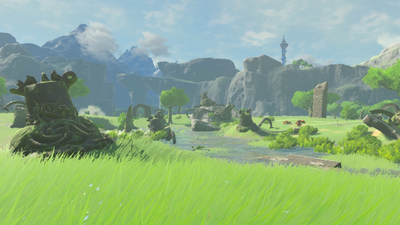
The Ash Swamp is a location found in Breath of the Wild & Tears of the Kingdom, in the western half of Blatchery Plain[1].
Breath of the Wild
The swamp is situated just northeast of the Dueling Peaks Stable, on the west side of Blatchery Plain. It is a marshy terrain with small ponds and old ruins found throughout the area. The swamp is littered with inactive guardians, although there is a single Decayed Guardian to the northwest that will come alive when Link draws near.
In the center of the Swamp, Link can find the Recovered Memory titled Zelda's Awakening. This clip shows Link doing battle with guardians during the Great Calamity. It is here that Link fell in battle and Princess Zelda's power was awoken, defeating all of the guardians in the process. Two Sheikah Warriors appeared, and Zelda instructed them to take Link to the Shrine of Resurrection.
The Ash Swamp has several Bokoblin in the area, including a Bokoblin Camp just to the northeast. The Bokoblin Camp has a treasure chest that contains an Opal gem. At the south end of the camp, the Bokoblin can be found guarding a treasure chest with a Double Axe, as well as several Traveler's Claymores that are in the ground. Two more treasure chests can be found to the west, one containing some Fire Arrows, with another having an Emblazoned Shield.
Animals
Items
Enemies
References
- ↑ Creating a Champion p385, bottom-left image


