This chapter covers the normal mode of Twilight Princess for the Nintendo Wii. If you are playing on the Nintendo Wii U, check out the Kakariko Village Twilight – HD Version.
- Chapter 1 – Ordon Village
- Chapter 2 – The Twilight
- Chapter 3 – Faron Woods: Twilight
- Chapter 4 – Forest Temple
- Chapter 5 – Kakariko Village: Twilight
- Chapter 6 – Death Mountain
- Chapter 7 – Goron Mines
- Chapter 8 – Lanayru Province: Twilight
- Chapter 9 – Lake Hylia: Sidequests
- Chapter 10 – Lakebed Temple
- Chapter 11 – The Master Sword
- Chapter 12 – Gerudo Desert
- Chapter 13 – Arbiter’s Grounds
- Chapter 14 – Scaling Snowpeak
- Chapter 15 – Snowpeak Ruins
- Chapter 16 – Sacred Grove: Round Two
- Chapter 17 – Temple of Time
- Chapter 18 – In Search of the Sky
- Chapter 19 – City in the Sky
- Chapter 20 – Palace of Twilight
- Chapter 21 – Cave of Ordeals
- Chapter 22 – Hyrule Castle
5.1 Hyrule Field
After completing the Forest Temple, you’ll be transported back to Faron, the Spirit of Light. He thanks you but states that your journey is far from over. Faron tells you to leave the woods and head west to the land protected by the spirit Eldin. There you will find those you seek, referring to Ilia, Colin, and the rest of the kids who were taken from Ordon Village. He warns that the lands ahead are covered in Twilight and Link will return to his beast form.

After a short talk with Midna you’ll regain control of Link. Run on over to Coro, the man running to the lantern shop, and from there head north to leave the Faron Woods, and enter Hyrule Field.


Walk straight ahead and defeat the two Bokoblins that are found here. Continue forward into the main area of the field and you’ll get a short cinematic of the land. There are a few new enemies in this area that we have to worry about. Kargaroks can be seen flying around portions of the field. If you recall, we saw a few Shadow Kargaroks in the twilight near Hyrule Castle. These creatures are identical to their shadow incarnations and are easily defeated with a simple sword slash. There are also bomb creatures known as Bomskits. These creatures run quickly all around the field and are harmless if left alone. However, if Link chases after them the bomskits will drop small remote bombs in their defense. Use the boomerang to stun the enemy and then finish it off with a sword slash. They leave Worms once defeated and Link can capture these worms within a bottle. They can later be used as fish bait to go with the fishing rod.


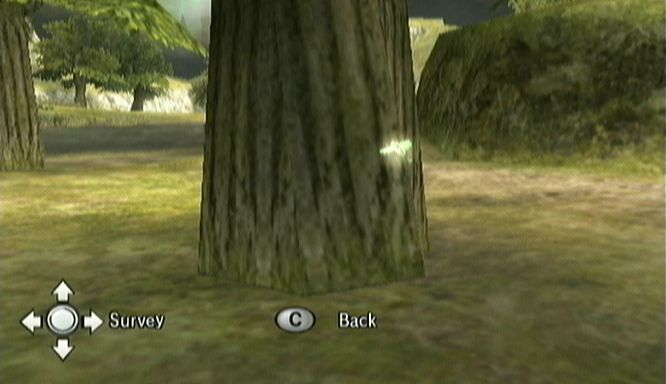
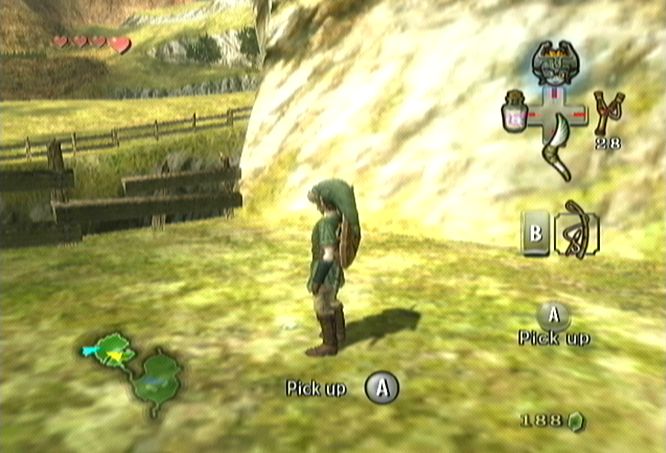
There is a dirt path just ahead; follow it up northward. It will start climbing uphill and if you look down below to the right, you’ll see a tree with a small golden spot at the bottom of its trunk. Jump down and run over to the tree to see that it is actually a tiny bug. Roll into the tree a few times and the bug will begin to fly away. Chase after it and when you are close enough, you will be able to press A to capture it. This insect is the Male Beetle. These insects are known as the Golden Bugs. There are 24 of them in total and they are one of the many side-quests within the game. If you view the start menu, you will now be able to view all the golden bugs that you have collected. These golden bugs will allow Link up upgrade his wallet at a later time.

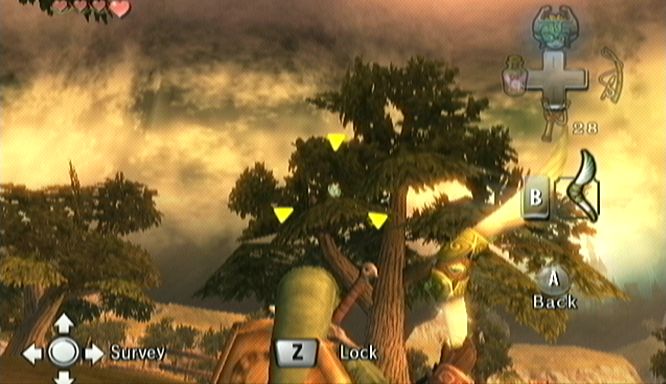
Return to the path we were at and continue following it up northward. The path will actually split with one end turning to the left and the other going straight across a bridge. At the split in the road there is a tree. Look up and you’ll see there is a piece of heart floating on one of the branches. Use the gale boomerang to retrieve your 4th Piece of Heart.

There isn’t much else at all to find in this portion of Hyrule Field, so begin making your way to the far west of this area. As you come close, a man will yell out, ‘HEEEEEY!’ It is the game’s resident Postman who resembles the postmen found in previous Zelda titles. He warns you of a black wall ahead that blocks the way. He wanted to deliver a few letters, but it seems impossible. He introduces himself as the postman and hands a letter to Link. He explains how to read letters and then runs off. If you go to the menu, you’ll see there is a spot for letters. The letter that he gave you is just an introductory letter.


One thing you might have noticed is that the time of day shifts while Link is in Hyrule Field. If Link is in the field long enough it will turn into nighttime and a new enemy known as a Stalhound will appear. This enemy is a doglike creature that only appears in Hyrule Field when it is nighttime. It will come from underground and dash towards Link. Link can easily avoid the creature but if you’d like, a simple sword strike will defeat it.
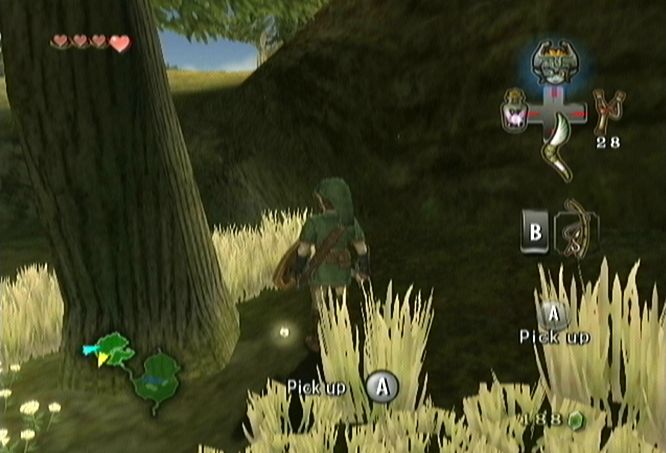
Continue traveling westward along the path and you’ll bump into another dirt path. Take this one northward and you’ll find a small pond to your right. You’ll also see a higher cliff on your left. Just head northward until you reach the end of the cliff on the left. Continue passed it just a bit and then turn around. On the cliff you’ll see a tree that has another one of those golden spots, indicating another golden bug. Use the gale boomerang to bring the bug over to you. Then walk close to it and capture it just as you did before to get the Female Beetle.


Now head back southward on the path and continue on it as it turns westward. Take it and you’ll eventually come to a huge wall of twilight just as before. Midna will warn you that you will turn into a wolf if you step through. Walk forward and have Midna pull you into the world of twilight.


5.2 Kakariko Gorge in Twilight
The next time you appear, you’ll be in the twilight world and will transform into wolf Link once again. Follow the path westward and you’ll find the wooden sword that you gave to Talo earlier. It has the scent of the kids from Ordon Village. Sniff at it and wolf Link will learn the Youth’s Scent. Now if you use wolf Link’s senses, you’ll be able to see where the children have been taken.


Follow the scent but don’t just stay in the view of your senses the whole time since you won’t be able to see enemies. Toggle between regular view and sense view as you follow the path. You’ll eventually come to three more shadow beasts that are in your way. Defeat them just as you had done before, making sure to never leave just one alive. Once defeated, they will be sent into the sky and the wall of twilight will disappear. The bridge that leads passed the gap is missing, preventing Link from traveling forward.


Midna will do some explaining about the portals that are viewable on your map. Every time you defeat the shadow beasts, a portal is open in the sky. These portals can be used as warp points for Midna while Link is in wolf form. Midna will now offer to warp you over back to the Faron Woods to try and find the bridge. Warp over to the portal that is in N. Faron Woods.
You’ll appear back in the woods and Midna will say it is your job to find the bridge. Actually, just look to your right and the bridge is right there. Walk over to it and press up on the d-pad to speak with Midna. She’ll offer to take it and warp you back. Click warp and the map pops up. Select the Eldin Province and then select the Kakariko Gorge.


You’ll be warped back to the field and the bridge will be put in place. Use your senses and follow the scent of the kids. Watch out for the Bokoblins while you are following the scent. You’ll eventually come to a gate with two Bokoblins on the other side. Midna will point out an area where you can dig through. Defeat the two enemies and then head into Kakariko Village.


5.3 Sixteen Tears of Light
After a brief cinema run forward and fight off three more shadow beings to create another portal in the sky. Once defeated, the Light Spirit Eldin will awake and call you over. It will introduce itself and then retell all that stuff about Link being chosen by the gods, etc, etc, etc. Eldin will then give you another Vessel of Light that Link needs to use to collect tears to return the world to normal. Once again the Spirit will mark where all the shadow insects are on your map.


Use your senses again and you’ll see the path from the youth’s scent. It will lead into the nearby building. You can listen in through the window but you don’t get much out of it. Walk over to the north side of the building and you can use Midna to jump on to the roof. Stand in the center and it will cave in allowing wolf Link to fall in as well.

Use your senses and you will see a short cutscene and be introduced to some of the villagers of Kakariko. The guy with the mask on is Barnes, who runs the bomb shop in Kakariko Village. The kids of Ordon Village can be found here as well, protected by Renado. There is another child here, whose name is Luda, and she is the daughter of Renado. You hear a short story about what the beasts of village had done. Renado explains that there is a cellar in the house but it will only open when all the candles have been lit. Colin is seen trying to settle Beth down, but to no avail. The kids have faith that Link will come to save them all.
Once you gain control of wolf Link, you’ll see a stick nearby. Lift it up and take it to the fire that Barnes lit up. Light up the stick and then run around the stairs in the house and light up all the candles. The statue in the center of the room will move over, revealing the entrance to the cellar. Drop down into the cellar below.


Use your senses and you’ll find a few of the Shadow Insects. Defeat them just as before and recover the first three light essences. You can’t climb back up the same way you came in so this time head to the north side of the cellar. Jump up the wooden planks and you’ll appear outside in the Graveyard.


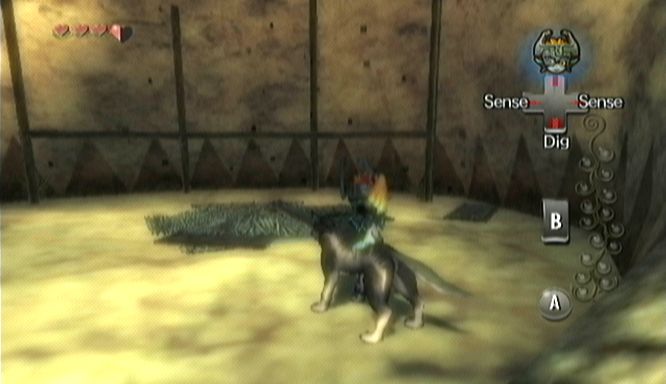
There are a few Shadow Keese in this area but nothing that is too difficult. If you look at the map there is also a Shadow Insect. Walk over and dig it up to reveal the insect. It is a smart little guy and will run away, but you can just use Midna’s charged attack to catch him in its tracks and recover tear number four. Walk over to the east side of the Graveyard and then return to Kakariko Village.


Walk towards the main part of town and on the right side you’ll see a sign that reads, ‘Dead End Ahead’. Don’t mind this for now but just left of the path is a building. There is a small hole on the side but there is a Shadow Kargarok that is here. Defeat the enemy and then crawl through the hole into the building.
Jump up from this small pit and you’ll be behind the counter of an abandoned general store. Climb the shelves to the corner that is marked by an insect. Defeat it and recover tear number five. Leave the house through the same entrance that you came in by.


Now climb the path where the sign said it was a dead end. You see another sign that warns you not to jump over the gap. Do so anyway and then enter the Kakariko Village hotel, known as the Elde Inn. Drop down to the bottom of the room and you’ll see that the Shadow Insect is just above the fireplace in the corner of the room. Grab one of the wooden sticks and then jump on the table that is on the other side of the room. From here jump over and light the stick on fire using the torch. Light up the fireplace and the Shadow Insect will come running out. Defeat it just as before and recover tear number six.
Go through the door on the left side of the room and you’ll encounter two Bokoblins here. Defeat them and open the chest in the southwest corner for some rupees. Climb the steps of the room and fight off a third Bokoblin at the upper level. Go through the room to the north and use your senses to find the next Shadow Insect along the wall. Defeat it and recover the 7th tear into the Vessel of Light. Now return to the first room where you entered the inn from. Climb to the top and exit the inn.


Jump off the balcony of the inn and cross to the other side of buildings. Start at the south of the grouping of buildings. There is a small building that you can climb on to the roof of. From there jump over from building to building continuing across a few buildings until you reach one where the roof is patched up. Just stand in the middle of the area and it will cave in.


You can see on your map that a Shadow Insect is in this room. Push the crate and then defeat the insect that is revealed for the 8th tear. Afterwards, target Midna on the opposite side of the room from the bed and make two jumps to exit through the roof.
Jump off the building and the next building northward is Barnes Bomb Shop. Just north of it is some sort of shack. Climb up the shack and then jump through the glass window to enter Barnes shop. Climb up the stairs and move towards where the Shadow Insect appears on your map. It is behind a shelf which will fall down if wolf Link dashes into it. Do so and defeat the insect for tear number nine. Climb the shelf and exit through the window up there.


You’ll now be on top of Barnes shop. Climb the steps and turn to your left to see one of the insects sparking around. It will crawl into the small building nearby. Follow it into the building by crawling through the small hole. This is another case where the insect is hiding in the fireplace. Grab the stick that is nearby and light it up from the small fire on the other side. Light the fireplace and the entire building goes up in flames! Midna will run out of the building, so quickly leave right behind her. As you leave you’ll see the entire building explode and three more light essences will appear for you to collect. Walk on over and grab numbers ten, eleven, and twelve.


Walk over to the far northwest corner of the village. Walk up a series of paths that lead you higher and you’ll reach the highest building within the village. Use your senses and dig under the side of the building to get inside. Break the barrels in the corner of the room to reveal the insect. Then defeat and recover it for the 13th tear. Dig your way out of the house.


There are still three more tears to go but none of them are here in Kakariko Village. Jump down to the bottom of the village and head northward. Take the path to the left that leads towards Death Mountain.
There are a series of rocks on the left side here. Use Midna to jump up them and scale the first part of the mountain. There is a Goron here who is standing guard. You can use your senses and listen to him and he basically mentions that the humans and gorons don’t have a good relationship going right now. Continue northward and defeat the Shadow Vermin that are crawling around the ground.


You’ll eventually come to another wall but there are small crates on the right side. Use them to climb up and then continue northward. You’ll reach an area where there are some geysers shooting steam that hurts you if you touch it. Use your senses to see the single Shadow Insect in this area. It will bury itself in the ground so use your dig ability to bring it back up. Defeat the insect for the 14th tear.
On the higher cliff right by the 14th insect you’ll see a Howling Stone. Walk over to it and click listen. Press A and howl the song just as the statue howled it. Hold A and then either press up for the high notes or down for the low notes. Just holding A will cover the middle. Howl the tune and you will appear on a cliff with the golden wolf. Press A and this time it has the tune already set, so just copy it and howl it once more. The song is actually that of the Song of Healing from Majora’s Mask. The wolf tells you to take your sword in hand and find him and then the location is placed on your map. We will return here shortly and learn the next hidden ability.


Continue heading northward along the winding path and you’ll eventually reach Death Mountain. You’ll see four Shadow Beasts at the area below. Defeat them and it will create a new warp portal. They are a bit tougher because the wall is not a big circle like it was before. Nonetheless, they aren’t too bad and shouldn’t give you much trouble.


Afterwards, walk over to the gate on the west side and use your senses to see one of the Shadow Insects. Dash against the gate and it will fly off. Defeat it for the 15th tear.
Just next to the gate there is a small platform that you can stand on. Do so and from there you will be able to jump over to Midna to get to a higher point of Death Mountain. You’ll notice there are several different geysers here that will shoot steam out. Just wait for the steam to settle and run across.


At the end of the line there is a narrow platform where wolf Link can climb. Climb up a bit and then use Midna to jump to a higher section of Death Mountain. There is a Goron up here but nothing else worth while. Jump off the higher platform to get to a hot spring. There are a bunch of Shadow Vermin running around. Defeat them and use your senses to spot the 16th Shadow Insect. Defeat it and capture the final tear to fill up the Vessel of Light.
You will automatically be transported to Eldin, the Spirit of Light. The area will return to normal and Link is back to his normal self. Eldin mentions that the second fused shadow is held by the Gorons and Link must cleanse the evil that has become of the area.


5.4 Reuniting with Epona
Link walks forward and Colin, Talo, Malo, and Beth coming running towards him. Renado and his daughter Luda also appear and Renado formally introduces himself to Link. Renado explains that the dark beasts attacked but even worse was the change of the Goron tribe. They were long friends of the people of Kakariko but suddenly changed and won’t permit entry into their mines. Renado asks Link to return the children to Ordon Village.


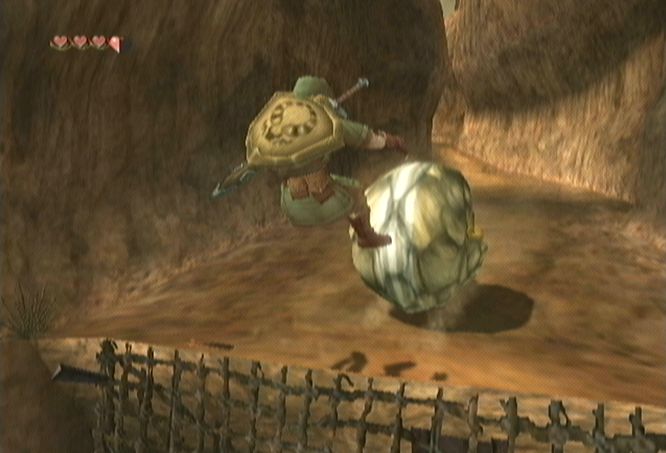
Ignore Renado’s request and return to the road to Death Mountain. Just climb the wall straight ahead and you’ll be met with an angry Goron at the top. He yells that there are no humans allowed and rolls towards Link. A button appears where you can grab him, but the Goron is too large and you’ll just be sent backwards and eventually off the cliff. There is not much you can do right now so turn around and head back to Kakariko Village.

Renado meets you once you arrive at Kakariko Village and tells you the Gorons only recognize strength. A normal person could never persuade them. Renado hints that he knows Bo, the mayor of Ordon, and he could help Link. He also mentions that it is best to keep the children in Kakariko since it is not safe to bring them to Ordon without a horse and carriage. He asks Link to tell their parents they are safe and free from harm.
Walk through town and you’ll see a scene of Epona running wildly with two Bulblins on her. Epona will lose them and Link will jump on. You’ll have to seize her as she is out of control. You will have to press left and right as they appear on the screen and then A to fully seize her. You can only warp via portals in wolf form so you’ll have to use Epona to get back to Ordon Village. Leave the village by exiting to the east.


5.5 Journey Back to Ordon
The gate is still here but with Epona you should be able to jump over it. This area is still known as Hyrule Field even though it’s part of Eldin Province. This section is appropriately labeled the Kakariko Gorge, given its geographical location and attributes.
There are a few things we can take care of within the Kakariko Gorge. First off, as you ride forward, the postman should run by and stop you. The letter is from Ooccoo, the bird like creature we saved in the Forest Temple. She thanks you for meeting her and depending on if you used her in the Temple or not, Ooccoo reveals that she has a son and will introduce him when you bump into each other later.

There are two golden bugs that we can find within this area. Since we are in the middle of a specific part of the game, time is locked during day time. Thus, it could be quite hard to find these two golden bugs, but this is your first opportunity to do so. If you are having trouble locating them, just return later in the game when it is dark and the gold bugs will glow brighter, making it easy to find them.
Ride Epona towards the bridge and once you cross it, dismount from Epona. The golden bug is just at the edge where the grass and bridge meet and it will be crawling around. Just walk up to it and catch the Male Pill Bug.

Its female counterpart is a bit more difficult to find. At the southwest portion of the Kakariko Gorge, you will find a ton of tall grass, three trees, and some flowers. The golden bug lies within the triangle of trees, often times underneath some of the tall grass. Cut down all the tall grass and once you finally do find it, just press A to grab the Female Pill Bug.
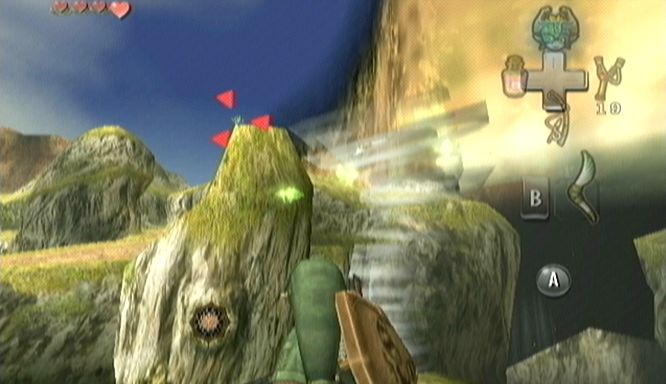
There is also a new heart piece that you can obtain. Ride over to the northeast corner of this area. The gorge cuts through to the northeast and in the middle of the gorge there are two large rock pillars. At the very top of the large one there is a heart piece. Use the gale boomerang and target the Heart Piece to bring it over. This should be your 5th heart piece now which will increase Link’s overall health to five full hearts.

Jump onto Epona and ride the horse to the east to get back to the Faron Province. There isn’t anything new for you to find here so just head south back into the Faron Woods. Ride through the woods and head south to return to the Ordona Province.
Cross the bridge and then ride over the spring. If you completed the howling stone on Death Mountain, the golden wolf will be waiting for you here. Walk over to it and like before you’ll be taken into a cloudy area and the hero’s shade appears. He is going to teach you another skill, but you must prove you have perfected the final blow. Strike the warrior to ground and deliver a final blow. The warrior will now teach Link the Shield Attack. To perform the attack, z-target the enemy and thrust the nunchuck forward. This will send your shield at the enemy and stun him for a short time, allowing free shots with the sword. The shield attack can also be used to repel enemy projectile attacks. Once you have perfected the attack you will return to the Ordon Spring.


Afterwards, jump back onto Epona and ride back into Ordon Village.
- Chapter 1 – Ordon Village
- Chapter 2 – The Twilight
- Chapter 3 – Faron Woods: Twilight
- Chapter 4 – Forest Temple
- Chapter 5 – Kakariko Village: Twilight
- Chapter 6 – Death Mountain
- Chapter 7 – Goron Mines
- Chapter 8 – Lanayru Province: Twilight
- Chapter 9 – Lake Hylia: Sidequests
- Chapter 10 – Lakebed Temple
- Chapter 11 – The Master Sword
- Chapter 12 – Gerudo Desert
- Chapter 13 – Arbiter’s Grounds
- Chapter 14 – Scaling Snowpeak
- Chapter 15 – Snowpeak Ruins
- Chapter 16 – Sacred Grove: Round Two
- Chapter 17 – Temple of Time
- Chapter 18 – In Search of the Sky
- Chapter 19 – City in the Sky
- Chapter 20 – Palace of Twilight
- Chapter 21 – Cave of Ordeals
- Chapter 22 – Hyrule Castle
