This chapter covers the normal mode of Twilight Princess for the Nintendo Wii. If you are playing on the Nintendo Wii U, check out the In Search of the Sky – HD Version.
- Chapter 1 – Ordon Village
- Chapter 2 – The Twilight
- Chapter 3 – Faron Woods: Twilight
- Chapter 4 – Forest Temple
- Chapter 5 – Kakariko Village: Twilight
- Chapter 6 – Death Mountain
- Chapter 7 – Goron Mines
- Chapter 8 – Lanayru Province: Twilight
- Chapter 9 – Lake Hylia: Sidequests
- Chapter 10 – Lakebed Temple
- Chapter 11 – The Master Sword
- Chapter 12 – Gerudo Desert
- Chapter 13 – Arbiter’s Grounds
- Chapter 14 – Scaling Snowpeak
- Chapter 15 – Snowpeak Ruins
- Chapter 16 – Sacred Grove: Round Two
- Chapter 17 – Temple of Time
- Chapter 18 – In Search of the Sky
- Chapter 19 – City in the Sky
- Chapter 20 – Palace of Twilight
- Chapter 21 – Cave of Ordeals
- Chapter 22 – Hyrule Castle
18.1 Restoring Ilia's Memory
You’ll appear back within the Temple of Time near the pedestal of time. Walk down the stairs but don’t leave the temple quite yet. Walk to the southwest corner of the room and use the dominion rod on the statue that is here. Pull it out and walk behind the statue to find a treasure chest. Open it up to get a Piece of Heart.
Now walk to the southeast portion of the room and pull this statue back as well. Walk behind and you will see a Poe floating around. Transform into Wolf Link and defeat it to get the 54th Poe Soul.
With those two things out of the way, climb the steps and exit the Temple of Time. Back outside, you’ll meet up with Ooccoo once again. She mentions the dominion rod but says that it has been around for quite some time and that its magic has been exhausted. Remember you were in a different time era while in the temple, so the dominion rod worked perfectly fine. In the outside world, the dominion rod is rendered useless since it has no magic. Ooccoo will mention statues that respond to rod and then float away. Midna gives her two cents of information and you’ll regain control of Link.


Talk to Midna and warp over to Kakariko Village. Transform back into human Link and enter Renado’s house within the village. Inside of the house, you’ll notice Darbus, the giant Goron who we battled in the Goron Mines. You’ll also see Gor Coron, one of the Goron elders. Both Gorons are inside of Renado’s house. Darbus is an acquaintance of Ilia, who is also in Renado’s house. Speak with Renado and he’ll mention Shad, one of the members of Telma’s bar. He has come to the house to research a statue that is in the basement. He gives you Renado’s Letter and tells you to show it to Telma. This hopefully will help regain Ilia’s memory.


You can drop to the sanctuary below and speak with Shad. He mentions the sky beings known as the Oocca. On the statue there is some writing that translates to ‘awaken us with the word that breaks the seal’. After that’s over with, climb out of the sanctuary, leave Renado’s house, and warp back to Castle Town. Transform back into a human and enter Castle Town. Walk over to the south part of town and show Renado’s letter to Telma. After speaking with Telma, she will mention that the doctor was the first to look at Ilia. Telma than gives Link the Invoice. Leave Telma’s bar and make your way to the west side of town.

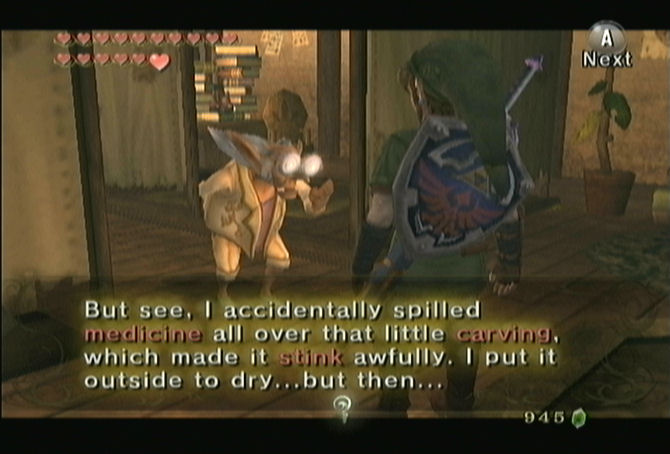
The Medical Clinic is the building that is right next to the west gate. Go inside and speak with the Dr. Borville. Show him the invoice and he’ll mention something about a wooden statue that the young lady had. He mentions that he spilled medicine all over the carving so he put it outside to dry. It was then stolen.
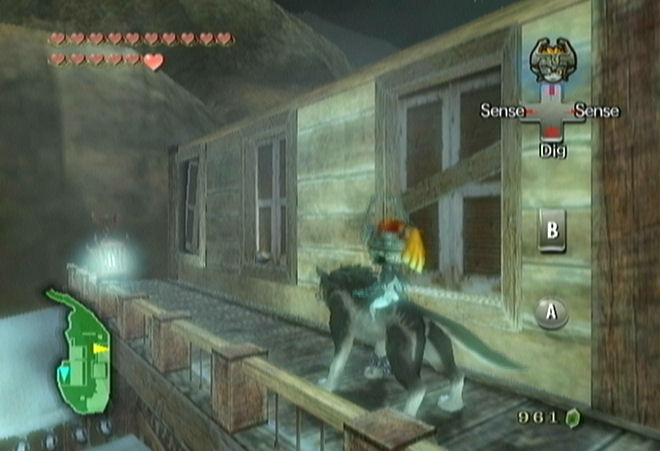
Leave through the west gate so that you can transform back into Wolf Link. Go back into Castle Town and use your senses to track the Medicine Scent. Follow the scent and it will take you back to the south road of town. It leads towards Telma’s bar but stops at Telma’s cat, Louise. Speak with her and she mentions Ilia’s wooden statue. Louise stole the wooden statue but it was then taken from her by dog beasts. She mentions that these dog beasts lurk just outside the south gate but only come out at night. Leave through the south gate and wait for nightfall.


The dogs are found burrowed under ground near the Goron by the south road. Just walk around and they’ll come up from underground. Use Midna’s attack as Wolf Link to defeat them quickly. Once they have all been defeated, a Wooden Statue will tumble towards you. Warp back over to Kakariko Village.


Transform back into a human and enter Renado’s house. Walk over to Ilia and show her the wooden statue. She mentions being confined with somebody, and that somebody saved her. That person then gave her this wooden statue. Gor Coron then jumps in and says that the statue belonged to the tribe that once protected the Hylian royal family. He mentions that there is a hidden village on the far side of the Bridge of Eldin. He mentions that certain rocks have blocked the path and then sends Darbus out to the location. The location is marked on your map, just north of the Bridge of Eldin. Leave Renado’s house.
18.2 The Hidden Village


Warp over to the Bridge of Eldin and then run northward from there. Enter the cave area that is marked on your map and you’ll see Darbus punching at some boulders. Walk up to him and he’ll break through the final boulders. He mentions the Hidden Village is straight ahead but there are twenty enemies in the village that Link must defeat them to save the girl. He tells you to destroy them before they spot you. Darbus will then roll away.


Walk forward and you’ll get a scene of the village, filled with twenty Bulblin Archers. A picture of a Bulblin head with ’20’ will appear on your screen. This shows how many Bulblins are left in the area. The twenty Bulblins are scattered all throughout the village, with many of them residing on tall towers. They are all pretty easy to find and defeat. This village is probably one of the very few areas where Link can actually use the hawkeye with the bow and make it useful.
Near the entrance to town and by the barrel of dynamite is the first Bulblin. If you killed this Bulblin fast enough, the second one should be walking in front of where he was, near the town sign. If not, he can be found in the building to the right.


The third Bulblin is on the left side, on the first building nearby the hanging grate. The fourth Bulblin is directly across from him, on the building to the right side.


The fifth Bokoblin is again on the left side, on the walkway of the second building. The sixth Bulblin can be found right down the center line, near the end of the row of buildings.


The 7th and 8th Bulblins can be found on the last building down the center line, both standing directly across from each other.


The 9th Bulblin is in the first building to the right, standing on the higher ledge. Number 10 can be found in the lower area behind the second building.


Bulblin number 11 is standing high above the village, on a platform on the left side of the back part of the village. The 12th Bulblin can be found directly across from him, on another high platform.


The 13 and 14th Bulblin can be found past the row of buildings, standing on the ground near barrels of dynamite, close to where 11 and 12 had their platforms.


On the second floor of the last building on the right side, the 15th Bulblin is waiting inside. Up on top of the building, through a hole on the second floor, the 16th Bulblin can be found looking down.


In the last building to the right side, on the bottom floor, the 17th one is walking around. The 18th one can be found in the second to last building to the left, waiting on the bottom floor.


The last two Bulblins can be found on the second floor of the second to last building on the left side, walking around.


Once all twenty Bulblins have been defeated, an old lady will come out of a house at the north end of the village. Link will walk over and the old woman refers to Link as the savior. Her name is Impaz and she is the last remaining resident of the village. Her name comes from the great one that created the village. She mentions how this used to be the village known as the old Kakariko Village, built by the protectors of the royal family. It has since become infested with dangerous beasts and has become an awful place. She mentions how Ilia knew Link would come and save them when she was here as well. Impaz then gives Link Ilia’s Charm.


We now want to return to Kakariko Village. For some reason, you cannot warp at all while in the hidden village so you must leave first. Outside the Hidden Village, warp over to Kakariko Village. Transform back into human Link and enter Renado’s house.
Show Ilia the charm that you got from Impaz and her memory will be restored a bit more. She remembers Link and then begins to cry. She remembers Link and Epona in Ordon. The kids are shown peaking through the window as Link and Ilia have their moment. She then gives back the charm and Link gets the horse call. Ilia had made this just for Epona. Now you can call Epona at any point. (This would have been SO MUCH more useful earlier in the game).


Ilia also tells Link some more information about the messenger to the heavens. Impaz had told Ilia about the messenger, and this is the reason that Impaz cannot leave the village. She must wait for the messenger to arrive with the rod. Leave Renado’s house and then use your newly acquired horse call to summon Epona. Ride Epona out of Kakariko Village and back towards the hidden village.


Back within the village walk over to Impaz house and speak with her once more. Pull out the dominion rod and she realizes that Link is the messenger to the heavens. The rod was only to the carried by the messenger to the heavens when there needed to be communication with the Oocca who live in the sky. Impaz then gives Link the Ancient Sky Book. Leave Impaz house.


There is still plenty to be done within the Hidden Village. Break through the windows on the west side of town and behind the building, you’ll see a Howling Stone. Transform into wolf Link and listen to the tune. This one is quite difficult to memorize, but once you got it down, howl it back at the statue. You’ll be taken to another strange area outside of a castle. Howl the tune once more and you’ll howl it together with the golden wolf. The wolf will once again tell you to take sword in hand and find him. A new location will appear on your map within the north part of Castle Town.
Near the howling stone, Link will find a cucco walking around. As Wolf Link, speak to the cucco and he challenges you to speak to all twenty cats that are in the village. This game works nearly identical to the twenty Bulblin Archers that you had to defeat. After a short cinema of the village again, the western music will hit again and your quest will begin. Run around town and talk to each cat one by one. After talking to them, they will tell you which they are: 1st, 2nd, 3rd, etc.


The first cat can be found right at the village entrance, standing on top of the crate. The second one can be found close by, standing near the bottom crate.


The 3rd and 4th cats can also be found next to each other, standing a little bit behind the 1st and 2nd cats, down the center line of the village.


Cat #5 can be found on the right side of town, wandering around in the alley between the first and second building. Cat #6 can be found in the alley on the left side, behind the second building.


The 7th cat is sitting inside of a red platform, down the middle line of town. The 8th cat is found near the end of the village, still down the center line.


The ninth cat is wandering around on the second floor of the first building on the right. The tenth one is close by, on the outside platform of the second level of the second building on the right.


The 11th one can be found on the left side, near the first house by the watering hole. The 12th cat is wandering inside the second building on the right, on the bottom floor.


The 13th cat is right next to the 12th one, in the second building on the right, on the bottom floor near the window. The 14th cat is also by the 12th and 13th cats, but on the second floor of the building.


Cat #15 is in the lower floor of the third building on the left side, behind the three barrels. The 16th cat is right in front of Impa’s house.


The 17th cat is found at the very back of the village, right next to the wall and Impa’s house. Cat the 18th is close by on the right side at the end of the village, passed the last building on the right.


The 19th cat is found near the beginning of the village, wandering around. The 20th and final cat is on the second floor of the third building on the left. He is only accessible by climbing onto the second building on the left, then walking around the back and nearby the window of the third building, from which you can jump over and speak with him.


Once you find all 20 cats, return to the cucco at the west end of the village. The cucco will award you with a prize and say it is in front of Impaz house. Run on over and you’ll see a Piece of Heart waiting for you.

With the cat mini-game over with, return to the northeast building and use the clawshot to get to the top. At the north end of the building on the awning, there will be a Poe floating around at night time. Defeat it and get the 55th Poe Soul. Talk to Midna and warp back to Kakariko Village.
18.3 Six Hidden Owl Statues
Upon arriving in Kakariko Village, transform back into human Link and enter Renado’s house. Drop down to the basement and speak with Shad. Equip the Ancient Sky Book and show it to Shad. Shad attempts to do something with the book and a dagger, but there is no reaction at all from the statue. He will then mark all similar statues in Hyrule that he has tracked over the years. Shad will then walk away.


As he walks away Link will pull out the dominion rod and will notice that power has returned to the rod. Even now that your dominion rod has been restored, this owl statue will still not move. If you take a look at your map, you’ll notice that Shad marked all the owl statue locations on your map. Talk to Midna and warp to the Bridge of Eldin once again.
Walk to the north end of the bridge and defeat the Bulbin Archer on the left. Then look to your right and you’ll see an owl statue. Use the dominion rod and move it out of the way. Then walk over to the where it stood and Link will find the first Sky Character. A missing part of the word in the Ancient Sky Book has been restored.


Take control of this statue and walk it south across the bridge. Move to the end of the bridge and if you look to your left, (east of the bridge), you’ll see a small gap and then a ladder on the other end. Move the statue so that it falls into this gap. Now you can jump on top of it to get to the ladder. Climb the ladder and open the treasure chest that is straight ahead to get a Piece of Heart.


Talk to Midna and warp to the Kakariko Gorge area. Transform into human Link and then use the horse call to summon Epona. Ride over to the red dot that is at the north end of this map. Climb up to the ledge and just like before, move the owl statue to the side. Walk over and step in the circle to get a second Sky Character.
There are two gaps on the sides of the walls near where the owl statue was. If you first position the owl statue in the middle of the gap on the west, you can use it to jump over the gap. Just climb up to the higher ledge and jump across the gap, using the owl statue. Continuing along the wall you can use the dominion rod to move the statue in the middle of the second gap. Jump across it against and you’ll come to a treasure chest that contains an orange rupee.


Talk to Midna and warp to South Faron Woods. From here, you can walk or call Epona and make your way to Coro’s lantern shop. Walk along the path just northeast of Coro. If you haven’t done so already break up the boulder that is in your way using the ball and chain or the bombs. Walk straight ahead to the owl statue and move it out of the way. Walk into the circle and you’ll get the third Sky Character.


Move the owl statue into a small ditch that is in the middle of this area. Now turn into Wolf Link and climb onto the rock. With the owl statue in place, we can use it as a platform to jump onto. Use Midna and make seven jumps. Continue east and you’ll arrive at the foggy purple area. Open the treasure chest here and you’ll get another Piece of Heart.


Talk to Midna and warp over to Castle Town. Use the horse call to call over Epona. Ride Epona southward to where the theatre that is in ruins lays. There is another owl statue waiting for you here. Move it out of the way and position it between where it was and the theatre seats. Jump onto the statue and then jump to the small circle. Link will collect the 4th Sky Character.
Move the owl statue to the other side of the theatre and you’ll see a second pillar, but this one has a treasure chest on it. Once again position the statue properly and then jump onto it. From there jump to the treasure chest and open it for an orange rupee.


Climb up the theatre and get back on top of Epona. If she isn’t there, use the horse call to call her over. Ride her eastward to the Great Bridge of Hylia. The owl statue is located just northwest of the bridge. Control it and bring it down. If you look up, you’ll notice some vines hanging down. You need to position the owl statue so it is right under the vines. Use the clawshot onto the vines and then fall down onto the statue. From here jump over to the circle and collect the 5th Sky Character.
There is another platform just to the west. Use the dominion rod and position the owl statue between the platforms. Now from the original spot of the statue, jump onto the owl statue and then over to the other platform. Open the treasure chest here to get an orange rupee.
Talk to Midna and warp to the Gerudo Mesa. From here, run to the west towards the red symbol that appears on your map. You’ll find a small rectangular area with four pillars. Use the dominion rod and position the owl statue between the two pillars to the north. Climb up on the northwest pillar and use the owl statue to jump over to the circle. Doing with will result in the 6th Sky Character, which will fill the Ancient Sky Book with all the missing characters.


You can slowly reposition the owl statue and jump your way to the southwest platform. Open the treasure chest for yet another orange rupee. Now talk to Midna and warp to Castle Town.
18.4 Shoot for the Sky
Walk towards the town and you should get a letter from the Postman. It is Shad, saying that he is disappointed but is heading back to Kakariko Village. Enter the Castle Town and make your way to the north end of a town. Walk up the steps and passed the door. Walk up to the golden wolf and you’ll be taken to a foggy area with the mighty warrior.


You must first show that you have mastered the previous skill, the jump strike. If you’ve forgotten, just Z-target the enemy and hold A. Link will charge his sword. Release the sword and you’ll slash at the warrior. The warrior will then teach Link the Great Spin. It works just as a regular spin attack, but when Link has full power, a small beam is sent out with the spin attack.
Talk to Midna and warp the Kakariko Village. Return to human form and enter Renado’s house. Jump down to the area below and walk over to Shad. He’ll ask if you have read his letter. Pull out the filled sky book and show it to Shad. Shad will then repeat the same process he did before, but with the new words that Link found in the book. Doing so, the rod that was on the statue disappears and the owl statue takes the same shape as the previous statues. Still disappointed, Shad says that he needs to cool off a bit and walks away.


Use the dominion rod to activate the owl statue. Pull it away and then walk through the passage that is now open. Walk down the steps that lead to an open area. Shad will appear and be shocked to see the Sky Cannon. Walk up to the cannon and Midna will appear. Talk to her and she’ll ask what you’d like to do. Choose to warp but Midna will say that Shad is watching. Speak with Shad and he realizes he is in your way and then walks off. Now walk up to the cannon and warp it to Lake Hylia.


The sky cannon will appear right by the warp point of Lake Hylia. Walk over and speak with Fyer and he will notice the cannon. After giving him a short tour he notices that it isn’t working. He offers to fix it for a hefty 300 rupees. There have been so many extra caves and treasure chests in Hyrule that we’ve come across, so the rupees should not be much of a problem. If they are, you’ll have to go collecting for awhile. Agree to allow him to fix it. A scene will show him hammering the thing together as the sun goes up and down, signifying that it has been a few days.


Once he’s finished, the cannon should now be operational. In order to use it just equip the clawshot and hook onto the target at the back of the cannon. Ooccoo will quickly join you and you’ll be shot into the heavens.
- Chapter 1 – Ordon Village
- Chapter 2 – The Twilight
- Chapter 3 – Faron Woods: Twilight
- Chapter 4 – Forest Temple
- Chapter 5 – Kakariko Village: Twilight
- Chapter 6 – Death Mountain
- Chapter 7 – Goron Mines
- Chapter 8 – Lanayru Province: Twilight
- Chapter 9 – Lake Hylia: Sidequests
- Chapter 10 – Lakebed Temple
- Chapter 11 – The Master Sword
- Chapter 12 – Gerudo Desert
- Chapter 13 – Arbiter’s Grounds
- Chapter 14 – Scaling Snowpeak
- Chapter 15 – Snowpeak Ruins
- Chapter 16 – Sacred Grove: Round Two
- Chapter 17 – Temple of Time
- Chapter 18 – In Search of the Sky
- Chapter 19 – City in the Sky
- Chapter 20 – Palace of Twilight
- Chapter 21 – Cave of Ordeals
- Chapter 22 – Hyrule Castle
