This chapter covers the normal mode of Twilight Princess for the Nintendo Wii. If you are playing on the Nintendo Wii U, check out the Forest Temple – HD Version.
- Chapter 1 – Ordon Village
- Chapter 2 – The Twilight
- Chapter 3 – Faron Woods: Twilight
- Chapter 4 – Forest Temple
- Chapter 5 – Kakariko Village: Twilight
- Chapter 6 – Death Mountain
- Chapter 7 – Goron Mines
- Chapter 8 – Lanayru Province: Twilight
- Chapter 9 – Lake Hylia: Sidequests
- Chapter 10 – Lakebed Temple
- Chapter 11 – The Master Sword
- Chapter 12 – Gerudo Desert
- Chapter 13 – Arbiter’s Grounds
- Chapter 14 – Scaling Snowpeak
- Chapter 15 – Snowpeak Ruins
- Chapter 16 – Sacred Grove: Round Two
- Chapter 17 – Temple of Time
- Chapter 18 – In Search of the Sky
- Chapter 19 – City in the Sky
- Chapter 20 – Palace of Twilight
- Chapter 21 – Cave of Ordeals
- Chapter 22 – Hyrule Castle
4.1 Dungeon Map
Once you enter the Forest Temple, just run straight ahead and defeat a Keese along the way. You’ll reach a large opening and a short cinematic will play, showcasing the Forest Temple. Just walk straight ahead and defeat some Deku Babas and a Bokoblin.


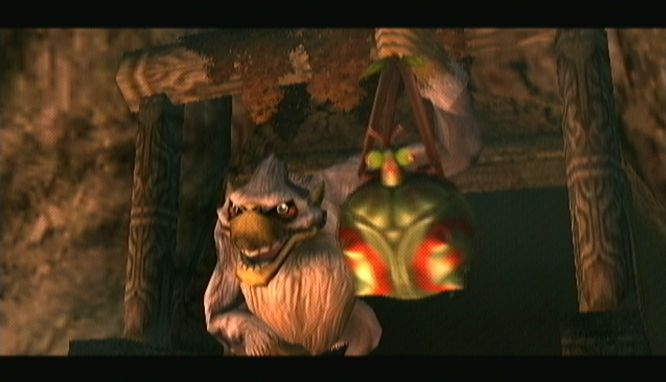
You’ll see the same monkey that stole your lantern. She is locked in a wooden cage. Strike the cage a few times with your sword to break it open. The monkey will climb up the ivy and signal for you to follow her upwards.


Turn and look at the wall on the left side of the room and you’ll see a few Walltulas. Shoot them down with your slingshot and then climb to the top of the ivy. Now climb over to your right and you’ll see a treasure chest. Open it up to get a yellow rupee.
Jump down and walk over to the north end of the room. Pull out the slingshot and shoot down a few more Walltulas. Climb up the ivy and the monkey will then run over to the door and call you over. Walk up and open the door.
With the monkey following right behind, walk down the steps and up another series of steps. You’ll encounter a Skulltula crawling around. The Skulltula will block your attacks from the front. Wait for it to attack and quickly sidestep. The Skulltula is vulnerable from its side. Just keep slashing away until it has been defeated.


At the top of the platform you will see four torches. Use your lantern to light up all four of them which causes a platform to rise from the ground.


You’ll notice that the raised staircase blocks a weird looking wall. Don’t worry about it as we will get to this wall later on. Follow the monkey across the platform and you’ll see a treasure chest on your left. Open it up to get the Dungeon Map. Go through the door which the monkey is standing by.
This massive center area of the temple is actually outdoors. A short cut-scene plays with the monkey trying to cross the bridge. A large baboon appears on the other side of the bridge, holding a gigantic boomerang. The baboon goes by the name Ook. Ook throws the boomerang and cuts the bridge in half, causing your monkey friend to retreat back towards you. Ook than slaps his butt and runs off. Midna jumps into the conversation with some more hilarious commentary. Lead your monkey friend back to the previous room.


4.2 The Second Monkey
Follow the monkey to the center of the room. She’ll jump and hang upside down on the rope that is on left side of the room. Jump on over towards the monkey and use her to swing back and forth. When the release button appears on screen press A and you’ll land over to the other platform. Go through the door.


Walk to the north and you’ll see an awkward creature known as a Bombling. Just slash at it once and it will turn into a bomb. There are large rocks right behind the bombling and the bomb should be close enough to blow them up. If not, just quickly pick up the bomb and toss it over to the rocks, blasting open a passageway.
Break the barrels and you’ll find a small creature known as Ooccoo, a member of the Oocca race, as well as a small Oocca known as Ooccoo Jr. These little fellows will give Link the ability to warp out of the temple. Then if you return to the temple, you can use Ooccoo to get back to this exact same point.


Now head down the path to the other side of this room and burn down the spiderweb. Defeat the Deku Baba that you find around the corner. Follow your monkey friend as she jumps from platform to platform. There is a spider hanging from the ceiling and it will scare the monkey. This creature is known as a pygmy Skulltula. Just use the slingshot to knock it down and then jump across the platform. The monkey leads you to a locked door, how nice of him. Backtrack and enter through the door at the north side of this room.


You are back outside once again but this time in a different area. The monkey won’t follow you to this room and will remain in the previous room. Since you are outside, the wind will blow and it will turn the platform around, occasionally allowing Link to run across. There are a few Keese here but nothing Link can’t handle. Run across and enter the door at the end of the path to get to the other side of the temple.
There isn’t much to do in this room right now but luckily there is a treasure chest just to the right of the door once you walk in. Open the chest to get a small key. Turn around and head back outside. Run across the outdoor area and return to the south part of the temple. Re-unite with the monkey and run over to the locked door. Use the small key and go through to the next room.


There is another caged monkey in this room and the first monkey will run up to the other one trying to break him out of its cage. It is actually quite humorous yet sad watching the monkey struggle to free her friend.


Walk down the path and cross the small bridge. You’ll see it break right behind you. On the bottom area, walk over to your monkey and check her out. She tries to roll into the center pillar that is under his monkey friend but she just hurts herself. Learn from the idiotic monkey and roll into the pillar three times and the cage will drop to the floor, breaking the bars and freeing the second monkey. Two Bokoblins will jump down and attack you but they should be no problem for you. Simple sword slashes will take care of them.


Under the platform by the bridge there is actually a small treasure chest containing 10 rupees. Walk on over to the monkeys and then follow them up the path. They’ll both hang on the ropes allowing Link to swing across the large gap above the broken bridge. Jump from monkey to monkey and then to the platform. Open the door and head back to the previous room.


There is a gate on the south side of this room but we can’t do anything about it just yet. Return to the center room where you go the dungeon map. (It is just one room to the right.) Use the monkey as a little swing to get to the right side of the room. Burn down the spider web using the lantern and head through the door.
4.3 More Monkey Business
Your monkey friends won’t follow you into this room because it is filled with enemies. There are two Deku Babas in this room but these ones are a bit different. They are known as Baba Serpents. Once you slash at them a few times their head will separate from their stems. Finish the head off with a few sword slashes. There is another strange creature known as a Deku Like that is blocking the path on the south side of the room. Don’t mind it for now and just start heading up the steps.
You’ll see another Deku Like straight ahead but don’t mind it and keep escalating up the steps. There is a Bombling near the top of the steps. Z-target him and wait until it jumps towards your shield or just slash at it with your sword. Lift up the bomb that is formed and quickly make a right turn. Run straight ahead until you are just over the gap where the Deku Like lies below. Z-target the creature and toss the bomb into its mouth, defeating the ugly looking thing.


Jump across the platform and you’ll see a boulder in between two torches. This can be blown up with another bomb. Jump back across the gap and defeat another spider Bombling. Lift up the bomb and jump across the gap with it. Toss it over to the boulder and it will explode, opening an entrance to another room. Enter the room.


There is a third monkey in this room all the way on the other side behind a locked door. Walk down the steps on either side and you’ll see two pillars, one of which has a treasure chest. Roll into it to knock down the treasure chest. Open it up for a small key.
There is a small bridge here with these ridiculously annoying enemies under some of the tiles. These creatures are known as Tile Worms. If you walk over them it will send you flying backwards. Keep an eye out for where the enemies are and walk across the bridge.


There are more Tile Worms waiting for you here. There are two unlit torches in this area. Maneuver the tile worms and use the lantern to light these torches up. This will finish off the large staircase. Climb up the staircase and a Skulltula appears. Defeat it just as you did before and then unlock the door to release the 3rd monkey.


Near where you lit the four torches, there is some ivy at the north side of the room. Climb up the ivy and move to your left. You’ll reach a treasure chest containing a red rupee. Walk across the tiled bridge once again and then return to the previous room.
Turn to your left and you’ll some ivy on the wall. Defeat the Walltulas that are hanging on wall by using the slingshot. Jump on over and climb up the ivy. Enter the door that is straight ahead.
Another monkey is being held prisoner here behind a locked door. The small key is immediately snatched up by a Big Baba in the middle of the room. The enemy is not nearly as tough as it looks. Just z-target it and let it attack Link. Since you are locked on, your shield will block the attack. Just keep z-targeting and use the jump attack to strike the Big Baba.


After just a few strikes, the enemy will fall and just a Deku Like is left behind. There are two Bomblings along the side of the room. Just strike one and grab their bomb. Toss it into the mouth of the Deku Like and it will explode, leaving the small key lying on the floor. Grab it and then walk up the steps towards the locked monkey cage. Open the locked door to free the fourth monkey. Now go through the door to return to the previous room.
There is still some business to take care of in this room. Once you head through the door turn to your left and you’ll see a Bombling. Defeat it and grab the bomb left behind. Walk straight ahead to the very edge of the platform and drop the bomb down into the Deku Like’s mouth that is on the bottom floor. It will explode and allow Link to enter this secret area. There is a large treasure chest here, so open it up to get your second heart piece! Return to the center room to reunite the four monkeys.

4.4 The Gale Boomerang
Back in the center room, walk up the steps and head through the door to the north to get back outside. The four monkeys will hang on the rope and will now be able to swing Link across the gap even without the bridge. Once you cross the large gap, go through the door.


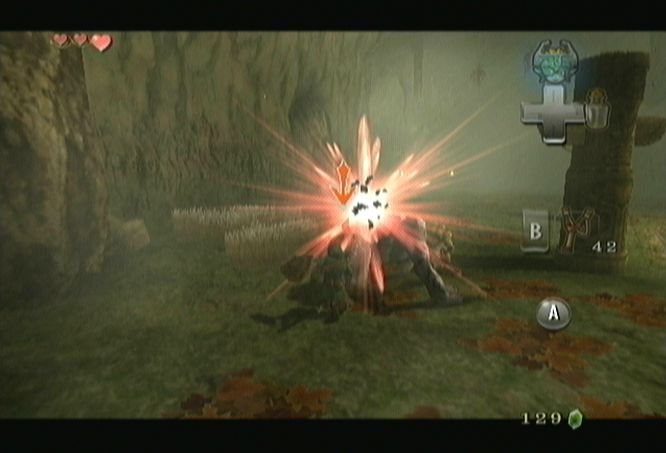
Ook, the baboon we saw earlier, is waiting for you with his boomerang in hand. He’ll begin the fight by tossing the boomerang towards the ceiling, releasing two Baba Serpents. These pesky enemies could be annoying and it is best to defeat them as soon as possible. Ook will jump from pillar to pillar occasionally tossing the boomerang towards Link.
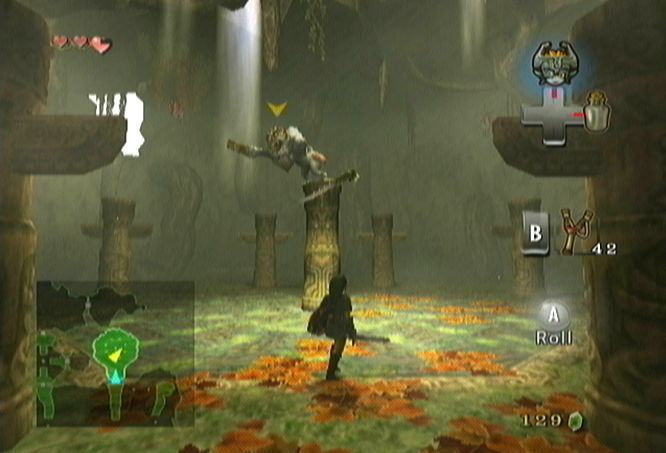
In order to defeat him, wait until he tosses the boomerang and then quickly roll into the pillar the baboon is standing on. He will lose his balance and when the boomerang comes back, it will knock Ook off the pillar. His weakness just happens to be his butt, so slash at it with your sword over and over. He’ll eventually get up and jump back on one of the pillars.
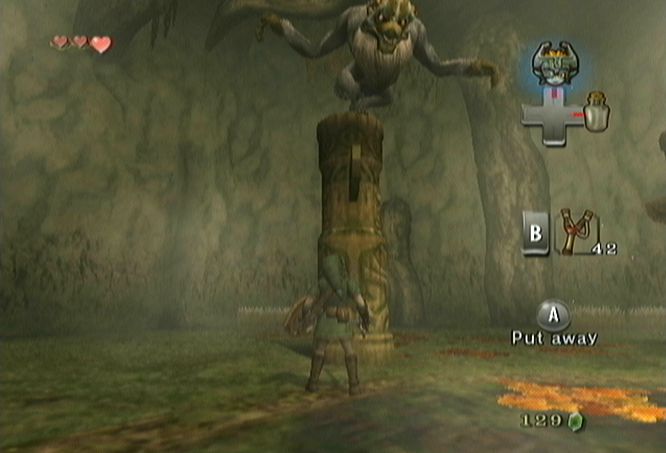
Ook will toss his boomerang and release more Baba Serpents as the battle goes on. Just get rid of them and repeat the same process of rolling into the pillar and then slashing his butt to defeat this mini-boss.
Once defeated a spider will jump off of Ook’s back and then the baboon will leave through the top of the room. Left behind is the dungeon weapon that Link receives, the Gale Boomerang. He’ll automatically walk over to it and hear that the Fairy of Winds resides within the boomerang.


There isn’t much else to do here so return towards the door, only to see it locked. You’ll notice just above the door there is a spinning panel. Use the gale boomerang and lock onto the spinning panel. Press it five times and then release the boomerang and it will lift the gate from the door. Enter it to get back outside.


4.5 The Compass
The monkeys that were hanging around are no longer here, but now with the gale boomerang there is a new path you can follow. Just to your left you’ll see a series of bridges with spinning panels above them. Use the gale boomerang to spin the platform and then cross it. There is a caged monkey and a Bokoblin here. Defeat the enemy and then use the gale boomerang on the web just above the cage to free the monkey. It will run off to a later part of the temple.


Use the gale boomerang to flip the bridges and head back south. Enter the door here. We have actually already been in this room; we just haven’t gone through this door. Turn to the left and head through the door that is on the far right of the room.
This is the room with the Tile Worms. Luckily you can actually use the gale boomerang to bring them out from underneath the tiles. Cross the bridge and then use the gale boomerang on the torches that you lit up earlier. All of them will go out and it will lower the four platforms that are straight ahead. Open the treasure chest that is under the steps to get another Piece of Heart. Nothing left to do here, so back track to the previous room.

Drop down to the bottom level and head through the door on the left to return to the central chamber. The monkeys are back here so use them to swing over to the center of the room. You may have noticed a treasure chest hanging from the ceiling just above you, but now that you have the gale boomerang you can actually get it down. Use it to cut the web and the chest will fall. Open it up to get the Compass. This shows all the various treasure chests that are still to be found in the temple. It also marks where the remaining monkeys are with red dots.


There is still more to do in this room. Use the gale boomerang on the torches and one of them will go out, lowering the platform that was raised earlier. Drop down and use the Bombling nearby to blow up the boulder that is in the wall. There is a treasure chest here containing a red rupee. Return to the higher platform in the center of the room. Use the monkey to swing over to the left and head through the door.


4.6 The Big Key
The enemies we fought earlier within this room will have re-spawned. Just defeat them and head over to the southwest corner of the room where you see two treasure chests on your map.
There are four pillars here with each having a spinning panel on top of them. On the floor you will see a z-shaped symbol. Use the gale boomerang and target all four of the spinning panels, but you must do them in order of the z-pattern, starting with one that is just left of the bridge. Toss the boomerang and in one swipe hit all four panels and the gate straight ahead will open up. Walk forward and open the chest to get the Big Key. This will allow Link to gain access to the dungeon’s boss room.


You can jump down into the water that is in the far southwest corner of the room. Swim through the small passage within the wall and it leads to a treasure chest containing a yellow rupee. Next, just continue through the door that is on the north side of this room to get back outside.


4.7 Find All the Monkeys
Wait for the platform to be spun around by the wind and then cross it. One of the monkeys that we saved earlier is waiting for you here. Continue straight ahead and go through the door.
Now that we have the gale boomerang we can spin the platform in the center of this room. Do so and then run across and enter through the door on the north side of the room. You’ll see the four monkeys you have already saved and then the fifth jumps over and joins them. There are still three more monkeys to save so head over and walk on the spinning platform to the right. Once you are standing on it, use the gale boomerang to spin it. Walk over to the next one that is right next to it and spin this one as well. This will give you access to the east side of the room.


Defeat the Bokoblins and the Walltulas in this area and then climb the ivy. Climb all the way to the top and then over to the right. Drop down to the platform here and you’ll notice some more ivy. Defeat the Walltula and climb the vines here as well. Defeat the Bokoblin and then head through the door.
There are three Baba Serpents in this room. Defeat them all and then pull out the gale boomerang. You might have noticed that just to the left of the entrance there was a Bombling on a small island platform. On the right of the room there is a Deku like. Lock onto the Bombling and toss the gale boomerang. It will pull a bomb over to Link so take it and throw it into the mouth of the Deku Like. Once it has blown up jump across to the treasure chest and open it for a small key.


Now head to the north side of the room and you’ll see a boulder at the top of the set of vines. You can’t climb the vine or toss a bomb from the Bombling high enough, so what do you do? What Link needs to do is pull out the gale boomerang, target the Bombling, and then target the boulder and release. The boomerang will take the bomb and with it, explode the boulder.


Climb the ivy and fight a Bokoblin here. There are also two Baba Serpents hanging from the ceiling in which you need to use the boomerang to slice off their stems. Once all enemies are defeated use the gale boomerang at the Bombling once again and then run on over and toss it at the boulder in this room. It will explode the boulder and the monkey will come running out. There is nothing else to do in this room so head back to left side of the room and head through the door.


You’ll notice that the sixth monkey you just saved has joined up with his other monkey friends. Jump down to the lower level and use the gale boomerang on the spinning platforms and make your way through the door at the south end of the room.
Spin the center platform using the gale boomerang and then walk on it. Then spin it once again so it is stretching from left to right. Defeat the two Bokoblins that are in this area and then head through the door on the east side of the room.
There are two Skulltulas in this room hanging from the ceiling. Use the gale boomerang to knock them down and then defeat them with some swords strikes. Head to the north portion of the room and you’ll find a spider web on the floor. Pull out the lantern and burn the web. Fall down the hole and you’ll find a monkey trapped in a small cage. Break it free with a few sword strikes and it will run off.


Climb the ivy that that is in the room to get back to the top of the room. Open the door on the left and head back to the previous room. From here just run straight across the platform, use the small key, and enter through the door.
There are three Tile Worms under the tiles. Just use the gale boomerang to bring them to the surface and defeat them with your sword. You’ll find a small tunnel at the northwest part of this room, so just head through it and battle the Skulltula at the end of the path. Once that foe has been defeated, use the boomerang to strike down the Walltulas that are crawling on the ivy. Climb the ivy and you’ll see the final monkey behind a gate in this room. There are two pillars on the sides of the cage with spinning panels. Use the gale boomerang to spin both of them and the door will open allowing the monkey to run free.


You can leave this area of the room through the passage on the right. There is a Baba Serpent here hanging from the ceiling but it should be no problem to you. Back in the other half of the room you’ll be on a higher ledge. Don’t jump down just yet as there is a treasure chest at the north side of the room. Jump over to it and open it to get some extra rupees. Go through the door and return to the room to the east.
4.8 Twilit Parasite: Diababa
Stand on the center platform and spin the panel with the boomerang. Head through the door at the north part of the room and you’ll see that all eight monkeys are now reunited. They’ll all hang from the center branch and swing back and forth. Walk over to the edge of the platform and once the monkeys swing towards you, jump and grab them. Swing over to the other side of the room and release. Walk straight ahead and to the right of the boss door you can find a fairy in one of the pots. Capture it in a bottle or let it restore you life if needed for the boss battle. When you’re ready, use the big key to unlock the door ahead to face the temple boss.


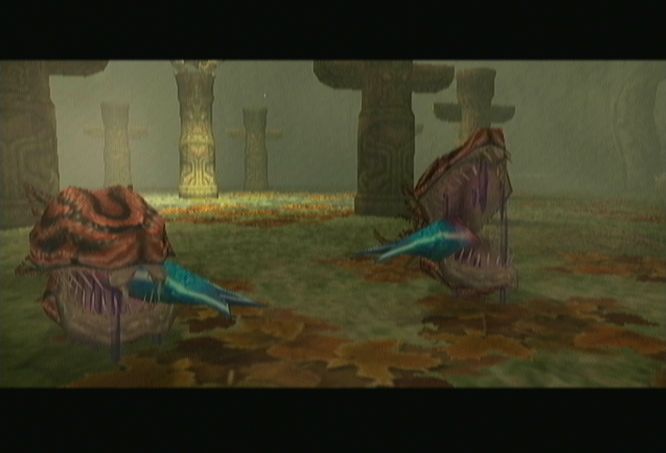
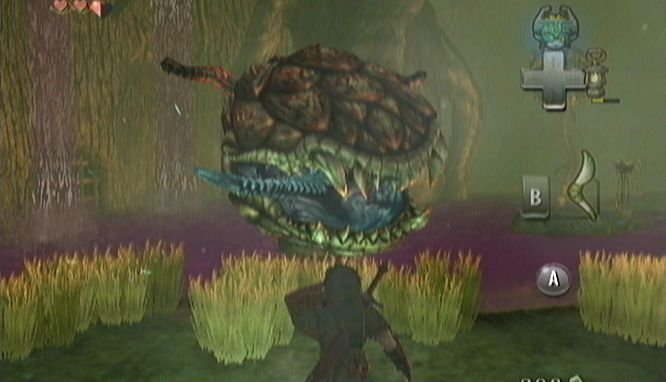
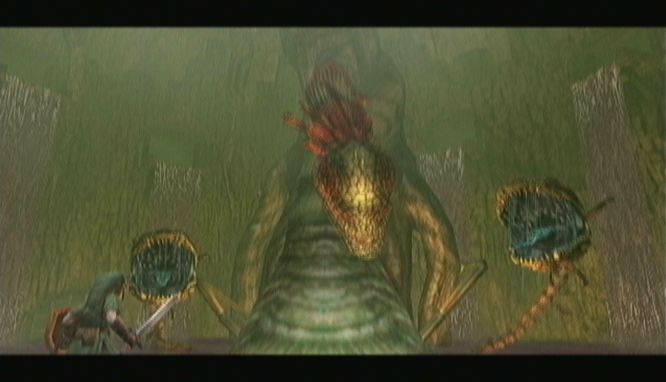
The door will shut behind you and you’ll notice a few Bomblings in the room. Then, out of the purple fog in the ground comes what looks like two Big Babas. The battle begins with the Twilit Parasite Diababa.


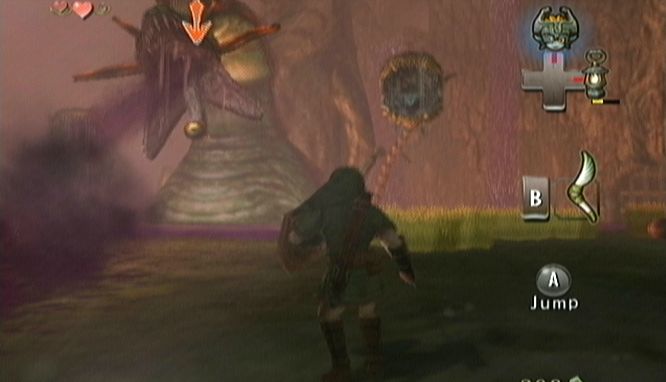
The battle with Diababa is broken down into two phases. The first phases consists of Link battling with what appears to be the hands of Diababa. The hands are in the form of two massive Big Babas. An area of purple water blocks Links path towards the big babas so he must battle them from a distance. There are a few Bomblings that are located within the purple water area.
All that Link really needs to do is use the gale boomerang on one of the Bomblings in the room and then target one of the Big Babas. Release the gale boomerang and the Bombling will blow up within the mouth of the Big Baba. It only takes one bomb to each of the Big Babas to send them falling into the purple water.
Diababa only has one attack during this early phase of the battle. The two Big Babas will pull back and then toss themselves towards Link to attack. Just quickly roll to your left or right, or simply just use your shield to block the attacks. Once both Big Babas have been defeated and have sunk into the purple water, Diababa will show its entire self.
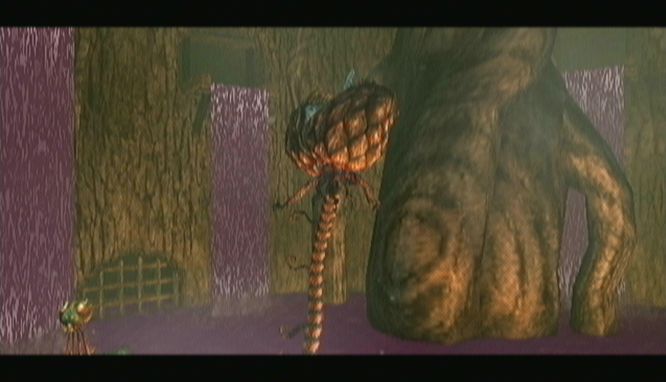
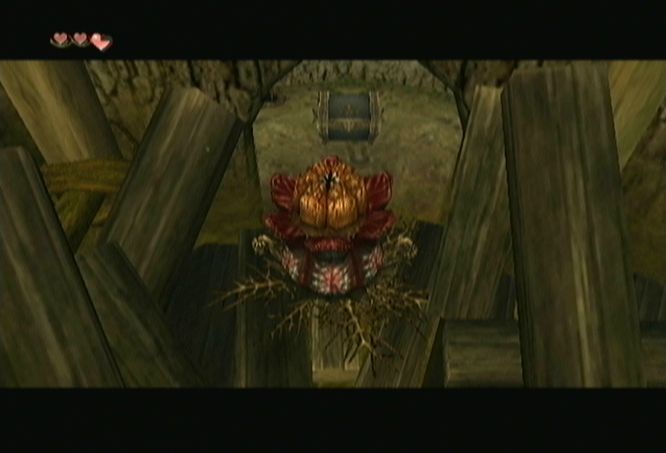
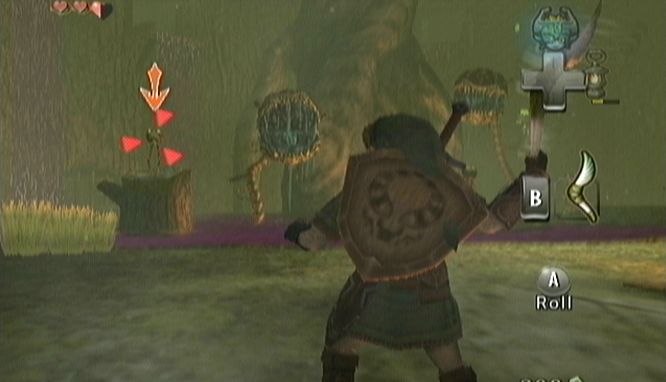
The second phase of the battle begins and you’ll notice an orange like ball, which acts as a tongue of Diababa. This will turn out to be Diababa’s weakness. There really is not much Link can do at all in this early part of this phase. Just run around the room avoiding the dash attacks by the Big Babas of Diababa.
Eventually Ook, the baboon that we fought earlier, will appear and he’s holding a Bombling. He’ll jump on a nearby branch and swing back and forth across the boss chamber. At this point, use the gale boomerang and target the Bombling that the baboon is holding. Next, target the head of Diababa and release the boomerang. This will bring the bomb and explode it in Diababa’s face, sending him crashing down to the floor right next to Link. Use your sword and swipe the orange eye as many times as you can until Diababa gets back up.

Diababa will now unleash its most fierce attack when it shoots purple slime out of its mouth. It is quite hard to avoid but just keep moving and try to get to one of the corners of the room. Eventually the attack will stop and Ook will return, holding another Bombling.

Repeat the same process by targeting the bomb and then Diababa’s head and it will come crashing down. Slash at him with your sword a few more times until it gets back up. That is about all there is to Diababa. After hitting a few Bomblings and several sword swipes, Diababa will be defeated.
Once defeated, the orange eye will fall out of Diababa’s mouth and turn into a full Heart Container. Diababa itself will burst into twilight and the temple item will be awarded to Link. This item here is a fragment of a Fused Shadow and there are three of them in total that Link needs to collect. Midna will be a bit vague about what it is, but mentions that this is what the Spirit of Light was talking about when it referred to as dark power. After some more talk, you’ll gain control of Link once again. Grab the Heart Container that was left behind to increase Link’s health to four hearts. Walk over to Midna and morph out of the temple. You’ll then be prompted to save your game.


- Chapter 1 – Ordon Village
- Chapter 2 – The Twilight
- Chapter 3 – Faron Woods: Twilight
- Chapter 4 – Forest Temple
- Chapter 5 – Kakariko Village: Twilight
- Chapter 6 – Death Mountain
- Chapter 7 – Goron Mines
- Chapter 8 – Lanayru Province: Twilight
- Chapter 9 – Lake Hylia: Sidequests
- Chapter 10 – Lakebed Temple
- Chapter 11 – The Master Sword
- Chapter 12 – Gerudo Desert
- Chapter 13 – Arbiter’s Grounds
- Chapter 14 – Scaling Snowpeak
- Chapter 15 – Snowpeak Ruins
- Chapter 16 – Sacred Grove: Round Two
- Chapter 17 – Temple of Time
- Chapter 18 – In Search of the Sky
- Chapter 19 – City in the Sky
- Chapter 20 – Palace of Twilight
- Chapter 21 – Cave of Ordeals
- Chapter 22 – Hyrule Castle
