This chapter covers the normal mode of Twilight Princess for the Nintendo Wii. If you are playing on the Nintendo Wii U, check out the Arbiter’s Grounds – HD Version.
- Chapter 1 – Ordon Village
- Chapter 2 – The Twilight
- Chapter 3 – Faron Woods: Twilight
- Chapter 4 – Forest Temple
- Chapter 5 – Kakariko Village: Twilight
- Chapter 6 – Death Mountain
- Chapter 7 – Goron Mines
- Chapter 8 – Lanayru Province: Twilight
- Chapter 9 – Lake Hylia: Sidequests
- Chapter 10 – Lakebed Temple
- Chapter 11 – The Master Sword
- Chapter 12 – Gerudo Desert
- Chapter 13 – Arbiter’s Grounds
- Chapter 14 – Scaling Snowpeak
- Chapter 15 – Snowpeak Ruins
- Chapter 16 – Sacred Grove: Round Two
- Chapter 17 – Temple of Time
- Chapter 18 – In Search of the Sky
- Chapter 19 – City in the Sky
- Chapter 20 – Palace of Twilight
- Chapter 21 – Cave of Ordeals
- Chapter 22 – Hyrule Castle
13.1 First Poe Soul; Dungeon Map
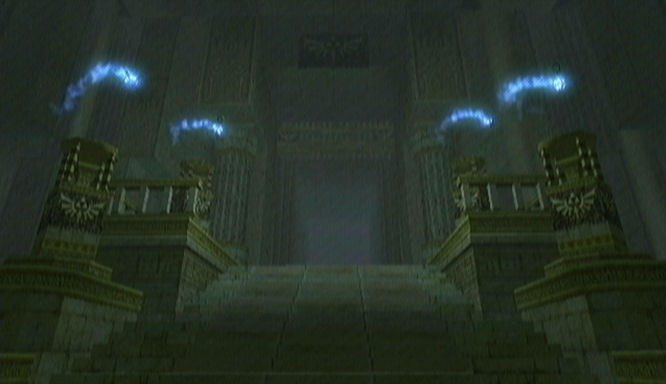
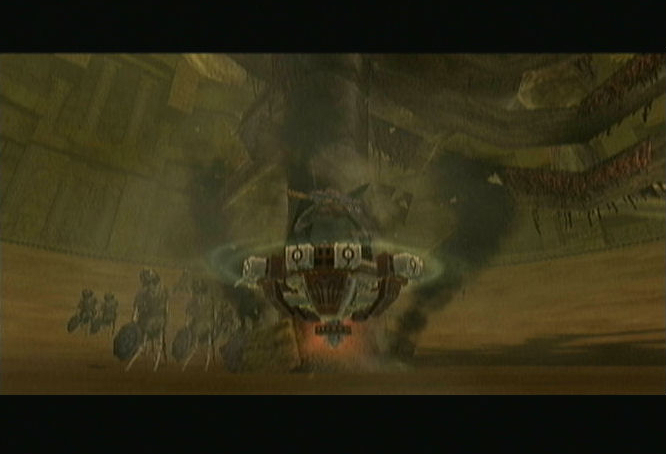
Once you begin the dungeon, run down a series of steps and you’ll reach a room filled with quicksand. After a short cinematic that shows off the temple, you’ll regain control of Link. Be careful of the Moldorms that will jump out of the sand. You can use the clawshot to pull them out and defeat them if you’d like.


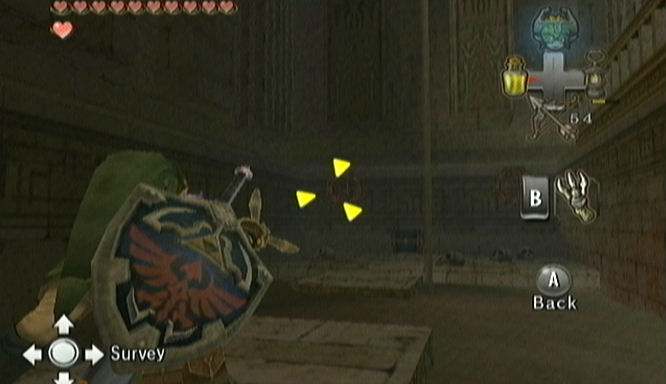
Look over to the right and you’ll see a target that you can grapple over to. Do so and from this platform you can jump across two platforms to get to the left side of the room. There are Moldorms all over the place, so be careful not to get hit into the quicksand. Jump across two more platforms to get to the northeast portion of the room.
You’ll have to run across the sand to the north part of the room. Using a roll works well. If you are having trouble, using Wolf Link actually works a bit better. Once you reach this area, you’ll notice the door is locked. There is a gated area on the left with a chain. Roll over to the platform on the west side of the room.


Once you get here, you’ll find a new creepy looking enemy, a Stalkin. Just slash at him with your sword to defeat him. Next, use the clawshot and grab onto the chain. It will pull it forward allowing Link to grab onto it. More Stalkins will pop up from the quicksand. Grab a hold of the chain and start pulling it backwards. This will open the gate at the north end of the room. Release the chain and roll back over to the north side of the room.


Walk up the steps and you’ll see a locked door straight ahead. Take a left and you’ll see a pot that has liquid in it. Use an empty bottle to scoop up some lantern oil. Now head over to the other side of the room where you’ll see a treasure chest on the other side of some quicksand. Be careful as the platform that is nearby will sink once you stand on it. Just run and roll right past the quicksand and open the treasure chest to get a small key. Little scarabs will appear from the sand and begin to latch onto you, causing you to slow down. Perform a spin attack to get rid of them and then quickly roll across the sand once again. Walk over and head through the locked door.


This room is awfully dark so pull out your lantern. Avoid the quicksand there is in this room and make your way to the north side. An army of Stalkins will appear as you make your way across the room. There are two torches on the sides of the door. Use the lantern to light both torches to open the door.
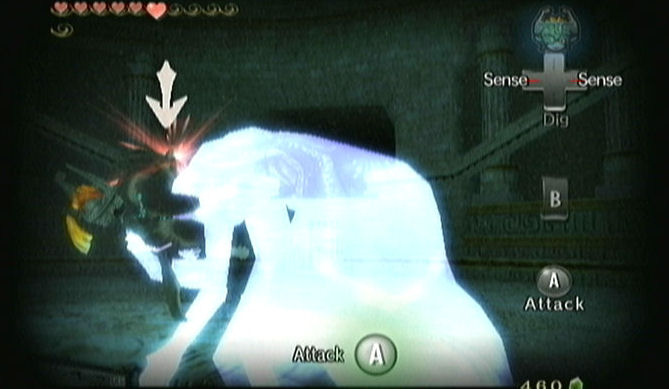
Walk forward in this room and four Poes will appear from the door straight ahead. There are four flames burning and each Poe will steal a flame. After circling around Link, one of the Poes will stick around while three of them scram. Turn into Wolf Link and use your senses to spot the Poe.

This Poe is quite different than any previous Poe we fought. For one, it is much larger, looks scarier, and can take in more damage. Another major difference is that it can only be harmed when it glows blue. Z-target the Poe and attack at it repeatedly when it glows. The Poe really isn’t that much harder than normal Poes, so just keep attacking it and then rip its soul out for the 38th Poe Soul. The lantern that it carries will break and the flame will light up one of the four torches that used to be lit.


As Wolf Link, sniff out the scent of the Poe. Choose to forget the Scent of Ilia and learn the Poe Scent. You can now use your senses to discover where the three other Poes have gone.
There are a few things we can do in this room before progressing on. Transform to human Link and walk to the northwest corner of the room. There is a treasure chest on the other side of the quicksand. There also two targets on the sides of the treasure chest. Use the clawshot to hook on over and open the chest to get a Piece of Heart. Turn back around and if you look at the wall to the right and a bit higher up, you’ll see another target. Use it to grapple back across the quicksand.

Now make your way to the northeast side of the room and you’ll bump into some Bubbles. Use your grappling hook to pull them over and two slashes with the Master Sword will defeat them. Now quickly roll across the two platforms to get to the other side of the quick sand. Open the chest for the Dungeon Map. Now use the clawshot on the target that is on the side of the wall to get back to the other side of the quicksand.


13.2 Second Poe Soul
Turn your attention to the west side of the room. Transform into Wolf Link and you’ll see the purple scent of a Poe goes into a dirt path. Dig up the area and it will reveal a chain. Pull the chain back as Wolf Link and a staircase will open. Run down the stairs and head through the door.


There is a Bubble floating around this room. Z-target the Bubble and attack it a few times to defeat it. Use your senses and you’ll see the Poe traveled through the ceiling. In the pillar in the center of the room you’ll notice a small portion that is sticking out. Walk up to it and push it clockwise. After one push, a passage to the north will be opened and a new enemy appears, a ReDead Knight. These guys are freaky looking and if they get close enough to Link, they will let out a loud scream which temporarily paralyzes Link. Use one of the sword techniques such as the back slice or the helm splitter to defeat. Alternatively you can just grab hold of the enemy using Wolf Link. Once defeated, open the small chest behind him to get a small key.


With the room now in this shape, use your senses and you’ll notice the Poe Scent no longer passes through the ceiling, but now through a hole in the ceiling. Standing just outside the small room where you got the small key, look up and you’ll see a target in the upper room. Transform into human Link and use the clawshot to get up there.


Defeat the Rats that are feeding off the skeleton bones and then transform back into Wolf Link. If you use your senses you’ll see two paths of Poes, one of which passes through the door to the north. Open the door and head through.
Walk forward and you’ll see a ton of Poe lanterns. Defeat the two Bubbles and then activate your senses. You’ll realize that all of them are frauds except for the one at the east end of the room. Attack it and it will activate and start floating around the room. Just like before, wait for it to shine blue and then attack. A few strikes with Wolf Link will bring it to the ground. Finish it off and grab the 39th Poe Soul. Return to the previous room.


Drop down to the floor below and push the center pillar back into its original position. (You have to push it counter-clockwise). Exit back to the main chamber and you’ll see the second Poe’s flame light up the second torch. Now climb up the stairs and head west, this time through the upper passage.
13.3 Third Poe Soul; Compass
With the key we got from the floor below, we can use it and open the door to the west. Using your senses in this room, you’ll see the Poe scent passes to the south end of the room. Straight ahead you’ll see some quicksand on the floor and a few small platforms in the sand to the north. Walk on these platforms, being careful of the spikes that appear and block your path. Move along these platforms to get to the northwest portion of the room.


Transform into human Link and you’ll see a large crate here. Pull it back and then push it against the wall where it fits perfectly. Climb the steps to get onto the higher platform at the west. There is a chain that can be pulled. Since we pushed that block, we can now pull that chain all the back. Start pulling it backwards and you’ll notice the chandelier in the room will rise. Once the chain is pulled back completely, run past where the chandelier was. You need to do this quickly since the chandelier will come crashing down in just a few seconds.


Once you pass the chandelier, climb the steps and defeat a few Bubbles that are in your way. One of the Bubbles is a brand new Fire Bubble. Just attack just as if it was a regular Bubble and defeat it the same way. At the top of the steps walk straight ahead and open the treasure chest that is behind the statue to get the Compass. Just like we did in the circular pillar room, stand on the side of the statue here and push it clockwise. Walk over to the room to the west and defeat the ReDead Knight that appears. Open the chest behind him to get a small key. Cross the room to the east side and use the small key on the locked door.


Walk around this room killing a bunch of Stalkins that appear. There are also two ReDead Knights here that can be quite annoying. Once defeated, transform back into Wolf Link and use your senses to see where the Poe has gone. Just like before, you’ll see it going towards a dirt path in the ground. Use your senses to dig it up and a chain will be revealed. Pull back on the chain and the door besides you will open up. The Poe is located right on the other side of the wall. Just like before, wait until its body is shining blue and then attack it. After two rounds of biting, it will fall to the floor. Finish it off and grab the 40th Poe Soul. Run through the rest of the room and open the door at the north end of the hallway.


Run around the corridor in this room and open the small chest in the southern part of this room to get a small key. Activate Wolf Link’s senses and you’ll see that a bunch of Ghoul Rats appear. If one or more of them do happen to attach to you, just use the spin attack to shake them free. On the upper level, jump over the short cap and exit through the locked door on the east side of the room.


You now are back in the main room, but just on a higher level. You’ll see the third flame light up at the third torch. Jump onto the chandelier that is hanging from the ceiling and then jump over to the east side of the room. Open the door.


13.4 Fourth Poe Soul
Walk down the steps on the left and you’ll see another crate. Just push it forward until it falls into a small ditch. Walk through the small passage that the gate previously blocked and you’ll see a treasure chest. Open it to get a red rupee.


Return to the crate and climb on top of it. On the north wall there is another chain that can be pulled. Do so and the chandelier in the room will lift. Once you’ve pulled it as far as it will go, release it and quickly run to the south end of the room. Open the treasure chest that is found here to get a red rupee.
Pull out your clawshot and aim at the target that is on the west wall. Drop down from here and then head north. The door that was here just leads to the middle room from the lower level. Navigate around this corridor to find yourself back to where the crate and chain were. Climb on top of the crate and pull the chain once again. Once you’ve pulled it back completely, release the chain and stand in the middle of the bridge. You want the chandelier to land right around you since there is a hole in the middle of the chandelier. You can tell where the hole is located, since the bridge is a bit lowered in this area. Once the chandelier comes crashing down, climb on top of it and jump over to the ledge to the east. Open the door.


Break through the wooden area here with a few sword strikes. Walk straight ahead and the bones on the ground will awaken, forming a Stalfos creature. The shield attack and helm splitter work wonders in knocking it down to the floor. Once it’s down on the floor, pull out your bombs and place one next to the Stalfos. The bomb will blow up its bones and unlock the nearby door. Be sure to break some of the nearby wooden planks to find two treasure chests, both containing bombs. Open the door that is at the south end of the room.


Climb up the staircase and you’ll find a large chamber, with more quicksand. Roll across the quicksand and you’ll see six torches in this area. You have to light two of them to open the door on the west side of the room. If you light the incorrect torches, a bunch of Stalkins will appear. The one in front is one of the two you have to light up. The one on the far right is the second one you have to light up. Once both are lit, the door will open on the west side of the room so quickly roll over towards it and head through.


Transform into Wolf Link and use your senses. Like in a previous room, there are eight Poe lanterns, but only one real Poe. This room is a bit trickier though. Once you find the real Poe, it will move to the center of the room and create three replicas. The Poes will then begin spinning around Link and then one of the four will attack Link. The one that attacks Link will glow in shiny blue just like before and this is the real Poe. Quickly attack it before it can hit you. Repeat this process until it is knocked to the ground. Then finish it off and grab the 41st Poe Soul and final one within this temple. Once defeated, the lantern will break and the flame will be set free. Walk through the door on the north end of the room and you’ll actually be back in the chandelier room.


Use the clawshot to hook over to the target on the west wall and then head through the door. Back in the main room, the fourth flame will light up the fourth torch and the massive door on the north end of this room will open up. Walk through opening.
13.5 The Spinner
Walk forward and you’ll find two Fire Bubbles floating around. Defeat them with a few sword slashes. The door on the east end of the room has a large quicksand area that cannot be crossed. Thus, our only path is through the door to your left, head through it.
Drop down to the very bottom of this rounded corridor. There are several Bubbles and Fire Bubbles in this tall room, so defeat them accordingly. There is a central pillar in this room similar to what we saw before. You can push it or pull it in both directions. Pushing it one way will cause the floor to rise while pulling it the other way will cause the floor to fall. It appears that it is random as to which direction it needs to be pushed or pulled in order to raise to floor. Experiment with it to find out which direction it has to be pushed, and push it so the floor raises two notches.


You’ll see a treasure chest on the south end of this room but as you come closer, it will be blocked by spikes. Defeat the nearby Bubble and then head through the entrance on the east side of the room. You’ll be able to make your way around the corridor to the treasure chest. Open it to get a small key.


Return to the central pillar and now lower the floor to the very bottom level. There is a locked door at the south end of this room. Use the small key and head through. Transform into Wolf Link in this room. There are numerous Ghoul Rats that will attach themselves to Link. Use your senses and then a spin attack to defeat them.
There are a ton of hidden spikes in the floor that will pop up if you come close to them. Start off by running across the quicksand to the left. Run to the south across some more quicksand. Straight ahead you’ll see spikes that pop up. You’ll have take make a turn and dash across back to the west side of the room. From here you can actually walk all the way to the southern part of the room where you will see a chain that you can pull.
This chain will open a door on the other side of the room, but the door will slowly retract. Don’t bother pulling the chain yet since you want to defeat any enemies that are in your way and memories the path. Walk back northward and just before the quicksand, take a right and dash over to the east side of the room. Walk to the south and defeat all the pesky Ghoul Rats that grab onto you as well as the scary ReDead Knight.
Jump onto the shiny platform and back to the middle of the room. The door that will open is just to the south. Now run around the room and get back to the chain. Make sure all the Ghoul Rats have been defeated so none of them slow you down. You’ll only be able to pull the chain as human Link, so transform if you need to do so. Pull the chain all the way back and then run around the room and head through the door.


The path then turns to the east with spikes rolling along rails on the walls. Turn into Wolf Link and jump to the middle platform. Time the spikes and when they are behind, you can quickly run across the sides to the next platform. About halfway through this room, annoying Scarabs will appear and cover your body. If you do a spin attack with Wolf Link they’ll leave your body, but they’ll just come back. Transform back into human Link and use the spin attack to defeat them.
There isn’t much left to do, so just roll through the rest of the room with Link. At the far east of the room, if you look to the south end, you’ll see a pot that is shaking. Walk on over and break the pot to meet up with Ooccoo once again. Roll across the sand and head through the door at the north end of the room.
A bunch of Scarabs will come after you once you enter this room. Defeat them with the spin attack and then roll across the quicksand. Avoid the rotating spikes and make your way around the room to the north end. Watch out for the patches of quicksand that are all over the place.


At the north end of this room you’ll find three Stalfos, one of which is at the small area at the west side of the room. Use your bombs to defeat these boney creatures and a gate on the other end of the room will open up. Return to the rotating spikes that we just past and now run around the room to the west side, where the gate is now open.
There are an endless amount of Scarabs in this room, as well as quicksand, and platforms that will fall under if you step on them. If you look on the walls, there are three targets along the path that you can use your clawshot on. Don’t mind the quicksand or the Scarabs and just use your clawshot three times to get across this area. At the other end, use the spin attack to get rid of the Scarabs.


Jump across the gap to the north to get to the other side of the room. Climb the nearby stairs and open the door at the north end of the room.
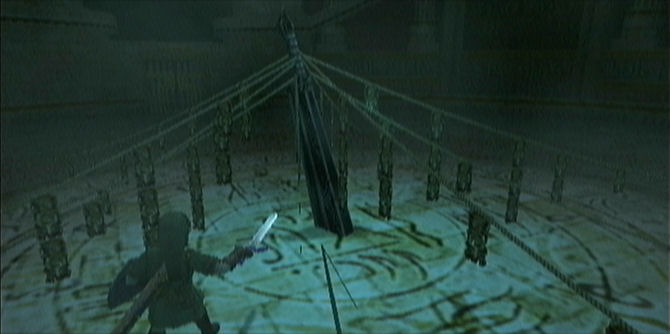
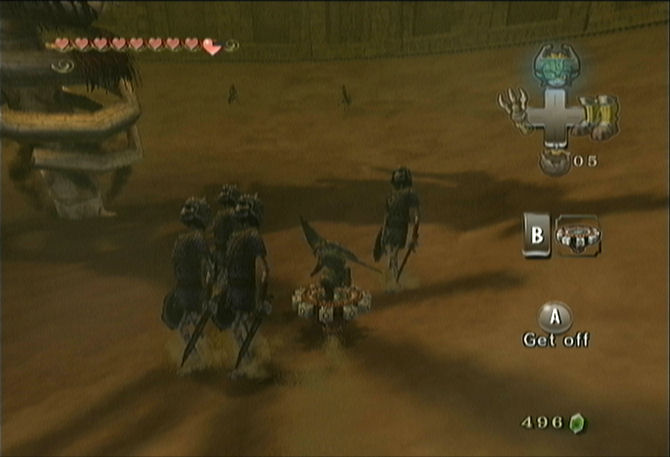
As you enter this room the door will lock behind you. Walk forward and you’ll see a series of ropes holding down an odd looking sword. Cut down one of the ropes and after a short scene, a mini-boss battle will take place with an Undead Prisoner known as Death Sword.
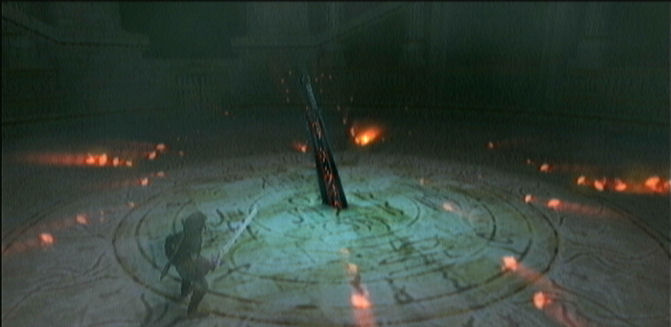

Death Sword is invisible, so you’ll have to use Wolf Link and activate your senses. The first phase of this battle is incredibly easy. Just wait for Death Sword to attack with its sword, dodge it, and then the sword will get stuck in the ground. At this point the undead prisoner will glow blue, so just like the Poes from before, jump and attack it.
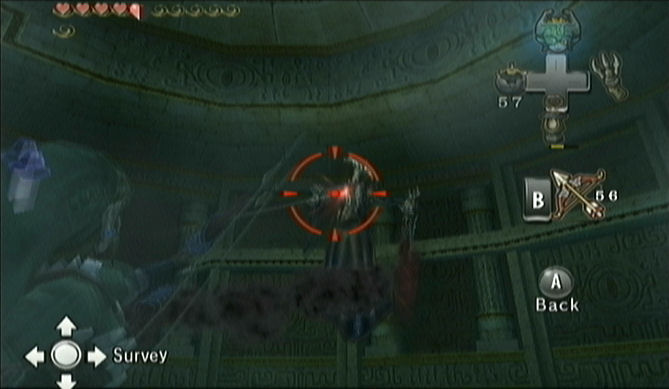
At this point, the boss is now visible, so you no longer need to use your senses. Return to human form and use your arrows to attack the boss. You won’t be able to Z-target the boss so carefully aim your arrow shots. One successful arrow will make the boss start flying around the room rapidly. Eventually it will try to swing its sword at you. Just dodge the attack and the sword will be stuck in the ground. Quickly target the foe and slash at it with your sword. One swipe will have the enemy fall to the floor, at which point you can repeatedly slash at him.
The undead prisoner will eventually awake and begin floating around the room. Use your arrows once again and it will send him flying around the room yet again. Repeat the same process you just did a few times and the boss will be defeated.
The door at the north end will open up, so walk through it. Jump off the ledge and walk up the staircase to the treasure chest. Open it to get the dungeon item, the Spinner! This new item will allow Link to glide onto railings that are on the sides of the walls. In addition, there are certain switches that you need to use the spinner to activate.


13.6 The Big Key
You immediately get to make use of the spinner. There is no staircase to get back to the south end of the room but there are railings on both sides of the walls. Equip the spinner and activate it when you are close by to the wall. The spinner will attach to the railing and start rolling you around the wall. You can stay on this railing all the way until you get to the south end of the mini-boss room. Get off the spinner and head through the door.


If you look to your left, you’ll see another railing where you can attach the spinner. Do so and you’ll notice the ‘B’ button appears on the screen with the jump command. Pressing the B button will allow you to jump away from the railing you are on. As you turn the corner, you’ll notice there is a railing on the other wall that leads upwards towards the door on the east end of the room. Use the jump command to jump over to this railing and then glide up to the door. If you miss the jump or go in the wrong direction, you might get stuck in the quicksand. Keep in mind that the spinner can spin over the quicksand, but it will lose speed. If you go in the other direction on the other railing, don’t worry. There is a platform that you can land on after the quicksand. From that platform you can activate the spinner and get up the railing. Keep trying at it and once you have figured it out, get to the east side of the room and head through the door.


This is perhaps the most fun room in the entire game. There are numerous railings and you can jump around with your spinner as you glide through this room. If you look at the map, there are numerous treasure chests to be found. Two of them are just to your left. Activate the spinner but don’t go on any railings yet as you glide towards the platform that holds the first chest. Open it and then ride to the next treasure chest that is straight ahead.
Look to the northeast and you’ll see a small railing against the wall on this lower portion of the room. Use the spinner and roll over to it and then jump off the railing to get to a large platform on the north side of the room. There is another treasure chest here that contains a yellow rupee.


Use the spinner and roll back to the railing we just used and get back to the platform that had the second treasure chest. Look to the east and you’ll see there is a railing that leads upwards. Use the spinner and roll onto this railing and allow it to take you upwards. It will land you in an area with rotating spikes. Get off the spinner and walk to the west side of the room. A Stalfos appears, so use your bombs to defeat him. Open the treasure chest to get a Piece of Heart.
Now get on one of the higher railings and make your way past the rotating spikes. If the spikes hit you, just walk back to where the treasure chest is and get back on the railing. Work on your timing so you don’t hit the spikes. As you glide back eastward, you’ll have to jump from railing to railing because some of the rails end. This will take you to an even higher level, which will eventually release you at the top right of the room on the bottom floor.


You’ll usually land in a position where you are going counter-clockwise in an endless circle. Jump off the railing and then get off the spinner and walk over to the middle platform. Get back on the spinner and move in the direction so that you can go clockwise on this railing. This railing will take you on a journey to the north end of the room.

Jump off the spinner and walk to the west of the room. Defeat the two Stalfos that are nearby and open the treasure chest to get another yellow rupee. Now walk to the far east of the room. Walk up the higher platform and you’ll see two railings on both sides, with spikes moving along both railings. This part can be a bit tricky, but with patience you should be able to get by. You need to use the spinner and jump from railing to railing, to get by the spikes and get across to the west side of the room. Once you make it, open the door.


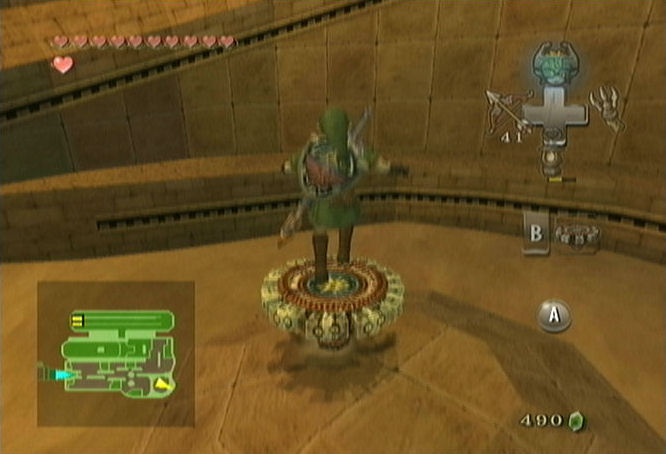
Open the large treasure chest here to get the Big Key. Then use the spinner on the railings to get back to this large room which we were in earlier in the dungeon. Walk to the center of the room and you’ll see a small hole in the ground. Stand over it and use your spinner. The spinner fits right into the hole. Press B repeatedly to spin the spinner which will eventually spin the entire wall and reveal a passage to the north.


13.7 Twilit Fossil: Stallord
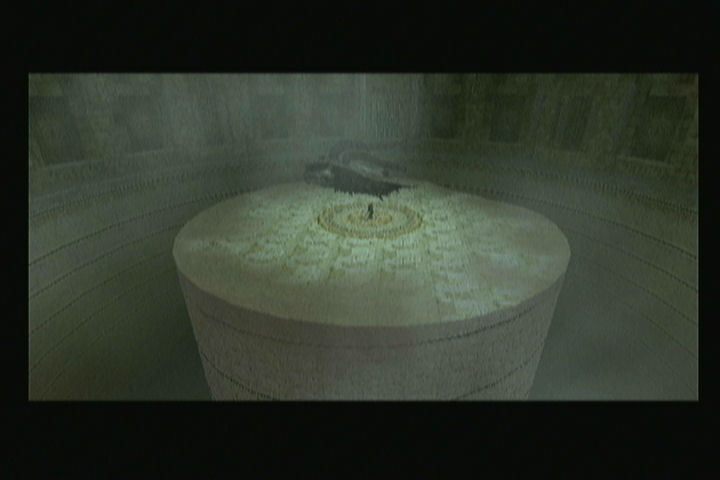
This large circular room has a railing all around the perimeter. Use the spinner to get onto the railing on the left side of the room and let it take you upwards. Ride the spinner a full 360 degrees and get off once you reach the platform on the west side of the room. From here you can look to the center of the room and see the top of the middle pillar. Perform a roll jump towards the center of the room to land on the central pillar. Use the spinner on the hole in the center of the room and press B continuously and it will raise a spiral rail from underground. Use the spinner on this spiral rail to head upwards to the top of the room. Get off the spinner and use the big key to open the door leading to the boss room.


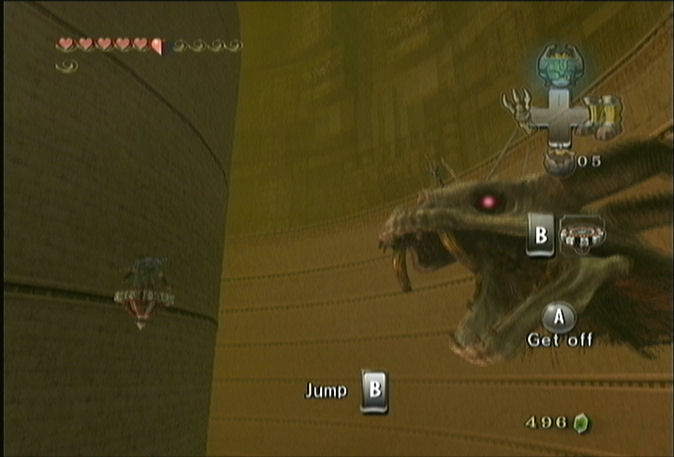
Walk forward and you’ll notice a giant fossil lying on the ground. Walk towards it and Zant appears. He is surprised you are still alive, but then goes on to say this is the last time that he will see you alive. He proceeds to stick a sword into the fossils head and then disappear. The giant fossil will awaken and the battle with the Twilit Fossil, STALLORD, will begin.
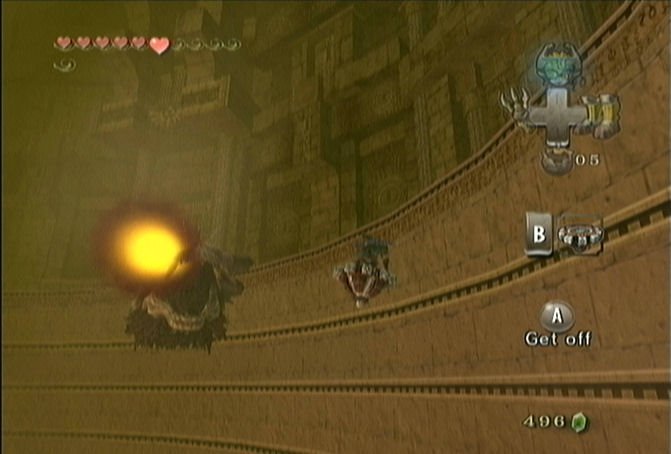
In the first phase of the battle, Link must attack the spine of Stallord, which is attached to the sand in the center of the room. Use the spinner and stick to the railing on the side of the room to pick up some speed. You’ll then need to jump off the railing and use the spinner to spin towards the center of the room. Once you get close, press B to jump while on the spinner and jump right into the spine of Stallord.
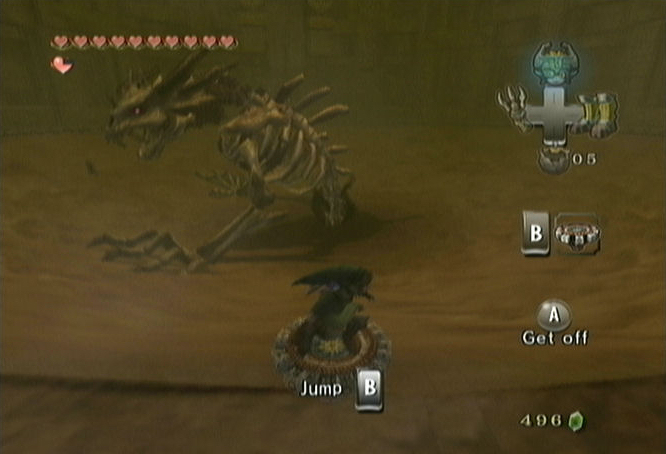
Part of the spine of Stallord will break. Back on the railing, you need to repeat the same process two more times. However, Stallord will begin to summon Skeletons from the sand that block Link’s path and the third time around these skeletons will surround Stallord’s spine. You must use the jump attack to defeat these guys as well.
Stallord will also shoot out some sort of toxic gas from his mouth, but most of the battle you’ll be either on the railing or attack him from his back, so the gas is rather useless. Perhaps the gravest threat to Link in this simple phase is the spikes that also spin around the railing. If you hear spikes nearby, be sure to jump off the railing. After three shots with the spinner, Stallord will sink under the sand.
The battle isn’t over just yet. All the sand in the room will now sink away, and Stallord will now be lying motionless on the ground. Walk to the center of the room and there is another small area where Link can use the spinner. Do so and begin spinning away, which will create a tall central tower in the middle of the room.
Once it has risen to the top, Link will turn around and realize the massive skull of Stallord has awakened. The boss knocks Link to the bottom of the room. If you look at the walls, there are railings now on inner circle tower as well as the outer walls. Link must use the inner railing to scale the tower. Stallord’s massive skull will appear while Link is scaling the inner tower. Stallord will shoot a ball of fire towards Link, which in order to avoid, he must jump with the spinner. He will jump to the outer wall, where Stallord will turn his attention and shoot another fireball. Jump once again and repeat this process until you have dodged four fireballs, at which point Stallord will move close to Link. Link can then jump off the railing and hit Stallord with the spinner. Its massive skull will tumble to the floor. Run over to the top of its mouth and strike that repeatedly at the piece that Zant stuck inside of Stallord. After several strikes, Stallord will get up.
The process starts all over so get on the spinner and start rolling up the inner circle. This time however, there are other spikes rolling along the rails, so you’ll have to jump across more frequently. Once you’ve dodged four more fireballs from Stallord, he’ll fall to the floor. Repeat the same process of striking its head until it gets up again. The third time around you’ll see spikes on both the inner and outer wall, making it even more difficult. After the long battle, Stallord will be defeated.
Link will next appear on top of the pillar where a Heart Container is waiting for him. Grab the Heart Container and cross the bridge that has appeared. Exit through the door to get to the outside of Arbiter’s Grounds.
After being prompted to save your game you’ll appear outside of the temple. Climb the steps to the top and enter to the area on the right. Walk counter-clockwise in this area until you reach a large opening with a huge statue. The area will be mentioned as the Mirror Chamber.

Walk towards the giant statue and a wall of twilight will appear, followed by five shadow beasts that drop from the sky. Defeat these guys just as you’ve always done. Defeat three of the five and then the remaining two at the same time. Walk up to the giant statue and you’ll notice there is a railing on it. Use the spinner to glide to the top of the statue. The spinner should fit right in place at the top of the statue. Once it has fit in, press B repeatedly and the statue will lower.


The mirror that Midna was looking for was broken. Only one piece of the Mirror of Twilight is in place. Afterwards, you’ll see a lengthy cut-scene where you see Ganondorf imprisoned. He was sentenced to death but with the power of the Triforce that he held, he was able to break free and kill one of the Sages. It was then that the Mirror of Twilight sealed Ganondorf away in the world of Twilight. Zant was unable to destroy the Mirror, so he just broke it into pieces.


You’ll then be granted a new quest. You must gather the three remaining mirror shards. They are found in the snowy mountain heights, one in an ancient grove, and one in the heavens. Great, sounds like fun!
- Chapter 1 – Ordon Village
- Chapter 2 – The Twilight
- Chapter 3 – Faron Woods: Twilight
- Chapter 4 – Forest Temple
- Chapter 5 – Kakariko Village: Twilight
- Chapter 6 – Death Mountain
- Chapter 7 – Goron Mines
- Chapter 8 – Lanayru Province: Twilight
- Chapter 9 – Lake Hylia: Sidequests
- Chapter 10 – Lakebed Temple
- Chapter 11 – The Master Sword
- Chapter 12 – Gerudo Desert
- Chapter 13 – Arbiter’s Grounds
- Chapter 14 – Scaling Snowpeak
- Chapter 15 – Snowpeak Ruins
- Chapter 16 – Sacred Grove: Round Two
- Chapter 17 – Temple of Time
- Chapter 18 – In Search of the Sky
- Chapter 19 – City in the Sky
- Chapter 20 – Palace of Twilight
- Chapter 21 – Cave of Ordeals
