This chapter covers the normal mode of Twilight Princess for the Nintendo Wii. If you are playing on the Nintendo Wii U, check out the Death Mountain – HD Version.
- Chapter 1 – Ordon Village
- Chapter 2 – The Twilight
- Chapter 3 – Faron Woods: Twilight
- Chapter 4 – Forest Temple
- Chapter 5 – Kakariko Village: Twilight
- Chapter 6 – Death Mountain
- Chapter 7 – Goron Mines
- Chapter 8 – Lanayru Province: Twilight
- Chapter 9 – Lake Hylia: Sidequests
- Chapter 10 – Lakebed Temple
- Chapter 11 – The Master Sword
- Chapter 12 – Gerudo Desert
- Chapter 13 – Arbiter’s Grounds
- Chapter 14 – Scaling Snowpeak
- Chapter 15 – Snowpeak Ruins
- Chapter 16 – Sacred Grove: Round Two
- Chapter 17 – Temple of Time
- Chapter 18 – In Search of the Sky
- Chapter 19 – City in the Sky
- Chapter 20 – Palace of Twilight
- Chapter 21 – Cave of Ordeals
- Chapter 22 – Hyrule Castle
6.1 The Iron Boots
You can talk to all the different villagers and they are all happy to hear that the kids are safe in Kakariko Village. Once you have spoken to most of the villagers, head to the south end of town and Mayor Bo will be waiting for you outside his house. He asks about the clothes Link is wearing and then invites him to come inside.

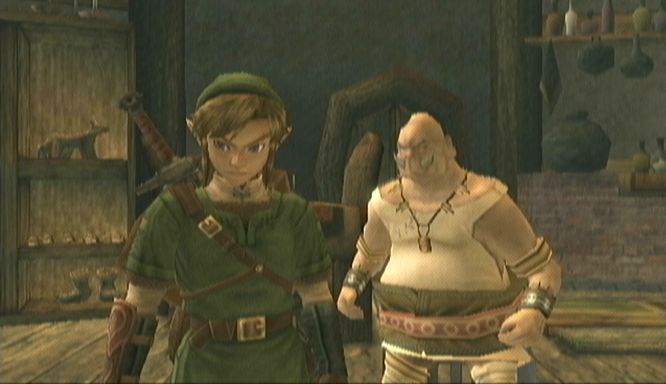
The mayor will ask about Ilia, but is a bit upset that she wasn’t found with the other kids. He asks what he can do to help and finds out that the Gorons of Death Mountain are up to no good. He offers to teach you a secret on how he defeated the Gorons. Mayor Bo takes Link to the back of his house and talks to him about sumo wrestling.
The two will take part in a sumo wrestling match. There are three maneuvers that Link can perform; pushing the wiimote forward delivers a small strike at your opponent. Pressing A will grab your opponent and continuously pushing A will push him backwards. You can also press left and right on the joystick to sidestep Mayor Bo. The first challenge is quite easy and you just need to be aggressive and you’ll toss Mayor Bo out in no time. However, the second time he says he won’t go so easy on Link and he really doesn’t. It is a bit tricky but just keep practicing, switching between grabbing, slapping, and sidestepping until you are able to toss Mayor Bo out of the circular ring.


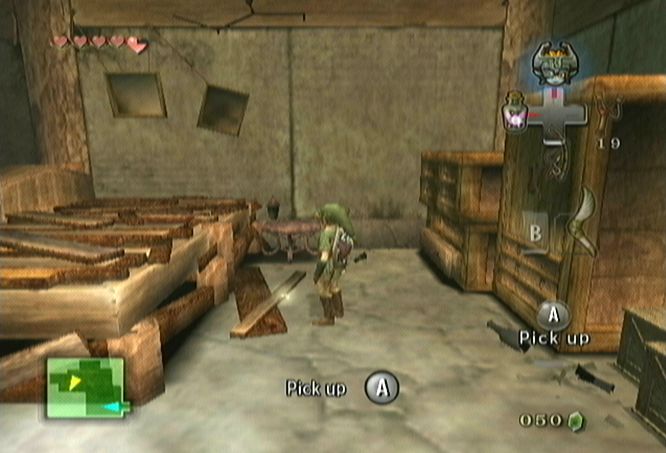
After his defeat, Mayor Bo reveals the secret to beating the Gorons. Open the chest that is behind him to get the Iron Boots! These boots will weigh Link down and also are magnetic. With the boots in hand, leave the house. Get back on Epona and ride her south into the Ordon Ranch.
Speak to Fado and he’ll be happy that the children are safe. Speak to him once again while on Epona and he’ll ask you if you’d like to herd the goats again. Sure thing! This is exactly the same as before. There are twenty goats and the time you are shooting for is three minutes. Herd all twenty in less than three minutes and Fado will reward you with a Piece of Heart. Awesome! There is nothing left for us to do here, although if you look in the barn, the Postman is kneeling in the corner. Anyway, just leave the ranch and make the long journey all the way back to Kakariko Village.


6.2 Battle with King Bulblin
Once you arrive in Kakariko Village a cut-scene takes place where King Bulblin returns for more trouble. Beth and Talo are seen standing in the middle of the village as King Bulblin passes through. Talo turns and runs away while Beth is frozen in place. Colin sees this and makes a heroic effort and pushes Beth out of the way. Colin is then taken just as Link and Epona appear in Kakariko Village. King Bulblin dashes away to the north.


You’ll regain control of Link in Kakariko Village. Ride Epona northward and hop the gate to leave the village to the northeast where you will battle with King Bulblin.


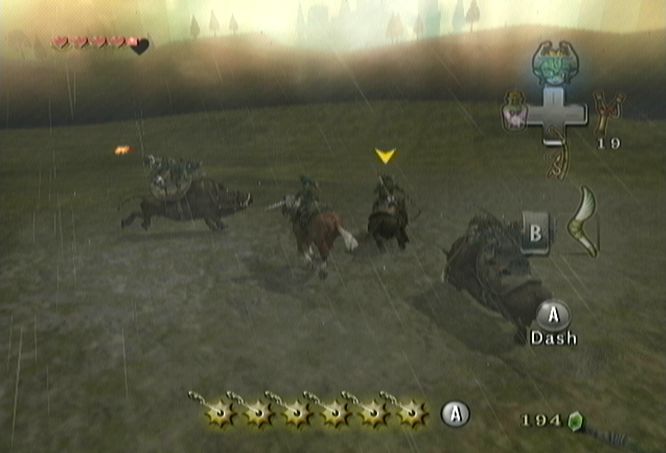
King Bulblin will blow his instrument and summon his pals to join him in battle. There are two Bulblins per each Bullbo. You can slash at the Bulblins but King Bulblin is your main target. Use all of Epona’s dashes to catch up with him and then slash away with your sword, each time removing a piece of King Bulblin’s armor. King Bulblin will then dash away. Let your dashes rejuvenate and then make another attack towards King Bulblin. Be careful as the Bulblin riders will shoot arrows towards Link and try to knock you off of Epona. Just keep repeating the same process until King Bulblin is weak and stumbles northward to the Bridge of Eldin, with Link and Epona following closely behind.
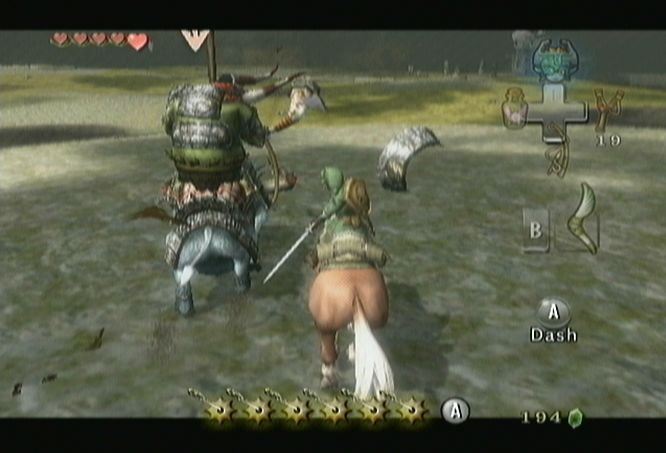
Once they jump over the gate a Bulblin shoots a fire arrow to light the gate on fire, so there is nowhere to escape. King Bulblin appears on the other side of the bridge and will charge towards you. Run towards him and once you get close, shift to the left or right so you don’t run into Lord Bullbo. Once you are on the side of King Bulblin, use your sword to slash at the beast. The Spin Attack works wonders as well.


At the other end of the bridge turn around and repeat the same process. After just a few hits King Bulblin wall fall off the bridge into the abyss.


An epic scene is shown with Link and Epona after their victory. Link walks over and recovers Colin and next we see, everybody is back in Kakariko Village. Colin gives a touching speech about strength and then Renado comes and takes Colin away. Afterwards, Link turns his attention back towards Death Mountain.


6.3 Kakariko Goodies
The first building on the right has been renovated and is now Malo Mart. How this little kid runs a shop is beside the point. He is behind the counter and is too short to see in direct eye sight. Anyway, he has a precious Hylian Shield available for 200 rupees. You should have roughly this amount by now, so purchase the shield. This is actually the strongest shield in the game, which kind of stinks since it’s still so early in the game. If you don’t have the rupees, just return when you do. The Wooden Shield is also available for purchase. The Ordon Shield can be burned by flames and if that happens, the Wooden Shield is a cheap replacement. Purchase the Hylian Shield and pause the game to equip your new shield. Leave the shop.


There are still a few other goodies to find in the village. Walk to the west of the Sanctuary to get to the Graveyard. Walk to the far northwest potion of the graveyard and you’ll find a tree. You should notice that there are a ton of birds floating around near the tree. These bird creatures are known as Guays. They appear in flocks and float near the top of trees. Use your boomerang to defeat them all one at a time. Once all of them have been defeated a bunch of rupees will fall from the nearby tree.

There is a golden bug crawling around on the floor and this one is bright and very easy to see. Catch the Male Ant and then return to the village.
We just caught the male ant and the female ant is also nearby. In the cluster of buildings along the left side of the village, the first two are boarded up, but Link can enter the third one. Do so and you’ll see the ant crawling around in the middle of the home. Grab the Female Ant and leave the house.
6.4 Scaling Death Mountain
There is nothing left in town, so head north towards Death Mountain. Climb the fence just like before and once you reach the top, equip the iron boots. Walk forward and the Goron will once again say he won’t let you pass. He begins rolling towards Link and once the Goron is close, use A to grab him and toss him down the cliff. Awesome!
Un-equip the iron boots and begin scaling the mountain. Several more Gorons will come rolling down and when they do so, just quickly equip the boots and toss them aside. Once you reach the area with steam, Bulblin Archers are here targeting Link with fire arrows. Just to the right, you’ll see a piece of grass where Link can call over a hawk. He can use the hawk to knock off these Bulblin Archers. Alternatively, you can use the less accurate slingshot to knock them off. Either way, defeat them or avoid them and continue northward up the mountain.


Once you reach the top of the mountain where all the Gorons live, you’ll see two of them at the top who see Link and do some talking. We’ll get to them later. Drop down and being fighting with one of the nearby Gorons. Be careful of all the random debris falling from the sky. All of a sudden a huge rock drops in the center of the area and Midna appears for some sarcastic comments. Talk to Midna when she calls you and she gives some advice on how you could use a Goron as a springboard to jump really high.


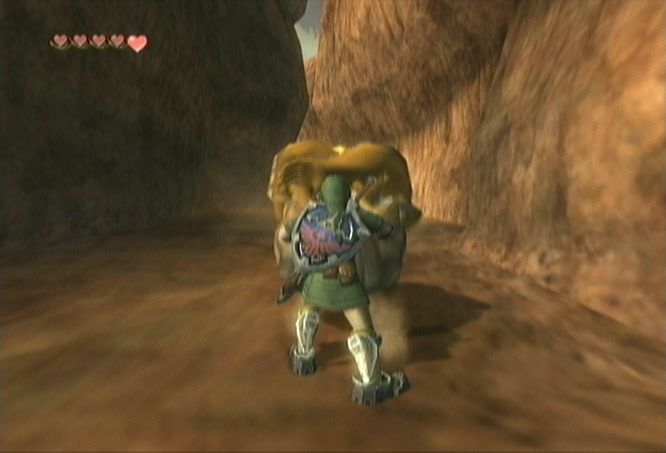
Use your shield to block the attacks of the nearby Gorons and then slash at them to make them curl into a ball. Jump on top of their backs and use them to launch you to the higher platform. Walk to the southeast to find another Goron in this tight area and repeat the same process to get launched to the higher platform. Use another Goron here to get up to another level.


On the 4th level up, you’ll see some steam geysers, just equip your iron boots and you should be able to walk right by them. Walk clockwise around the mountain, passing some geysers until you reach another Goron. Battle him and launch yourself up to another Goron. Battle this one as well to finally reach the top of the mountain. Enter through the door.
Once you enter, all the Gorons will want a piece of you but Gor Coron, the Goron Elder, appears and tells his fellow Gorons to stop. He tells Link he is strong for a human but the mines beyond this point are sacred to the Goron tribe and outsiders are not allowed unless you beat Gor Coron in a sumo wrestling match.
The match will begin, but Link will be defeated rather quickly. Equip the iron boots and challenge Gor Coron once again. He likes to grab and slap a lot so side-stepping is the way to go. Alternate between stepping to the left and to the right and grab him after each time. This strategy is just one of the effective ways and should get the job done.


After the match, he says Link has fine traits and mentions to Link that the mountain has been erupting without pause. He mentions that when the mountain got out of control, the four elders and Darbus, the Goron Patriarch, went inside to investigate. There is a treasure in the mines that the Gorons must protect. Darbus touched the treasure and transformed into a monster. The Gorons had then sealed him inside the mountain, as painful as it was for them to do so. He asks for your help to go to the aid of Darbus. He tells two of the Gorons to move to the side, revealing the entrance. Head north through the passage and enter into the second dungeon of the game, the Goron Mines.


- Chapter 1 – Ordon Village
- Chapter 2 – The Twilight
- Chapter 3 – Faron Woods: Twilight
- Chapter 4 – Forest Temple
- Chapter 5 – Kakariko Village: Twilight
- Chapter 6 – Death Mountain
- Chapter 7 – Goron Mines
- Chapter 8 – Lanayru Province: Twilight
- Chapter 9 – Lake Hylia: Sidequests
- Chapter 10 – Lakebed Temple
- Chapter 11 – The Master Sword
- Chapter 12 – Gerudo Desert
- Chapter 13 – Arbiter’s Grounds
- Chapter 14 – Scaling Snowpeak
- Chapter 15 – Snowpeak Ruins
- Chapter 16 – Sacred Grove: Round Two
- Chapter 17 – Temple of Time
- Chapter 18 – In Search of the Sky
- Chapter 19 – City in the Sky
- Chapter 20 – Palace of Twilight
- Chapter 21 – Cave of Ordeals
- Chapter 22 – Hyrule Castle
