Gallery:Hyrule Warriors Characters: Difference between revisions
Jump to navigation
Jump to search
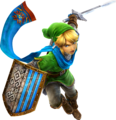
Link - Hylian Sword
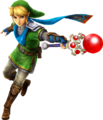
Link - Magic Rod
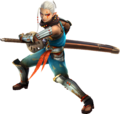
Impa - Giant Blade
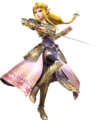
Zelda - Rapier
Lana - Book of Sorcery
Agitha - Parasol
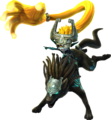
Midna - Shackle
Want an adless experience? Log in or Create an account.
(→Screenshots: added Link (Glove) and Zelda (Wind Waker)) |
(→Screenshots: fixed Lana, added Zant) |
||
| Line 58: | Line 58: | ||
{{Gallery/Box|file=Impa Screen.jpg}} | {{Gallery/Box|file=Impa Screen.jpg}} | ||
{{Gallery/Box|file=Hyrule Warriors Midna Screenshot.jpg}} | {{Gallery/Box|file=Hyrule Warriors Midna Screenshot.jpg}} | ||
{{Gallery/Box|file=Hyrule Warriors Lana | {{Gallery/Box|file=Hyrule Warriors Screenshot Midna Lana.jpg}} | ||
{{Gallery/Box|file=Hyrule Warriors Lana | {{Gallery/Box|file=Hyrule Warriors Screenshot Lana.jpg}} | ||
{{Gallery/Box|file=Hyrule Warriors Lana | {{Gallery/Box|file=Hyrule Warriors Screenshot Lana Midna.jpg}} | ||
{{Gallery/Box|file=Hyrule Warriors Lana | {{Gallery/Box|file=Hyrule Warriors Screenshot Lana Agitha.jpg}} | ||
{{Gallery/Box|file=Hyrule Warriors Lana | {{Gallery/Box|file=Hyrule Warriors Screenshot Lana Lightning.jpg}} | ||
{{Gallery/Box|file=Hyrule Warriors Lana | {{Gallery/Box|file=Hyrule Warriors Screenshot Lana Barrier Push.jpg}} | ||
{{Gallery/Box|file=Hyrule Warriors Lana | {{Gallery/Box|file=Hyrule Warriors Screenshot Lana Cube.jpg}} | ||
{{Gallery/Box|file=Hyrule Warriors Lana | {{Gallery/Box|file=Hyrule Warriors Screenshot Lana Magic.jpg}} | ||
{{Gallery/Box|file=Hyrule Warriors Lana | {{Gallery/Box|file=Hyrule Warriors Screenshot Lana Force Fragment.jpg}} | ||
{{Gallery/Box|file=Hyrule Warriors Lana | {{Gallery/Box|file=Hyrule Warriors Screenshot Lana Pages.jpg}} | ||
{{Gallery/Box|file=Hyrule Warriors Screenshot Lana Special Barriers.jpg}} | |||
{{Gallery/Box|file=Hyrule Warriors Screenshot Lana Special Finish.jpg}} | |||
{{Gallery/Box|file=Hyrule Warriors Screenshot Agitha Butterfly.jpg}} | {{Gallery/Box|file=Hyrule Warriors Screenshot Agitha Butterfly.jpg}} | ||
{{Gallery/Box|file=Hyrule Warriors Screenshot Agitha Cornered.jpg}} | {{Gallery/Box|file=Hyrule Warriors Screenshot Agitha Cornered.jpg}} | ||
| Line 91: | Line 93: | ||
{{Gallery/Box|file=Valga 3.jpg}} | {{Gallery/Box|file=Valga 3.jpg}} | ||
{{Gallery/Box|file=Wizro Screen.jpg}} | {{Gallery/Box|file=Wizro Screen.jpg}} | ||
{{Gallery/Box|file=Hyrule Warriors Screenshot Zant.jpg}} | |||
{{Gallery/Box|file=Hyrule Warriors Screenshot Zant Midna.jpg}} | |||
{{Gallery/Box|file=Hyrule Warriors Screenshot Zant Giant.jpg}} | |||
{{Gallery/Box|file=Hyrule Warriors Screenshot Zant Scimitars.jpg}} | |||
{{Gallery/Box|file=Hyrule Warriors Screenshot Ghirahim.jpg}} | {{Gallery/Box|file=Hyrule Warriors Screenshot Ghirahim.jpg}} | ||
{{Gallery/Box|file=Hyrule Warriors Screenshot Ghirahim Gate of Souls.jpg}} | {{Gallery/Box|file=Hyrule Warriors Screenshot Ghirahim Gate of Souls.jpg}} | ||
Revision as of 16:19, July 13, 2014
Videos
Link - Hylian Sword
Link - Magic Rod
Impa - Giant Blade
Zelda - Rapier
Lana - Book of Sorcery
Agitha - Parasol
Midna - Shackle
Artwork
Link with the Hylian Sword
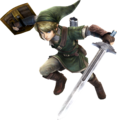
Link from Twilight Princess
Link from Skyward Sword
Zelda from Twilight Princess
Zelda from Skyward Sword
Impa with the Giant Blade
Lana with the Book of Sorcery


