Gallery:Hyrule Warriors Characters: Difference between revisions
Jump to navigation
Jump to search
Link - Hylian Sword
Link - Magic Rod
Impa - Giant Blade
Zelda - Rapier
Lana - Book of Sorcery
Agitha - Parasol
Midna - Shackle


Want an adless experience? Log in or Create an account.
(→Artwork: fixed moved image links, added to captions of weapon images) |
(→Screenshots: fixed Fi links, added The Imprisoned) |
||
| Line 59: | Line 59: | ||
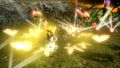
{{Gallery/Box|file=Hyrule Warriors Screenshot Agitha Golden Butterfly Swarm.jpg}} | {{Gallery/Box|file=Hyrule Warriors Screenshot Agitha Golden Butterfly Swarm.jpg}} | ||
{{Gallery/Box|file=Hyrule Warriors Screenshot Agitha Giant Stag Beetle.jpg}} | {{Gallery/Box|file=Hyrule Warriors Screenshot Agitha Giant Stag Beetle.jpg}} | ||
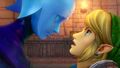
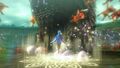
{{Gallery/Box|file=Hyrule Warriors Fi and Link.jpg}} | {{Gallery/Box|file=Hyrule Warriors Screenshot Fi and Link.jpg}} | ||
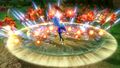
{{Gallery/Box|file=Hyrule Warriors Fi Dancing.jpg}} | {{Gallery/Box|file=Hyrule Warriors Screenshot Fi Dancing.jpg}} | ||
{{Gallery/Box|file=Hyrule Warriors Fi Goddess Crest.jpg}} | {{Gallery/Box|file=Hyrule Warriors Screenshot Fi Goddess Crest.jpg}} | ||
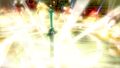
{{Gallery/Box|file=Hyrule Warriors Fi Goddess Sword.jpg}} | {{Gallery/Box|file=Hyrule Warriors Screenshot Fi Goddess Sword.jpg}} | ||
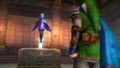
{{Gallery/Box|file=Hyrule Warriors Fi Pedestal.jpg}} | {{Gallery/Box|file=Hyrule Warriors Screenshot Fi Pedestal.jpg}} | ||
{{Gallery/Box|file=Hyrule Warriors Fi Sacred Flames.jpg}} | {{Gallery/Box|file=Hyrule Warriors Screenshot Fi Sacred Flames.jpg}} | ||
{{Gallery/Box|file=Hyrule Warriors Fi Sealed Grounds.jpg}} | {{Gallery/Box|file=Hyrule Warriors Screenshot Fi Sealed Grounds.jpg}} | ||
{{Gallery/Box|file=Hyrule Warriors Fi Singing.jpg}} | {{Gallery/Box|file=Hyrule Warriors Screenshot Fi Singing.jpg}} | ||
{{Gallery/Box|file=Shia-Screen.jpg}} | {{Gallery/Box|file=Shia-Screen.jpg}} | ||
{{Gallery/Box|file=Cia Screen.jpg}} | {{Gallery/Box|file=Cia Screen.jpg}} | ||
| Line 77: | Line 77: | ||
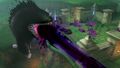
{{Gallery/Box|file=Valga 3.jpg}} | {{Gallery/Box|file=Valga 3.jpg}} | ||
{{Gallery/Box|file=Wizro Screen.jpg}} | {{Gallery/Box|file=Wizro Screen.jpg}} | ||
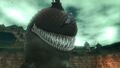
{{Gallery/Box|file=Hyrule Warriors The Imprisoned Attacked.jpg}} | {{Gallery/Box|file=Hyrule Warriors Screenshot The Imprisoned.jpg}} | ||
{{Gallery/Box|file=Hyrule Warriors Screenshot The Imprisoned Attacked.jpg}} | |||
{{Gallery/Box|file=Hyrule Warriors Screenshot The Imprisoned Stomp.jpg}} | |||
{{Gallery/Box|file=Hyrule Warriors Screenshot The Imprisoned Barrage.jpg}} | |||
{{Galleries}} | {{Galleries}} | ||
Revision as of 06:46, July 12, 2014
Videos
Link - Hylian Sword
Link - Magic Rod
Impa - Giant Blade
Zelda - Rapier
Lana - Book of Sorcery
Agitha - Parasol
Midna - Shackle
Artwork

Link with the Hylian Sword
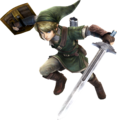
Link from Twilight Princess

Link from Skyward Sword

Zelda from Twilight Princess

Zelda from Skyward Sword

Impa with the Giant Blade

Lana with the Book of Sorcery


Screenshots


