Level 7 (Second Quest)

The Entrance to the Dungeon
Games | ||
Boss | ||
Mini-bosses | ||
Enemies | ||
Items | ||
Rewards | ||
Level 7 is the seventh dungeon in the second quest of The Legend of Zelda. Link travels here in search of the seventh Triforce Shard. In order to find the entrance, Link must travel from the up one screen and right five screens from the Starting Screen. Once here, Link must burn a bush to reveal the entrance to the dungeon, however, to do this, Link must make his way around to the other side of the bushes.
Items
The main item Link can find in this dungeon is called the Red Candle. This item is an upgrade of the Blue Candle, and does all the things the Blue Candle did, including lighting rooms, burning bushes, and harming enemies. However, the one and only difference between the two is that the Blue Candle has a restriction that only allows it to be used once in a screen. The Red Candle can be used multiple times in a room, making it a much more viable option in a room full of enemies. The Red Candle, similarly to most items in the game, is found a side-scrolling section that can be entered via a staircase. This staircase is found in the room that is, from the entrance, right three rooms, then going down a staircase that is revealed after defeating all of the enemies and pushing a block, emerge on the other side and go down one room. This room contains a mix of Darknuts and Pols Voice. Defeating them all grants Link the ability to move the block blocking the staircase and enter the area where the Red Candle is found.
Enemies
Level 7 presents a large mix of enemies. All the enemies found are listed below.
- Enemies in Level 7
Gleeok
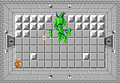
Gleeok returns as the main boss of Level 7. This time, he has a total of four heads that need to be defeated. The battle is exactly the same as the last battle, the main difference being there are a total of four heads this time. If Link has obtained the Magical Sword, each head takes only two hits to kill, making this battle much easier. After defeating Gleeok, Link can collect the Heart Container and move on to the next room to collect the seventh Triforce Shard.
Old Man Location
There are two Old Man locations found in this dungeon. They each say "LEAVE YOUR LIFE OR MONEY", requireing Link to leave either 1 Heart Container or 50 Rupees. Link is required to pass through both rooms in order to complete the dungeon. If Link chooses to give up a Heart Container, it cannot be replaced for the remainder of the game, so it is suggested to begin the dungeon with at least 100 Rupees to pay off the Old Man each time.
Compass & Dungeon Map
Similar to previous dungeons in this game, the Compass and Dungeon Map both appear in this dungeon.
Compass
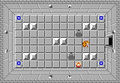
The Compass is found in this dungeon and is used to show Link the location of the Triforce Shard that is hidden in the dungeon on his map via a blinking spot. This spot easily leads Link right to his goal. The Compass is very easy to find in this dungeon, as it is only one room to the left of the entrance. This room contains Blade Traps and two Zols. The Compass is on the floor in the lower right section of the room.
Dungeon Map
The Dungeon Map shows Link the layout of the dungeon after he has collected it. This helps Link find and enter all the rooms in this dungeon. The room this item is found in contains two Red Darknuts, two Blue Darknuts, three Red Bubbles and one Blue Bubble. After defeating all of the Darknuts, the map is appears in the upper left portion of the room. This room is found by going five rooms right and one room up from the entrance.
Keys & Locked Doors
There is only one Small Key and two Locked Doors throughout the dungeon. One of the Locked Doors, however, does not need to be opened to complete the dungeon.
Gallery
Room with the Compass

Room with the Dungeon Map
Room with Gleeok


